GPU
ใช้ส่วนนี้เพื่อทำความเข้าใจวิธีเดินสายสำหรับ GPU
หมายเหตุ
หาก TDP ของอะแดปเตอร์ GPU เท่ากับหรือต่ำกว่า 75 วัตต์ อะแดปเตอร์จะสามารถจ่ายไฟได้โดยตรงจากช่องเสียบตัวยก ต้องใช้สายไฟเสริมในการจ่ายไฟอะแดปเตอร์ GPU ที่มี TDP สูงกว่า 75 วัตต์
รูปที่ 1. GPU cable routing
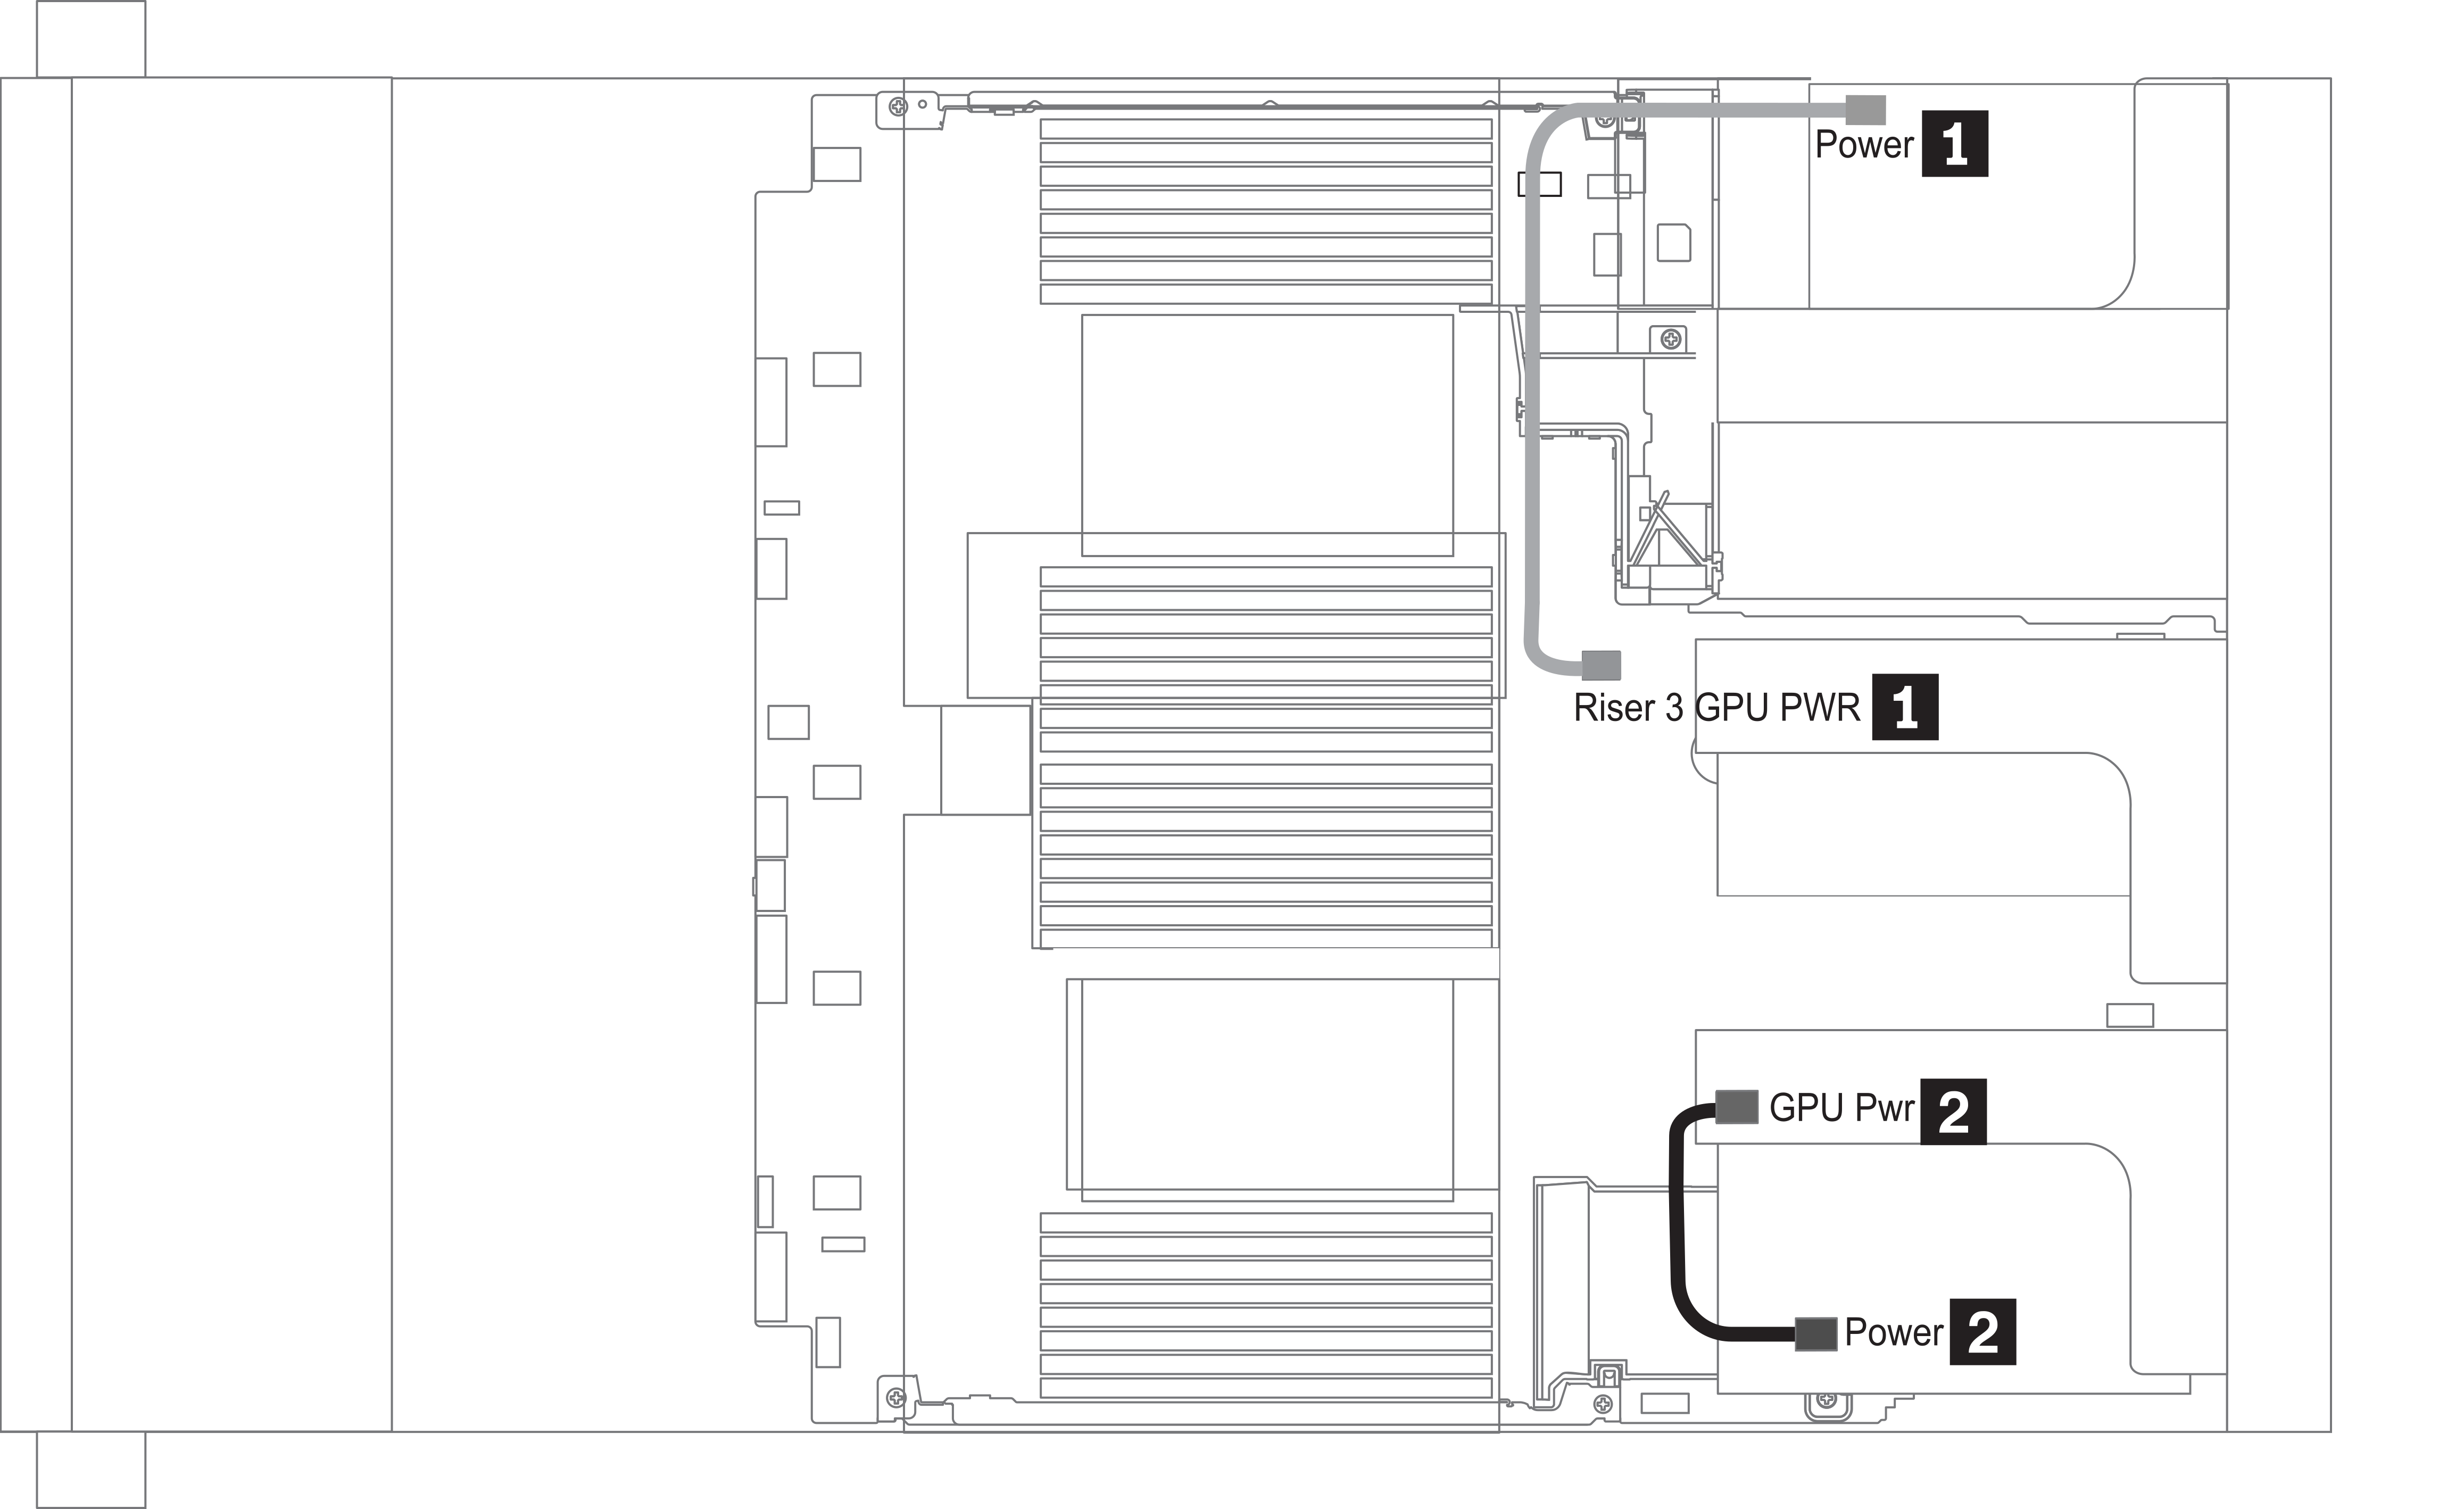
| From | To |
|---|---|
| 1 Power connector on a GPU adapter (on riser 3 assembly) | Riser 3 GPU Pwr connector on the system board |
| 2 Power connector on a GPU adapter (on riser 1 or 2 assembly) | GPU Pwr connector on the riser card (on riser 1 or 2 assembly) |
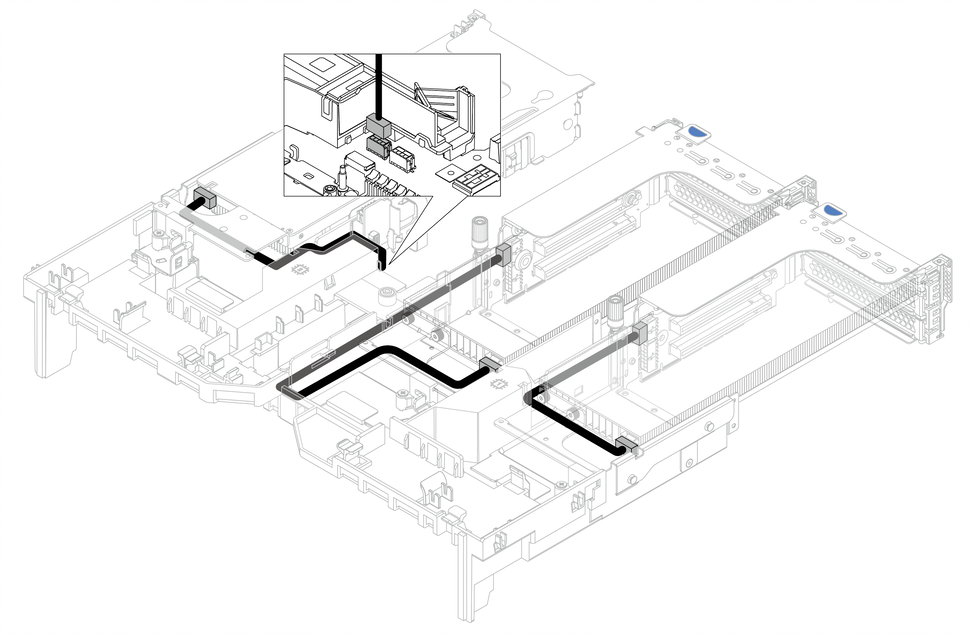
หากคุณต้องการติดตั้งแบ็คเพลน M.2 บนแผ่นกั้นลม GPU ให้เดินสายไฟ GPU จากตัวยก 2 ใต้ตัวยึดแบ็คเพลน M.2 โปรดดูภาพประกอบด้านล่างของการเดินสายบนแผ่นกั้นลม
ส่งคำติชม