Install the SXM GPU power distribution board
Follow instructions in this section to install the SXM GPU power distribution board.
About this task
Attention
Read Installation Guidelines and Safety inspection checklist to ensure that you work safely.
Touch the static-protective package that contains the component to any unpainted metal surface on the server; then, remove it from the package and place it on a static-protective surface.
Note
Prepare Phillips #1 head screwdriver for this task.
Procedure
- Install the SXM GPU power distribution board.
- Fasten the four screws to secure the SXM GPU power distribution board to the PSU bays.NoteRemove the screws with a torque screwdriver sets to the proper torque. For reference, the torque required for the screws to fully tighten/removal is
0.6±0.06 newton-meter, 5±0.5 pound-inch. Torque screwdriver type list Screw Type PH 1 head screwdriver Phillips #1 head screw Figure 1. Installing the SXM GPU power distribution board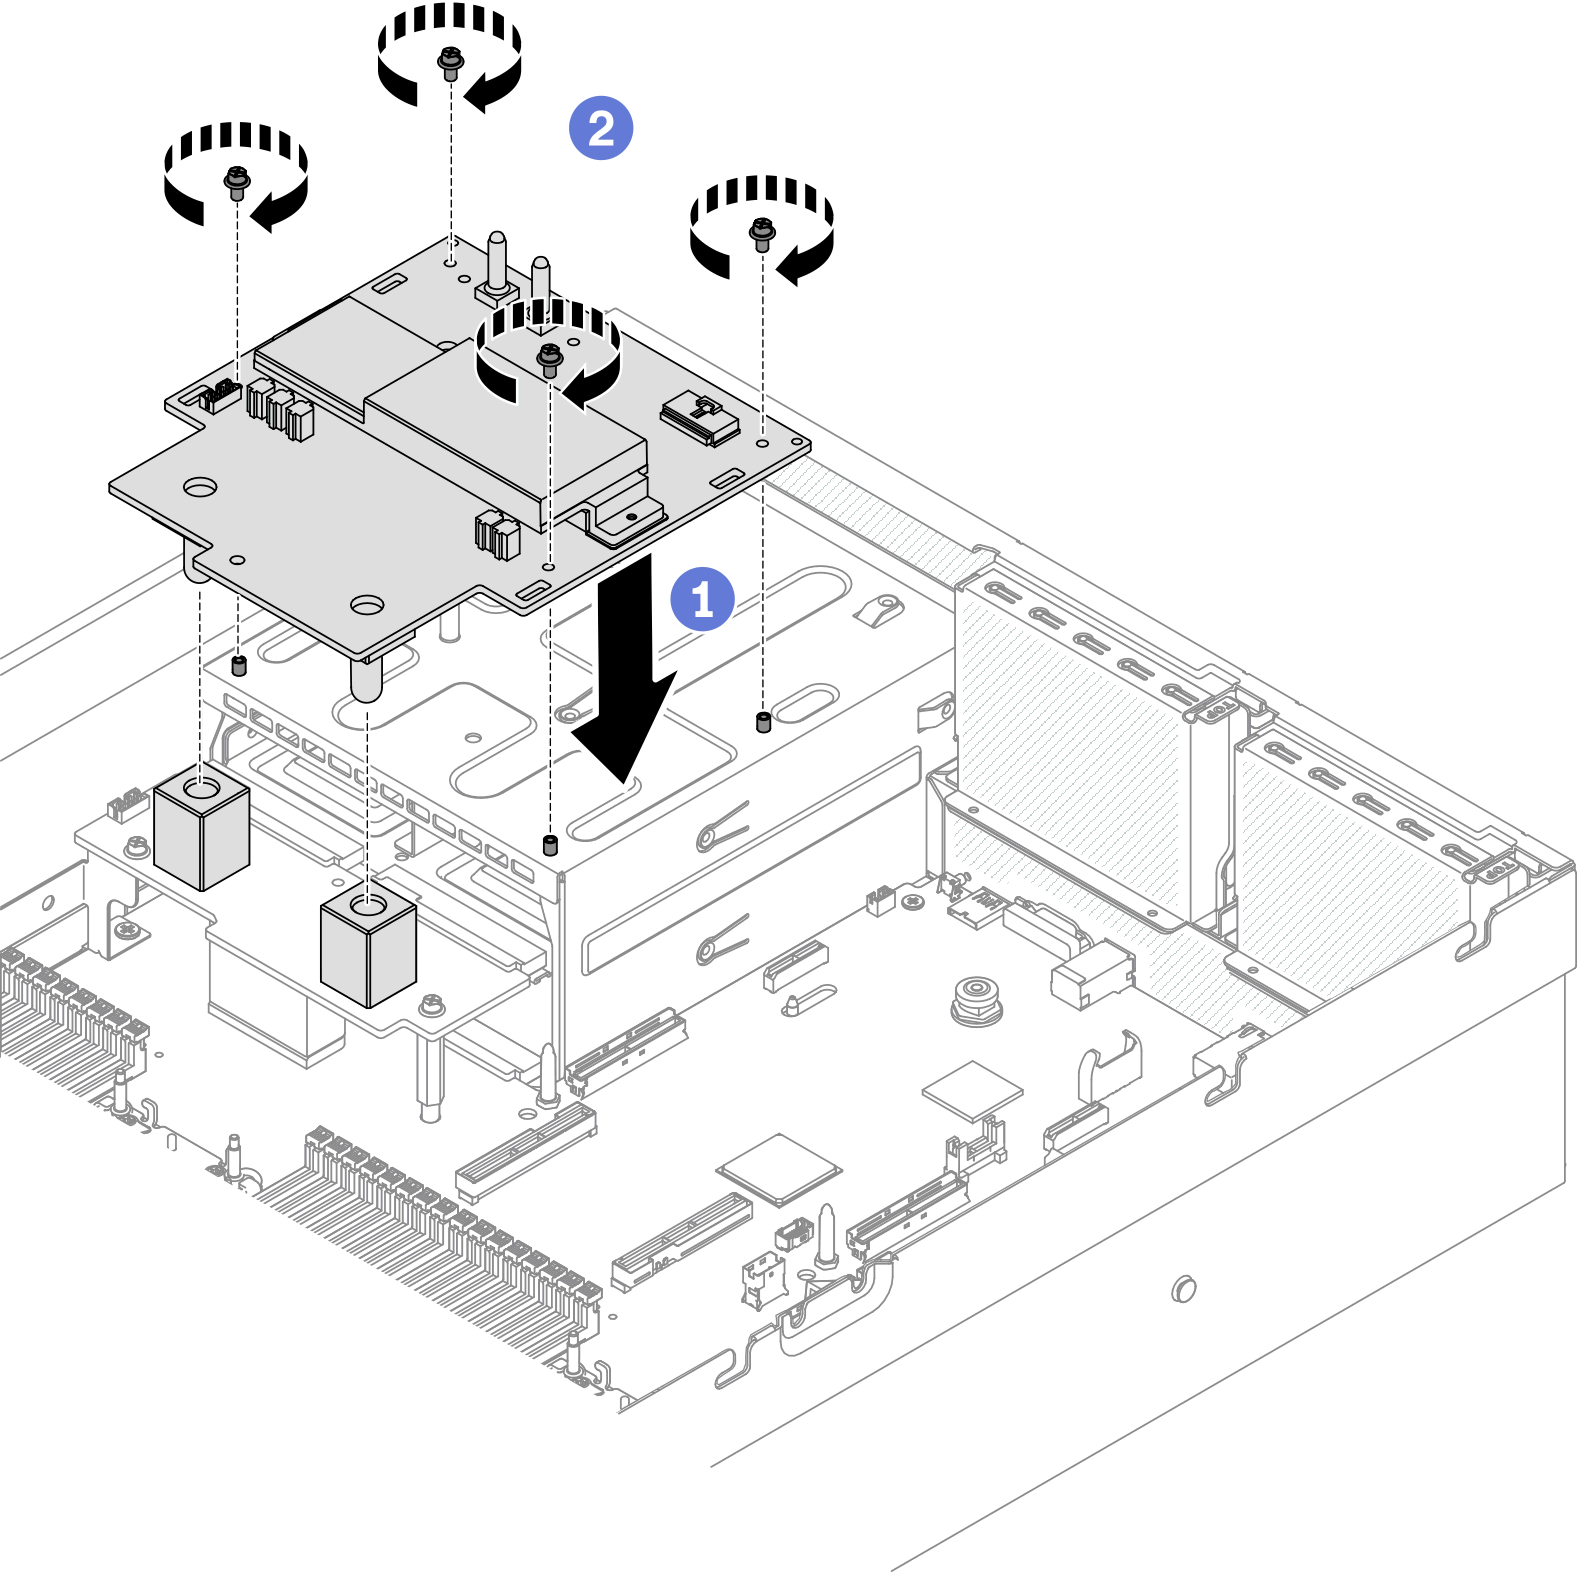
- Fasten the four screws to secure the SXM GPU power distribution board to the PSU bays.
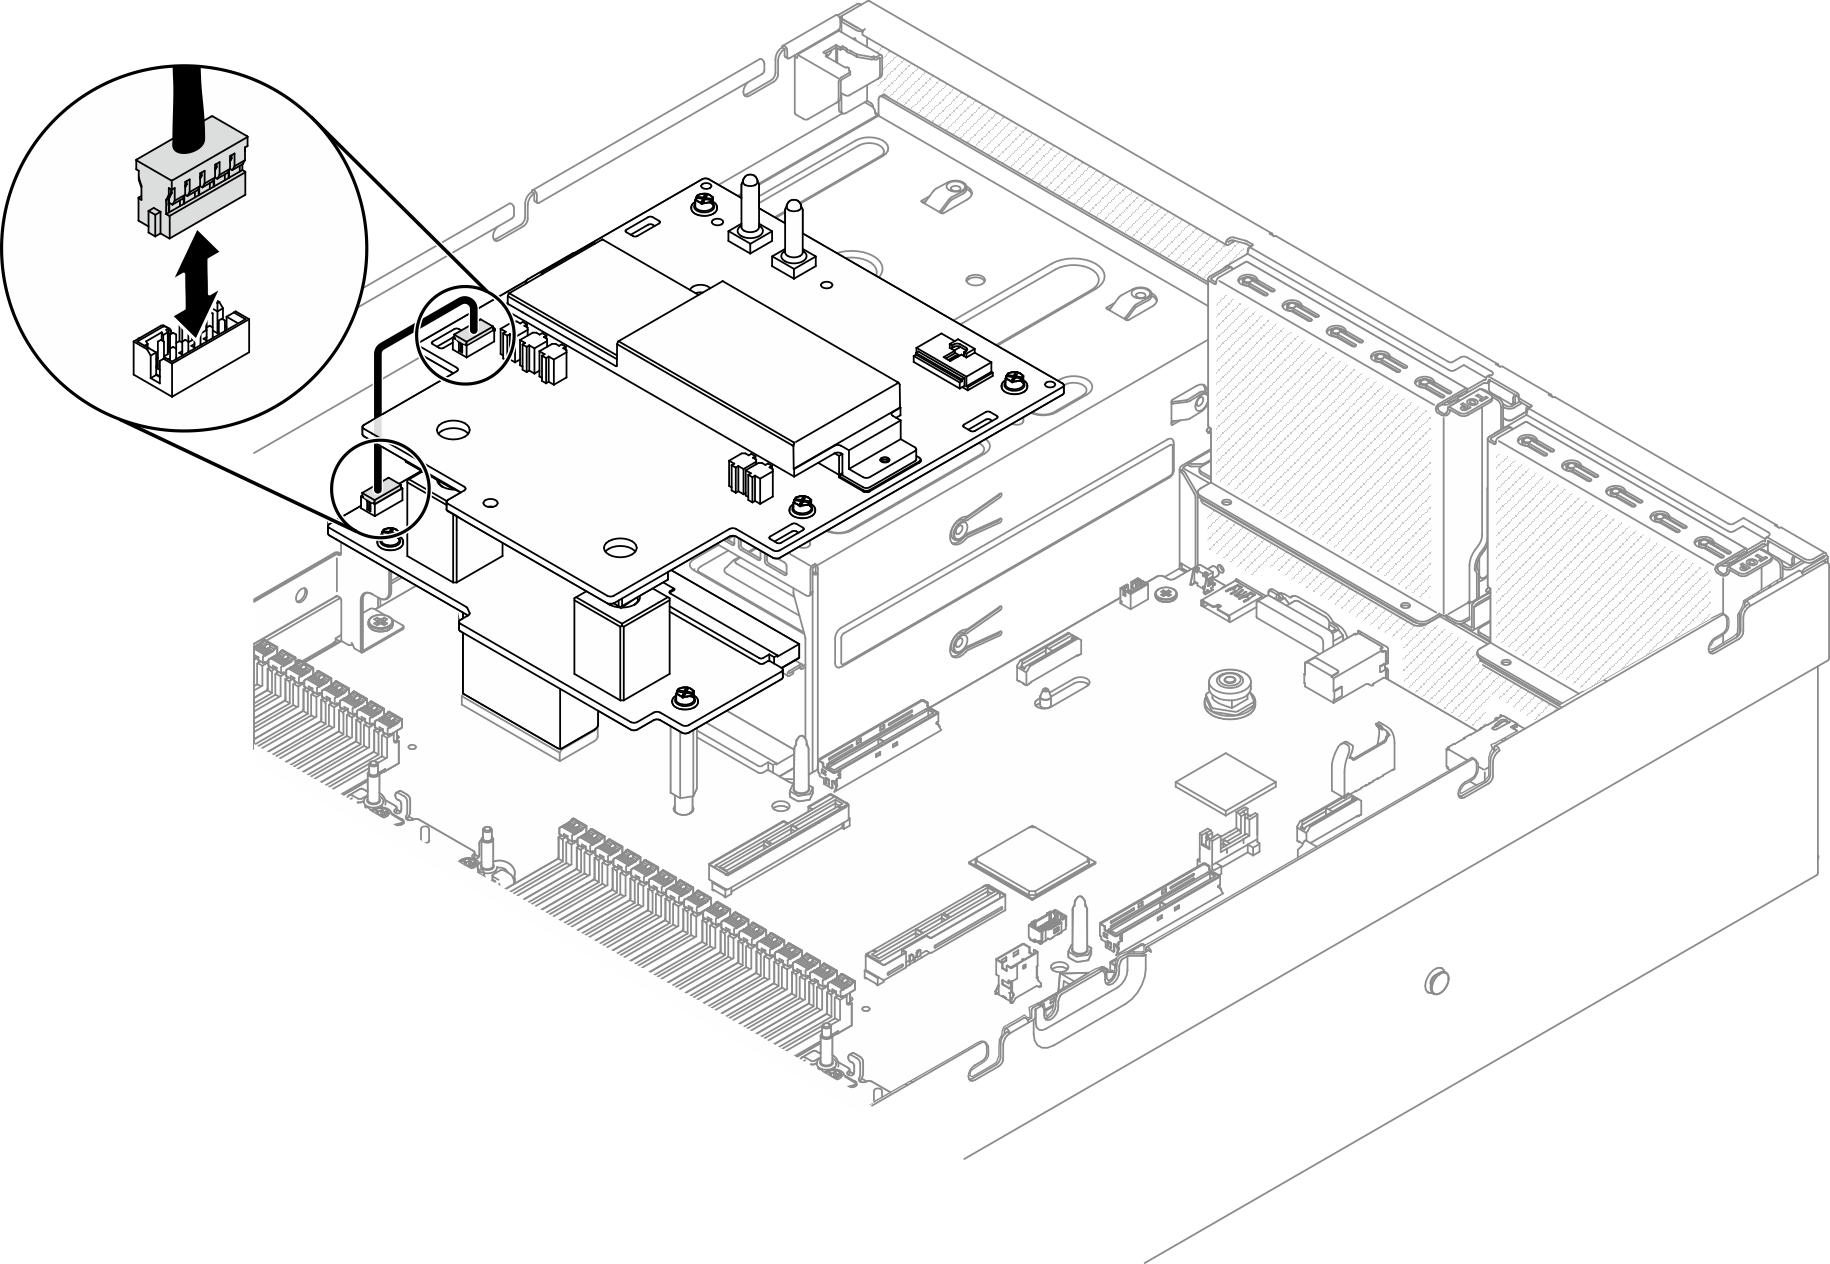
- Connect the side band cable to SXM GPU power distribution board and power distribution board.Figure 2. Connecting sideband cable
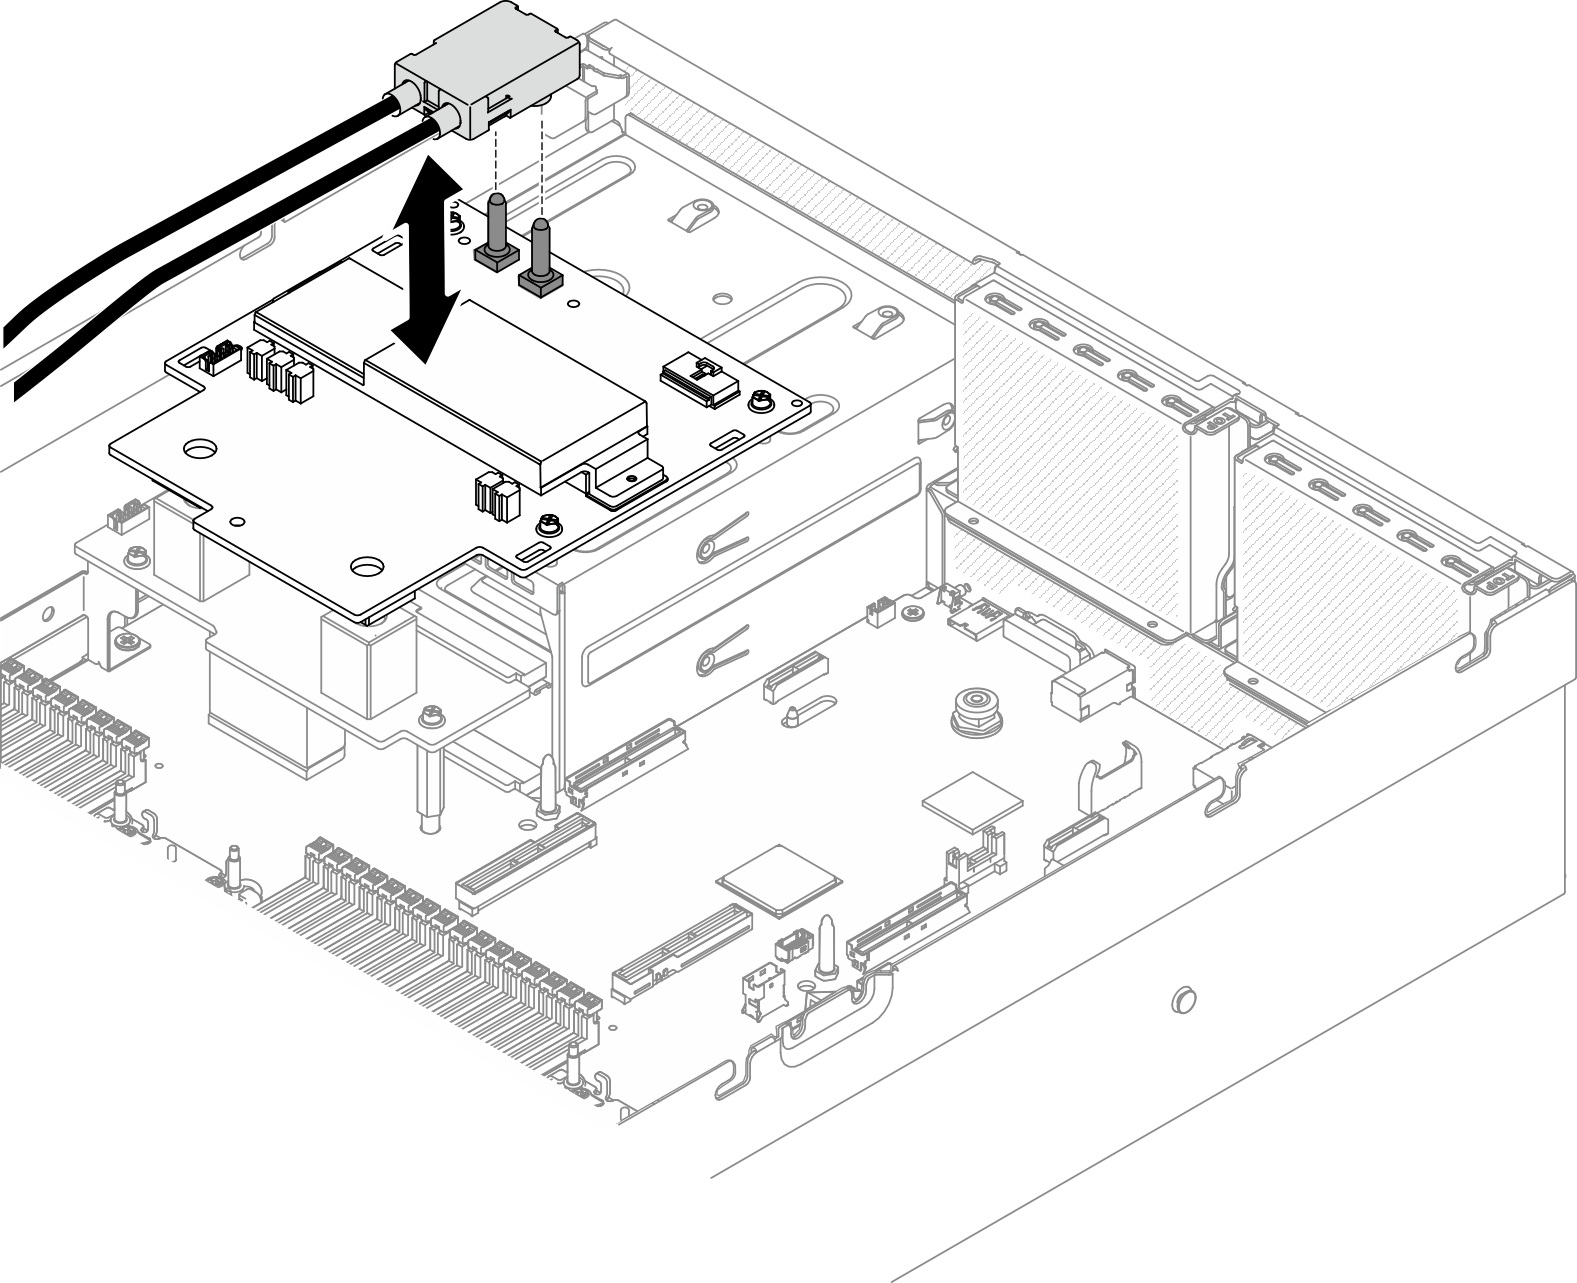
- Connect the SXM GPU board power cable to the SXM GPU power distribution board.Figure 3. Connecting the SXM GPU board power cable
After you finish
Reinstall the 2.5-inch drive cage assembly. See Install the 2.5-inch drive cage assembly.
Complete the parts replacement. See Complete the parts replacement.
Demo video
Give documentation feedback