Remove the SXM GPU power distribution board
Follow instructions in this section to remove the SXM GPU power distribution board.
About this task
Read Installation Guidelines and Safety inspection checklist to ensure that you work safely.
Power off the server and peripheral devices and disconnect the power cords and all external cables. See Power off the server.
If the server is installed in a rack, slide the server out on its rack slide rails to gain access to the top cover, or remove the server from the rack. See Remove the server from rack.
Procedure
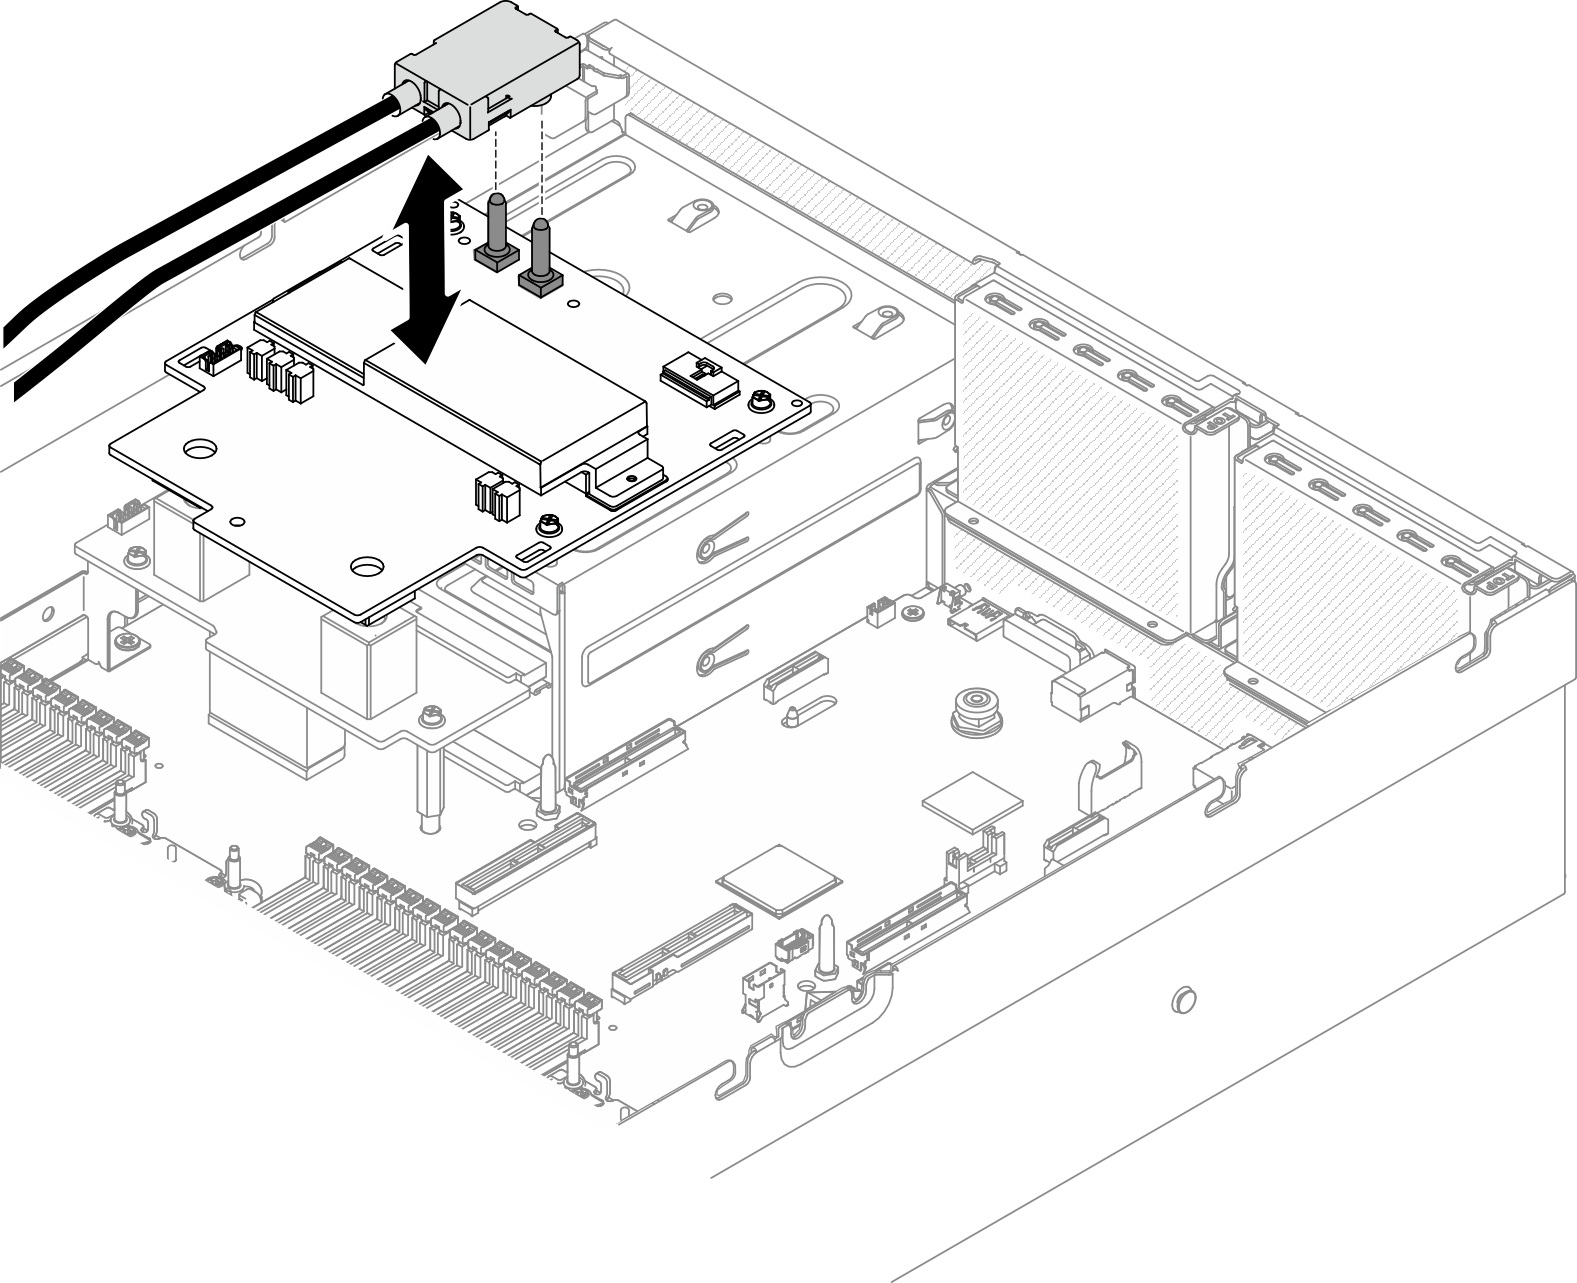
- Disconnect the SXM GPU board power cable from the SXM GPU power distribution board.Figure 1. Disconnecting the SXM GPU board power cable
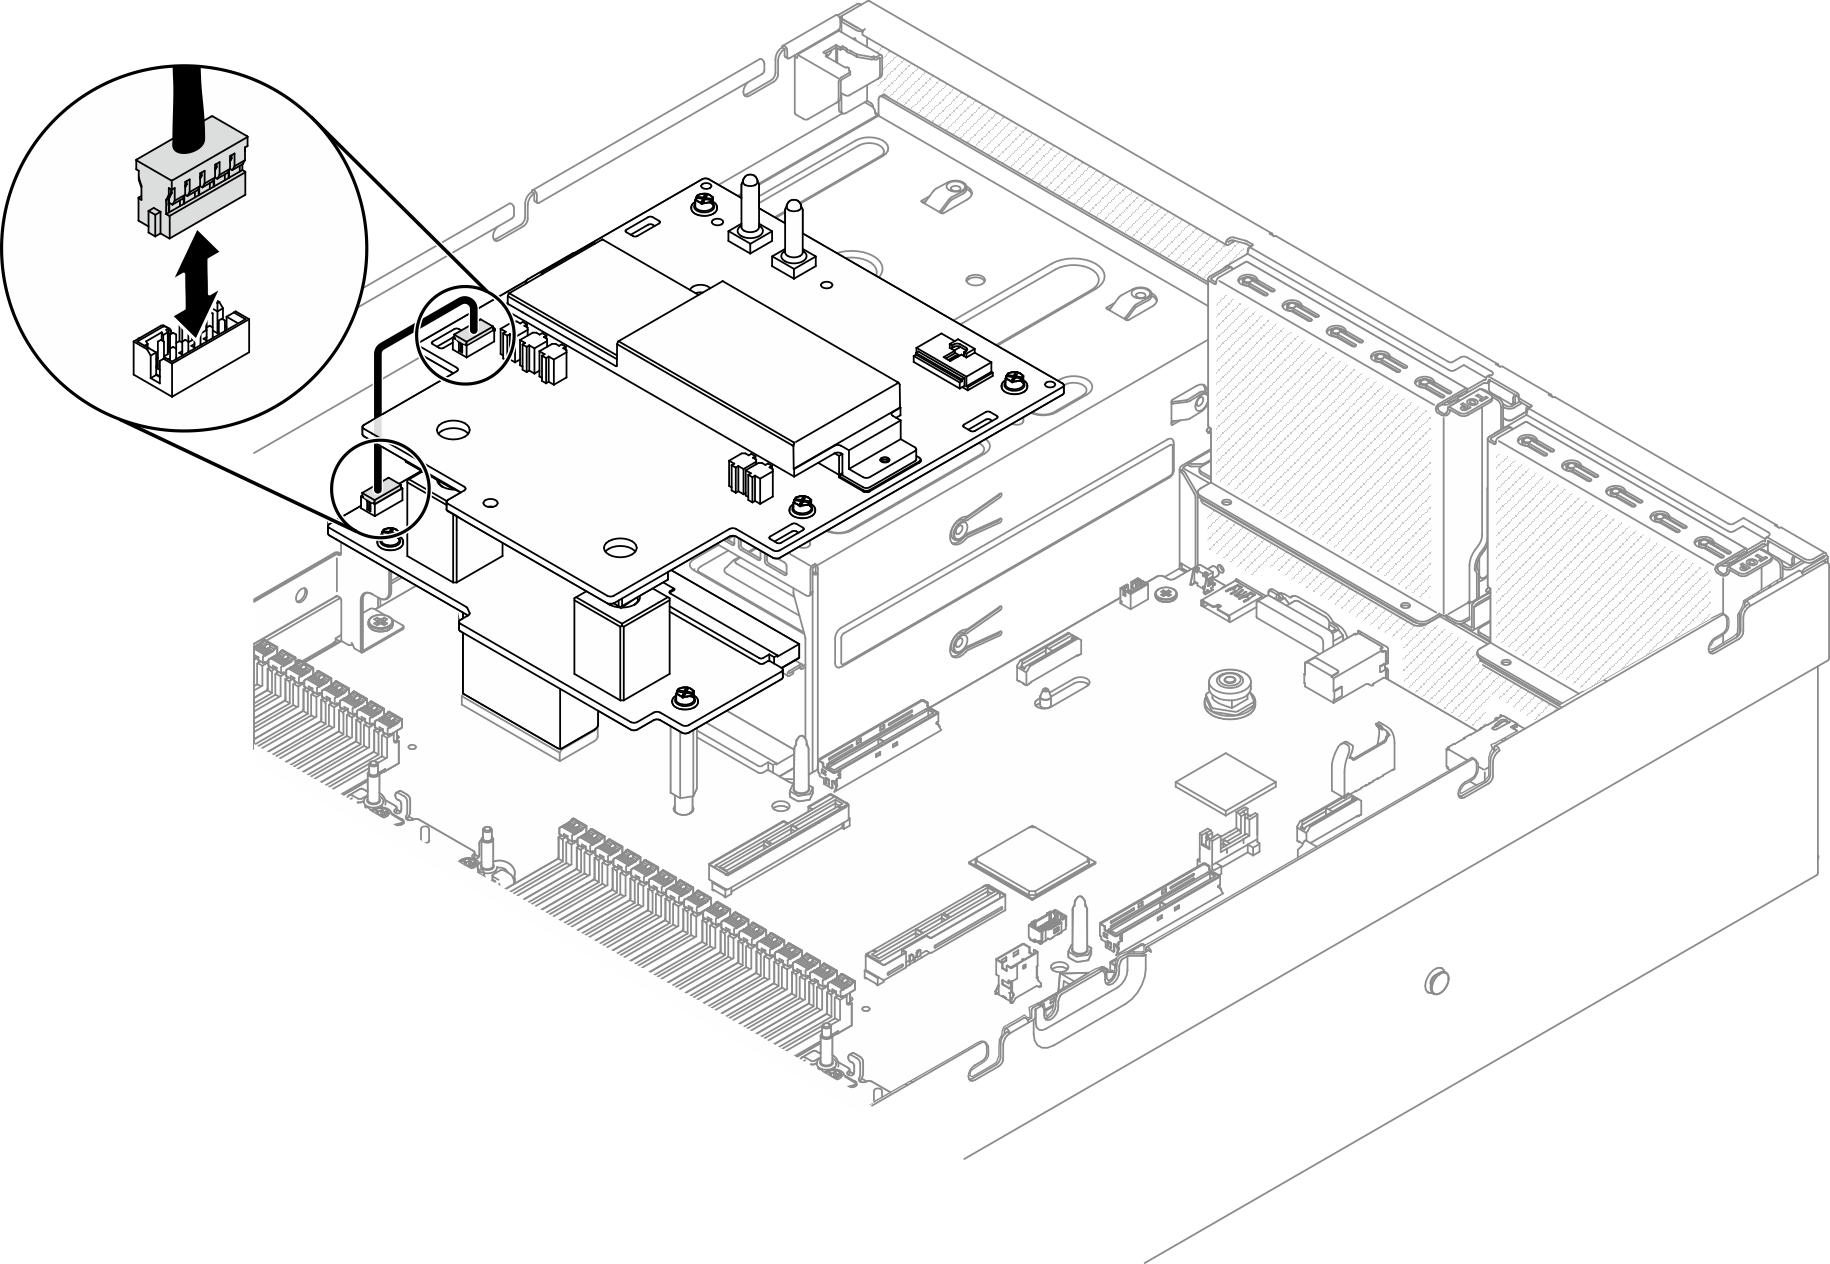
- Disconnect the sideband cable from both power distribution boards.Figure 2. Disconnecting the sideband cable
- Remove the SXM GPU power distribution board.
 Unfasten the four screws that secure the SXM GPU power distribution board to the PSU bays.
 Lift up the SXM GPU power distribution board out of the chassis.NoteRemove the screws with a torque screwdriver sets to the proper torque. For reference, the torque required for the screws to fully tighten/removal is
0.6±0.06 newton-meter, 5±0.5 pound-inch. Torque screwdriver type list Screw Type PH 1 head screwdriver Phillips #1 head screw Figure 3. Removing the SXM GPU power distribution board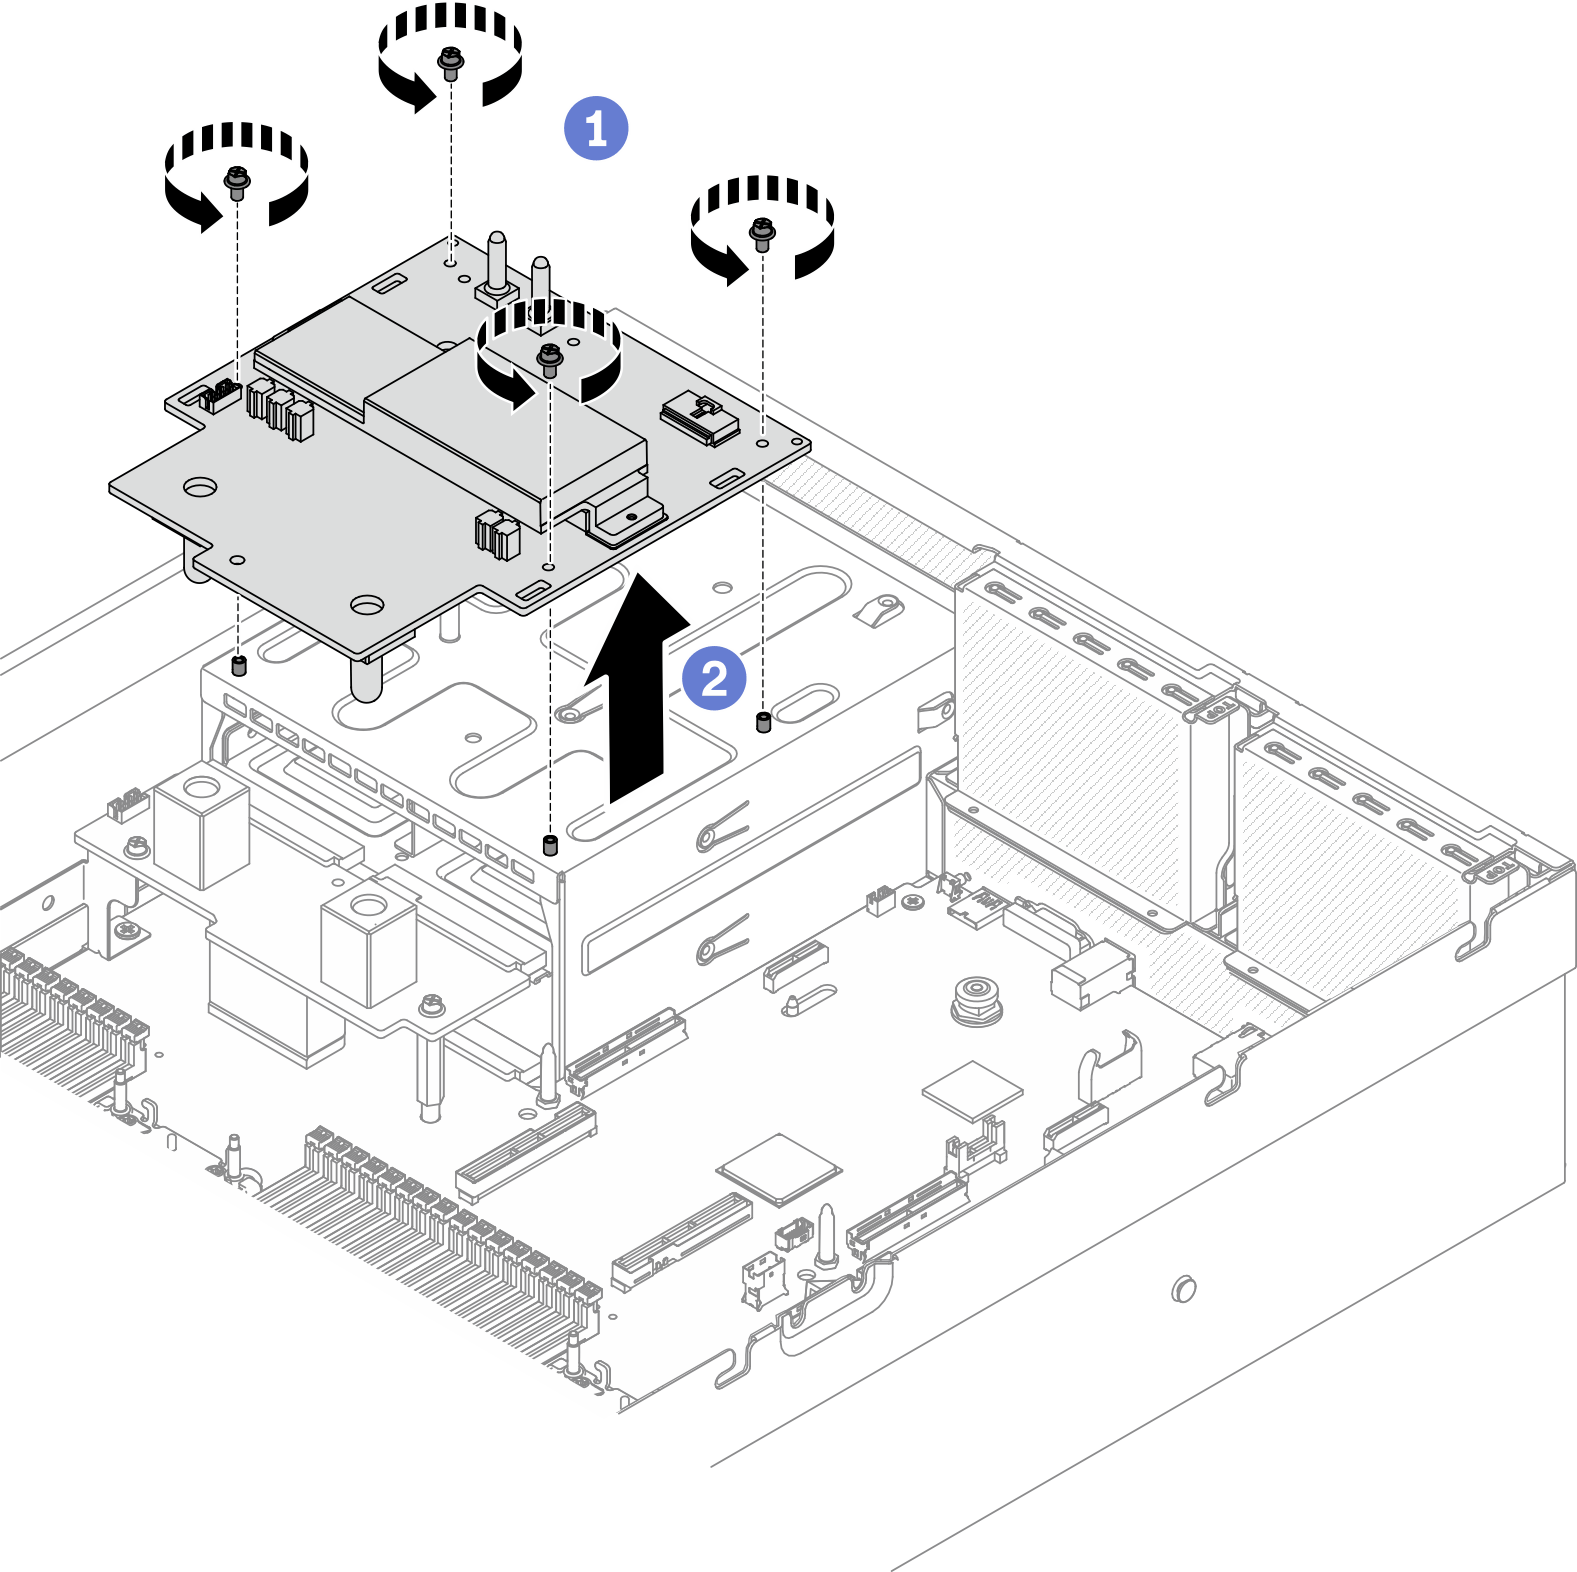
Install a replacement unit. See Install the SXM GPU power distribution board.
To replace the power distribution board, see Power distribution board replacement.
If you are instructed to return the component or optional device, follow all packaging instructions, and use any packaging materials for shipping that are supplied to you.
Demo video