Install the server to rack
Follow instructions in this section to install the server to the rack.
S036
 |  |
| 18 - 32 kg (39 - 70 lb) | 32 - 55 kg (70 - 121 lb) |
R006
CAUTION
Do not place any object on top of a rack-mounted device unless that rack-mounted device is intended for use as a shelf.
About this task
Attention
Read Installation Guidelines and Safety inspection checklist to ensure that you work safely.
Power off the server and peripheral devices and disconnect the power cords and all external cables. See Power off the server.
CAUTION
Make sure to have three people operate the server installation procedures to prevent injury.
Procedure
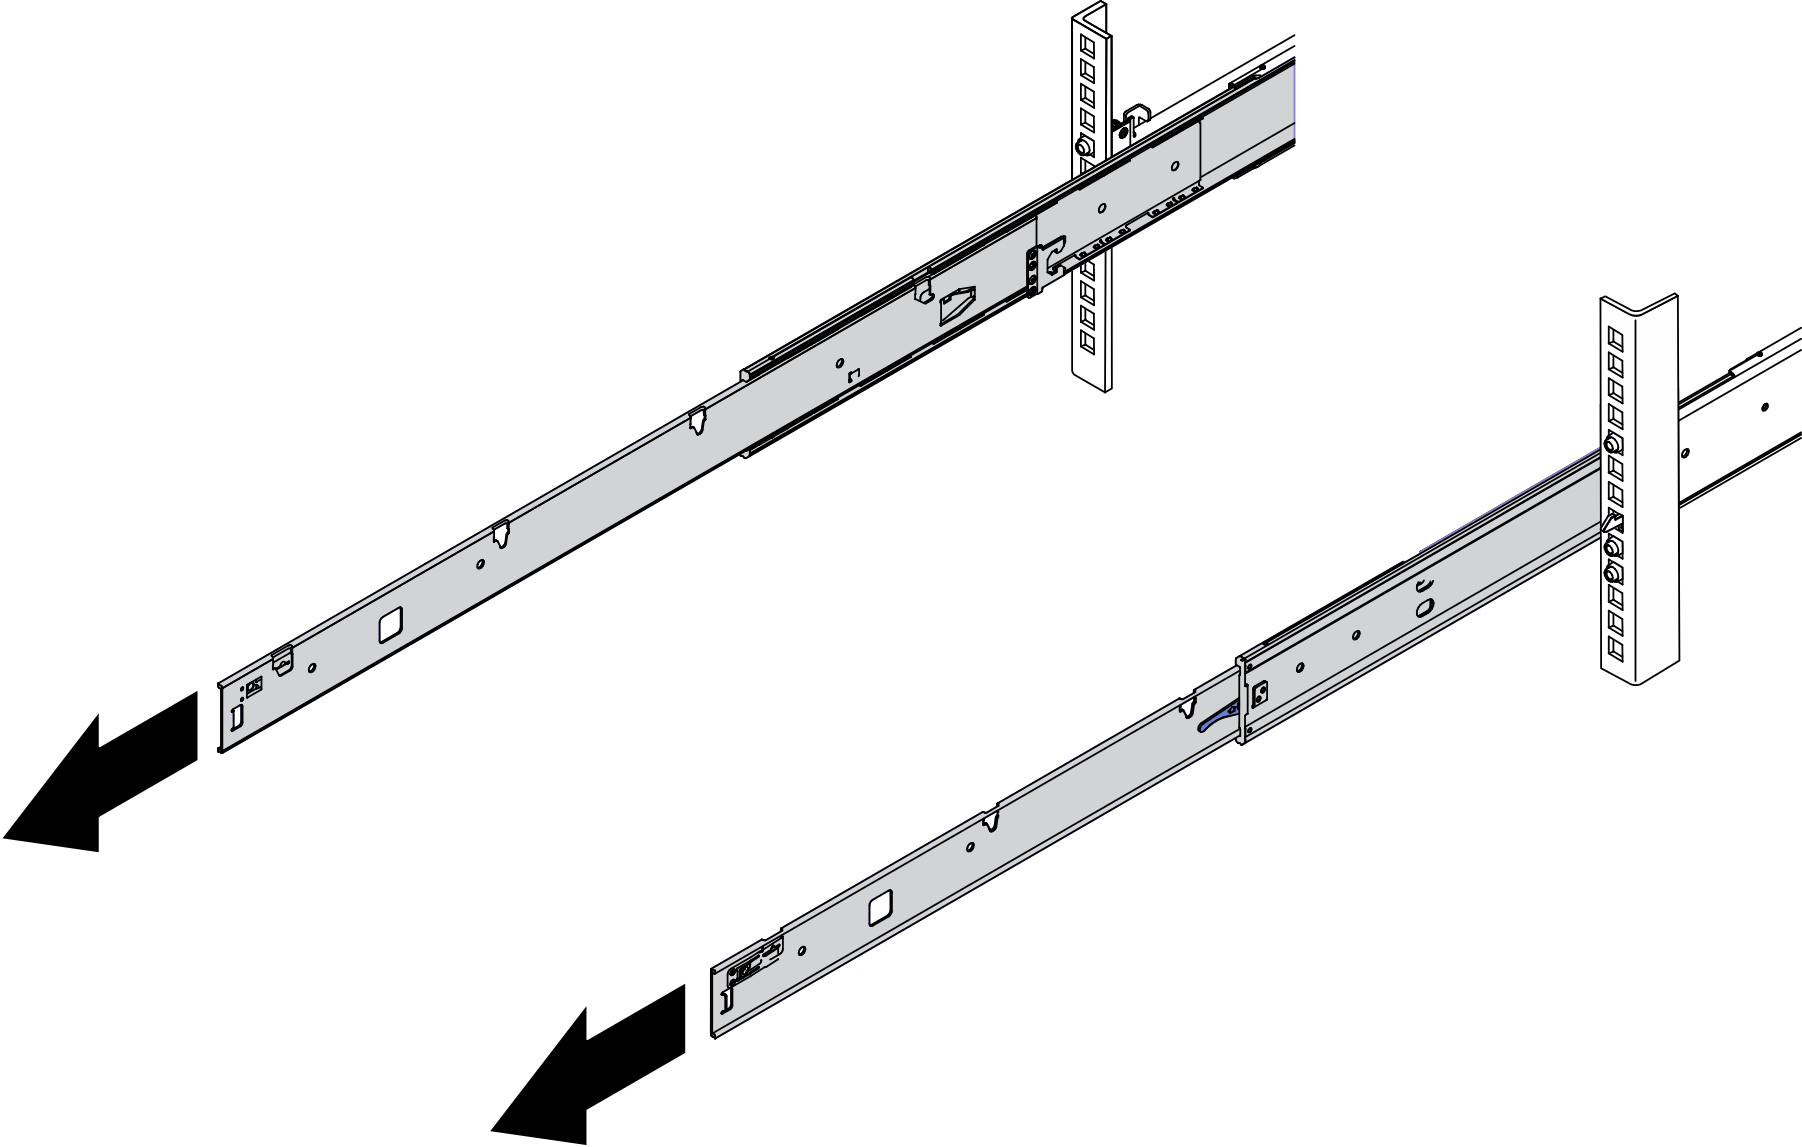
- From the front of the rack, pull the rails all the way out until they stop AttentionYou can only install the server successfully when the rails are fully extended.Figure 1. Pulling out the rails
Rack front
- Carefully lift up the server with three people.CAUTIONMake sure three people are lifting the sever by holding the lift pointsFigure 2. Lifting up the server
Rack front
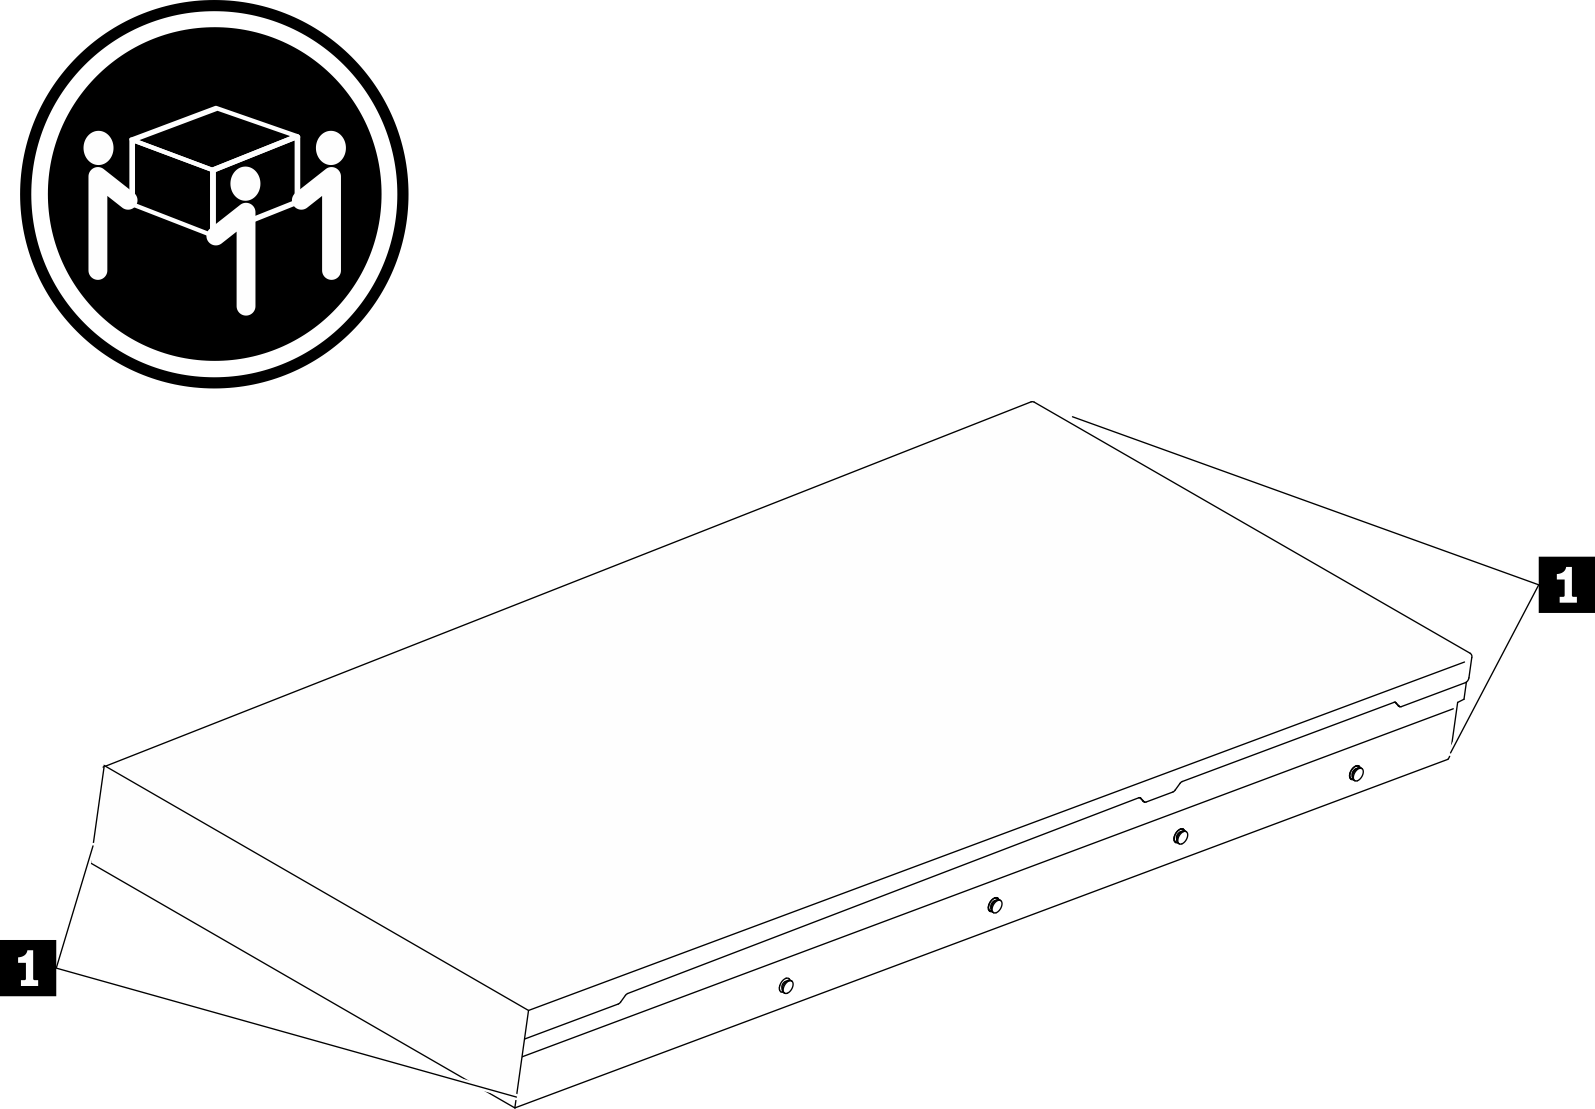
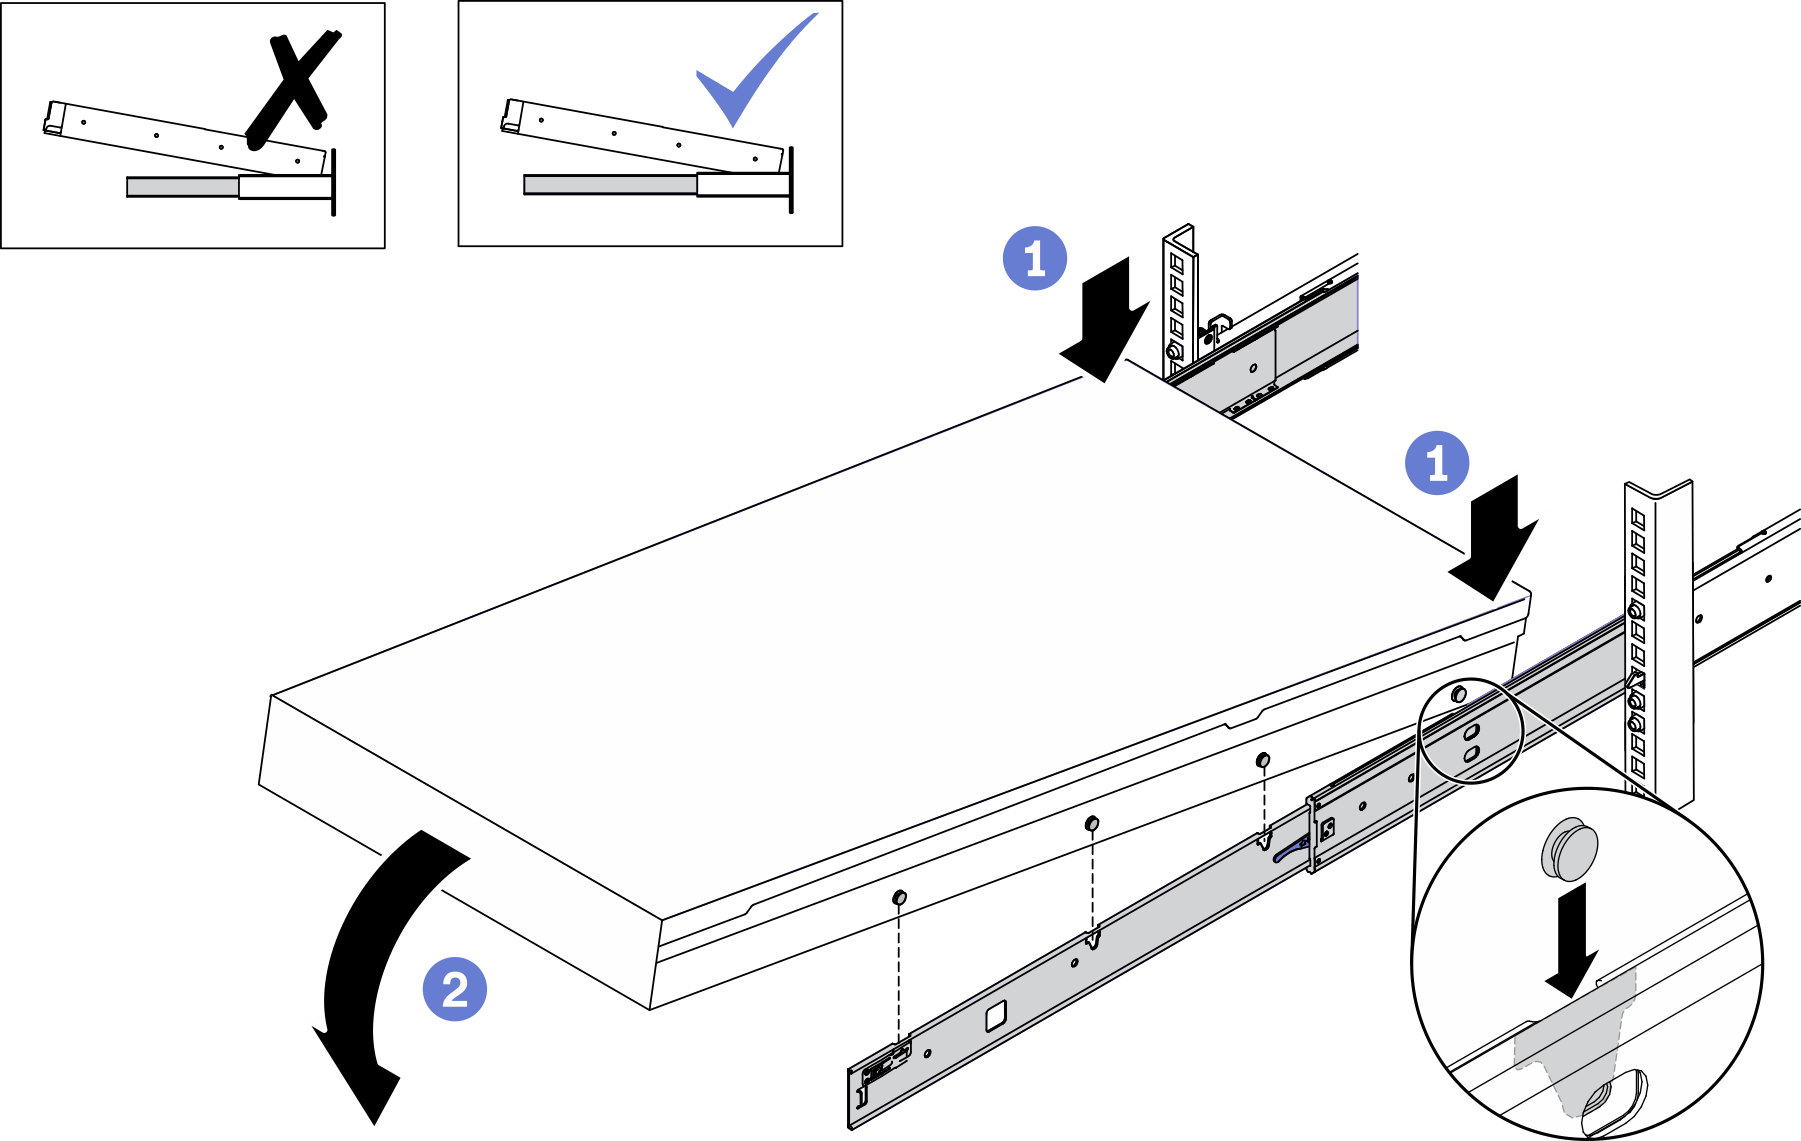
1 Lift point - From the front of the rack, install server into the rails.
 Tilt the server and slowly lower the rear end; then, push the rails toward the server and make sure the farthest nailheads on server’s left and right side go into the slots on the rail.
 Slowly lower the server down and make sure the other 3 nailheads on server’s left and right side slip into corresponding slots.NoteInspect the sides of the rails to make sure the nailheads are placed in the slots.AttentionYou can only install the server successfully when the rails are fully extended.Figure 3. Installing the server into the rails
Rack front
- Slide the server into rack.
- Push up the latches on the rails.
- Push the server all the way into the rack.Figure 4. Installing the server into the rack
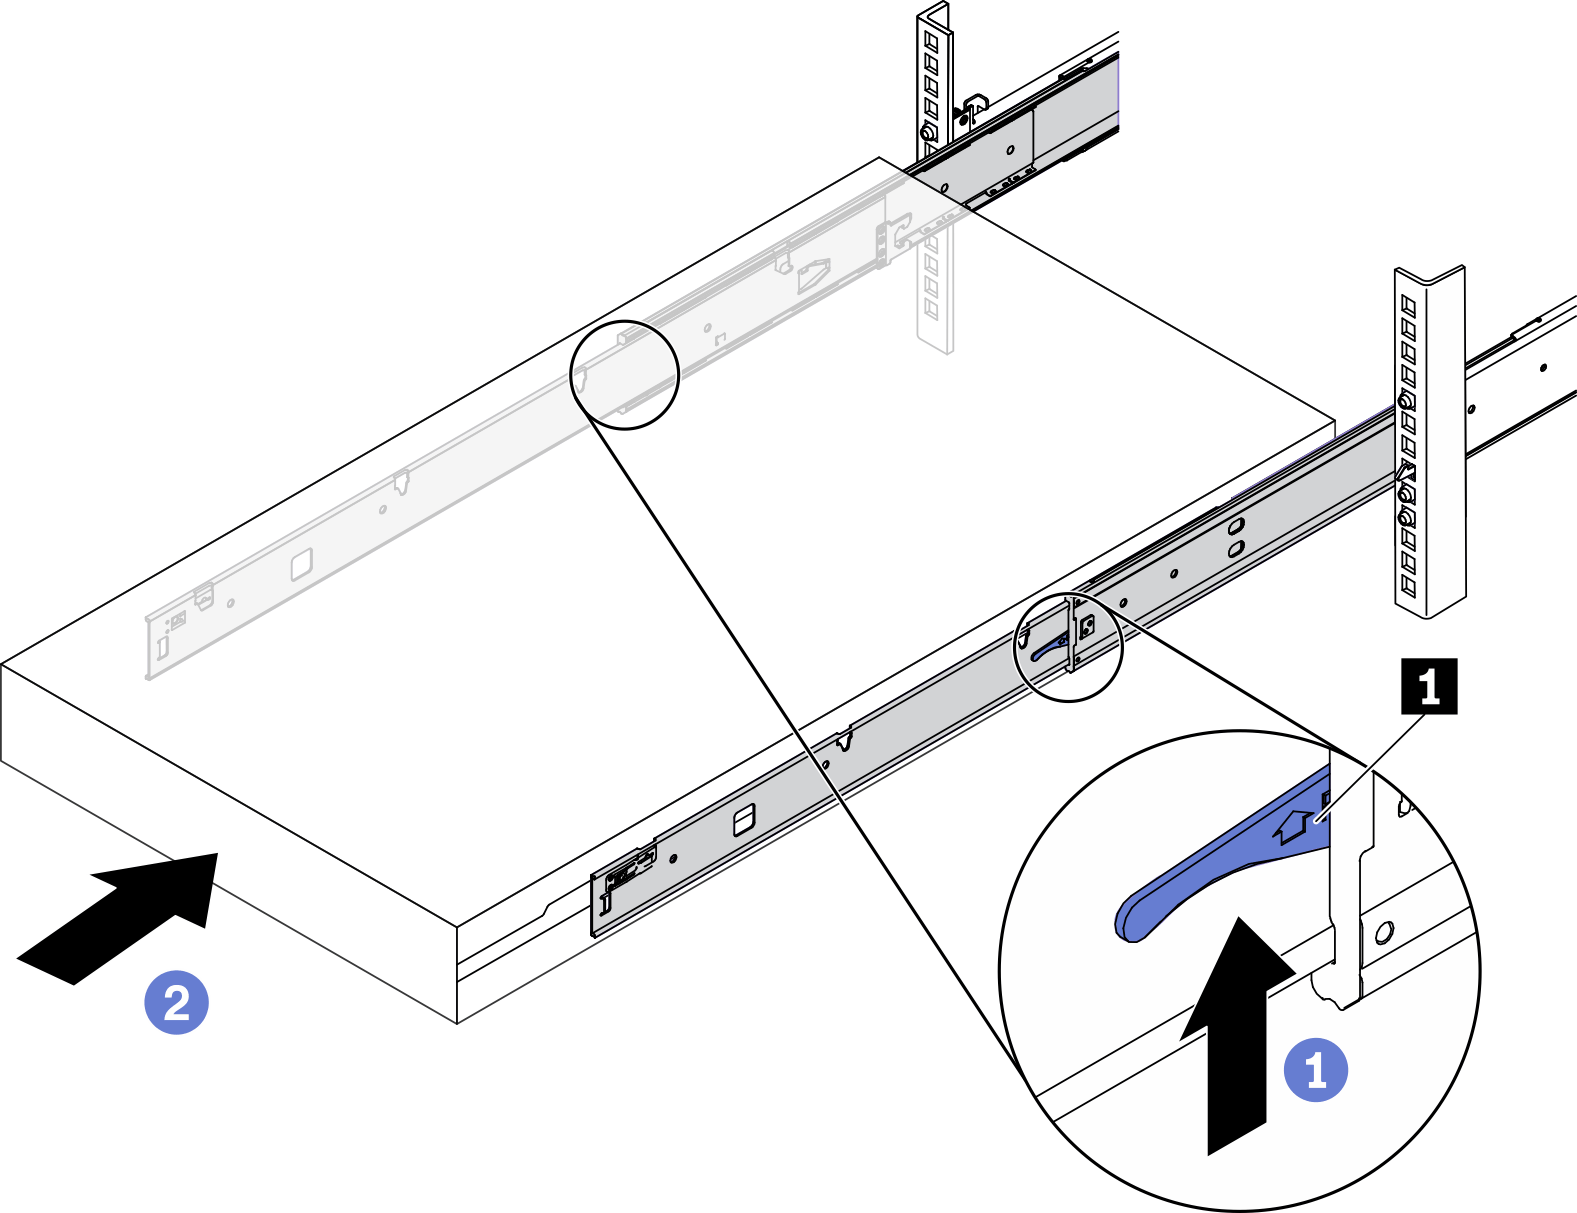
1 Latch
- (Optional) Secure the server to the rack.
- Secure the server to the rear of the rack. Select the first rail you want to secure. Insert a washer and M5 screw; then, fasten the M5 screw. Repeat to secure the other rail.Figure 5. Securing the server to the rear of the rack
Rack rear
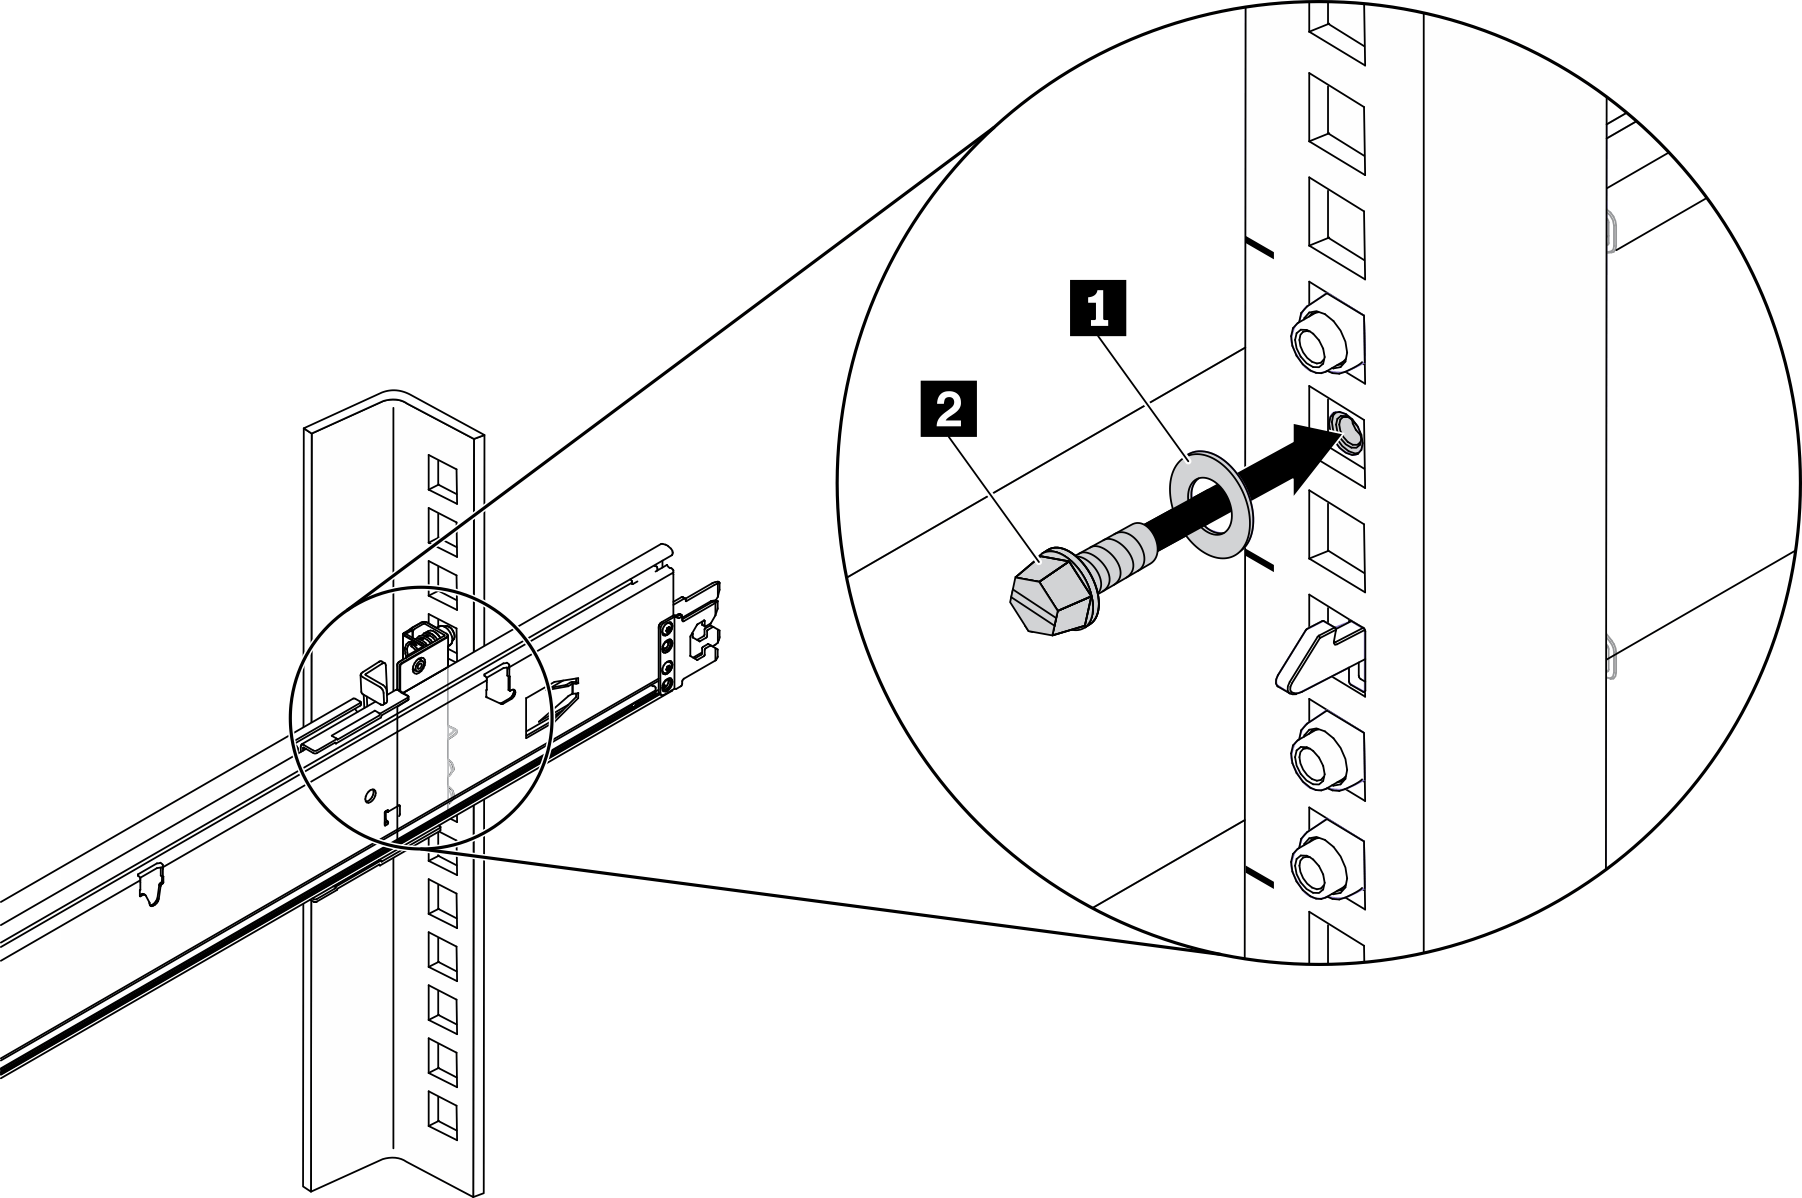
1 Washer 2 M5 screw - Secure the server to the front of the rack. Fasten the two thumbscrews located on the front of the server.Figure 6. Securing the server to the front of the rack
Rack front
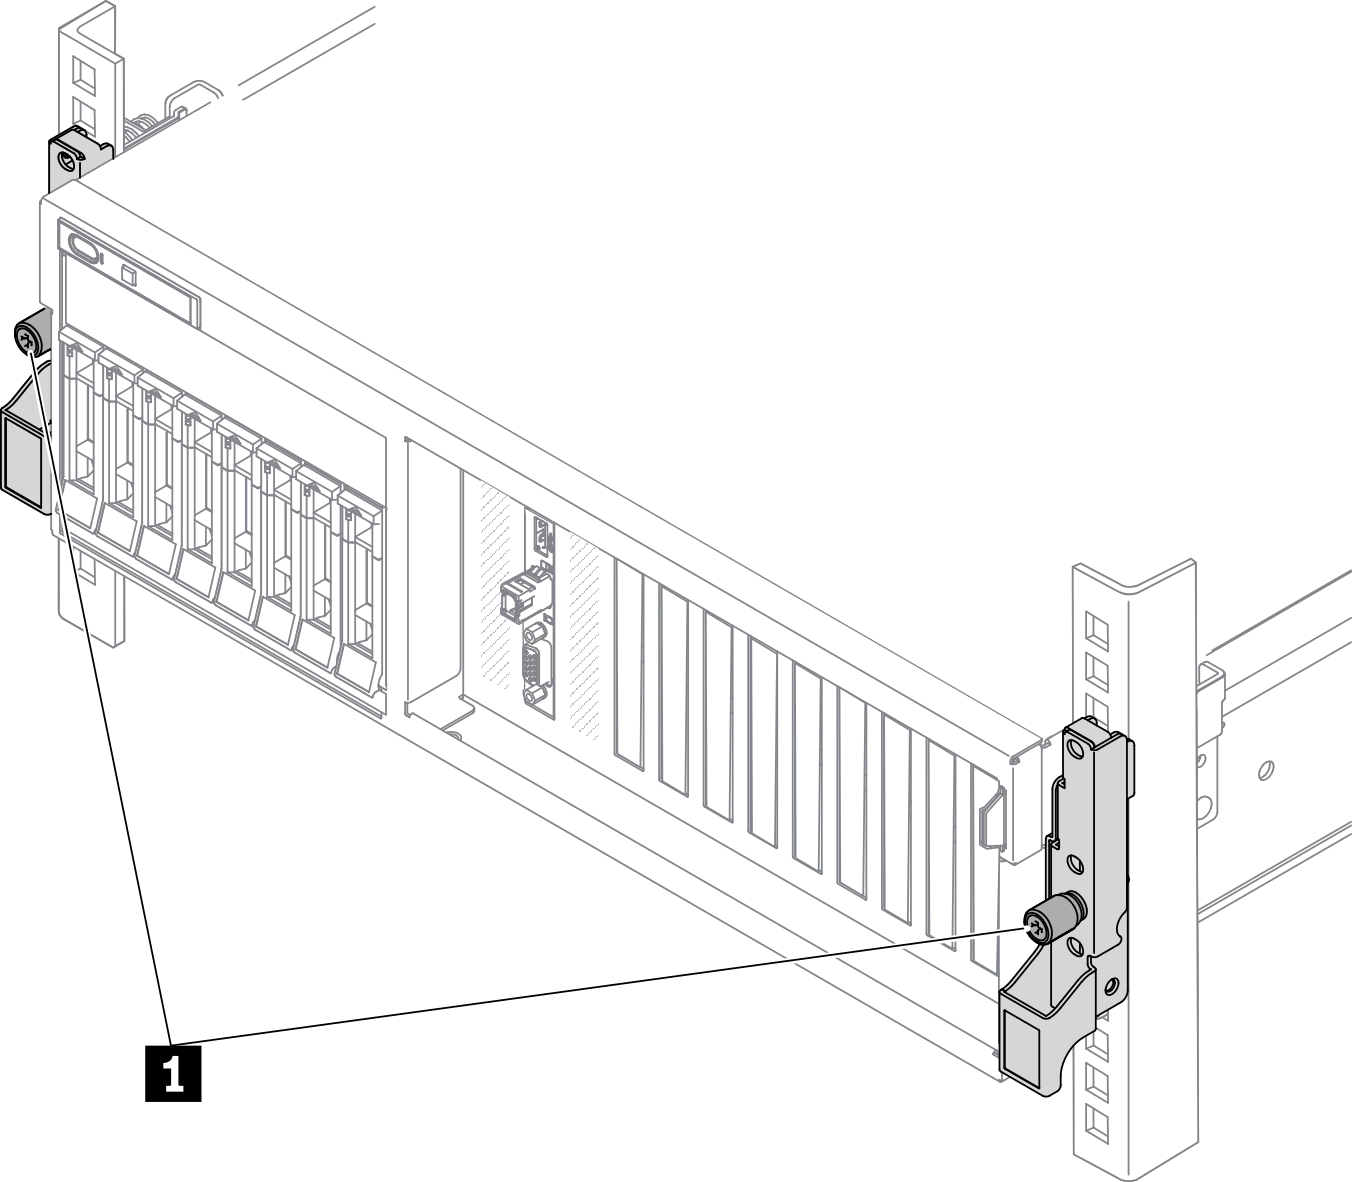
1 Thumbscrew
- Secure the server to the rear of the rack. Select the first rail you want to secure. Insert a washer and M5 screw; then, fasten the M5 screw. Repeat to secure the other rail.
After you finish
Reconnect the power cords and any cables that you removed.
Power on the server and any peripheral devices. See Power on the server.
Update the server configuration. See Complete the parts replacement.
Give documentation feedback