Install the M.2 backplane and M.2 drive
Use this information to install the M.2 backplane and M.2 drive.


Touch the static-protective package that contains the new M.2 backplane and M.2 drive to any unpainted surface on the outside of the server. Then, take the new M.2 backplane and M.2 drive out of the package and place them on a static-protective surface.
Adjust the retainer on the M.2 backplane to accommodate the particular size of the M.2 drive you wish to install. See Adjust the retainer on the M.2 backplane.
To install the M.2 backplane and M.2 drive, complete the following steps:
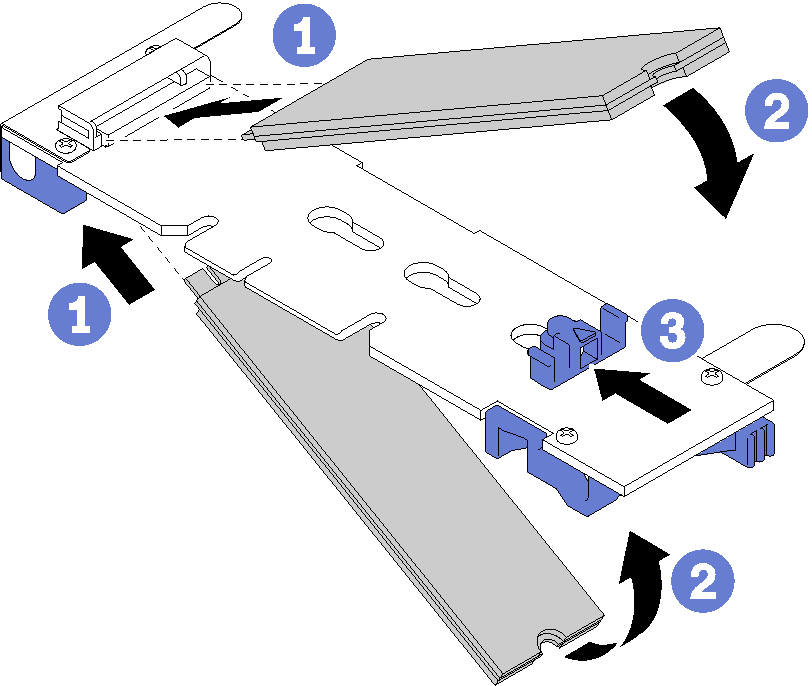
- Insert the M.2 drive at an angle of approximately 30 degrees into the connector.NoteWhen only one drive is installed, it must be installed in slot 0.Figure 2. M.2 drive slots
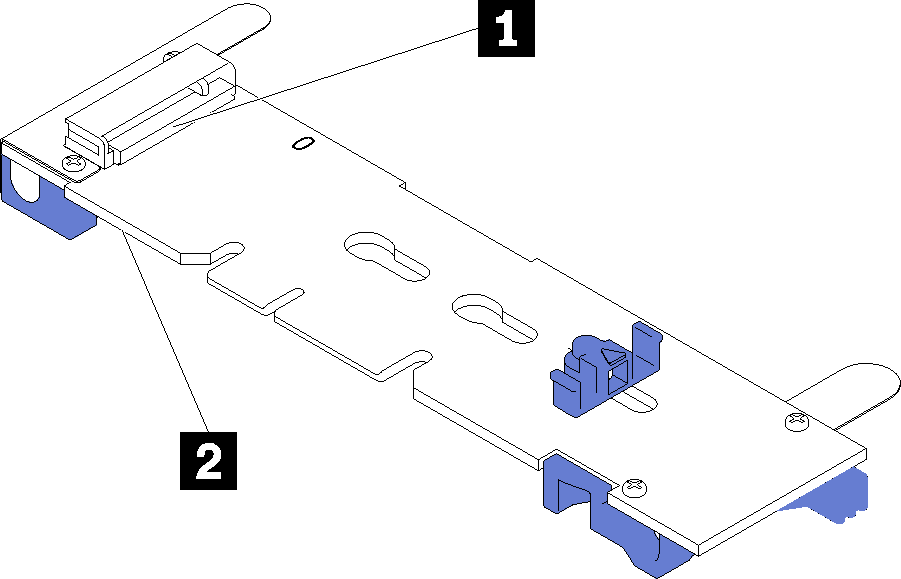
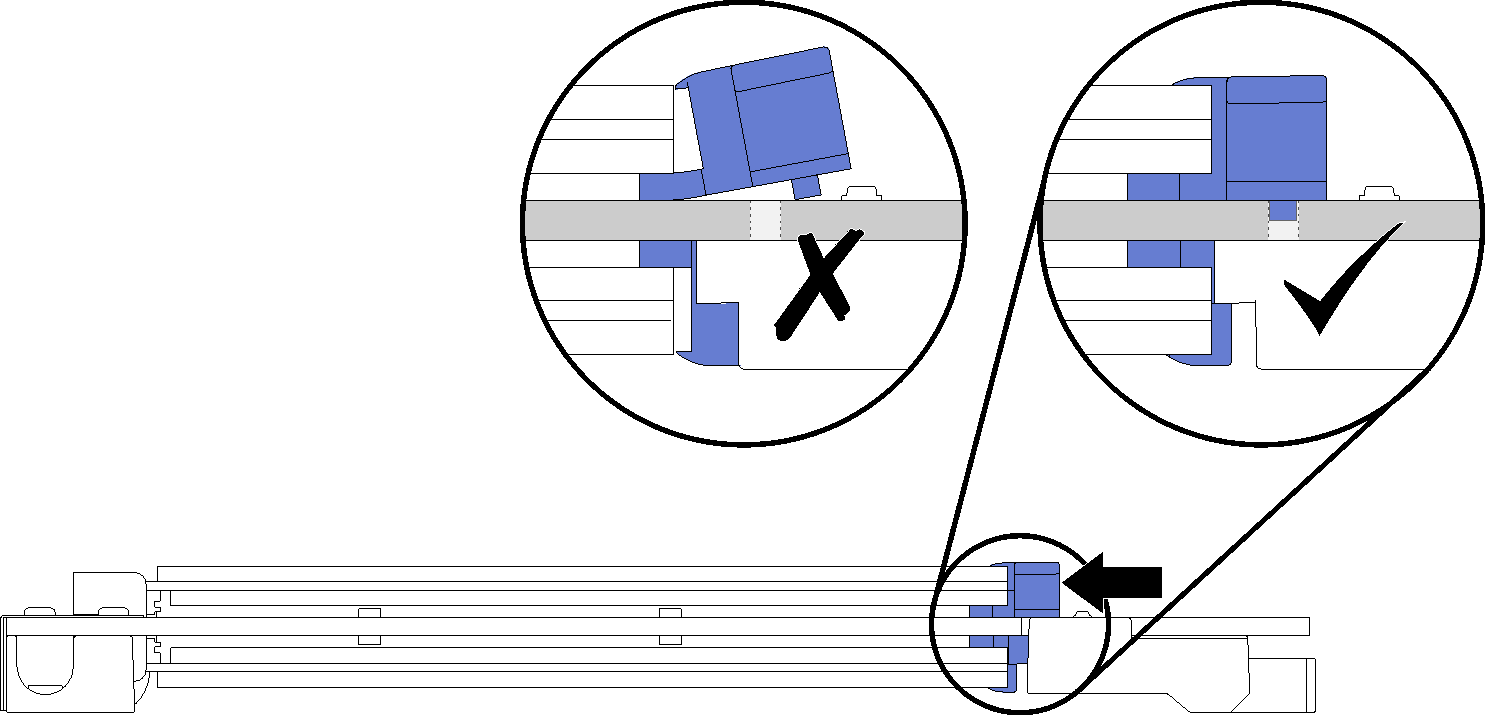
Table 1. M.2 drive slots 1 Slot 0 2 Slot 1 - Slide the retainer forward (toward the connector) to secure the M.2 drive or drives into place.AttentionWhen sliding the retainer forward, ensure that the two nubs on the retainer enter the small holes on the M.2 backplane. Once they enter the holes, you will hear a soft “click” sound.Figure 3. Sliding the retainer
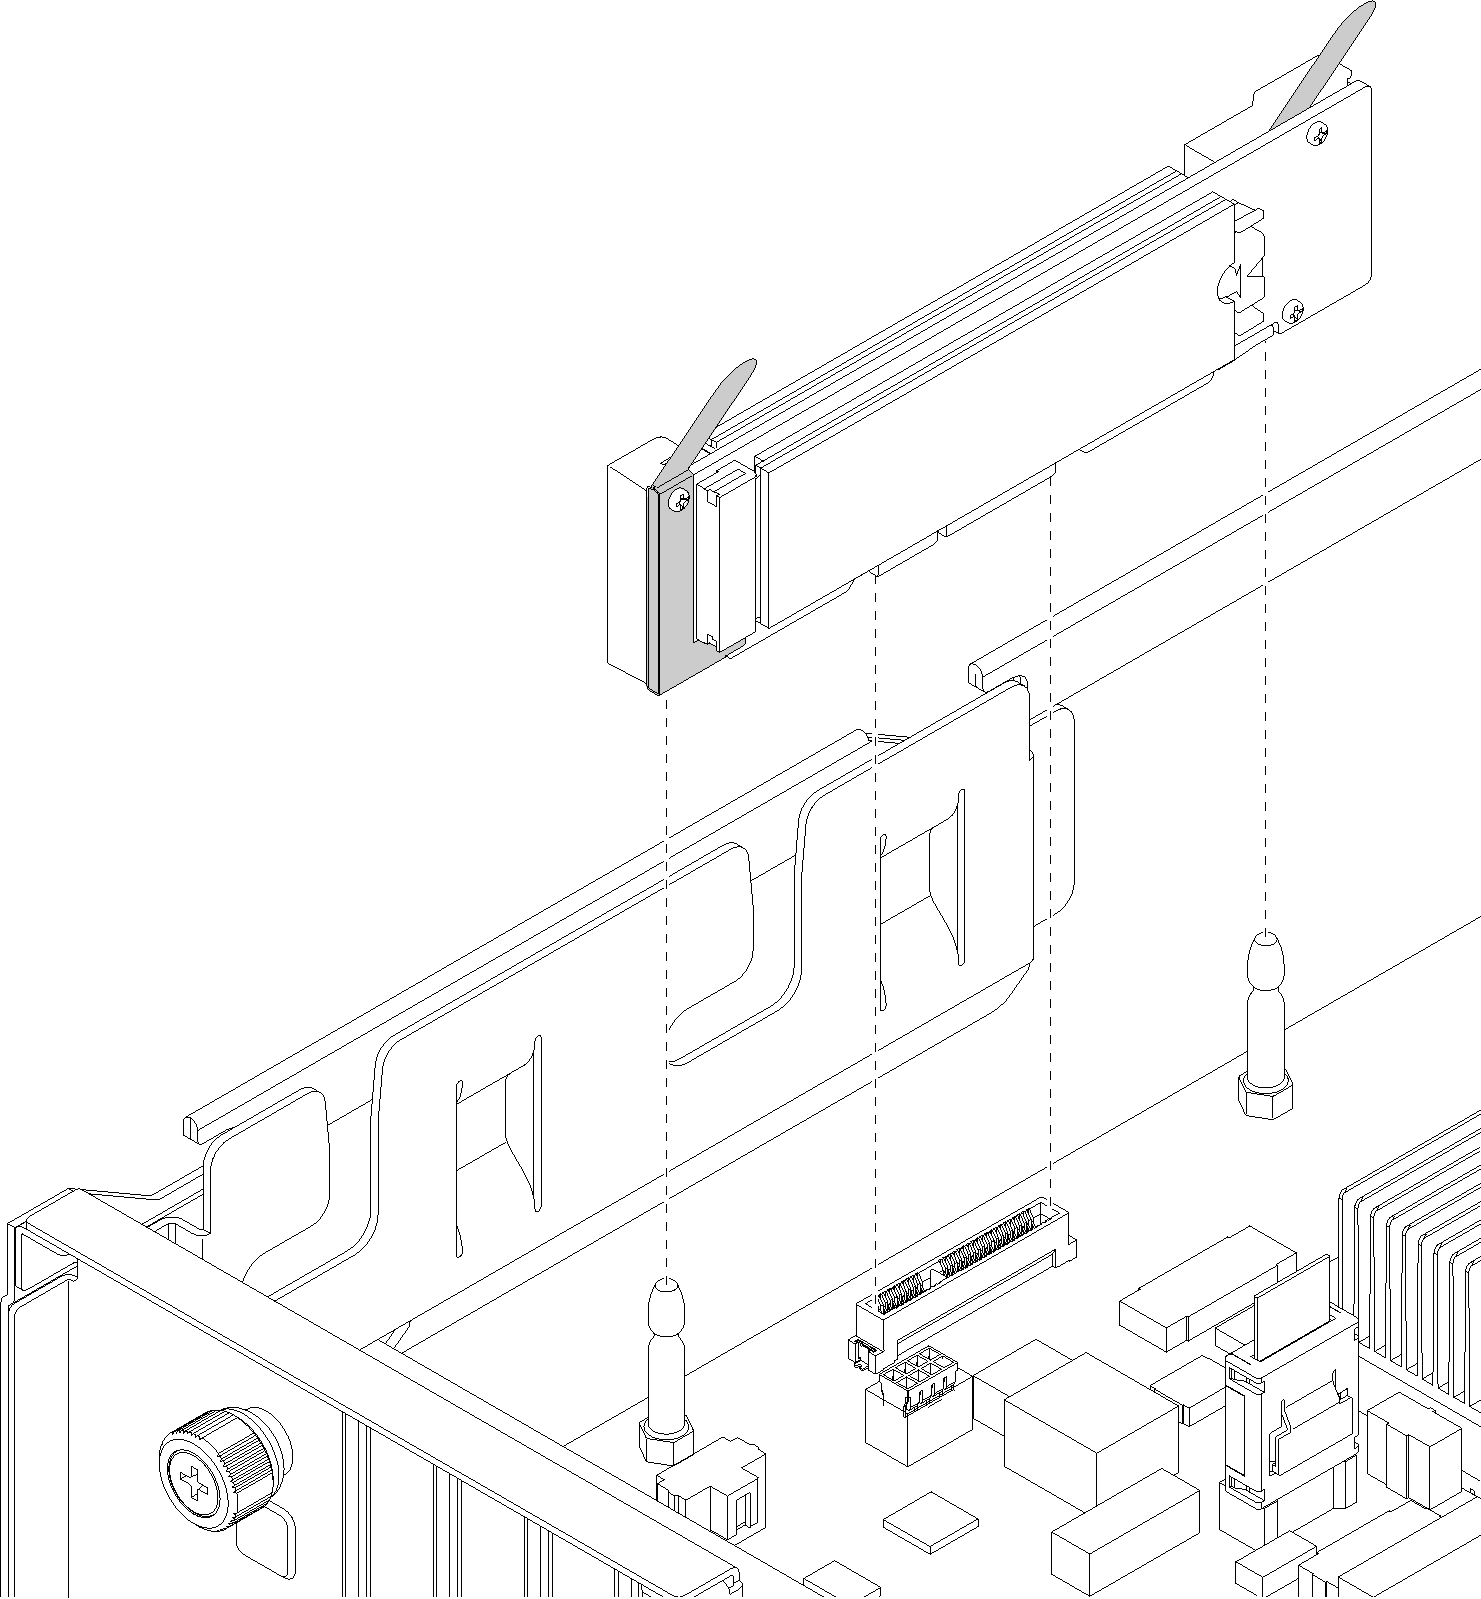
- Align the blue plastic supports at each end of the M.2 backplane with the guide pins on the system board. Then, insert the M.2 backplane into the M.2 slot on the system board and press it down to fully seat it.Figure 4. Installing the M.2 backplane
Install the drive cage. See Install the drive cage.
Install the top cover. See Install the top cover.
Push up on the latches on the slide rails and push the server back into the rack.
Tighten the two captive screws located on the front of the server to secure the server in the rack.
NoteAlways secure the system in the rack if your are moving the rack.Connect all cables to the ports on the front of the server, including the management port, if necessary, and all PCIe adapter ports. The management port and PCIe adapter ports are located in the I/O expansion cage.
Connect power cords to both power supplies, which are located at the rear of the server.
Demo video