Install the drive cage
Use this information to install the drive cage.


To install the drive cage, complete the following steps:
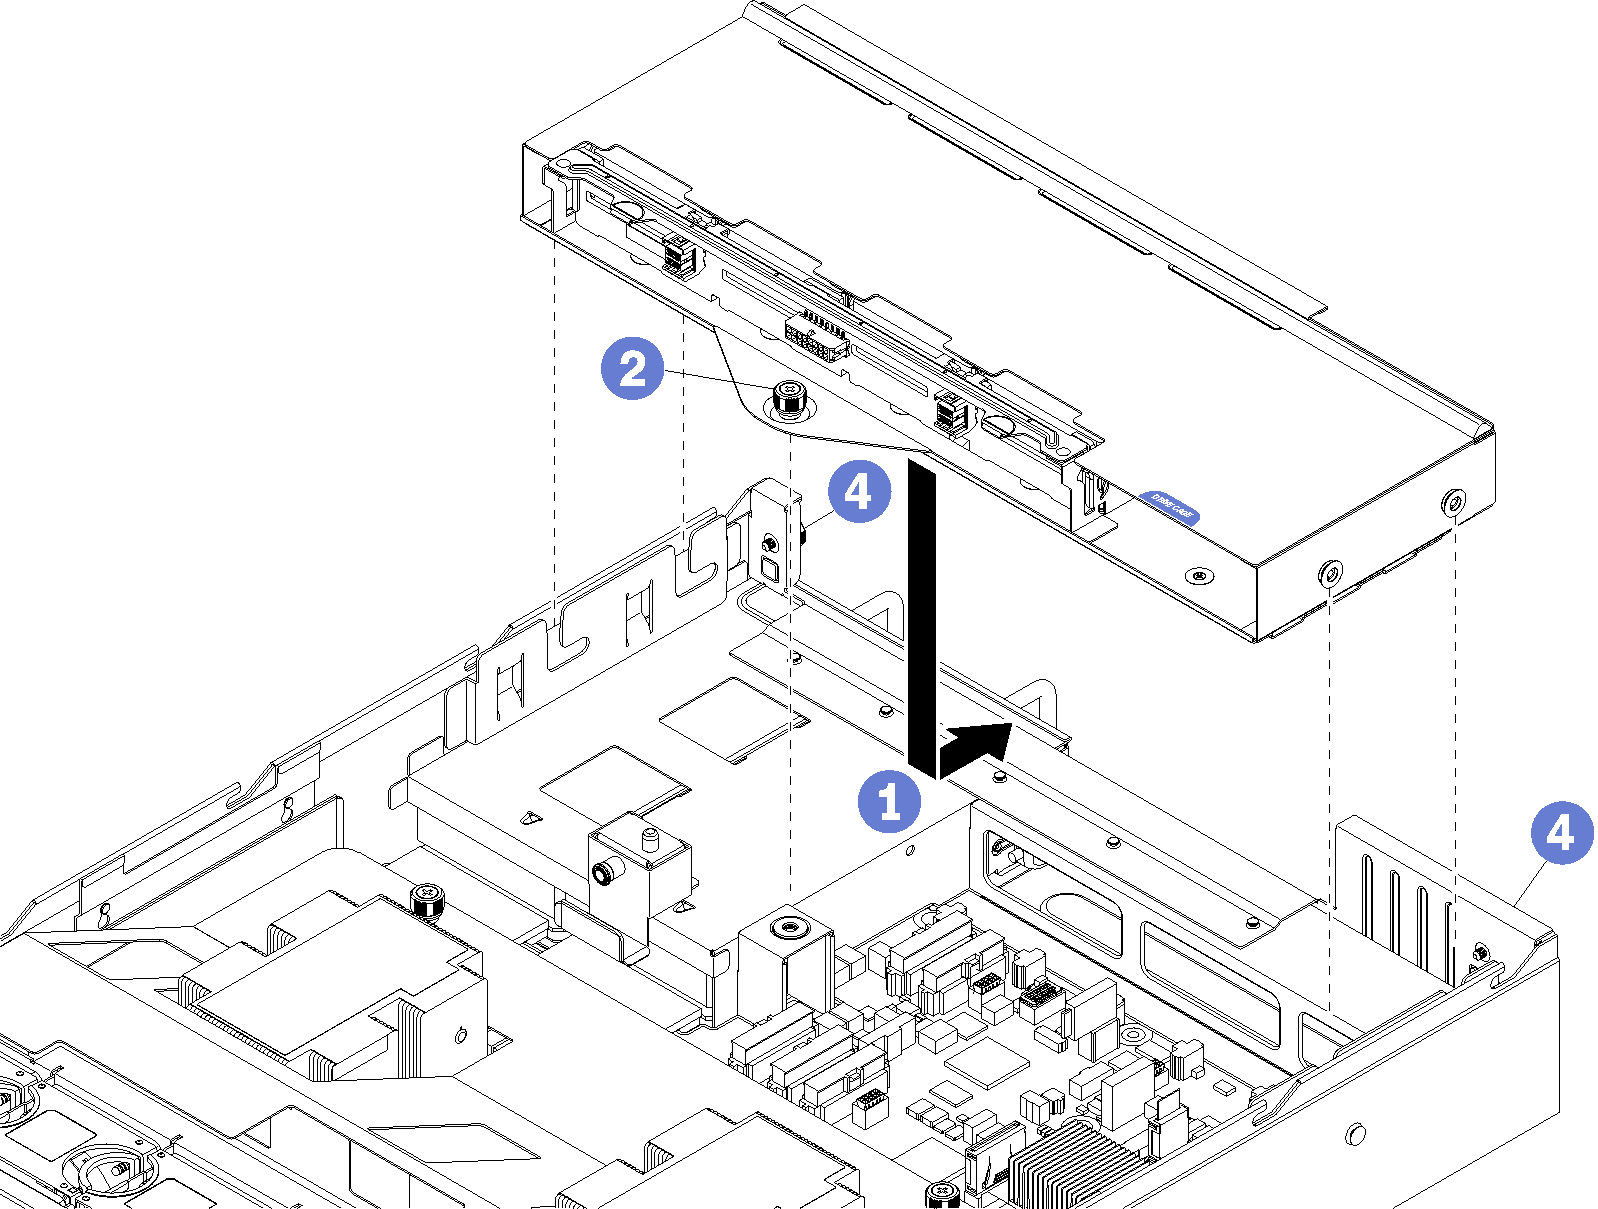
- Align the guideposts on the drive cage with the slots in the server chassis and lower the drive cage and then slide it rearward until the drive cage fits snuggly against the rear of the server chassis.
- Tighten the single internal captive screw to secure the drive cage in place.
- Connect the three cables (two data cables and one power cable) to the 2.5-inch-drive backplane.
Install the air baffle. See Install the air baffle.
Install the top cover. See Install the top cover.
Push up on the latches on the slide rails and push the server back into the rack.
Tighten the two captive screws located on the front of the server to secure the server in the rack.
NoteAlways secure the system in the rack if your are moving the rack.Connect all cables to the ports on the front of the server, including the management port, if necessary, and all PCIe adapter ports. The management port and PCIe adapter ports are located in the I/O expansion cage.
Tighten the two captive screws located on the rear of the server using a P2 screwdriver.
Connect power cords to both power supplies, which are located at the rear of the server.