Remove the drive cage
Use this information to remove the drive cage.
Power off the server. See Power off the server.
Disconnect power cords from both power supplies, which are located in the rear of the server.
Loosen the two captive screws located on the rear of the server that secure the drive cage to the server chassis.
Record the location of the cables in the front of the PCIe adapters that are installed in the I/O expansion cage at the front of the server, and disconnect the cables.
Disconnect the management port cable from the management port in the I/O expansion cage, if necessary.
Loosen the two captive screws located on the front of the server. If necessary, use a P2 screwdriver to loosen the screws.
Pull the server forward until the slide rails click into place.
Remove the top cover. See Remove the top cover.
Remove the air baffle. See Remove the air baffle.
To remove the drive cage, complete the following steps:
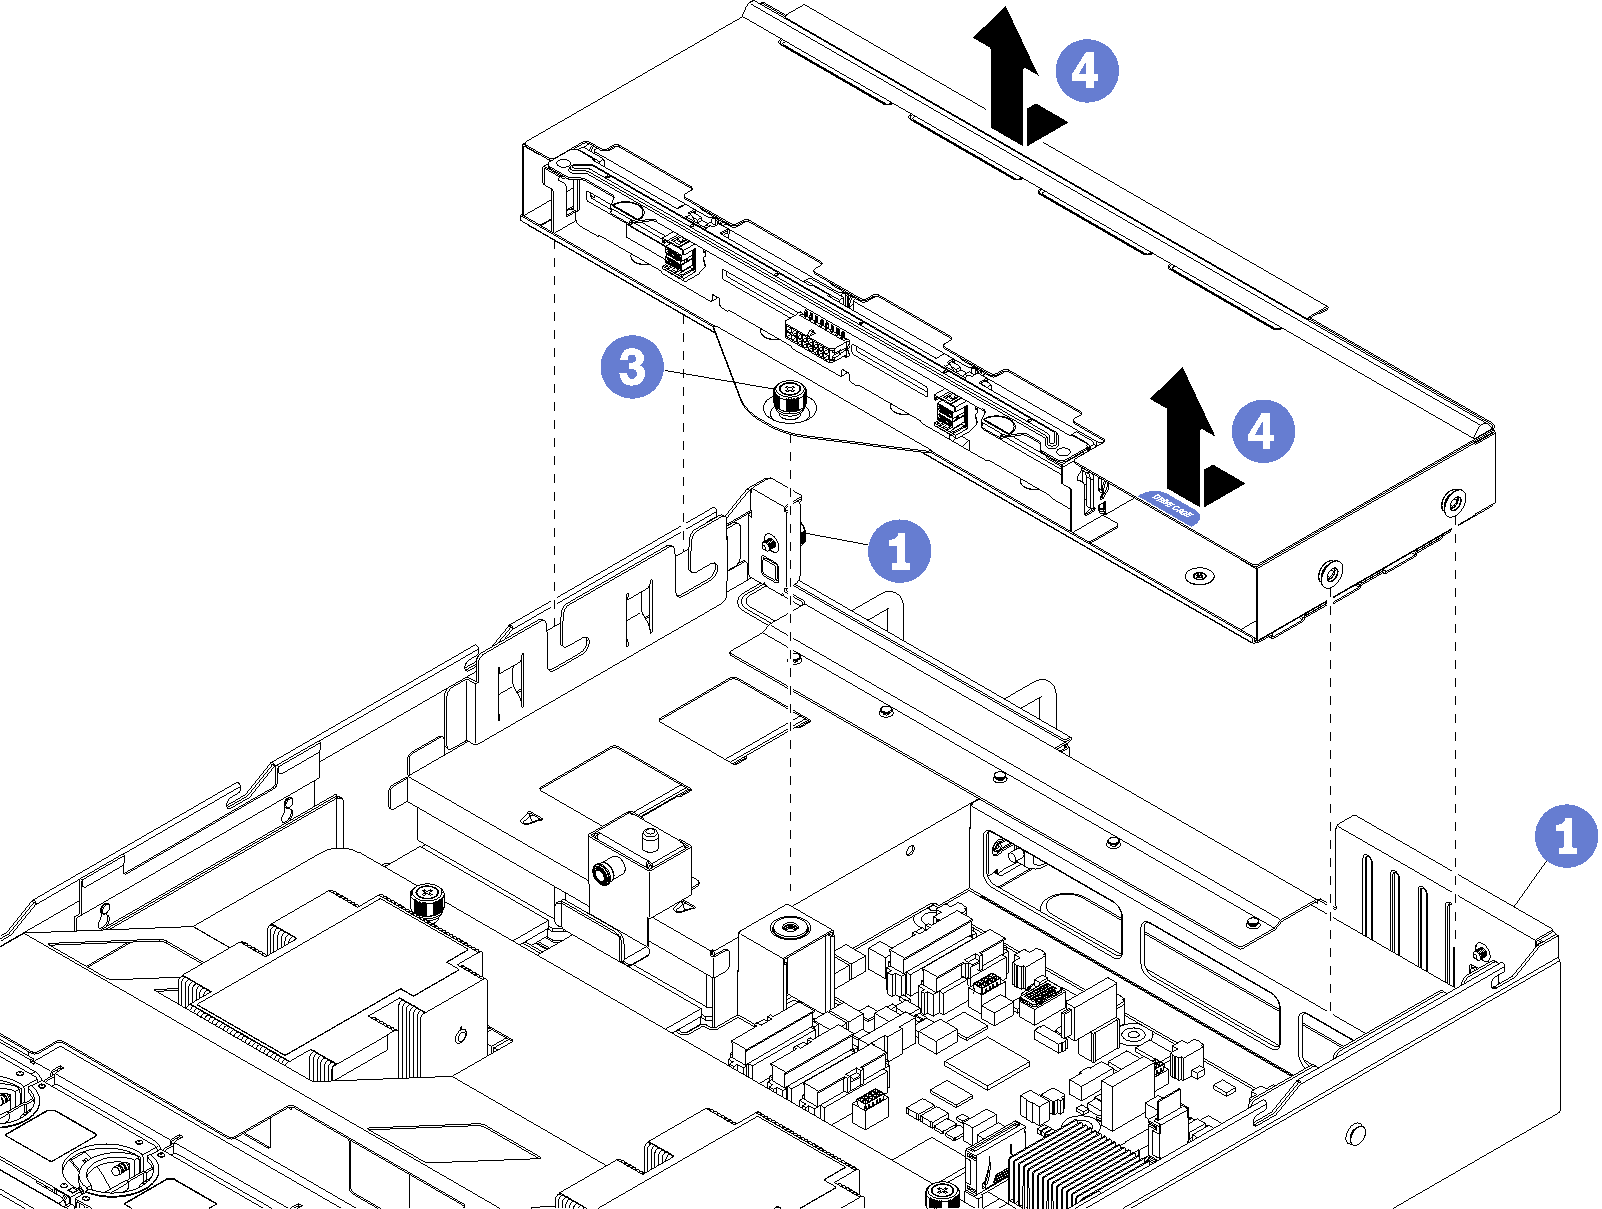
- Make sure that the two captive screws located on the rear of the server are loosened.
- Disconnect the three cables (two data cables and one power cable) that are connected to the 2.5-inch-drive backplane (not shown).
- Loosen the captive screw that is connecting the drive cage to the server chassis, using a P2 screwdriver if necessary.
- Slide the drive cage back and lift it out of the server chassis.