Rear view
This section contains information about the LEDs and connectors on the rear of the server.
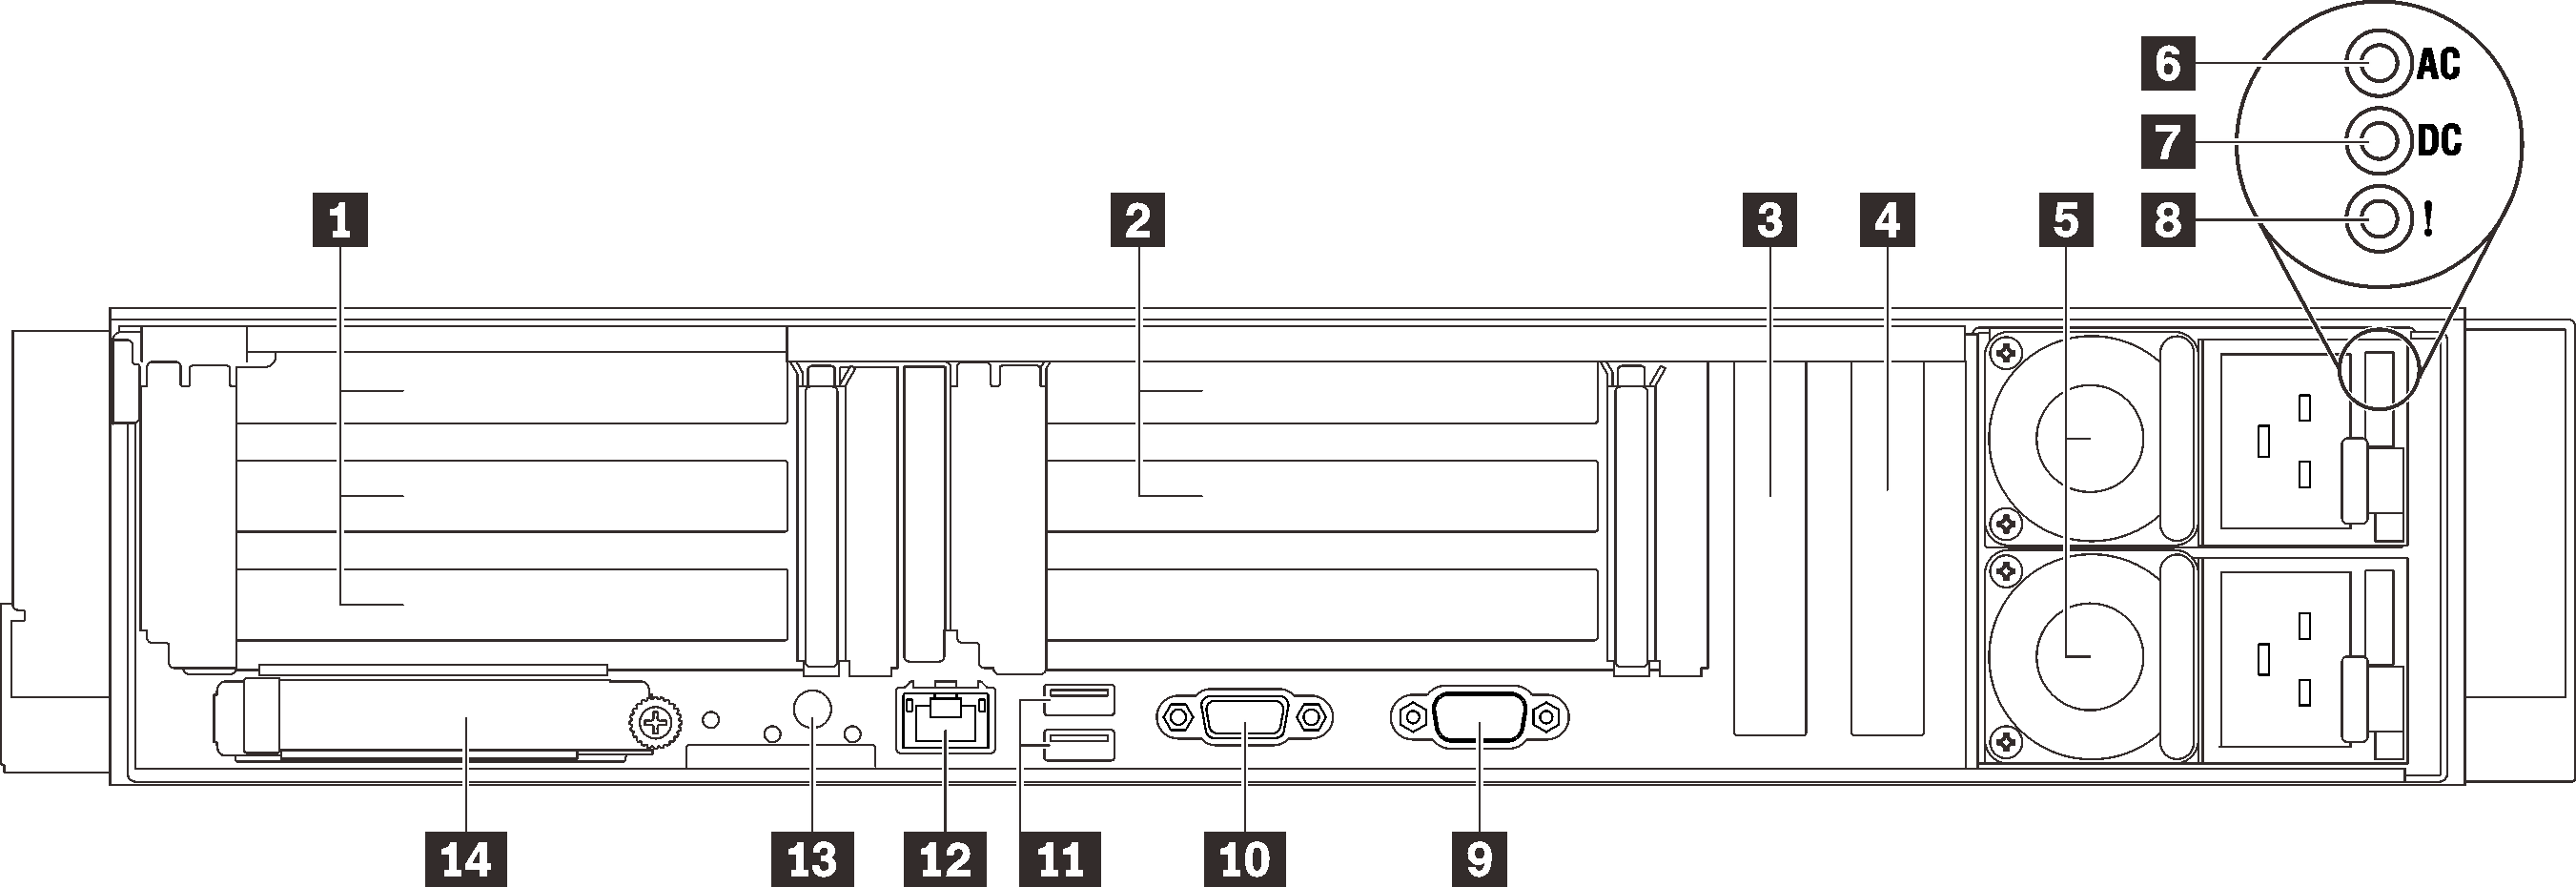
| 1 | PCIe slot 1-3 (Riser 1) | 8 | Power supply error LED (yellow) |
| 2 | PCIe slot 5-6 (Riser 2) | 9 | Serial connector |
| 3 | PCI Express 3.0 x8 (PCIe slot 7) | 10 | VGA connector |
| 4 | PCI Express 3.0 x8 (PCIe slot 8) | 11 | USB 3.1 connectors |
| 5 | Power supply units | 12 | XClarity Controller network connector |
| 6 | AC power LED (green) | 13 | NMI button |
| 7 | DC power LED (green) | 14 | OCP 3.0 Ethernet adapter |
1 Riser 1 (PCIe slot 1-3)
| Slot | x16/x16/x16 riser card | x16/x16 (x8 lanes) riser card (without 7mm drive cage) | x16/x16 (x8 lanes) riser card(with 7mm drive cage) |
| 1 | x16 | x16 (x8 lane) | x16 (x8 lane) |
| 2 | x16 | x16 (x8 lane) | x16 (x8 lane) |
| 3 | x16 | NA | 7mm drive cage |
2 Riser 2 (PCIe slot 5-6)
| Slot | x16/x16 PCIe riser card |
| 5 | x16 |
| 6 | x16 |
3 4 PCI Express 3.0 (x8)
Install adapters, particularly RAID adapters, to these slots.
5 Power supply units
- 750-watt Titanium, input power 230 Vac / 240 VDC
- 1100-watt Platinum, input power 115 Vac / 230 Vac / 240 VDC
- 1100-watt Titanium, input power 230 Vac / 240 VDC
- 1800-watt Platinum, input power 230 Vac / 240 VDC
- 1800-watt Titanium, input power 230 Vac / 240 VDC
- 2400-watt Platinum, input power 230 Vac / 240 VDC
- 2600-watt Titanium, input power 230 Vac / 240 VDC
6 AC power LED (green)
Each hot-swap power supply unit comes with one AC and one DC power LED. When the AC power LED is lit, it indicates that sufficient power is being supplied to the power supply through the power cord. During normal operation, both the AC and DC power LEDs are lit.
7 DC power LED (green)
Each hot-swap power supply unit comes with one AC and one DC power LED. When the DC power LED is lit, it indicates that the power supply is supplying adequate dc power to the system. During normal operation, both the AC and dc power LEDs are lit.
8 Power supply error LED (yellow)
When the power supply error LED is lit, it indicates that the power supply has failed.
9 Serial connector
Connect a 9-pin serial device to this connector. The serial port is shared with XCC. XCC can take control of the shared serial port to redirect serial traffic, using Serial over LAN (SOL).
10 VGA connector
- When the optional front VGA connector is in use, the rear one will be disabled.
- The maximum video resolution is 1920 x 1200 at 60 Hz.
11 USB 3.1 connectors
Connect a USB device, such as a mouse, keyboard, or other devices, to either of these connectors.
12 XClarity Controller network connector
Use this connector to manage the server, by using a dedicated management network. If you use this connector, the Lenovo XClarity Controller cannot be accessed directly from the production network. A dedicated management network provides additional security by physically separating the management network traffic from the production network. You can use the Setup utility to configure the server to use a dedicated systems-management network or a shared network.
13 NMI button
Press this button to force a nonmaskable interrupt to the processor. You might have to use a pen or the end of a straightened paper clip to press the button. You can also use it to force a blue-screen memory dump. Use this button only when you are directed to do so by Lenovo Support.
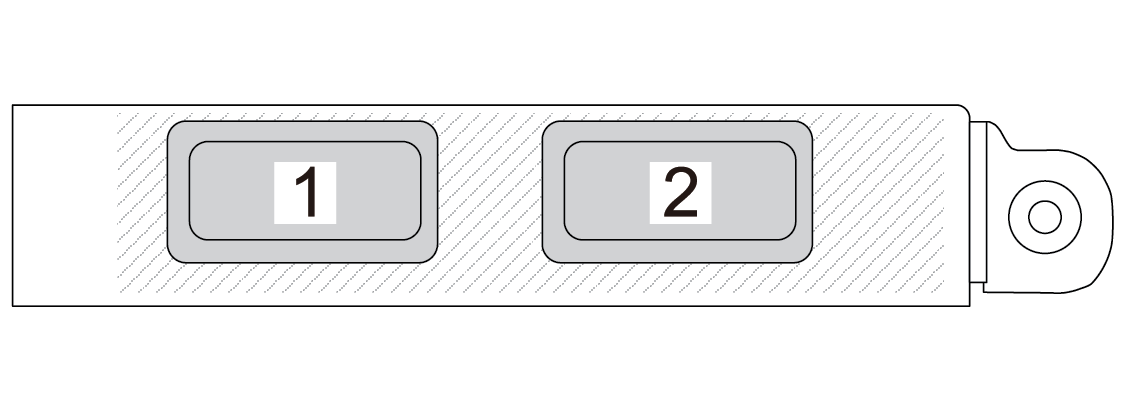
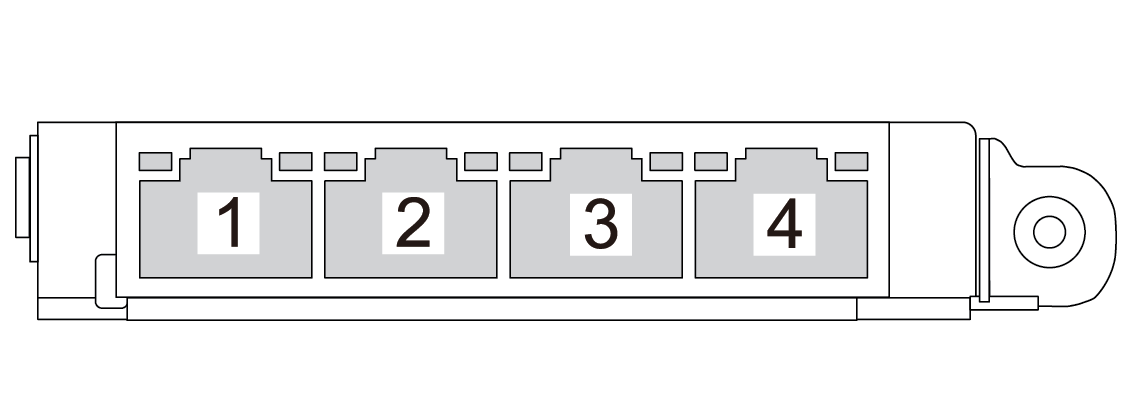
14 OCP 3.0 Ethernet adapter
The OCP 3.0 Ethernet adapter provides two or four extra Ethernet connectors for network connections. One of the Ethernet connectors on the OCP 3.0 Ethernet adapter can also function as a management connector with shared management capacity. If the shared management connector fails, traffic can automatically switch over to another connector on the adapter.