Install an adapter
Use this procedure to install an adapter.
Before installing an adapter:
Read the safety information and installation guidelines (see Safety and Installation Guidelines).
Touch the static-protective package that contains the component to any unpainted metal surface on the server; then, remove it from the package and place it on a static-protective surface.
Follow the following instructions accordingly to the location where the adapter is to be installed.
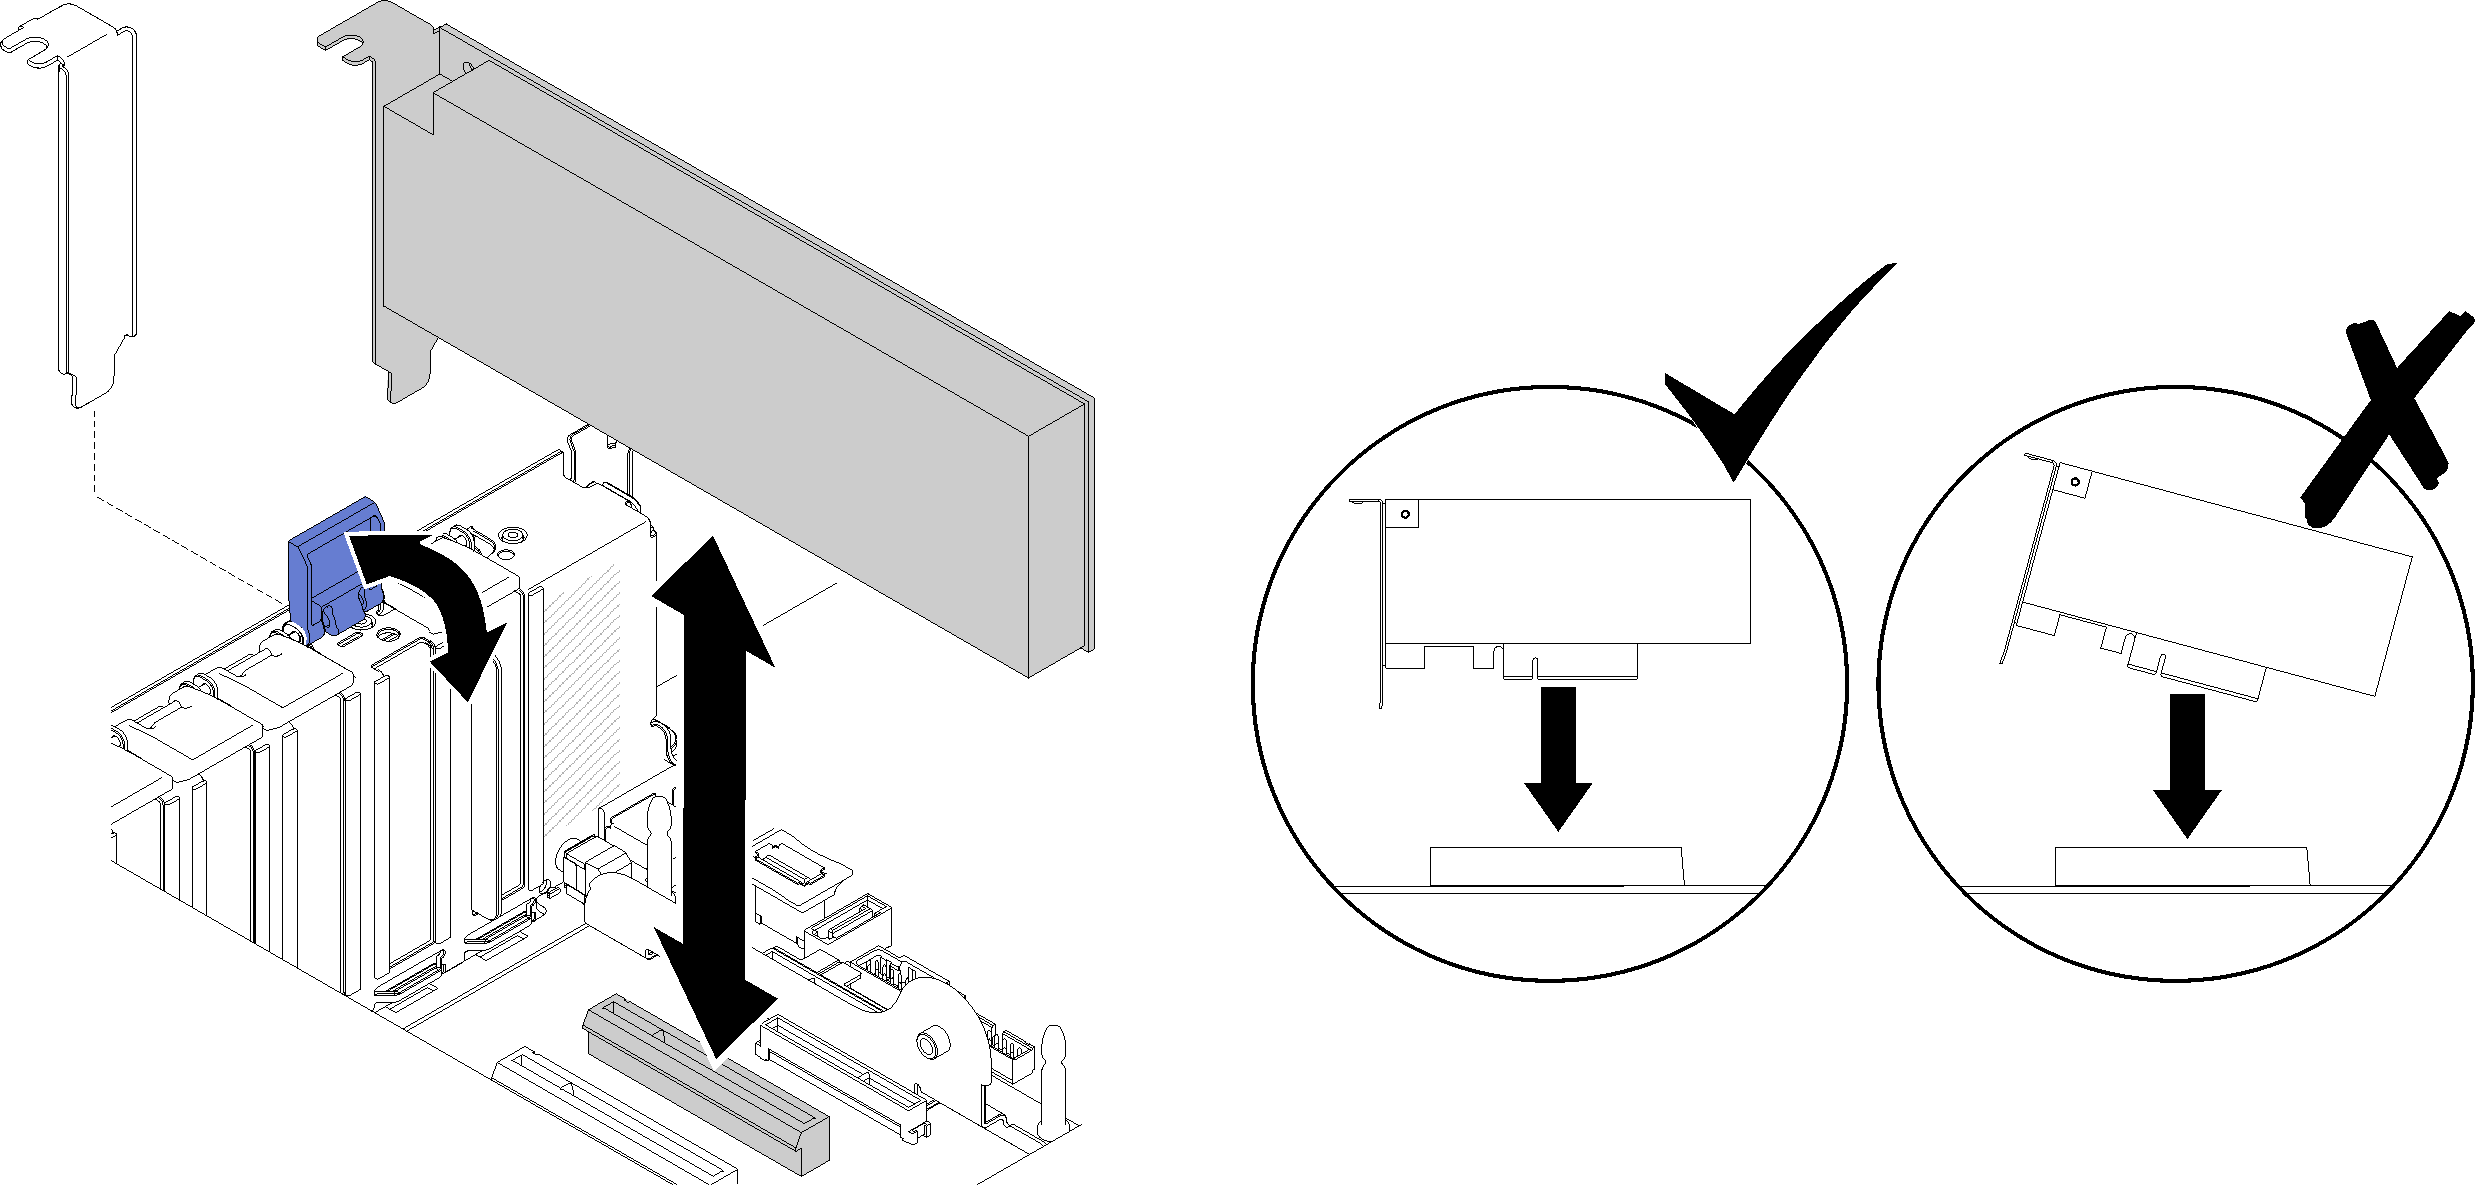
Install an adapter on the system board
To install an adapter on the system board, complete the following steps:
- Push the adapter in until it clicks into place.Figure 1. Adapter installation to the system board
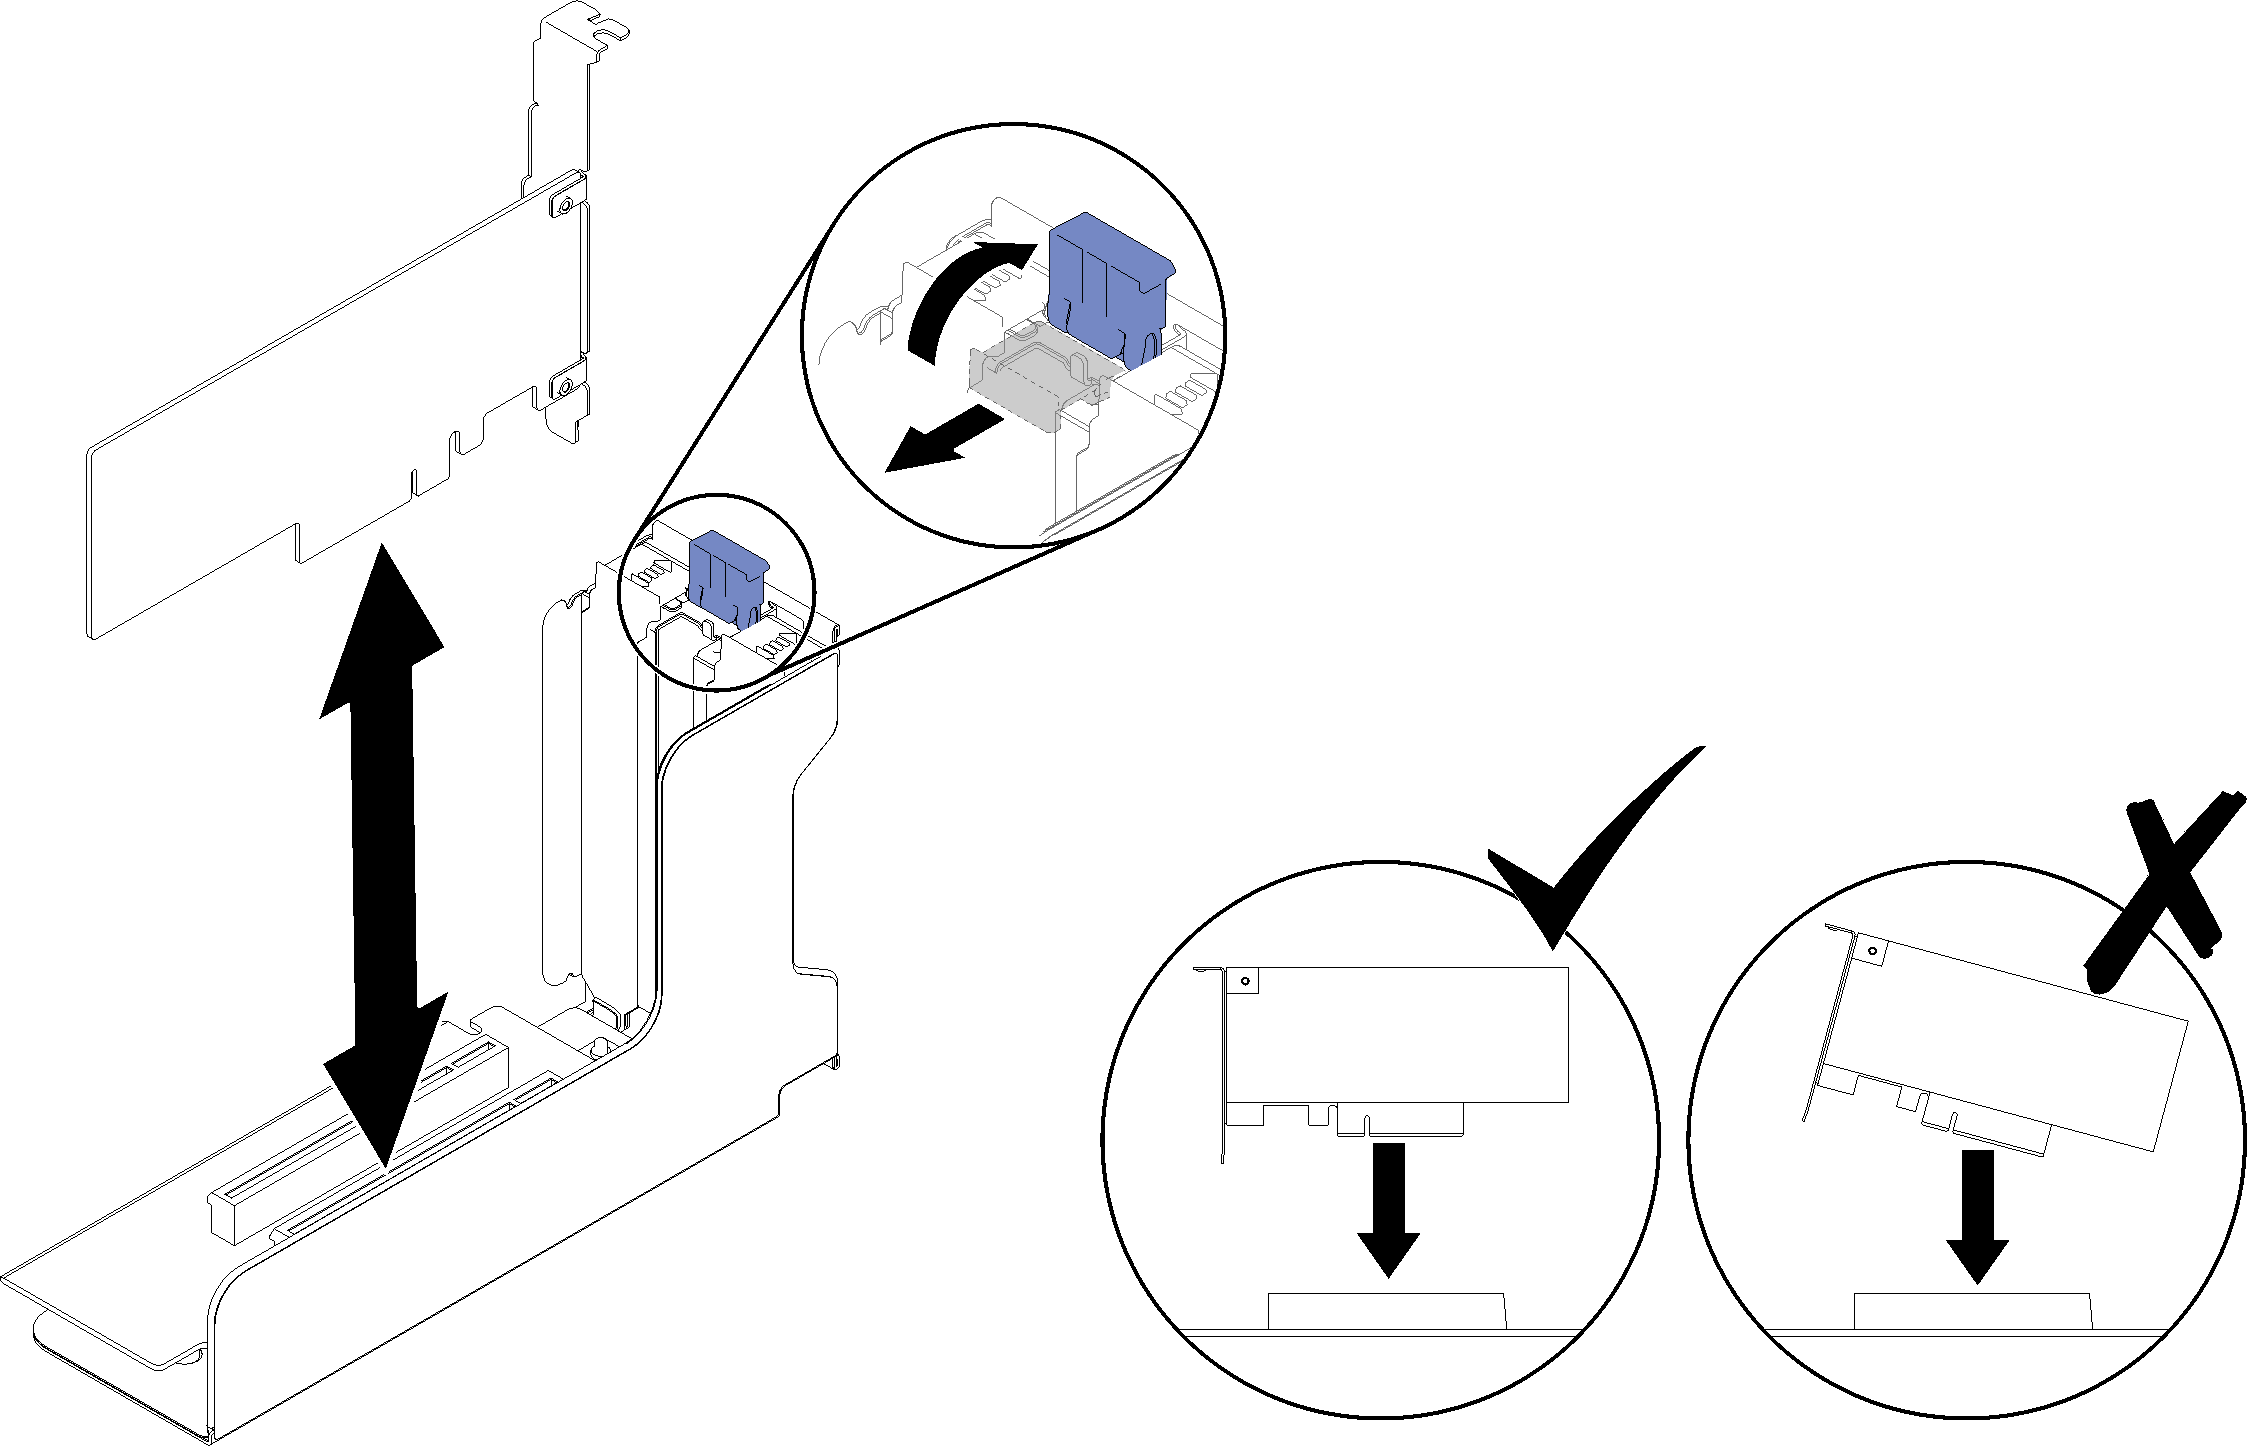
Install an adapter in a PCIe riser-card assembly
To install an adapter to a PCIe riser-card assembly removed from the server, complete the following steps:
- Push the adapter into the PCIe riser-card assembly until it clicks into place.Figure 2. Adapter installation to the PCIe riser-card assembly
After installing an adapter in a PCIe riser-card assembly, complete the following steps:
- If the adapter is installed to a PCIe riser-card assembly, install the PCIe riser-card assembly to the server (see Install the PCIe riser-card assembly).
Reinstall the top cover (see Install the top cover).
Reconnect the power cords and any cables that you removed.
Install the server in the rack.
Power on the server and any peripheral devices.
Demo video