Install the system board
Follow instructions in this section to install the system board.
Attention
Go over Installation Guidelines to ensure that you work safely.
Touch the static-protective package that contains the component to any unpainted metal surface on the server; then, remove it from the package and place it on a static-protective surface.
Procedure
- Place the system board in the chassis.Figure 1. Installing the system board
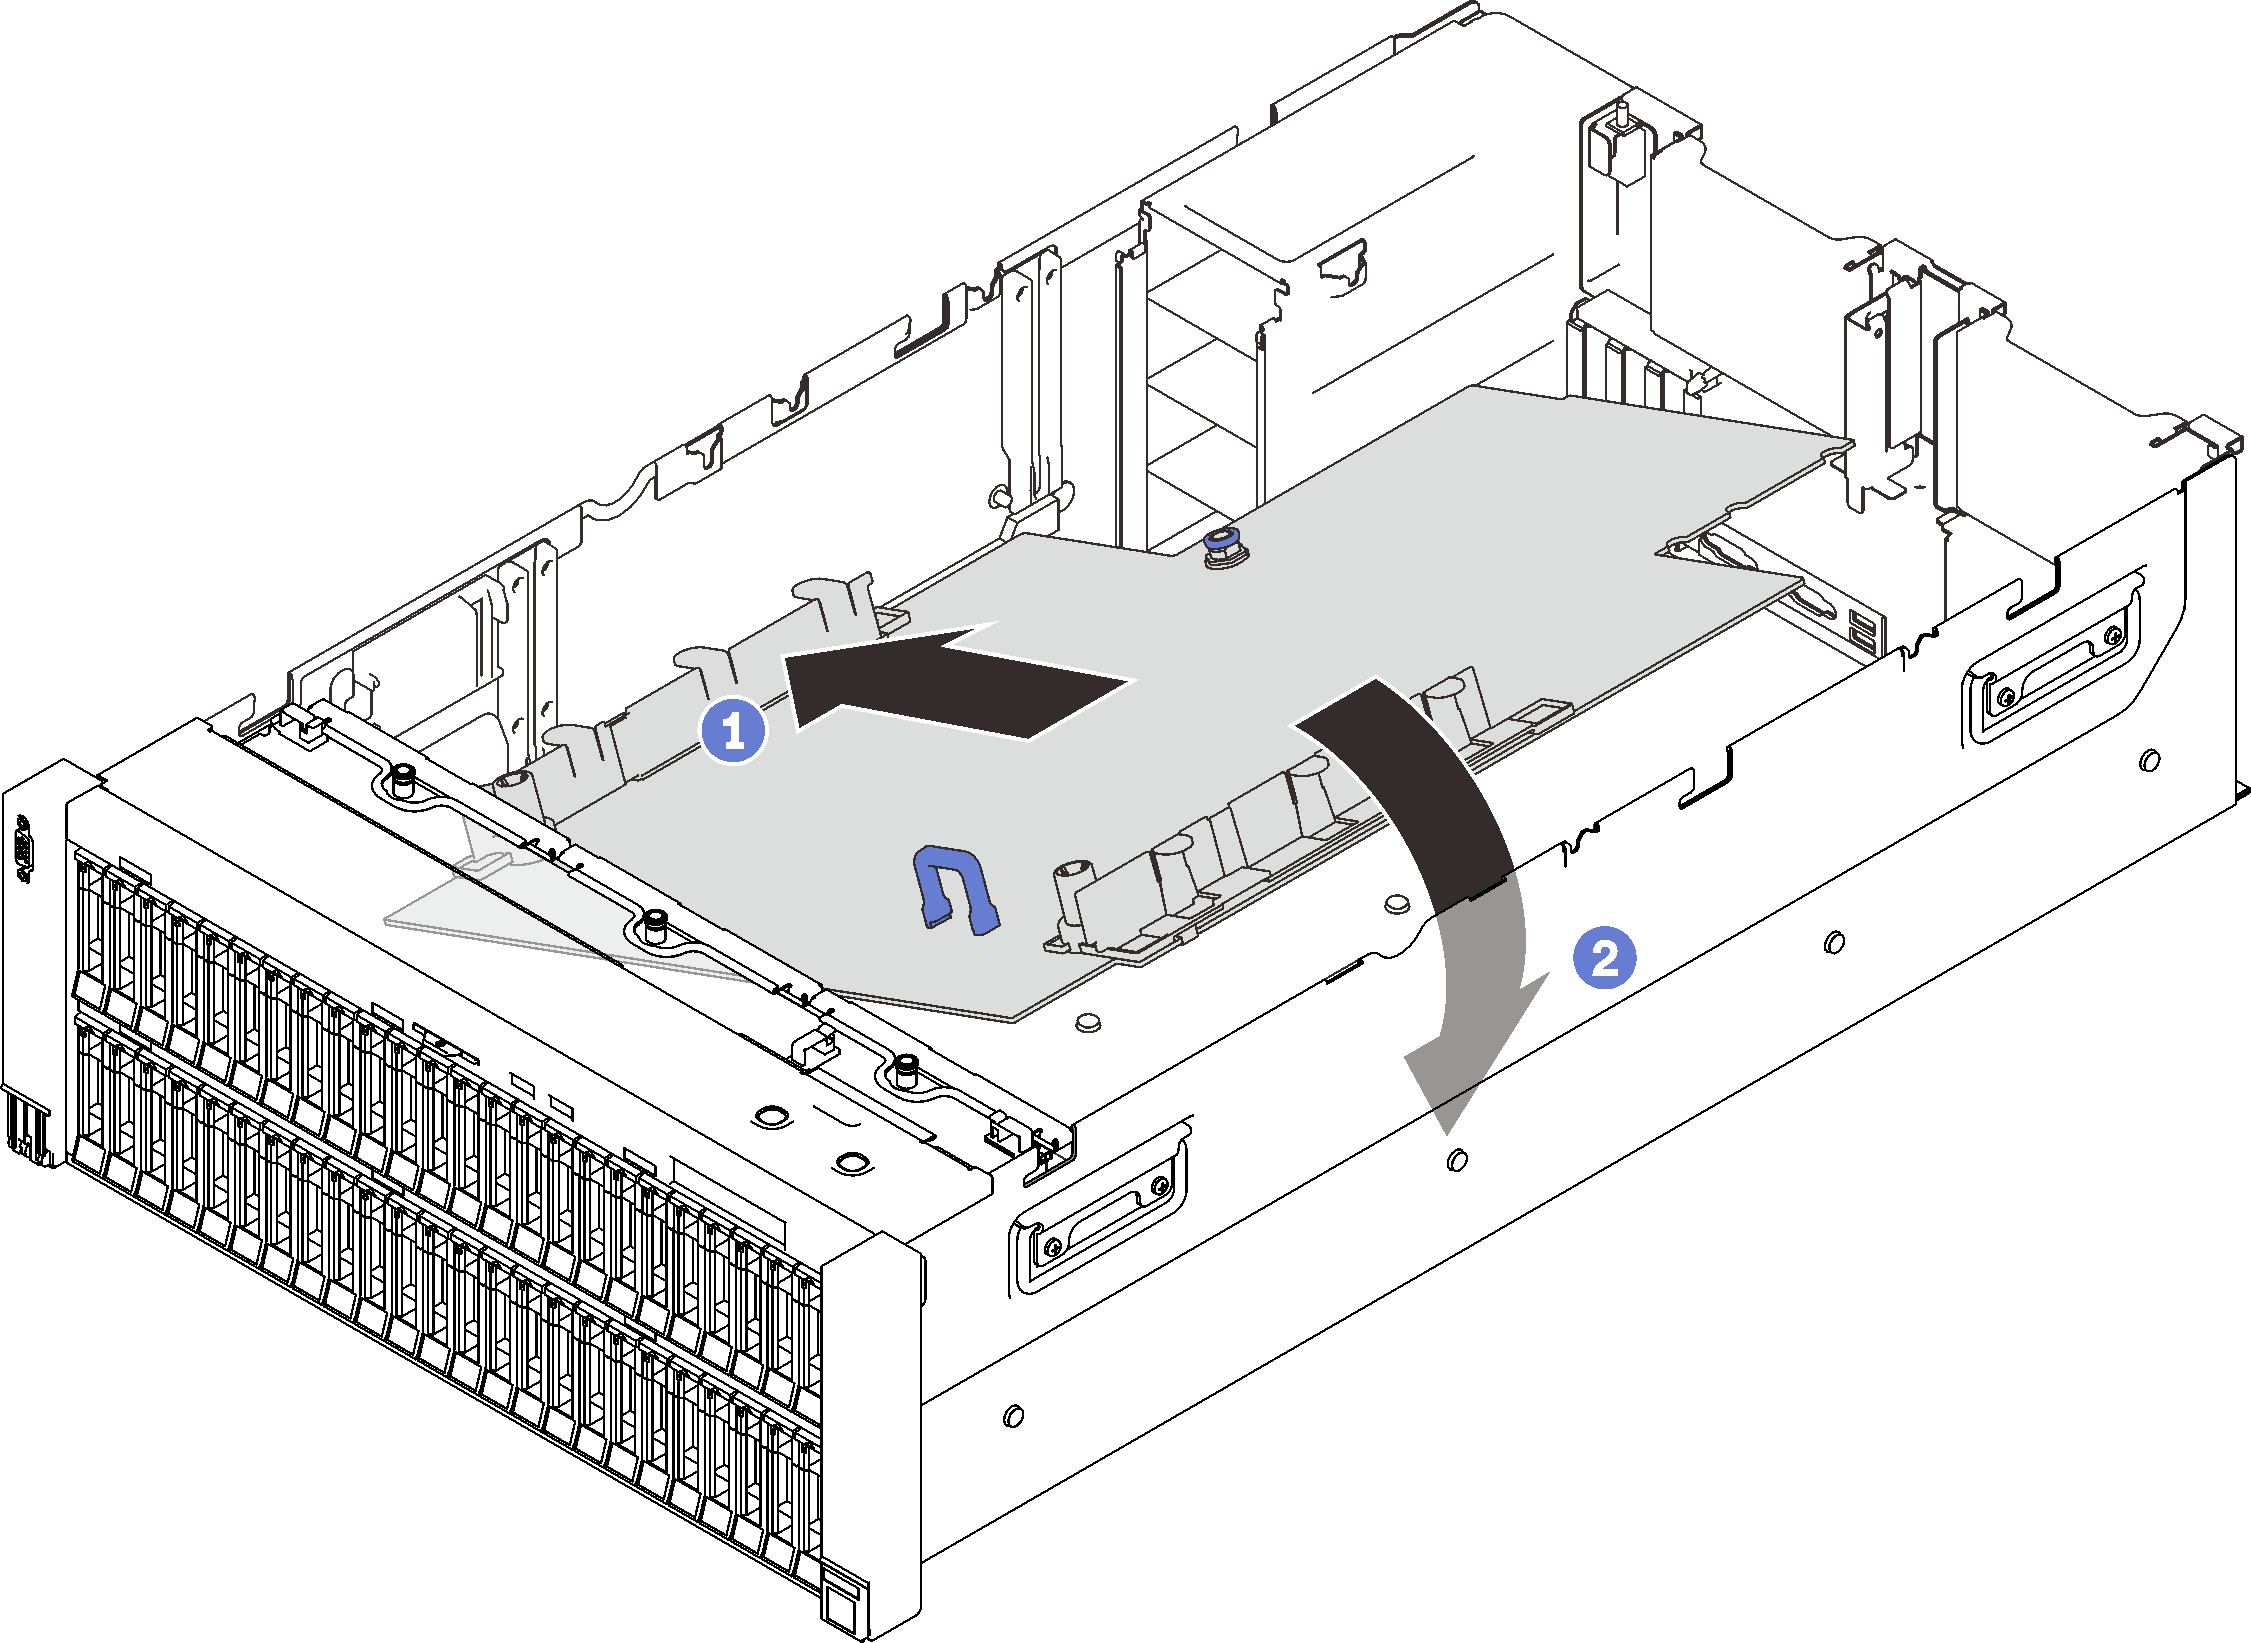
 Align the shorter side of the system board with the slots in the server.
 Lower the longer side down until it stops.
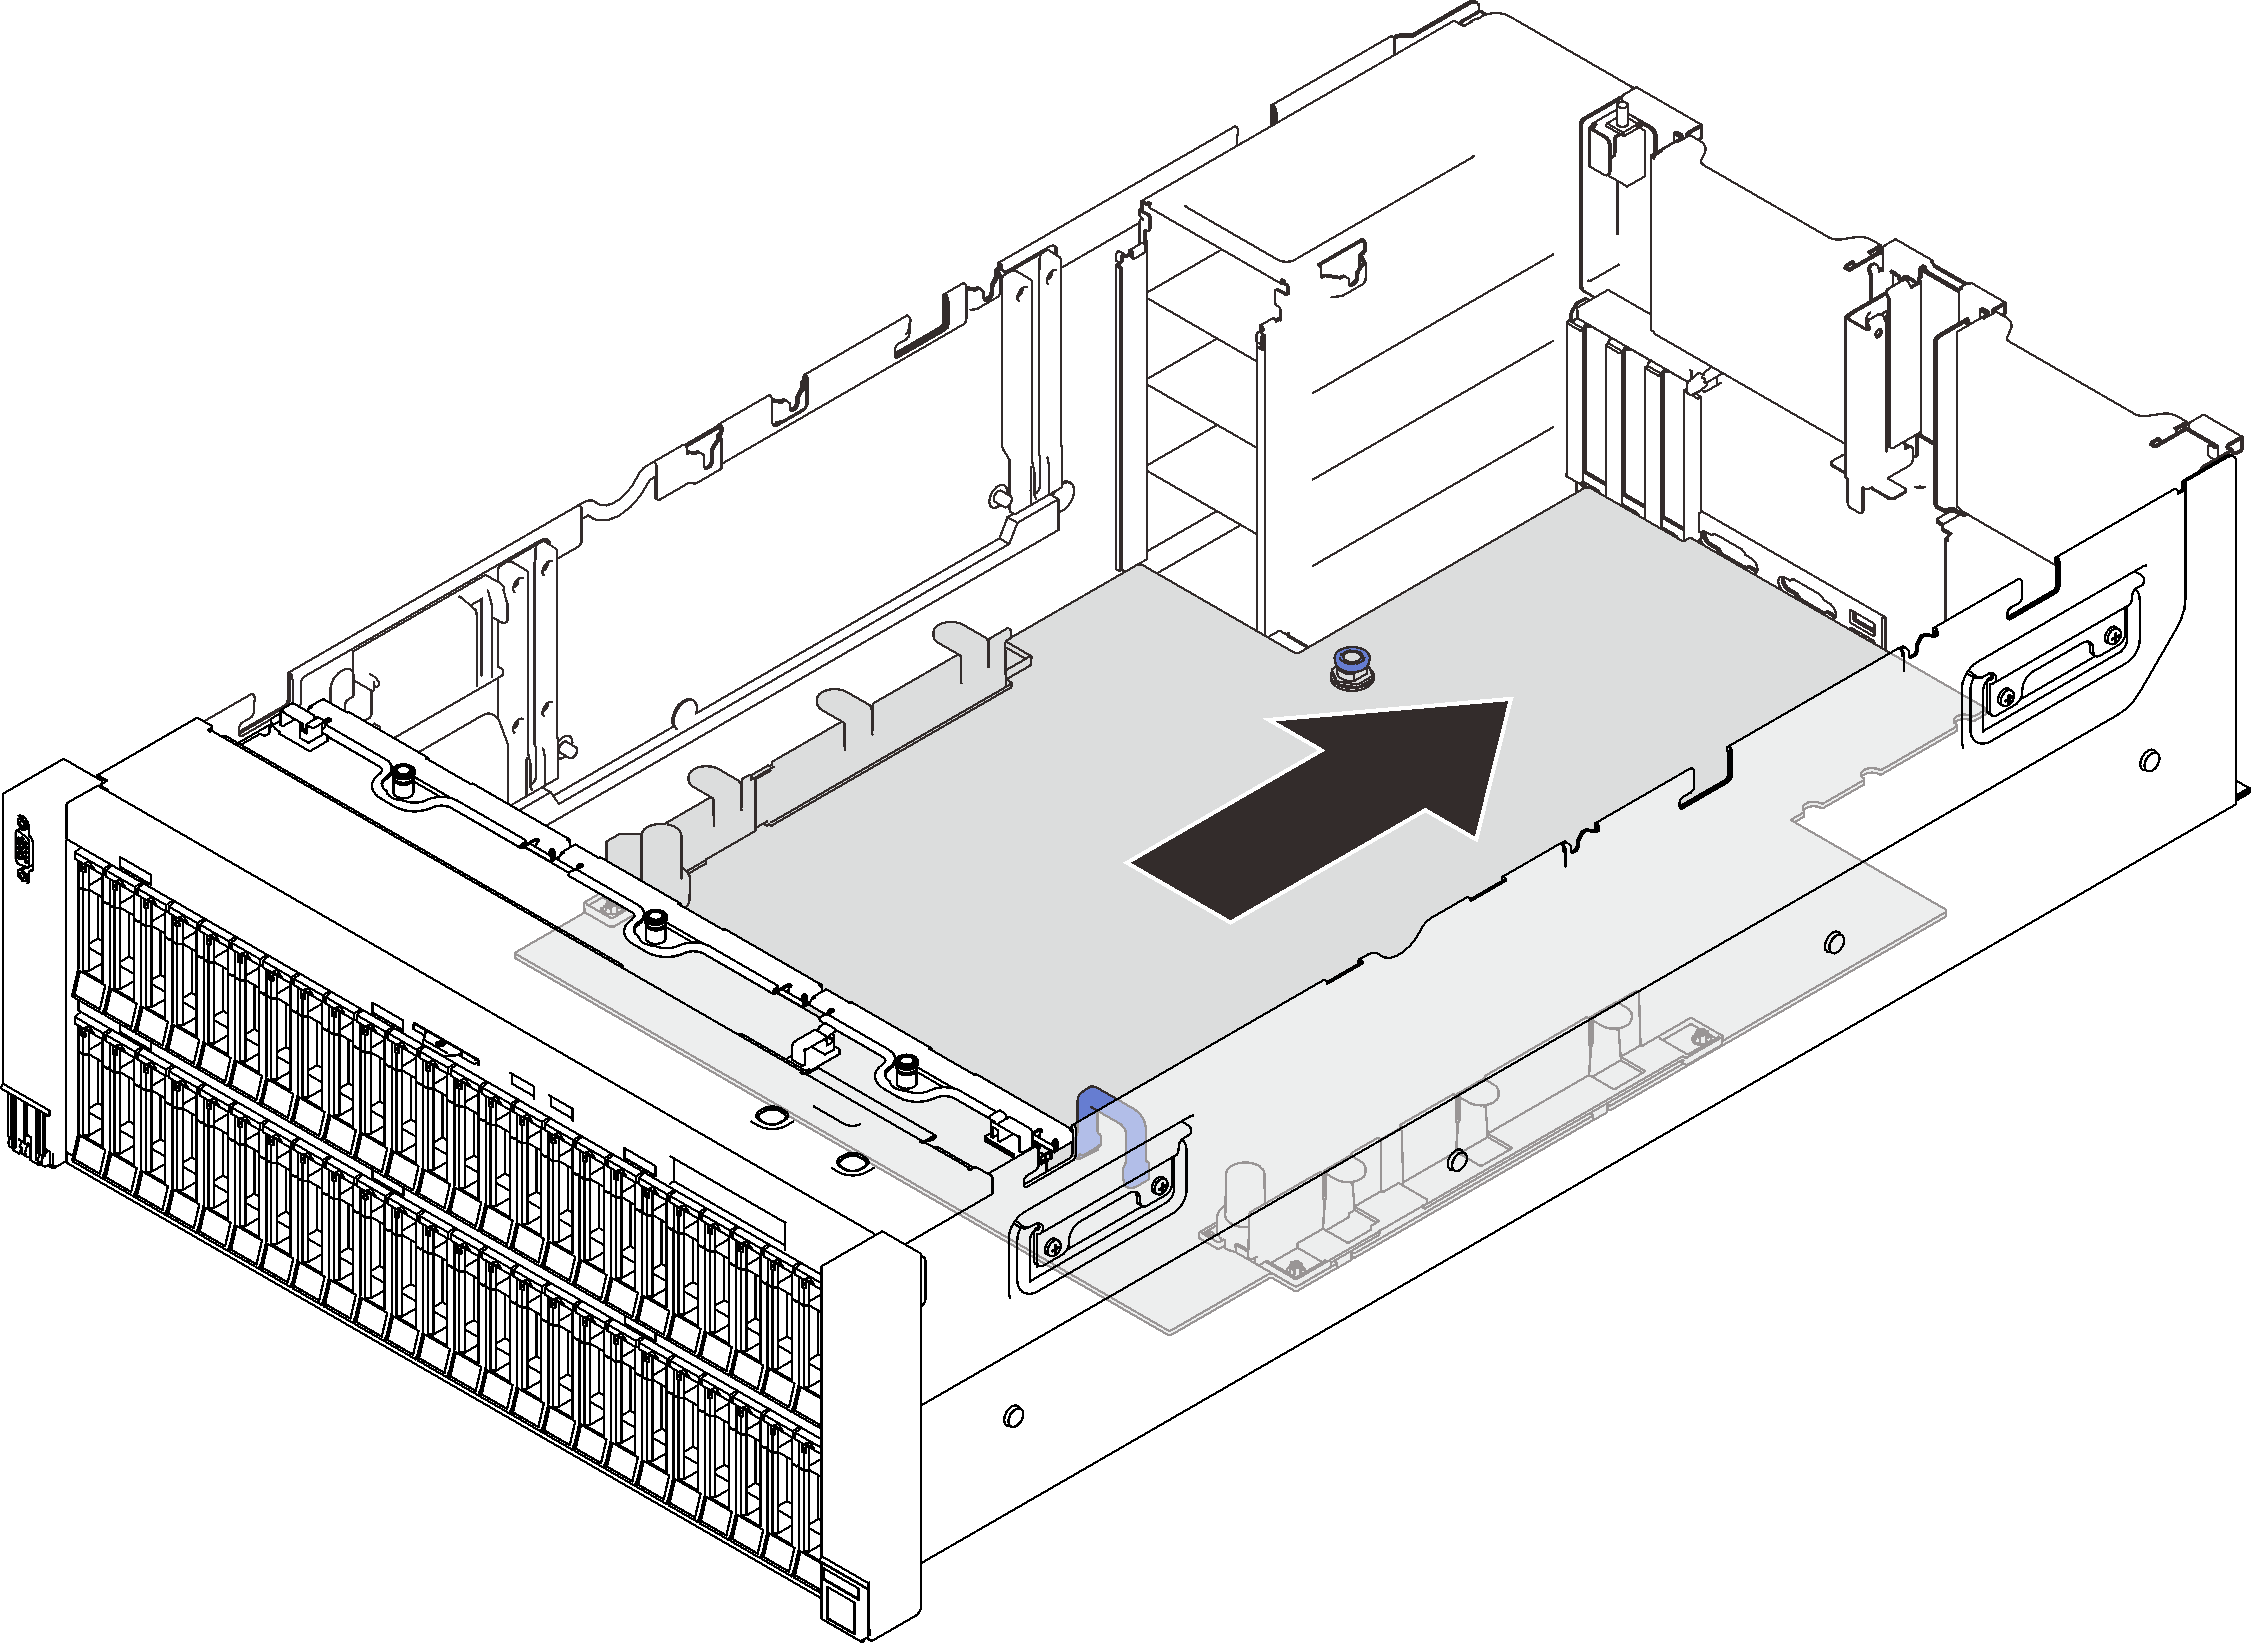
- Slide the system board forward until it stops.Figure 2. Installing the system board
After this task is completed
- Install the power backplane (see Install the power backplane).
- Install both PHMs (see Install a processor and heat sink).
- Install each memory module to the same slot on the new system board as on the defective system board (see Install a memory module) until all the memory modules are installed.
- Reinstall the drive backplanes (see Install a drive backplane carrier assembly).
- Install the power supplies (see Install a hot-swap power supply unit).
Proceed to complete the parts replacement (see Complete the parts replacement).
- Reconnect all the required cables, and boot the server.
Update the machine type and serial number with new vital product data (VPD). Use the Lenovo XClarity Provisioning Manager to update the machine type and serial number. See Update the machine type and serial number.
Enable TPM/TCM. See Enable TPM
Optionally, enable Secure Boot. See Enable UEFI Secure Boot.
Demo video
Give documentation feedback