Install a drive backplane carrier assembly

Follow instruction in this section to install a drive backplane carrier assembly.

About this task

Attention
  • Go over Installation Guidelines to ensure that you work safely.

  • Touch the static-protective package that contains the component to any unpainted metal surface on the server; then, remove it from the package and place it on a static-protective surface.

Procedure

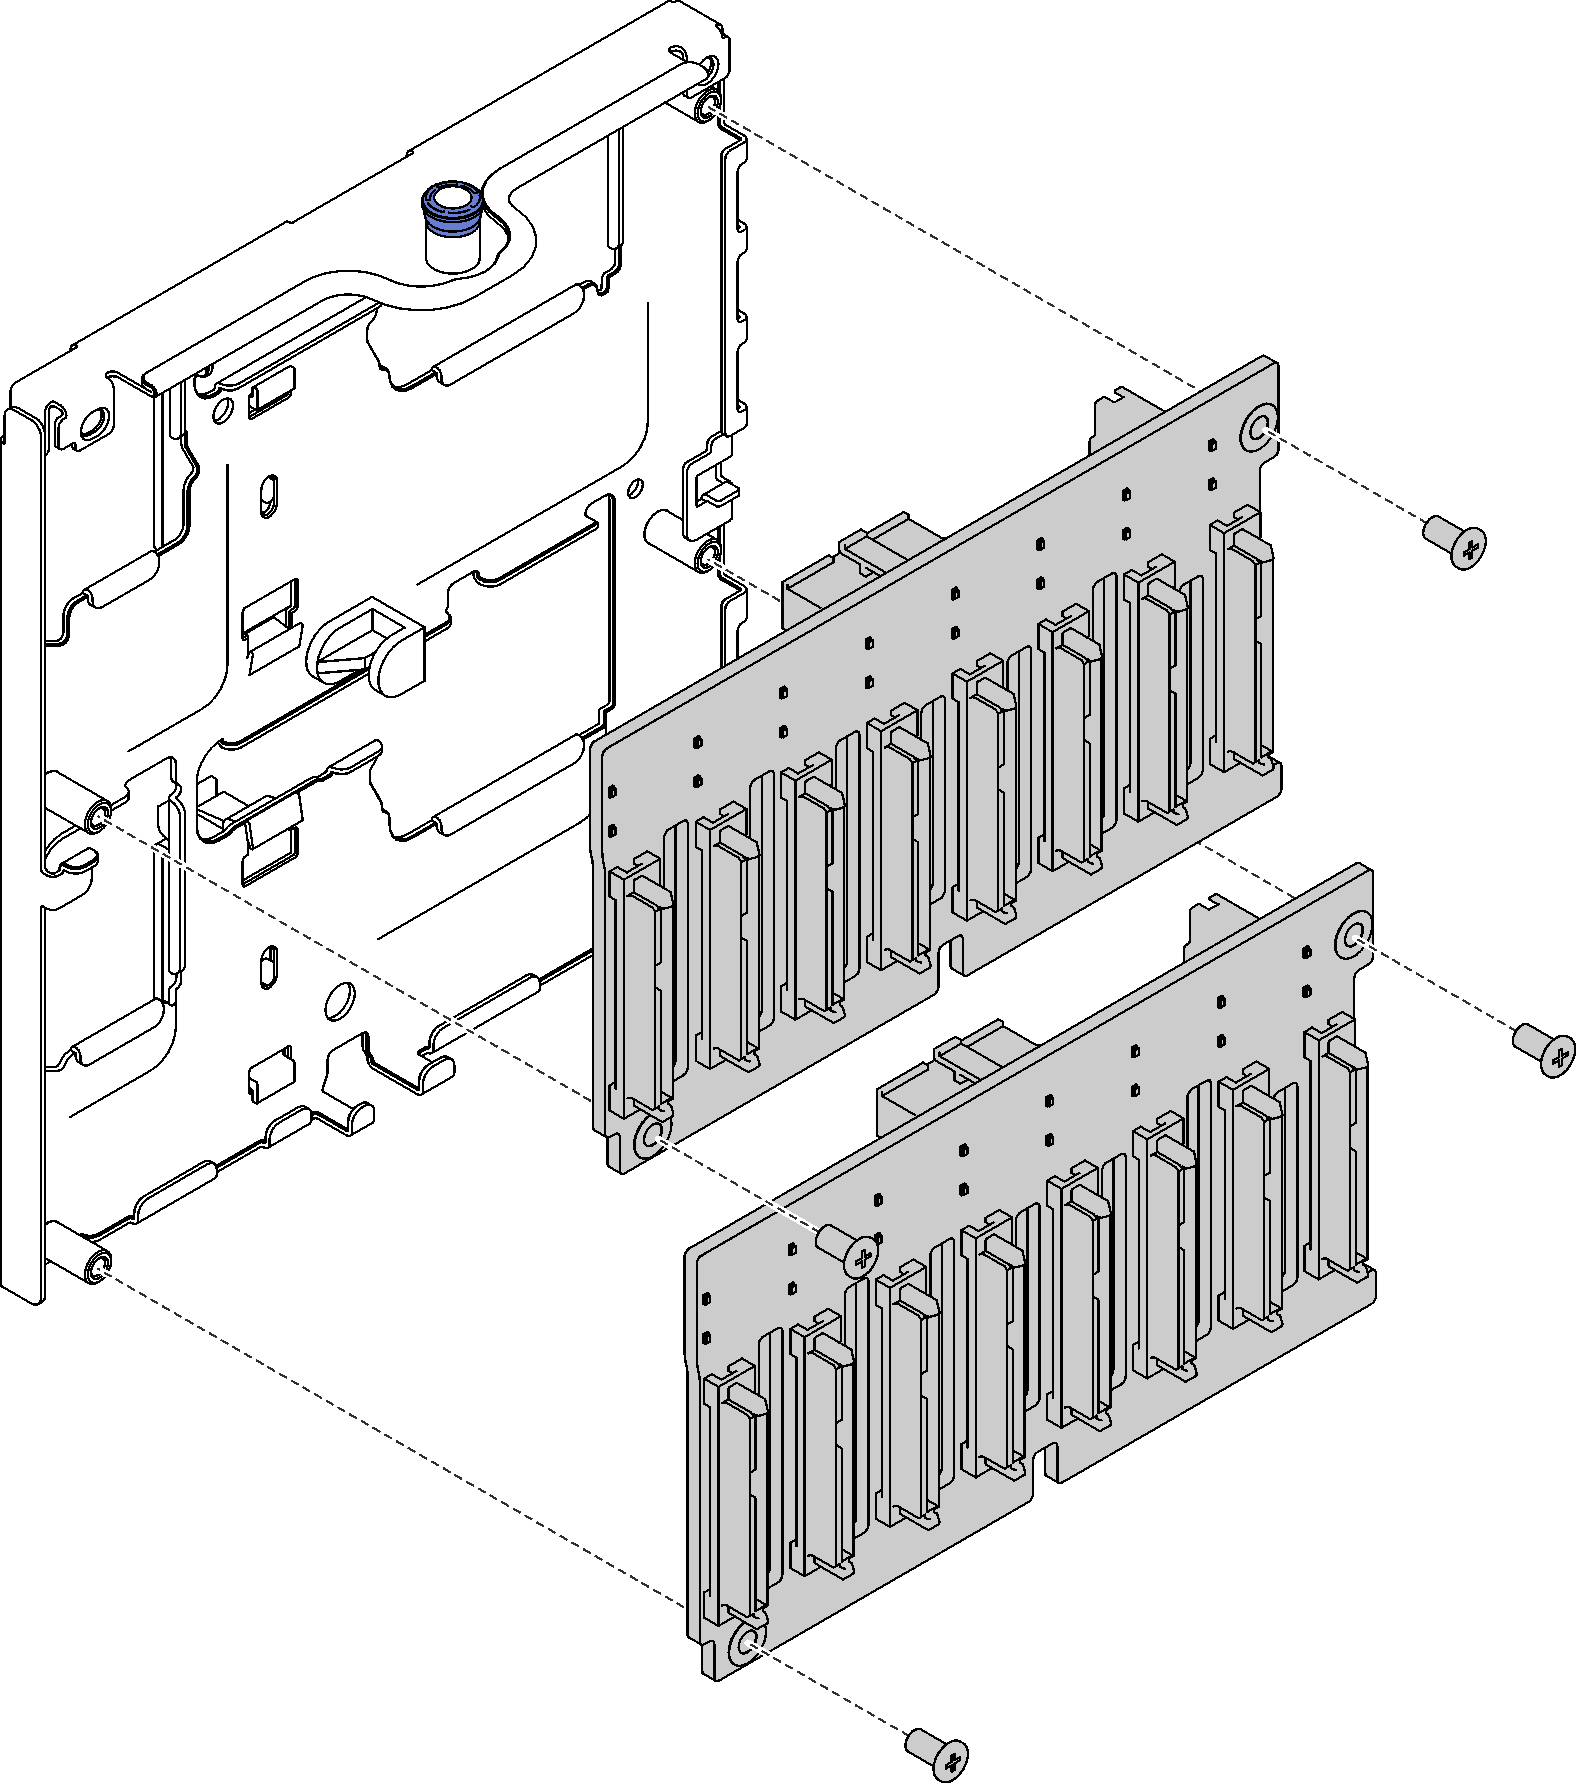
  1. If necessary, install each backplane to the carrier with two screws.
    Figure 1. Installing drive backplanes to the carrier

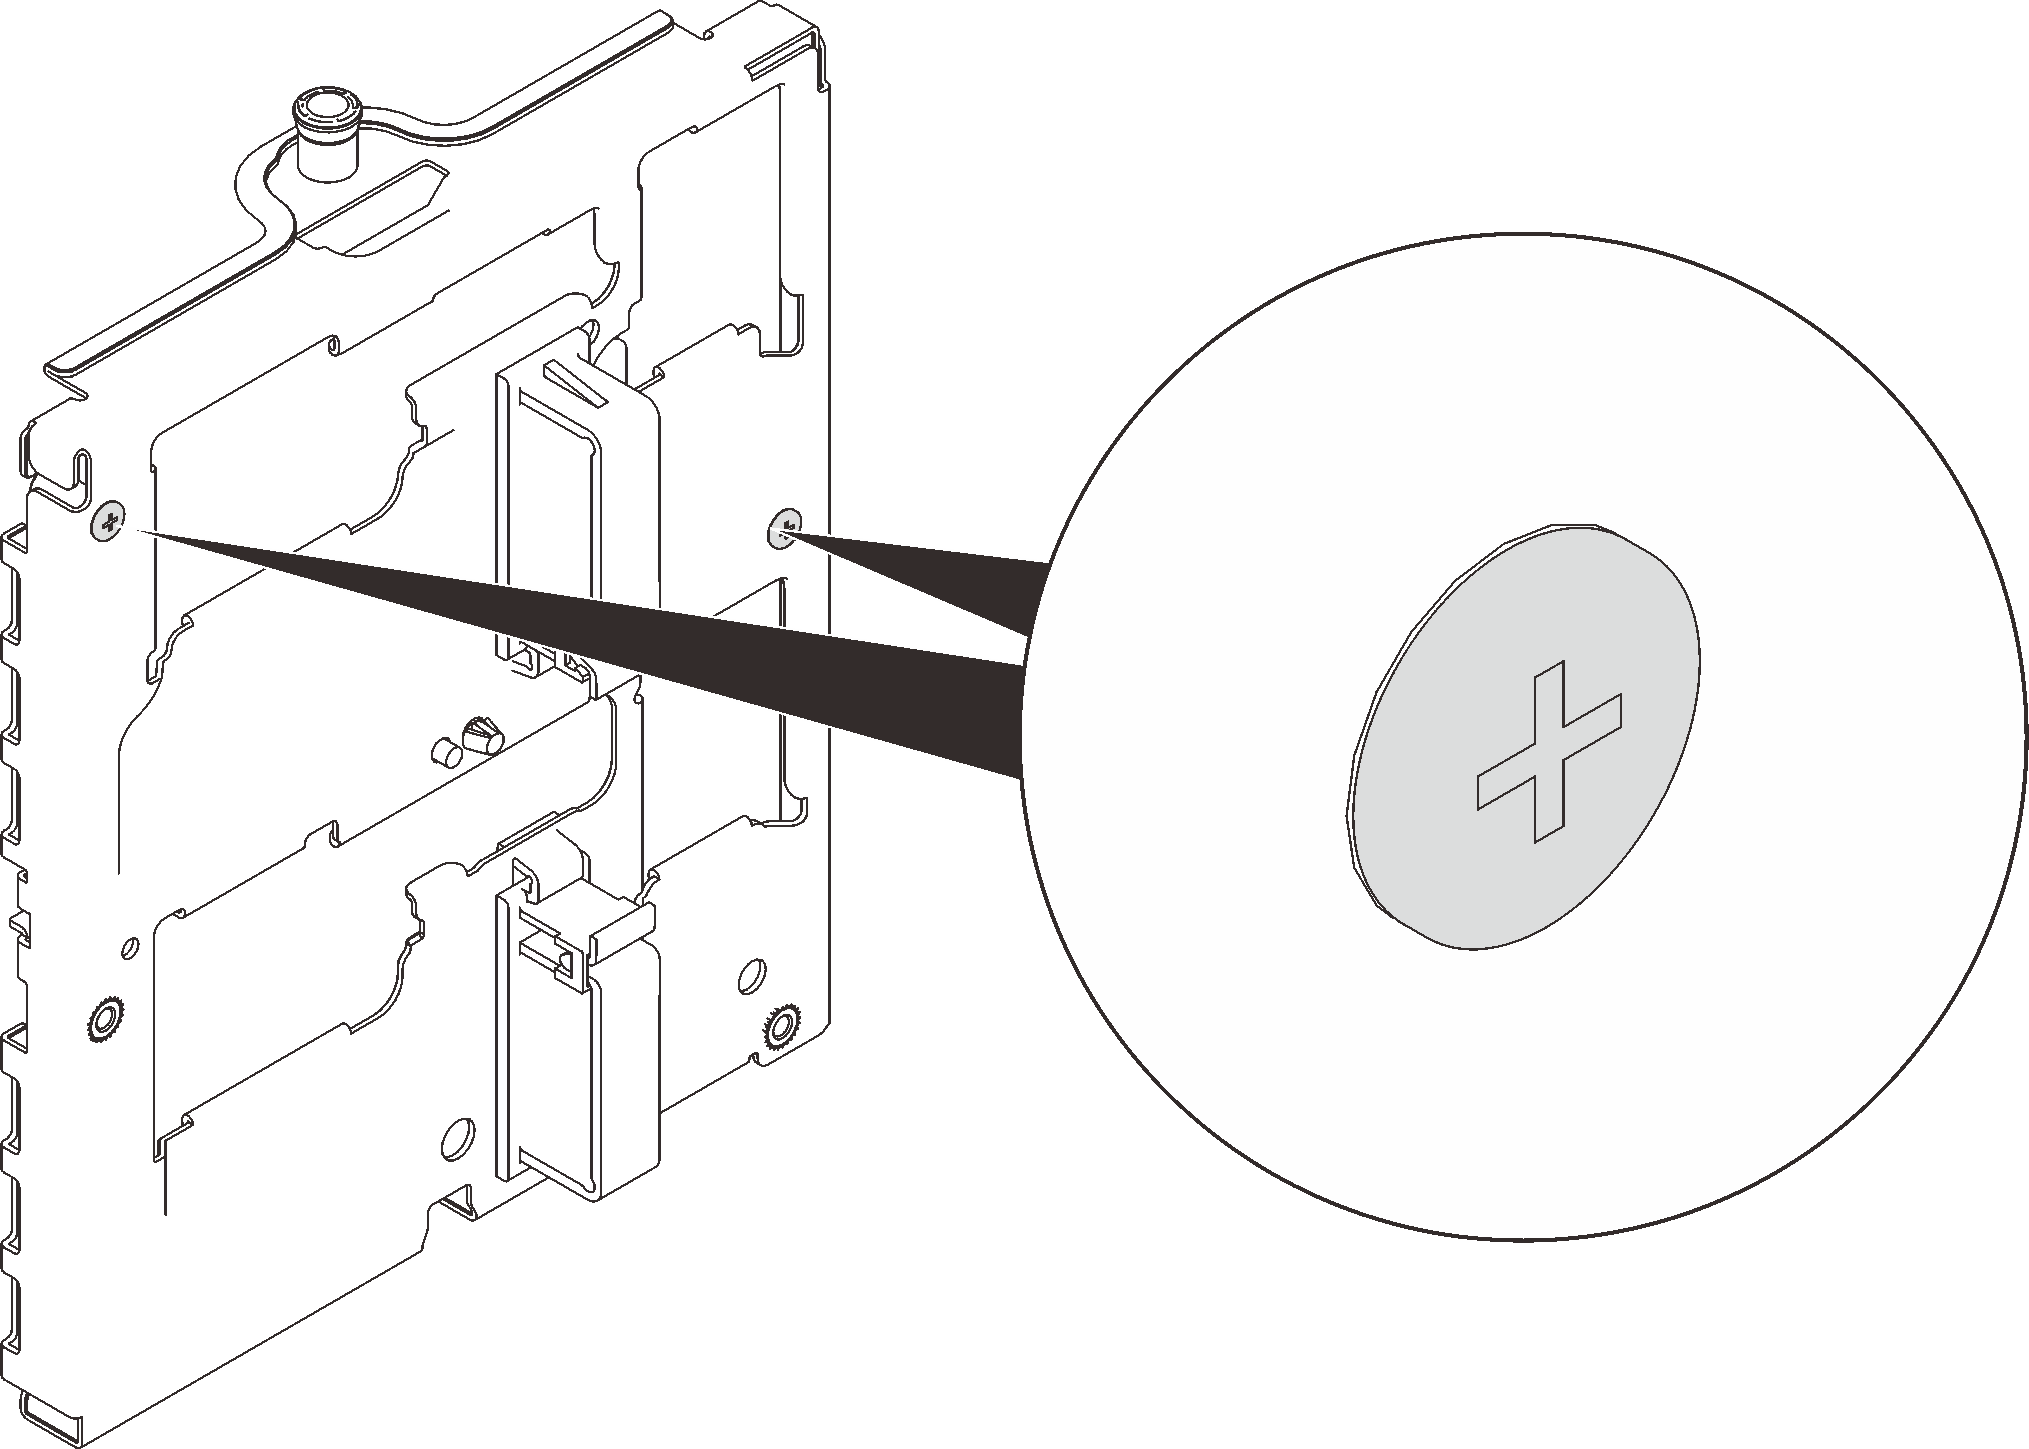
    Note
    Two spared screws that come with the empty carrier are available for backplane installation.
    Figure 2. Spared screws on the carrier

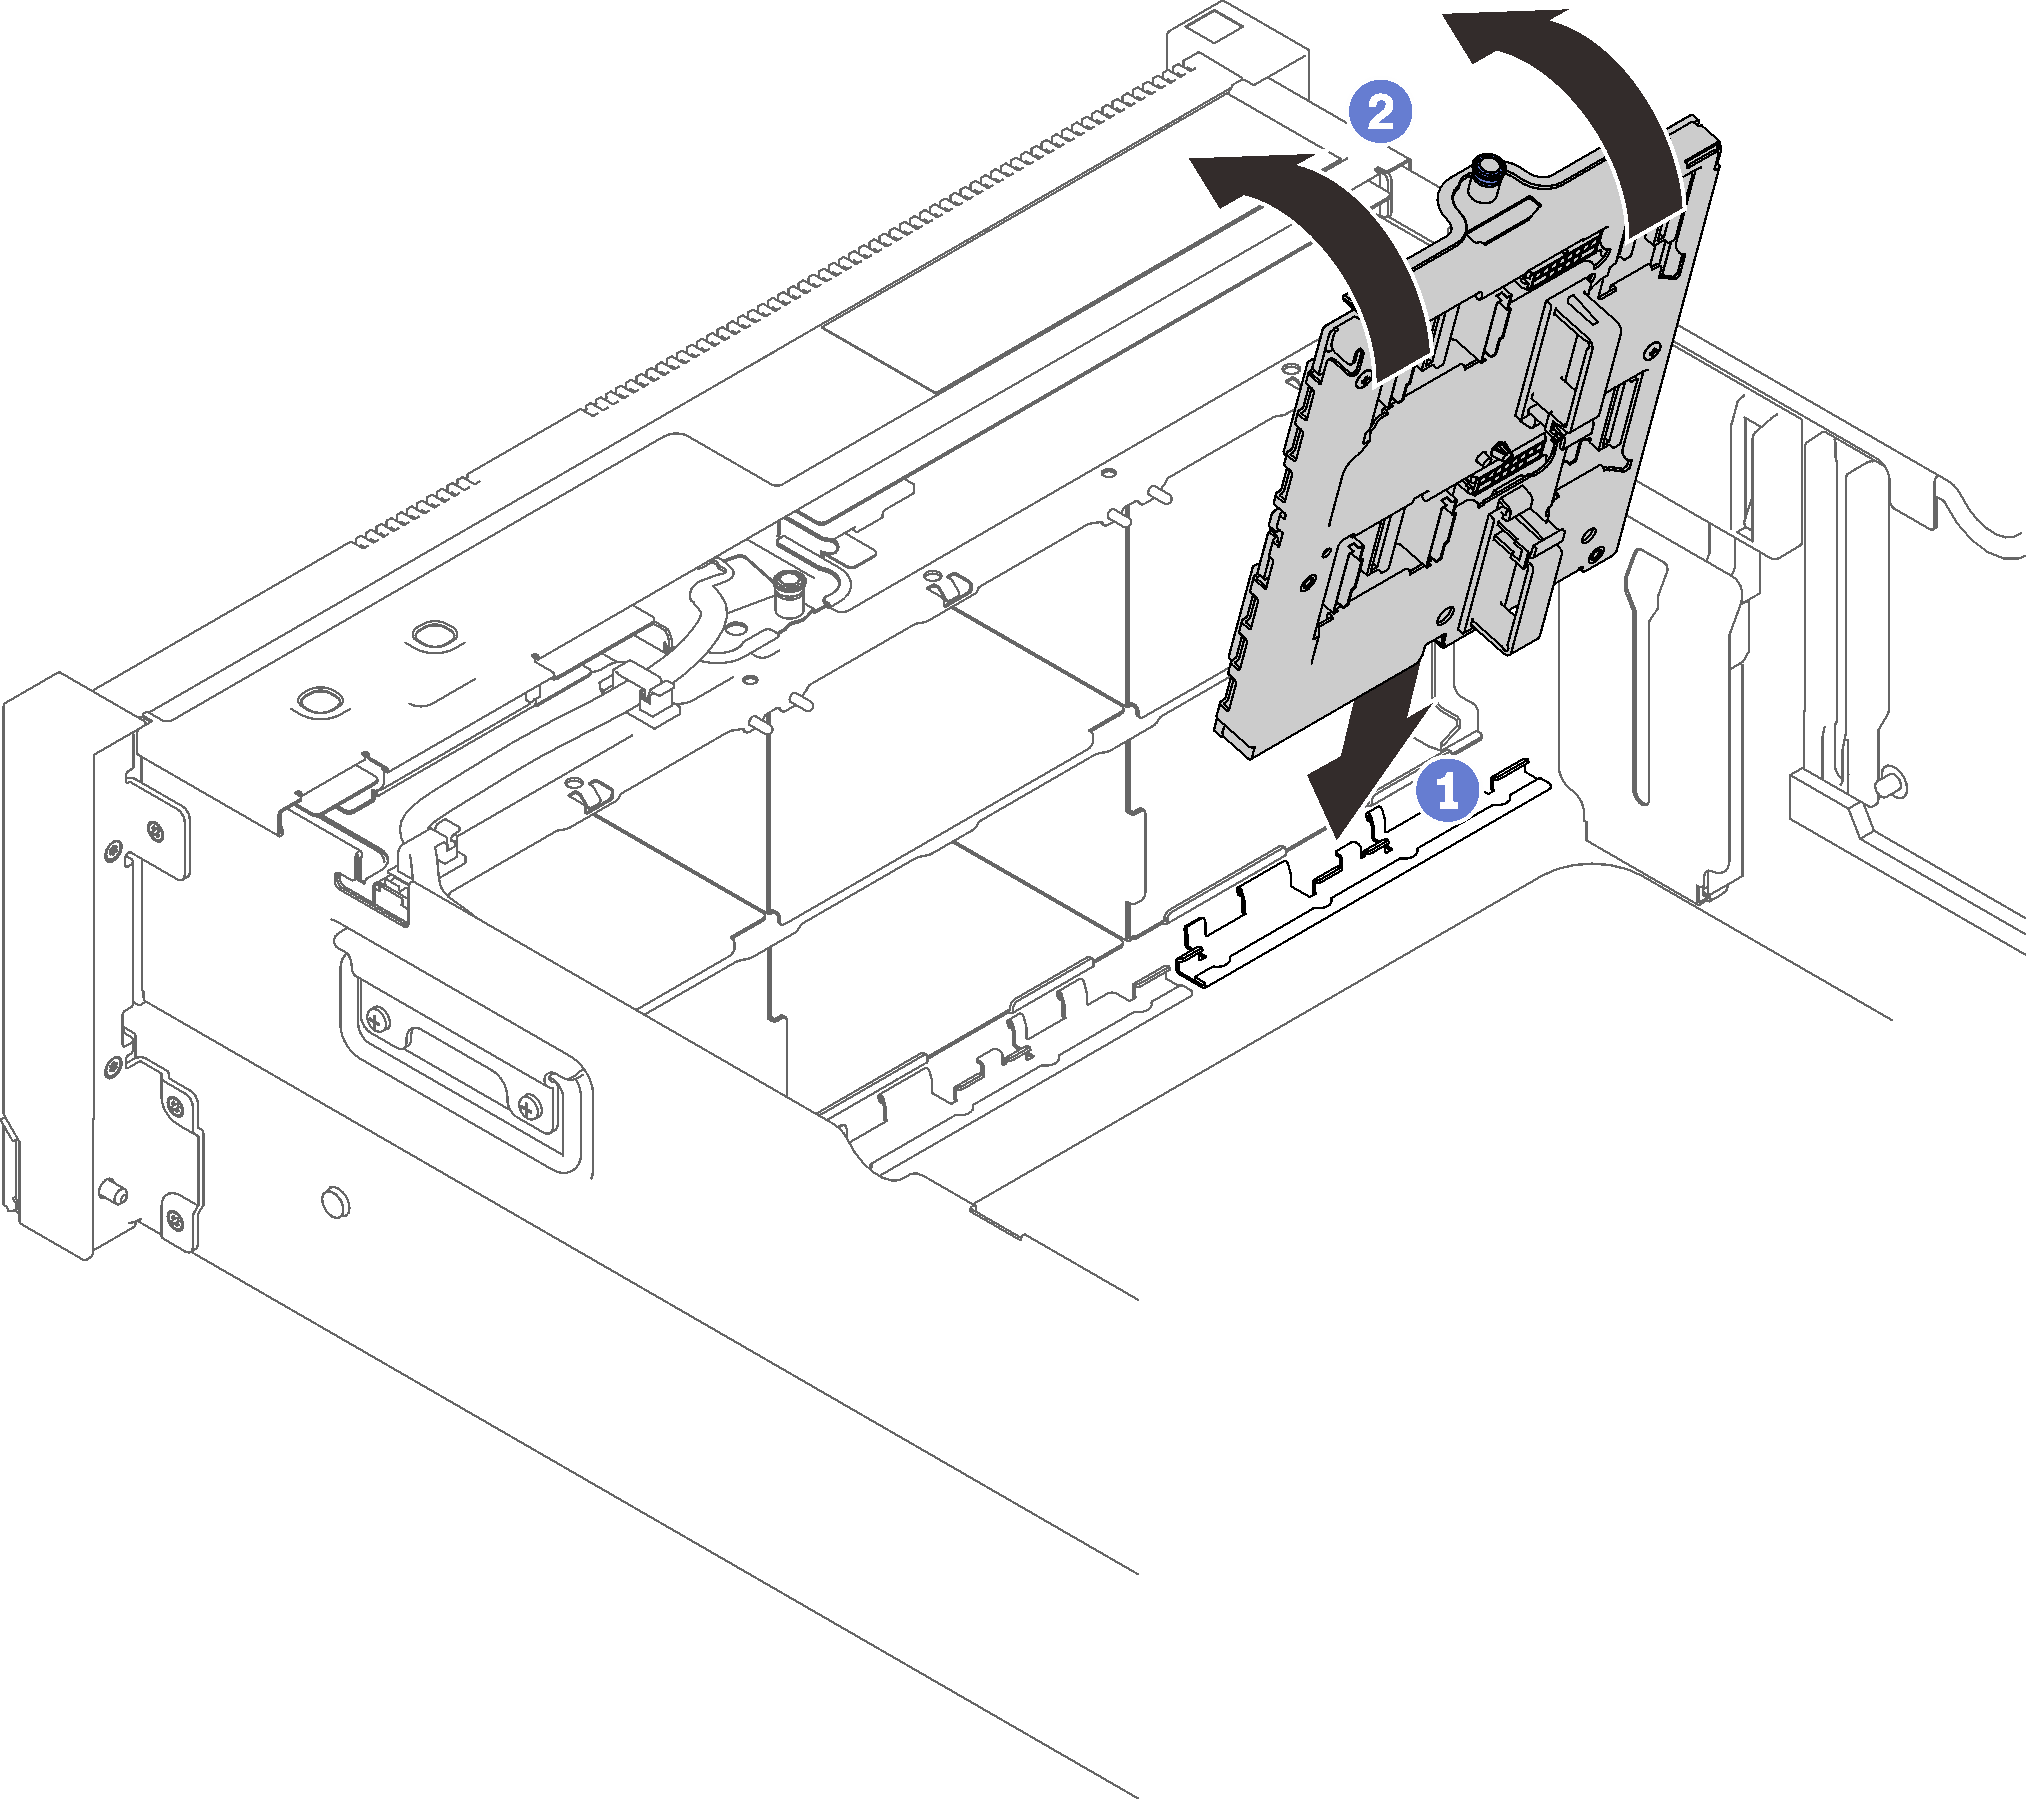
  2. Install the drive backplane carrier assembly.
    Figure 3. Installing the drive backplane carrier assembly

    • Align the bottom of the carrier to the slot in the server.
    • Pivot the top of the carrier until it clicks into place.
  3. Installed all the other backplanes and carriers you plan to install, and see Internal cable routing to do corresponding cable routing.

After this task is completed

Proceed to complete the parts replacement (see Complete the parts replacement).