Install the M.2 drive and backplane bracket assembly
Follow instructions in this section to install the M.2 drive and backplane bracket assembly.
About this task
Attention
Go over Installation Guidelines to ensure that you work safely.
Touch the static-protective package that contains the component to any unpainted metal surface on the server; then, remove it from the package and place it on a static-protective surface.
Procedure
- Install the M.2 drives into the backplane if necessary.Figure 1. Install the M.2 drives
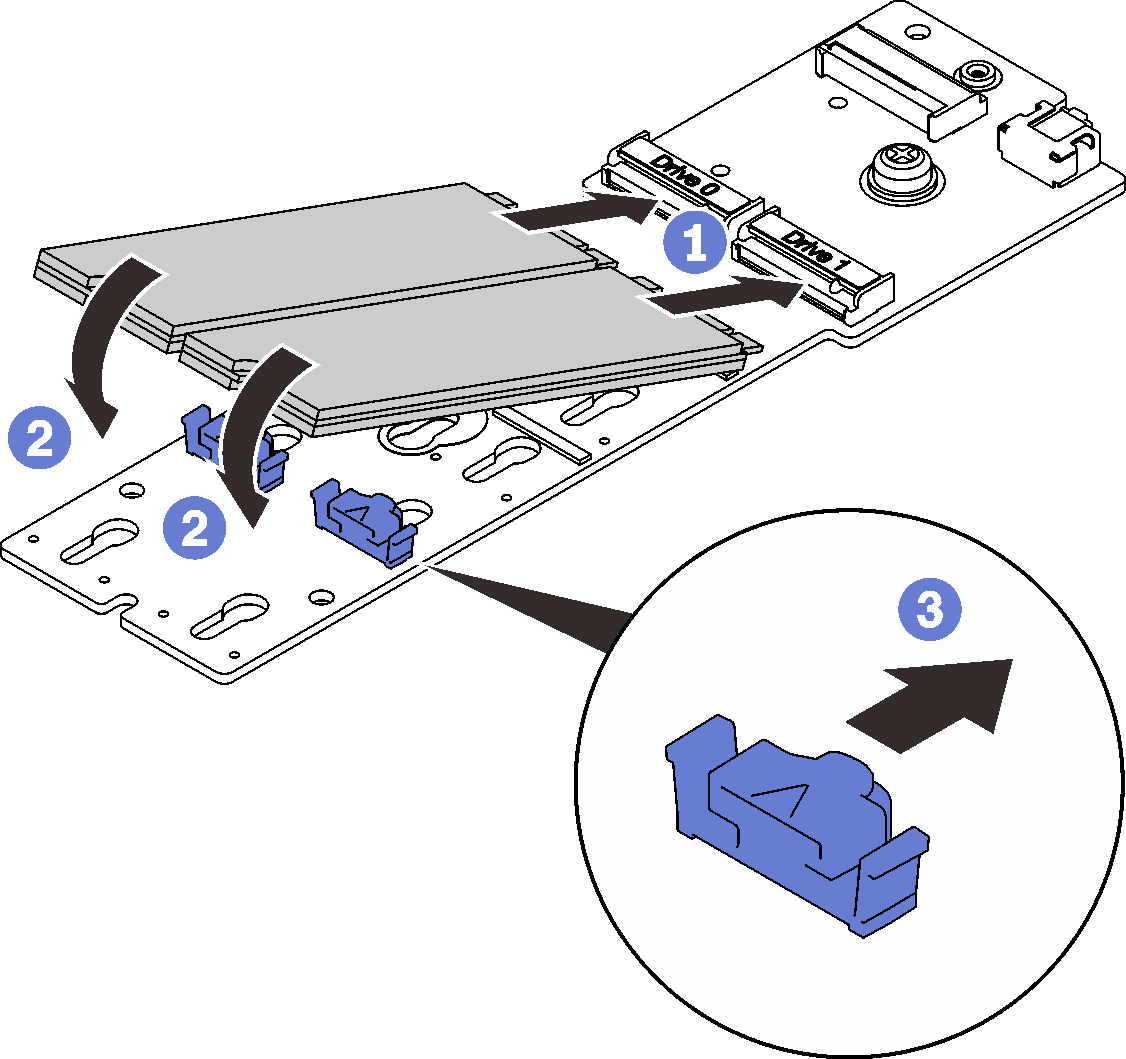
 Align the M.2 drives with the connectors.
 Pivot the other end of the M.2 drives toward the backplane.
 Slide the retaining clips forward to secure the drives to the backplane.
- If applicable, connect the cables to the M.2 backplane.Figure 2. Connecting the cable to the M.2 backplane
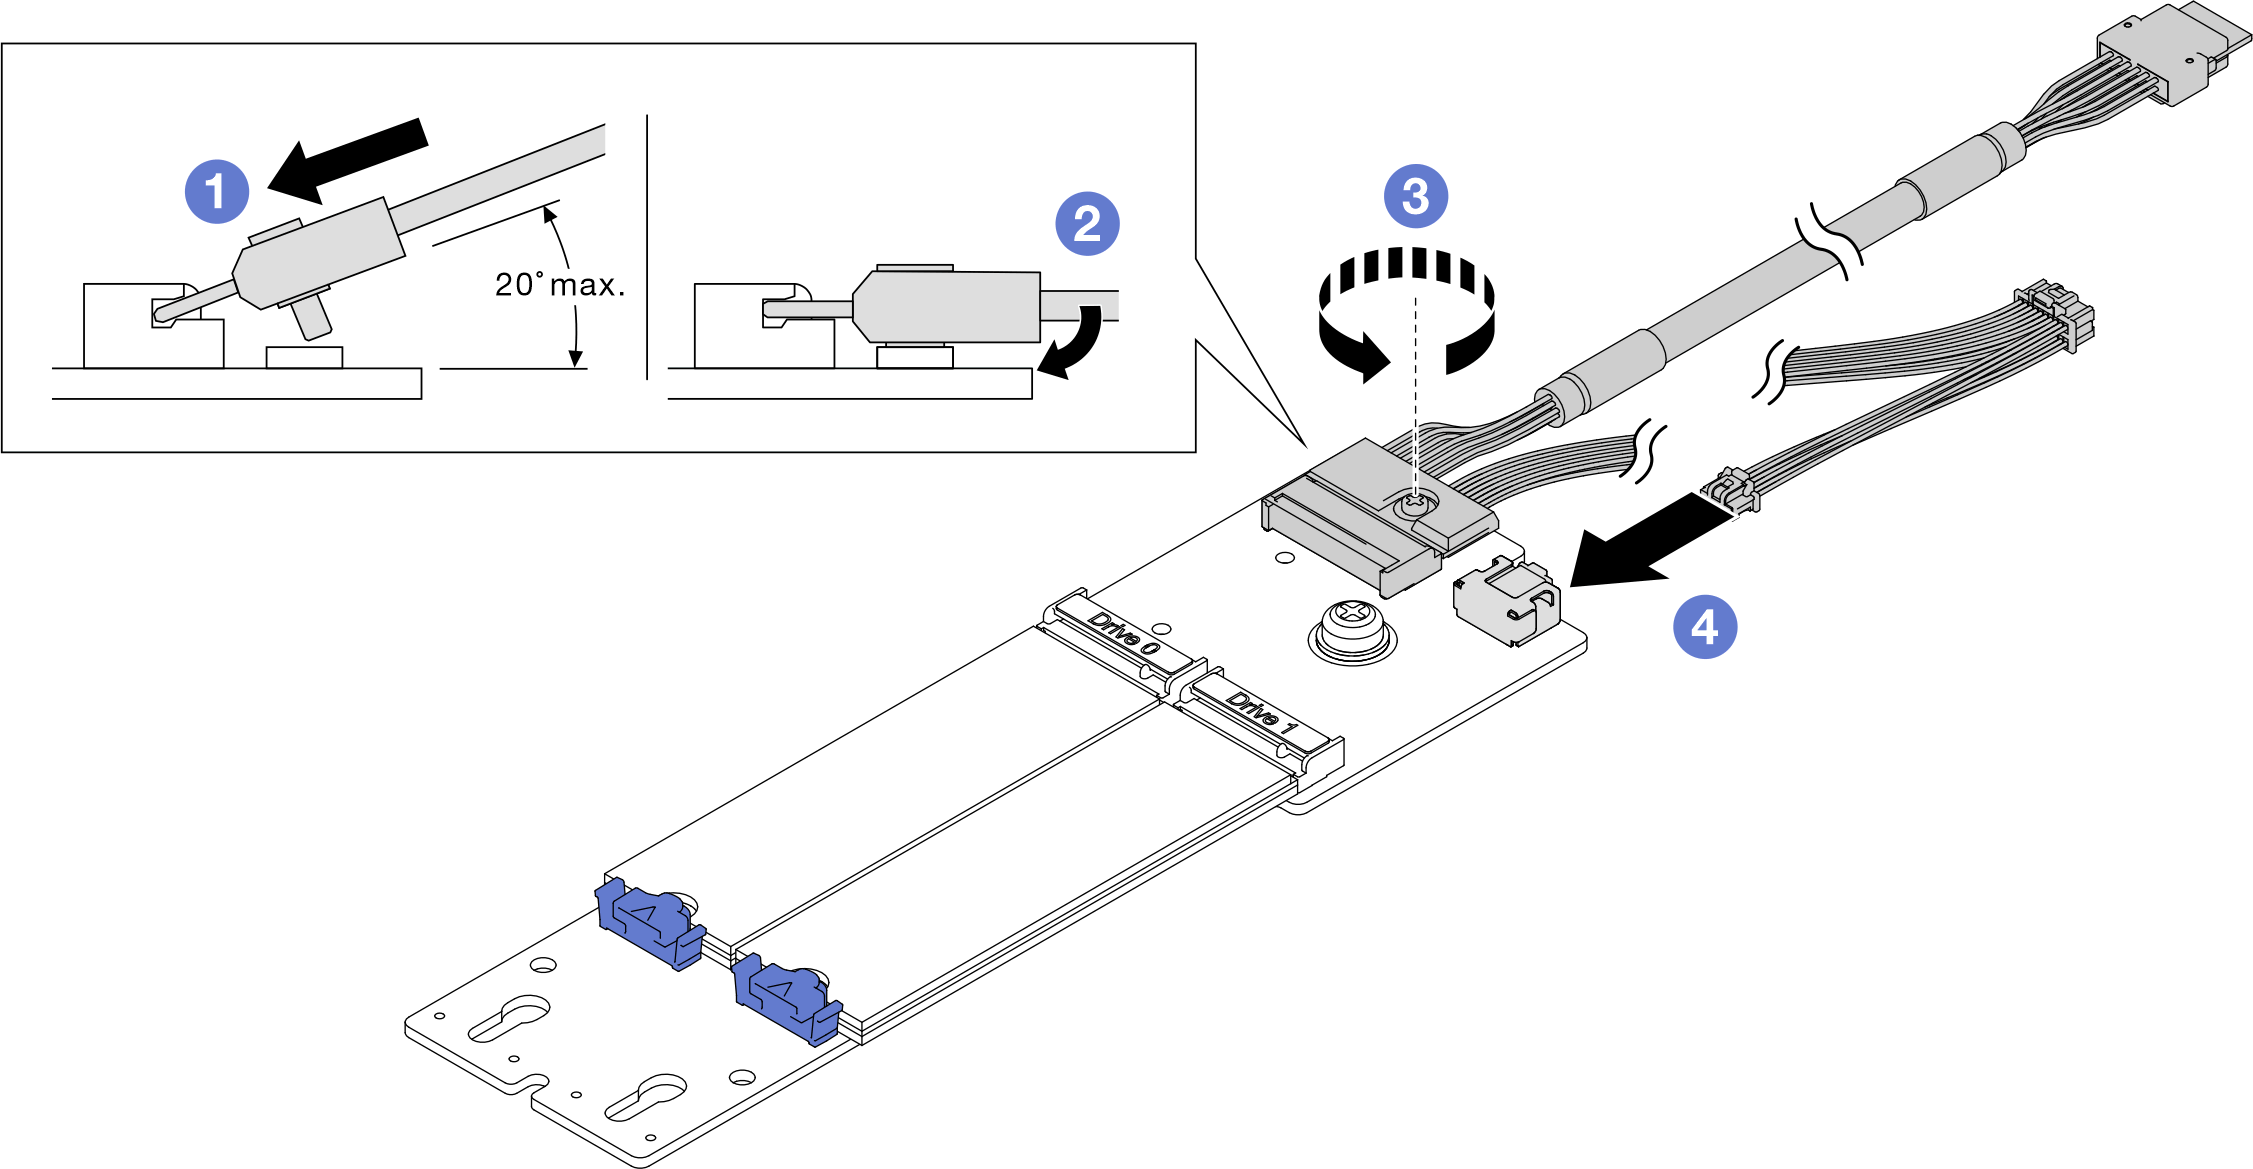
- Tilt the connector at an angle of 20 degrees or lower, and insert it until its bottom surface reaches the ramp.
- Press the connector down flat.
- Tighten the screw on the signal cable.
 Connect the power cable.
- If applicable, install the M.2 backplane to the bracket.Figure 3. Installing the M.2 backplane to the bracket
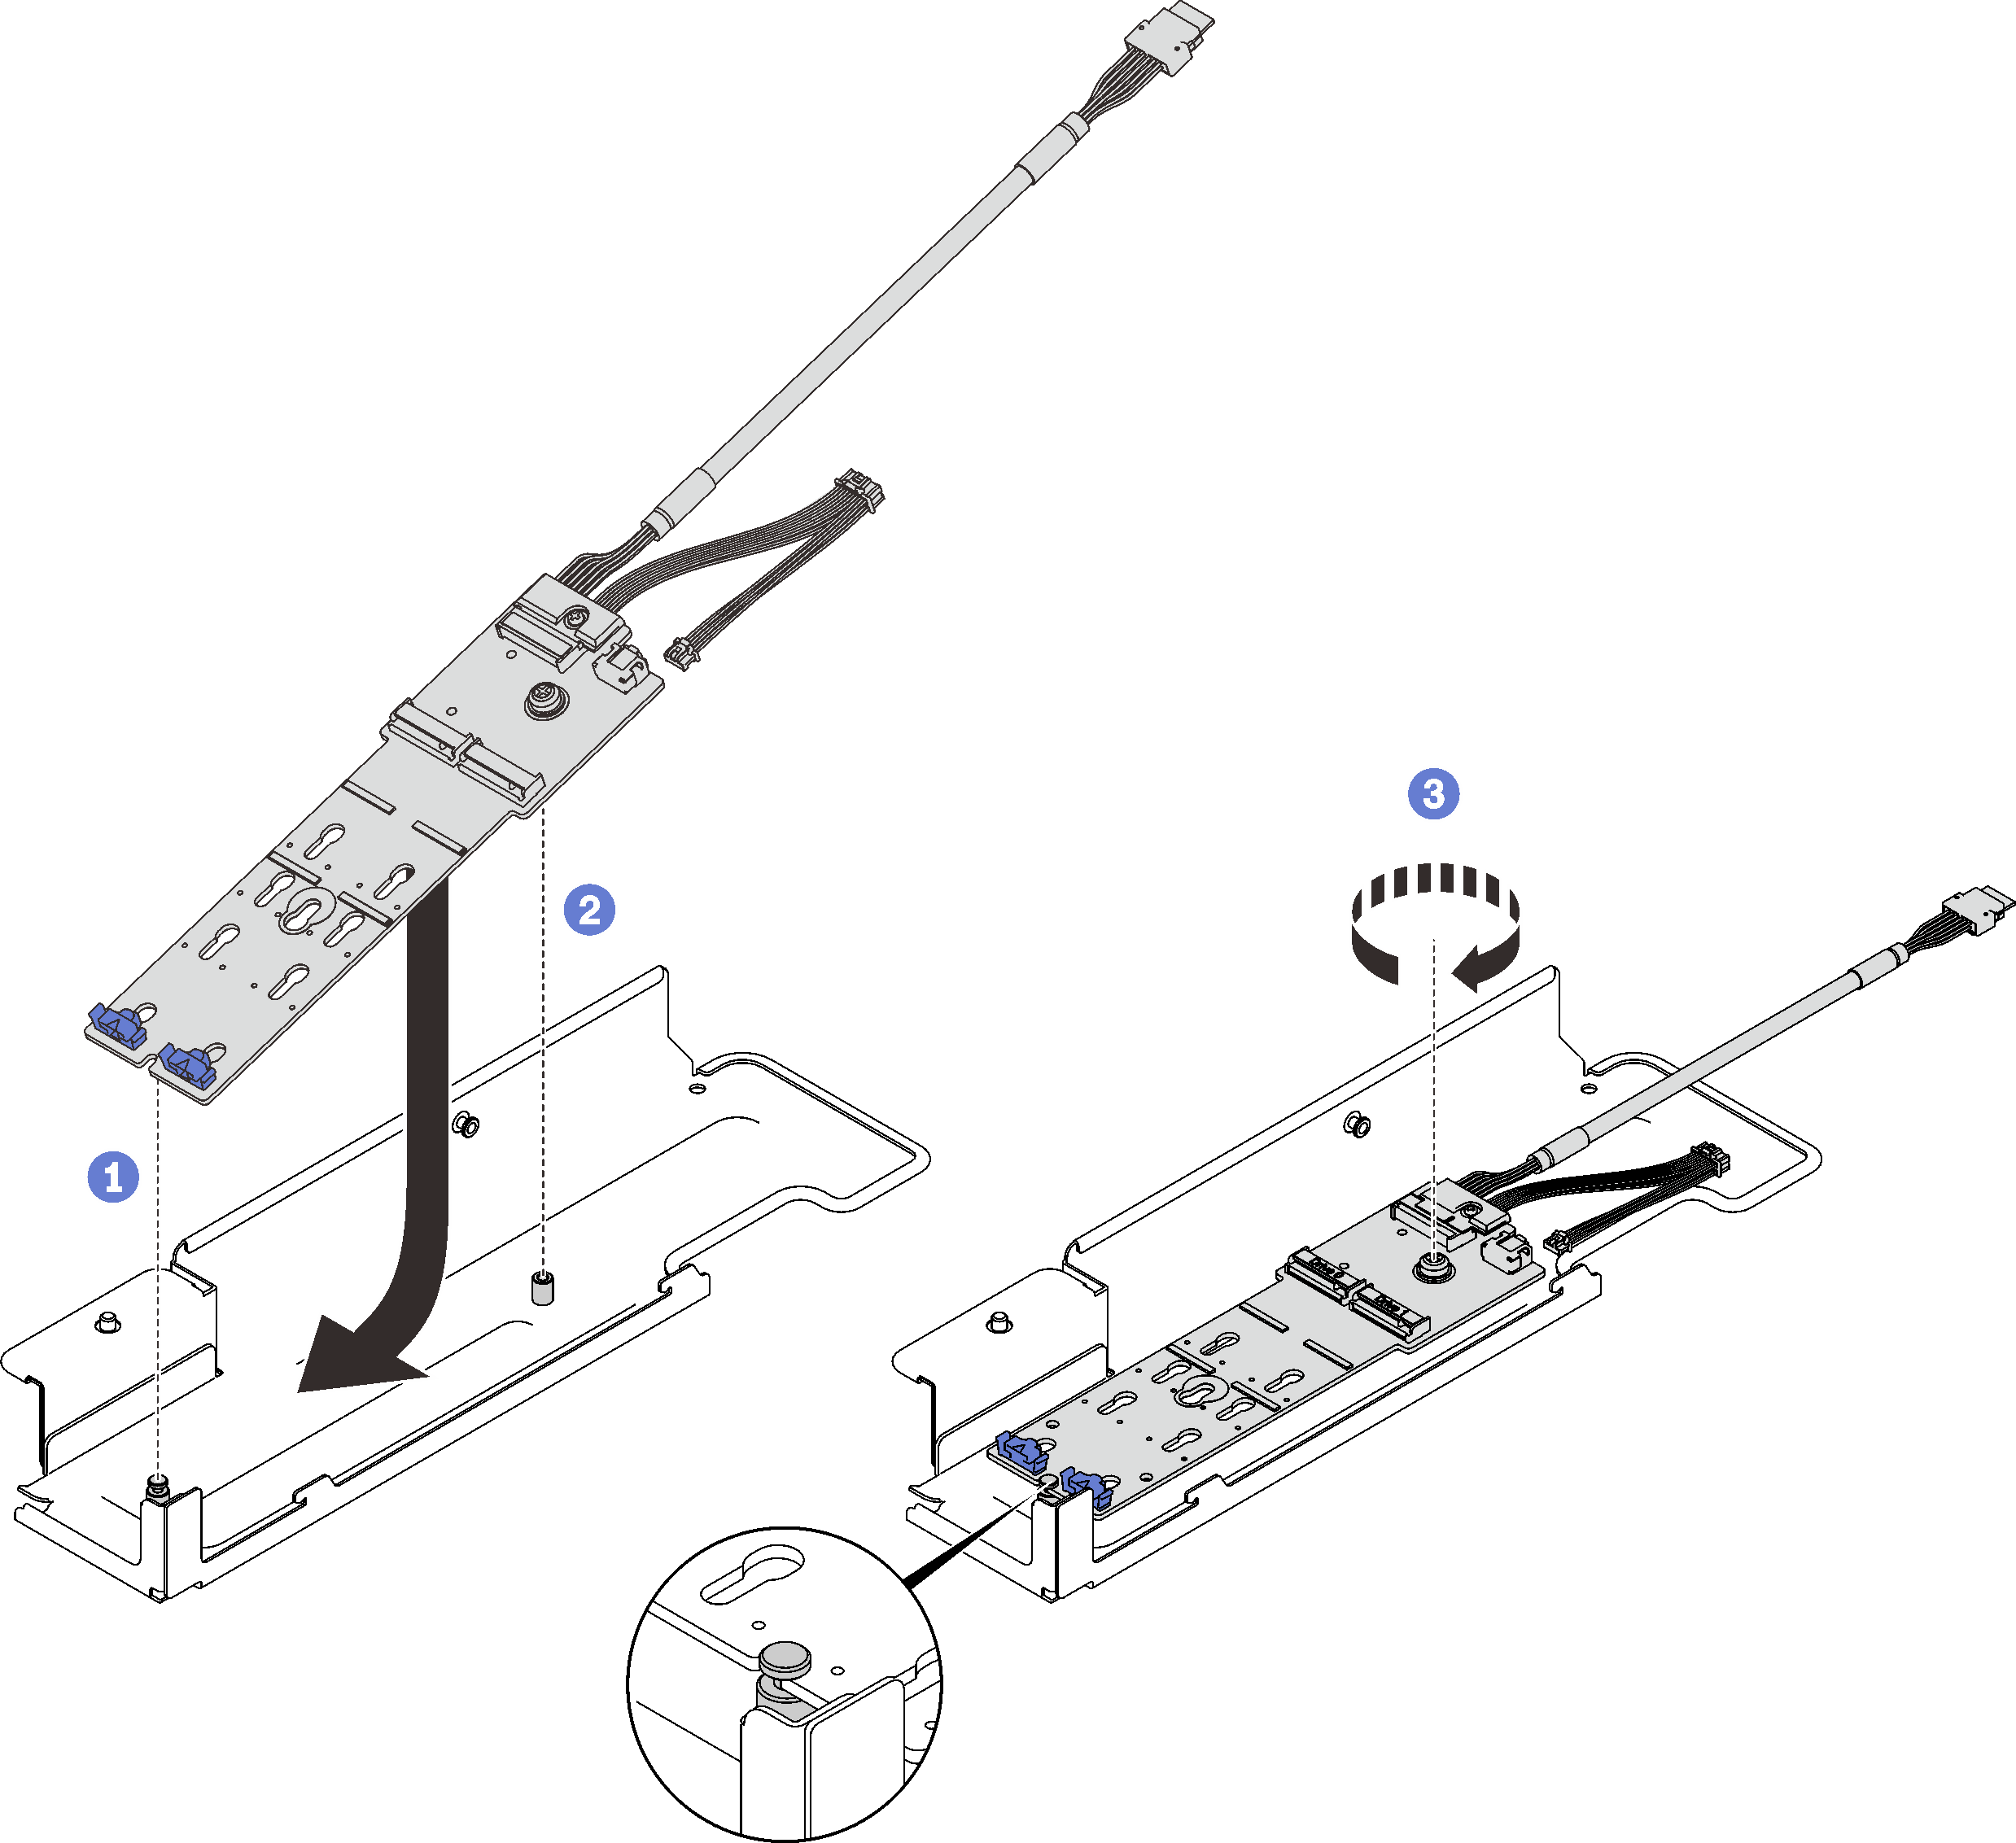
- Align the slot on the rear of the backplane with the rear pin on the bracket, and lower the other side of the backplane.
- Align the captive screw on the backplane to the front pin on the bracket.
- Tighten the captive screw with a screw driver to secure the backplane to the bracket.
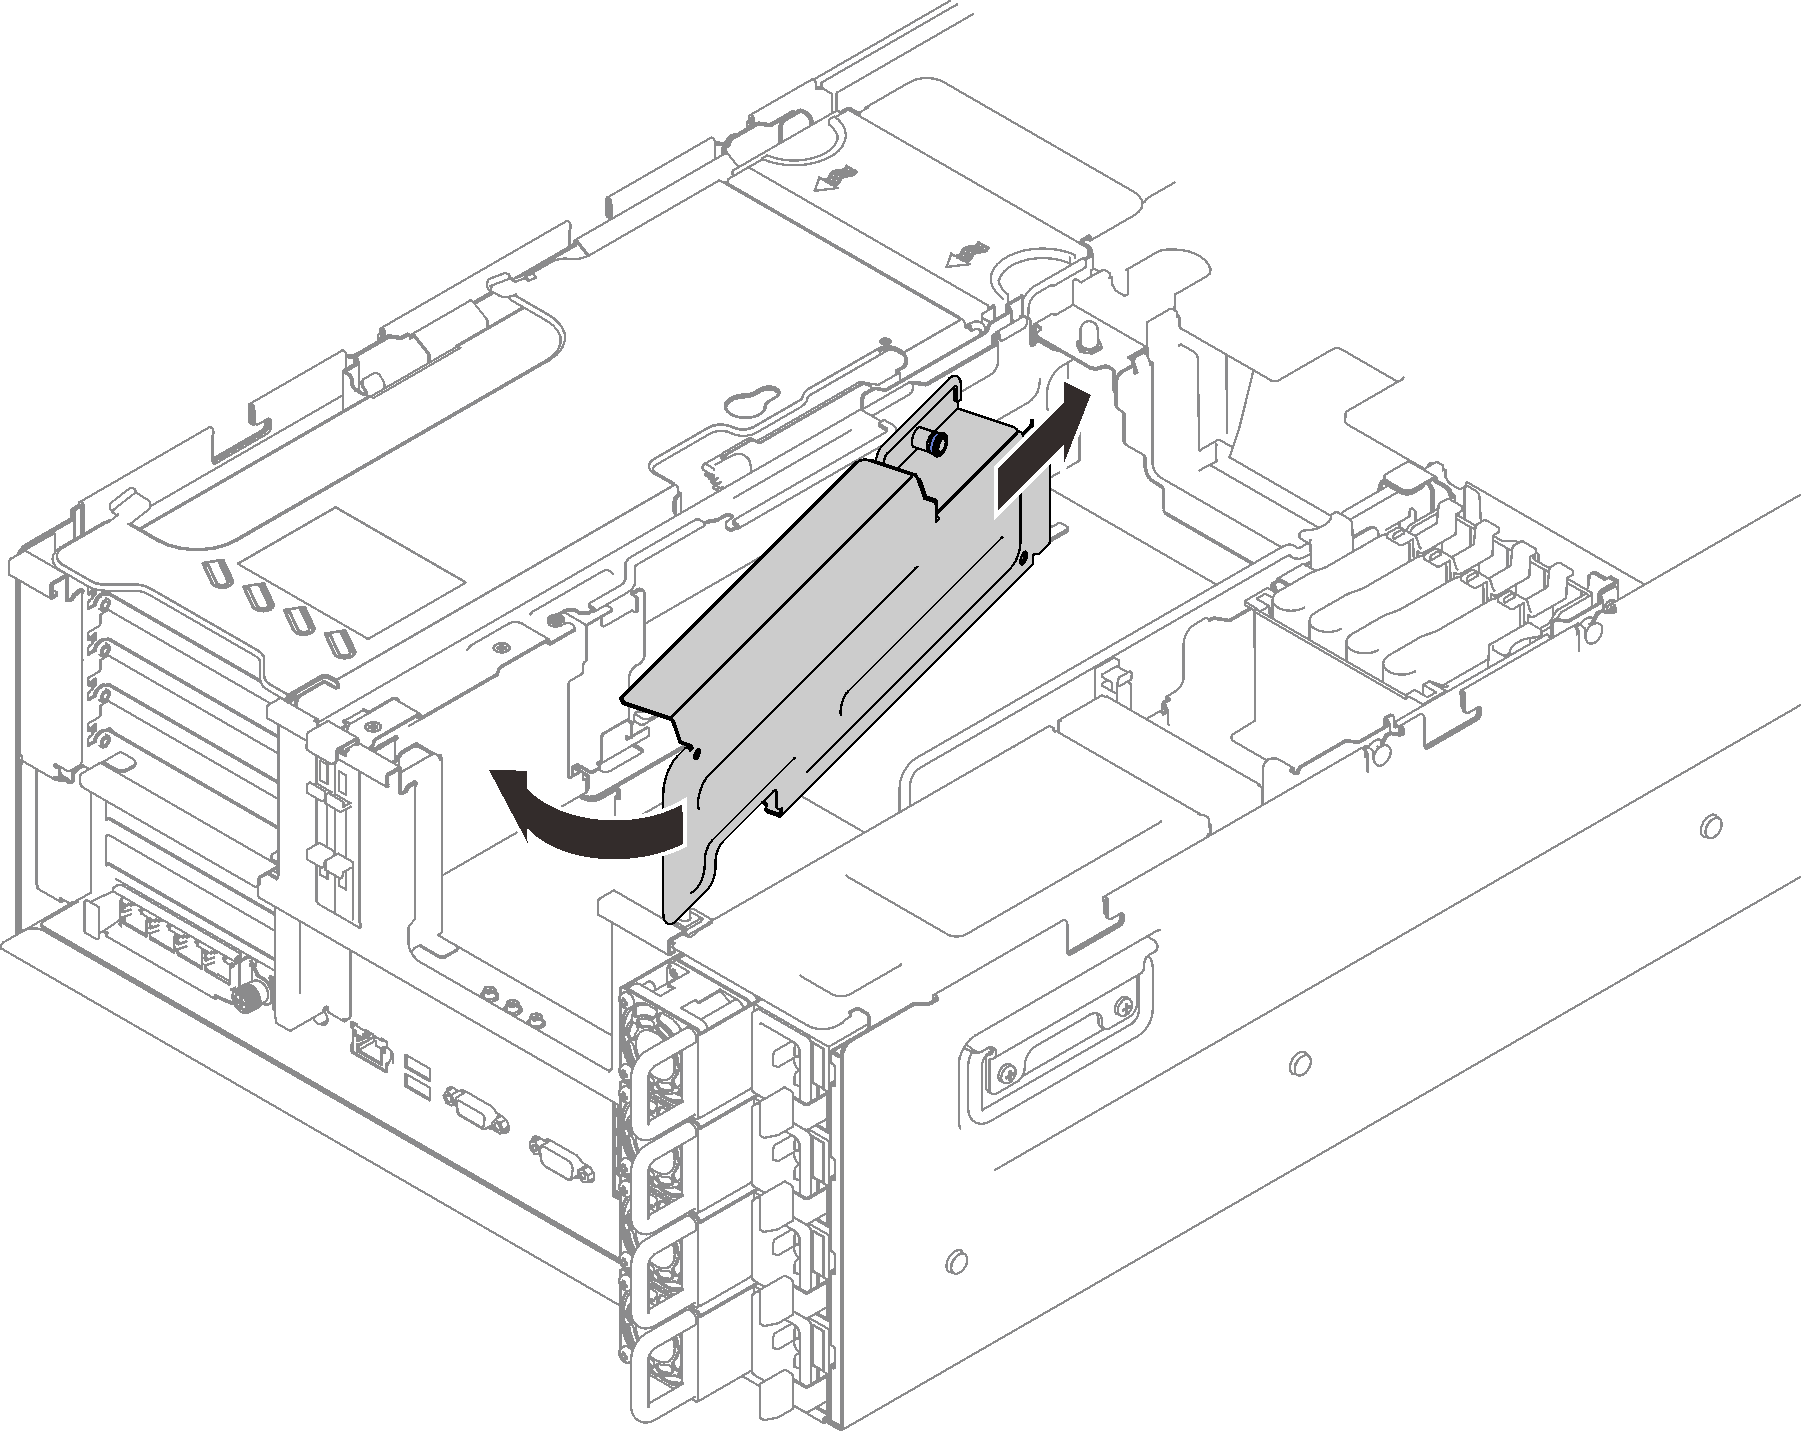
- Align the end of the M.2 backplane to the slot on the PCIe expansion tray, and pivot the other end towards the tray until the bracket clicks in place.Figure 4. Installing the M.2 backplane bracket assembly
- Connect the M.2 signal and power cable to the system board.Figure 5. M.2 drive cable routing
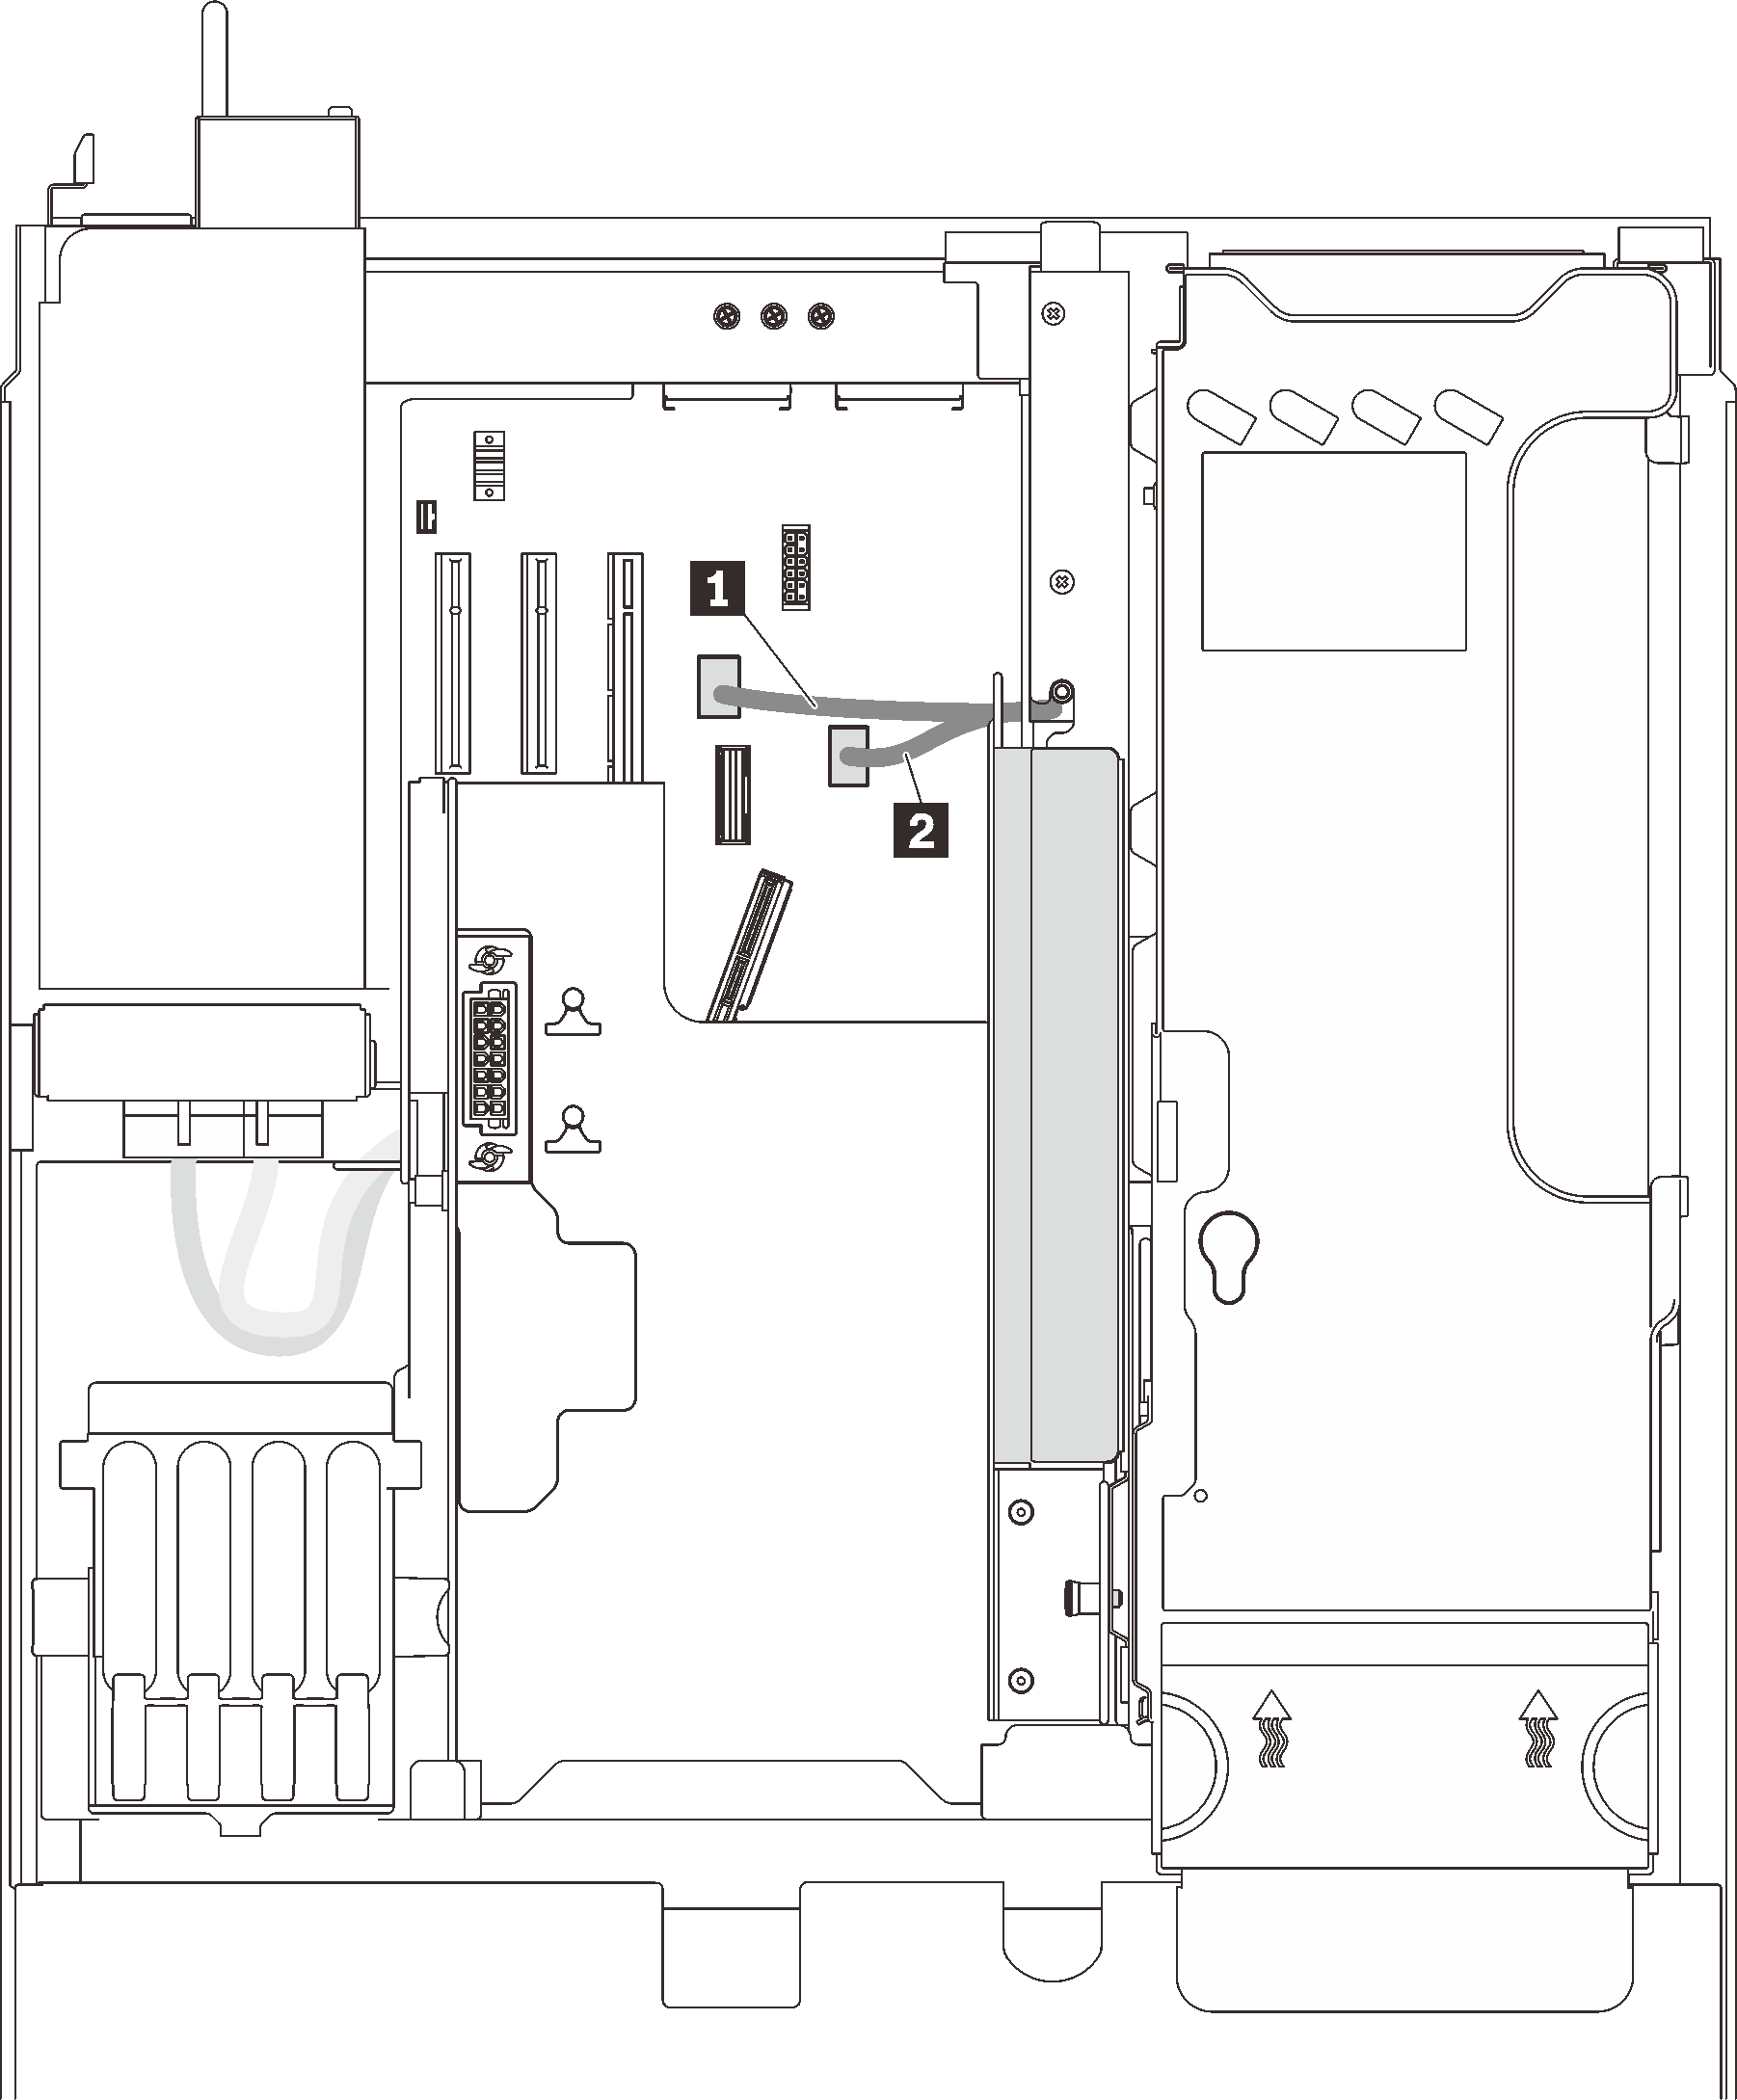
1 M.2 PCIe connector 2 M.2 backplane power connector
After this task is completed
Proceed to complete the parts replacement (see Complete the parts replacement).
Demo video
Give documentation feedback