Install the system board

Use this procedure to install the system board.

Attention
Removing and installing this component requires trained technicians. Do no attempt to remove or install it without proper training.

Before installing the system board:

  1. Read the safety information and installation guidelines (see Safety and Installation Guidelines).

  2. Touch the static-protective package that contains the component to any unpainted metal surface on the server; then, remove it from the package and place it on a static-protective surface.

To install the system board, complete the following steps:

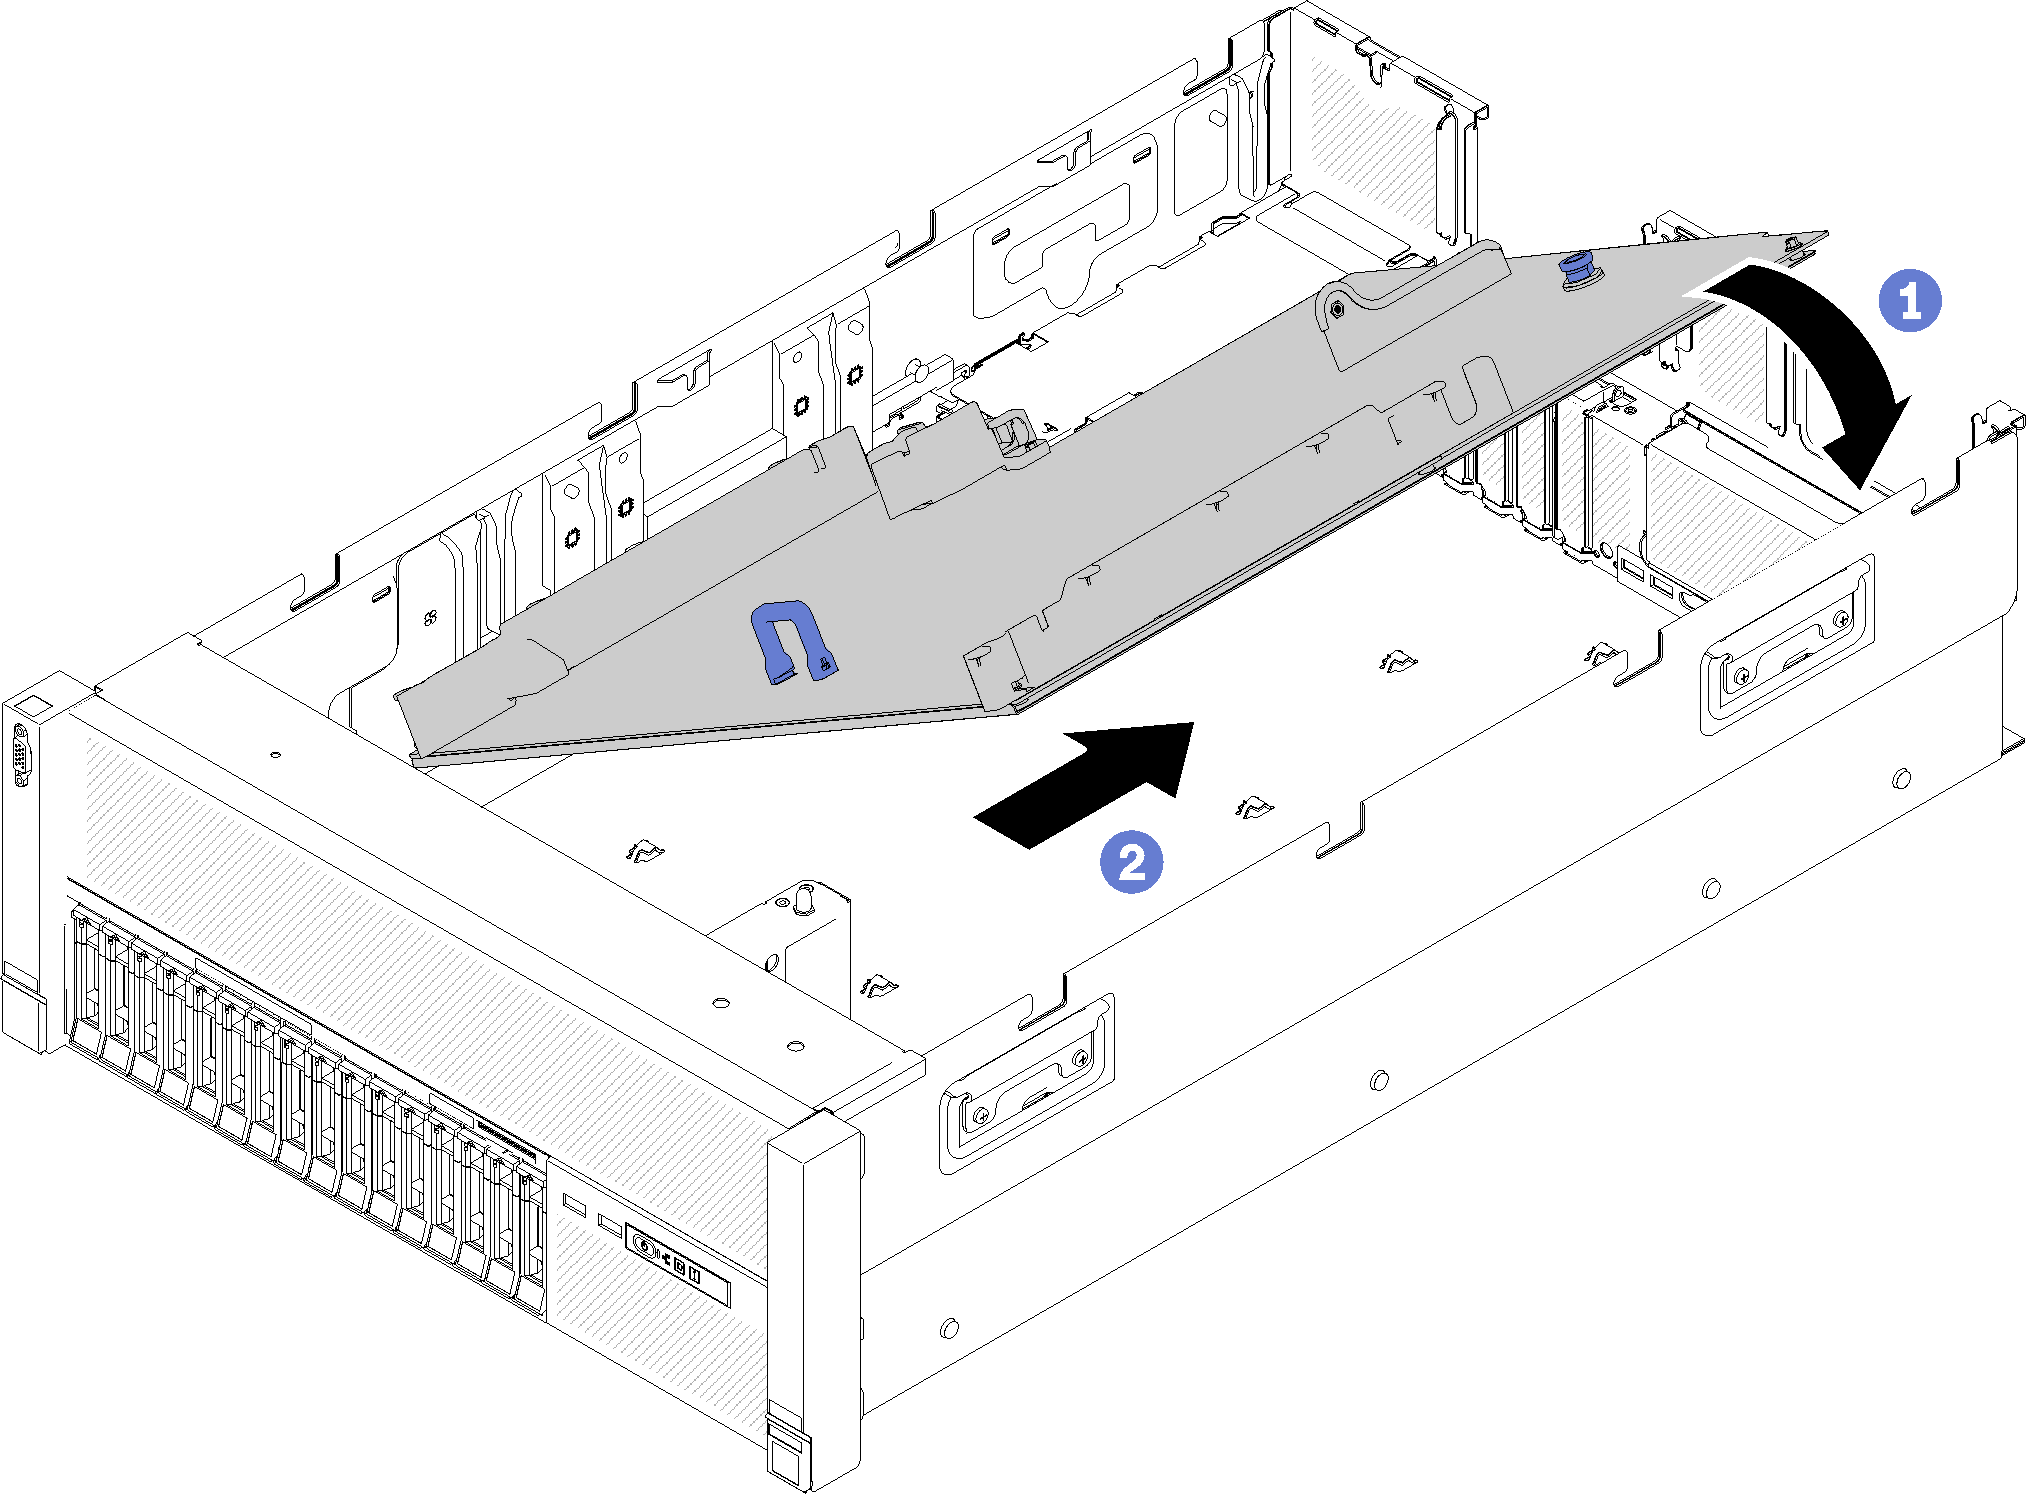
  1. Lower the short side of the system board and align it with the slots in the server; then, lower the longer side.
    Figure 1. System board installation


  2. Slide the system board toward the rear of the server to secure it in place. To ensure that the system board is properly installed, gently tug handle of system board forward, a properly installed system board will not release and slide forward.
  3. Reinstall the TCM/TPM to the system board (see Install the TCM/TPM adapter (for Chinese Mainland only)).
  4. Reinstall the DIMMs to the system board (see Install a memory module).
  5. Install the PHMs (see Install a processor and heat sink).
  6. Reinstall PCIe riser card assembly if necessary (see Install the PCIe riser card assembly).
  7. Reinstall adapters removed earlier (see Install an adapter).
  8. Reinstall the LOM adapter if necessary (see Install the LOM adapter).
  9. Reinstall the system board air baffle (see Install the system board air baffle and the power interposer) or the processor and memory expansion tray (see Install the processor and memory expansion tray).
  10. Reconnect the cables disconnected earlier.
  11. Reinstall the power supplies (see Install a hot-swap power supply unit).
  12. Reinstall the drive backplanes (see Install a drive backplane).
  13. Reinstall the chassis air baffle (see Install the chassis air baffle).
  14. Reinstall the PCIe expansion tray (see Install the PCIe expansion tray).

After installing the system board, complete the following steps:

  1. Push the power supplies into the bays until they click into place.

  2. Install any components that you removed from the failing system board. See the related topics in “Hardware replacement procedures.”

  3. Update the machine type and serial number with new vital product data (VPD). Use the Lenovo XClarity Provisioning Manager to update the machine type and serial number. See Update the machine type and serial number.

  4. Enable TPM/TCM. See Enable TPM/TCM.

  5. Optionally, enable Secure Boot. See Enable UEFI Secure Boot.

Demo video
Watch the procedure on YouTube