Install the PCIe riser card assembly
Use this procedure to install the PCIe riser card assembly.
Read the safety information and installation guidelines (see Safety and Installation Guidelines).
Touch the static-protective package that contains the component to any unpainted metal surface on the server; then, remove it from the package and place it on a static-protective surface.
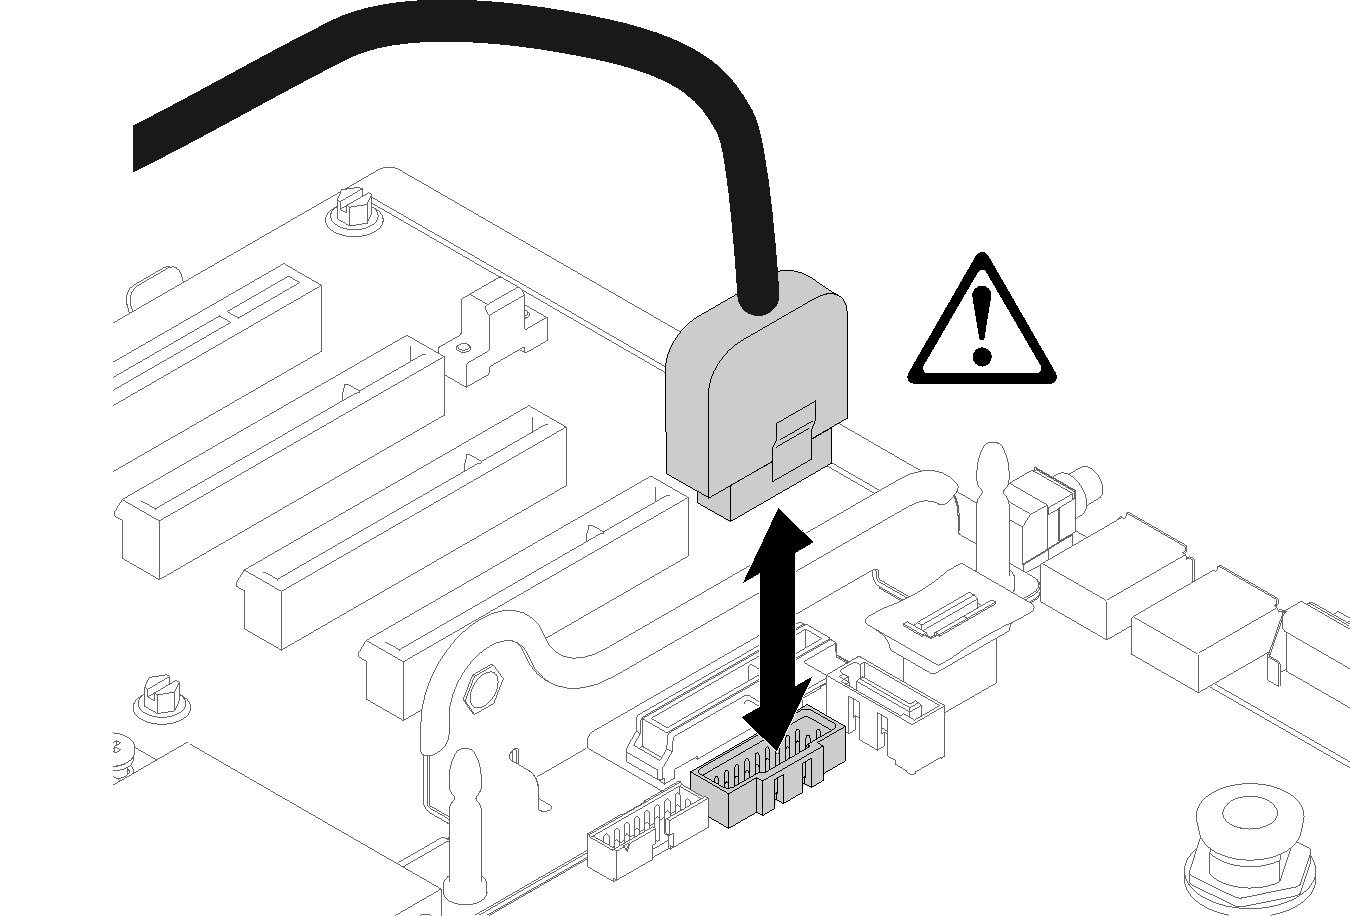
- Disconnect the USB 3.0 cable of operator panel tray assembly, and remove it vertically from the system board.Figure 1. Removing USB 3.0 connector vertically
To install the PCIe riser card assembly, complete the following steps:
- Assemble the PCIe riser card assembly:
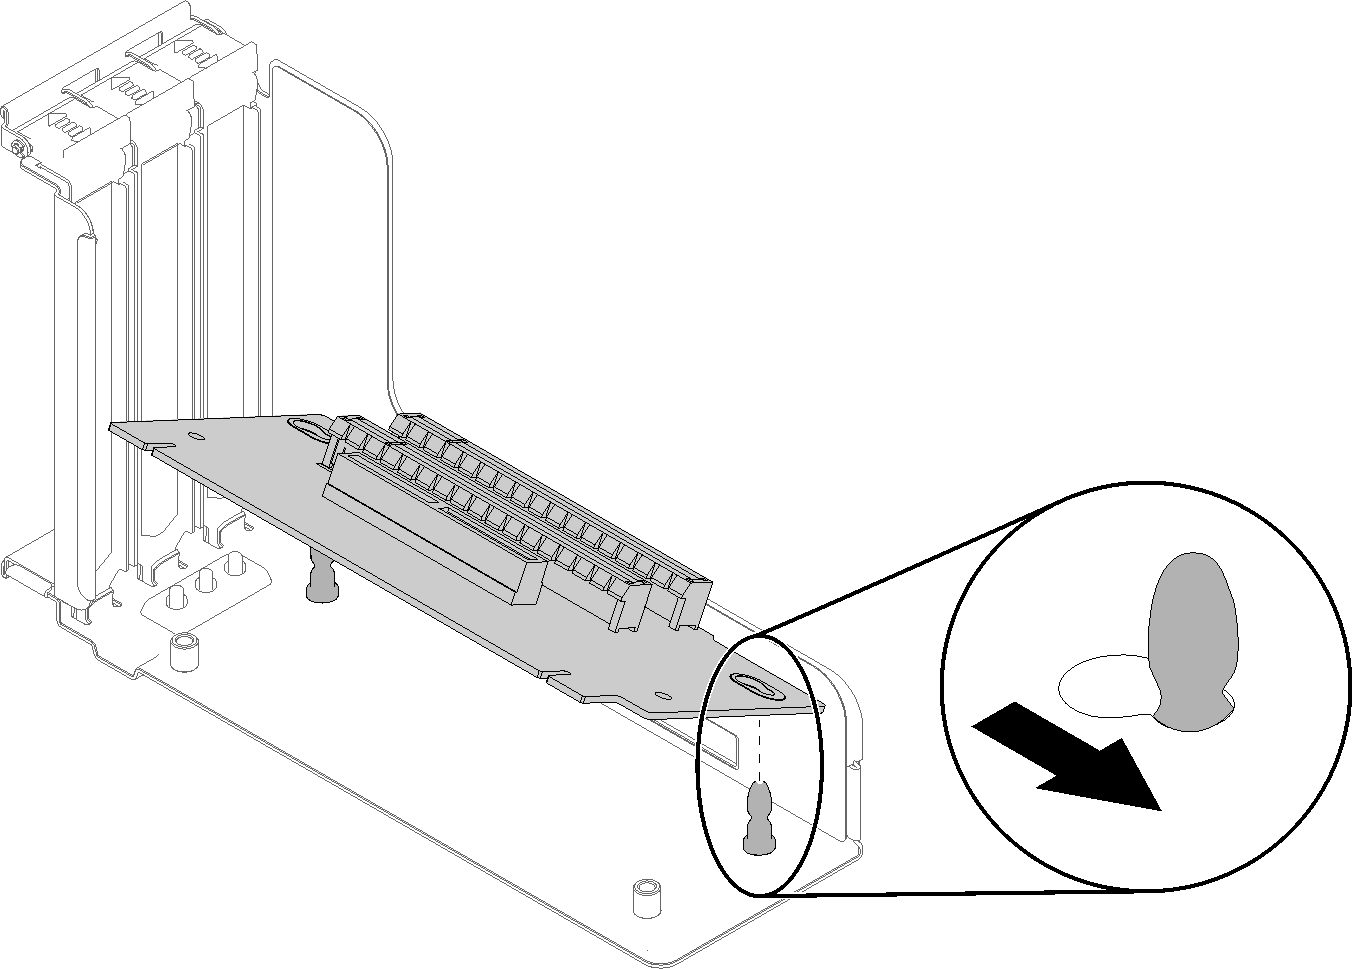
- Align the bottom of the PCIe riser card to the slot, and rotate the top to fit it into the slot on the riser-cage; then, move the PCIe riser card slightly to fit the holes into the pins.Figure 2. PCIe riser card assembly
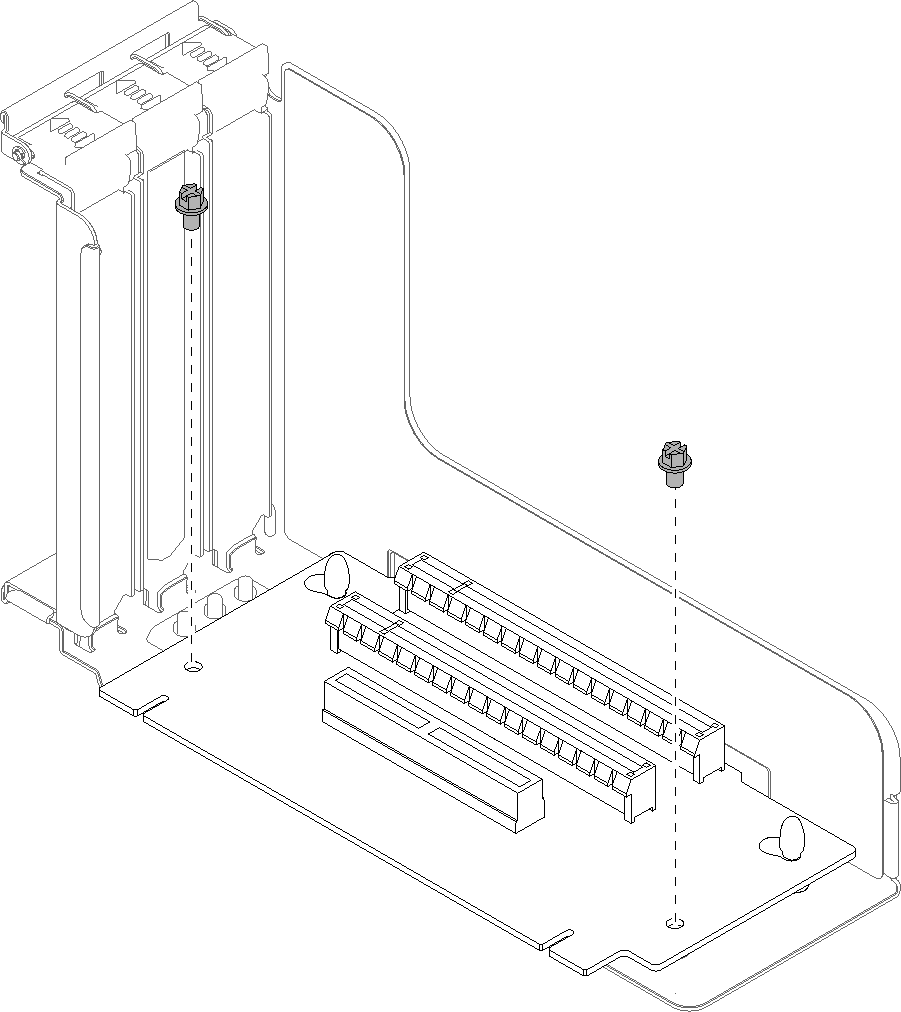
- Install the PCIe riser card to the riser cage with screws.Figure 3. PCIe riser card assembly
- Align the bottom of the PCIe riser card to the slot, and rotate the top to fit it into the slot on the riser-cage; then, move the PCIe riser card slightly to fit the holes into the pins.
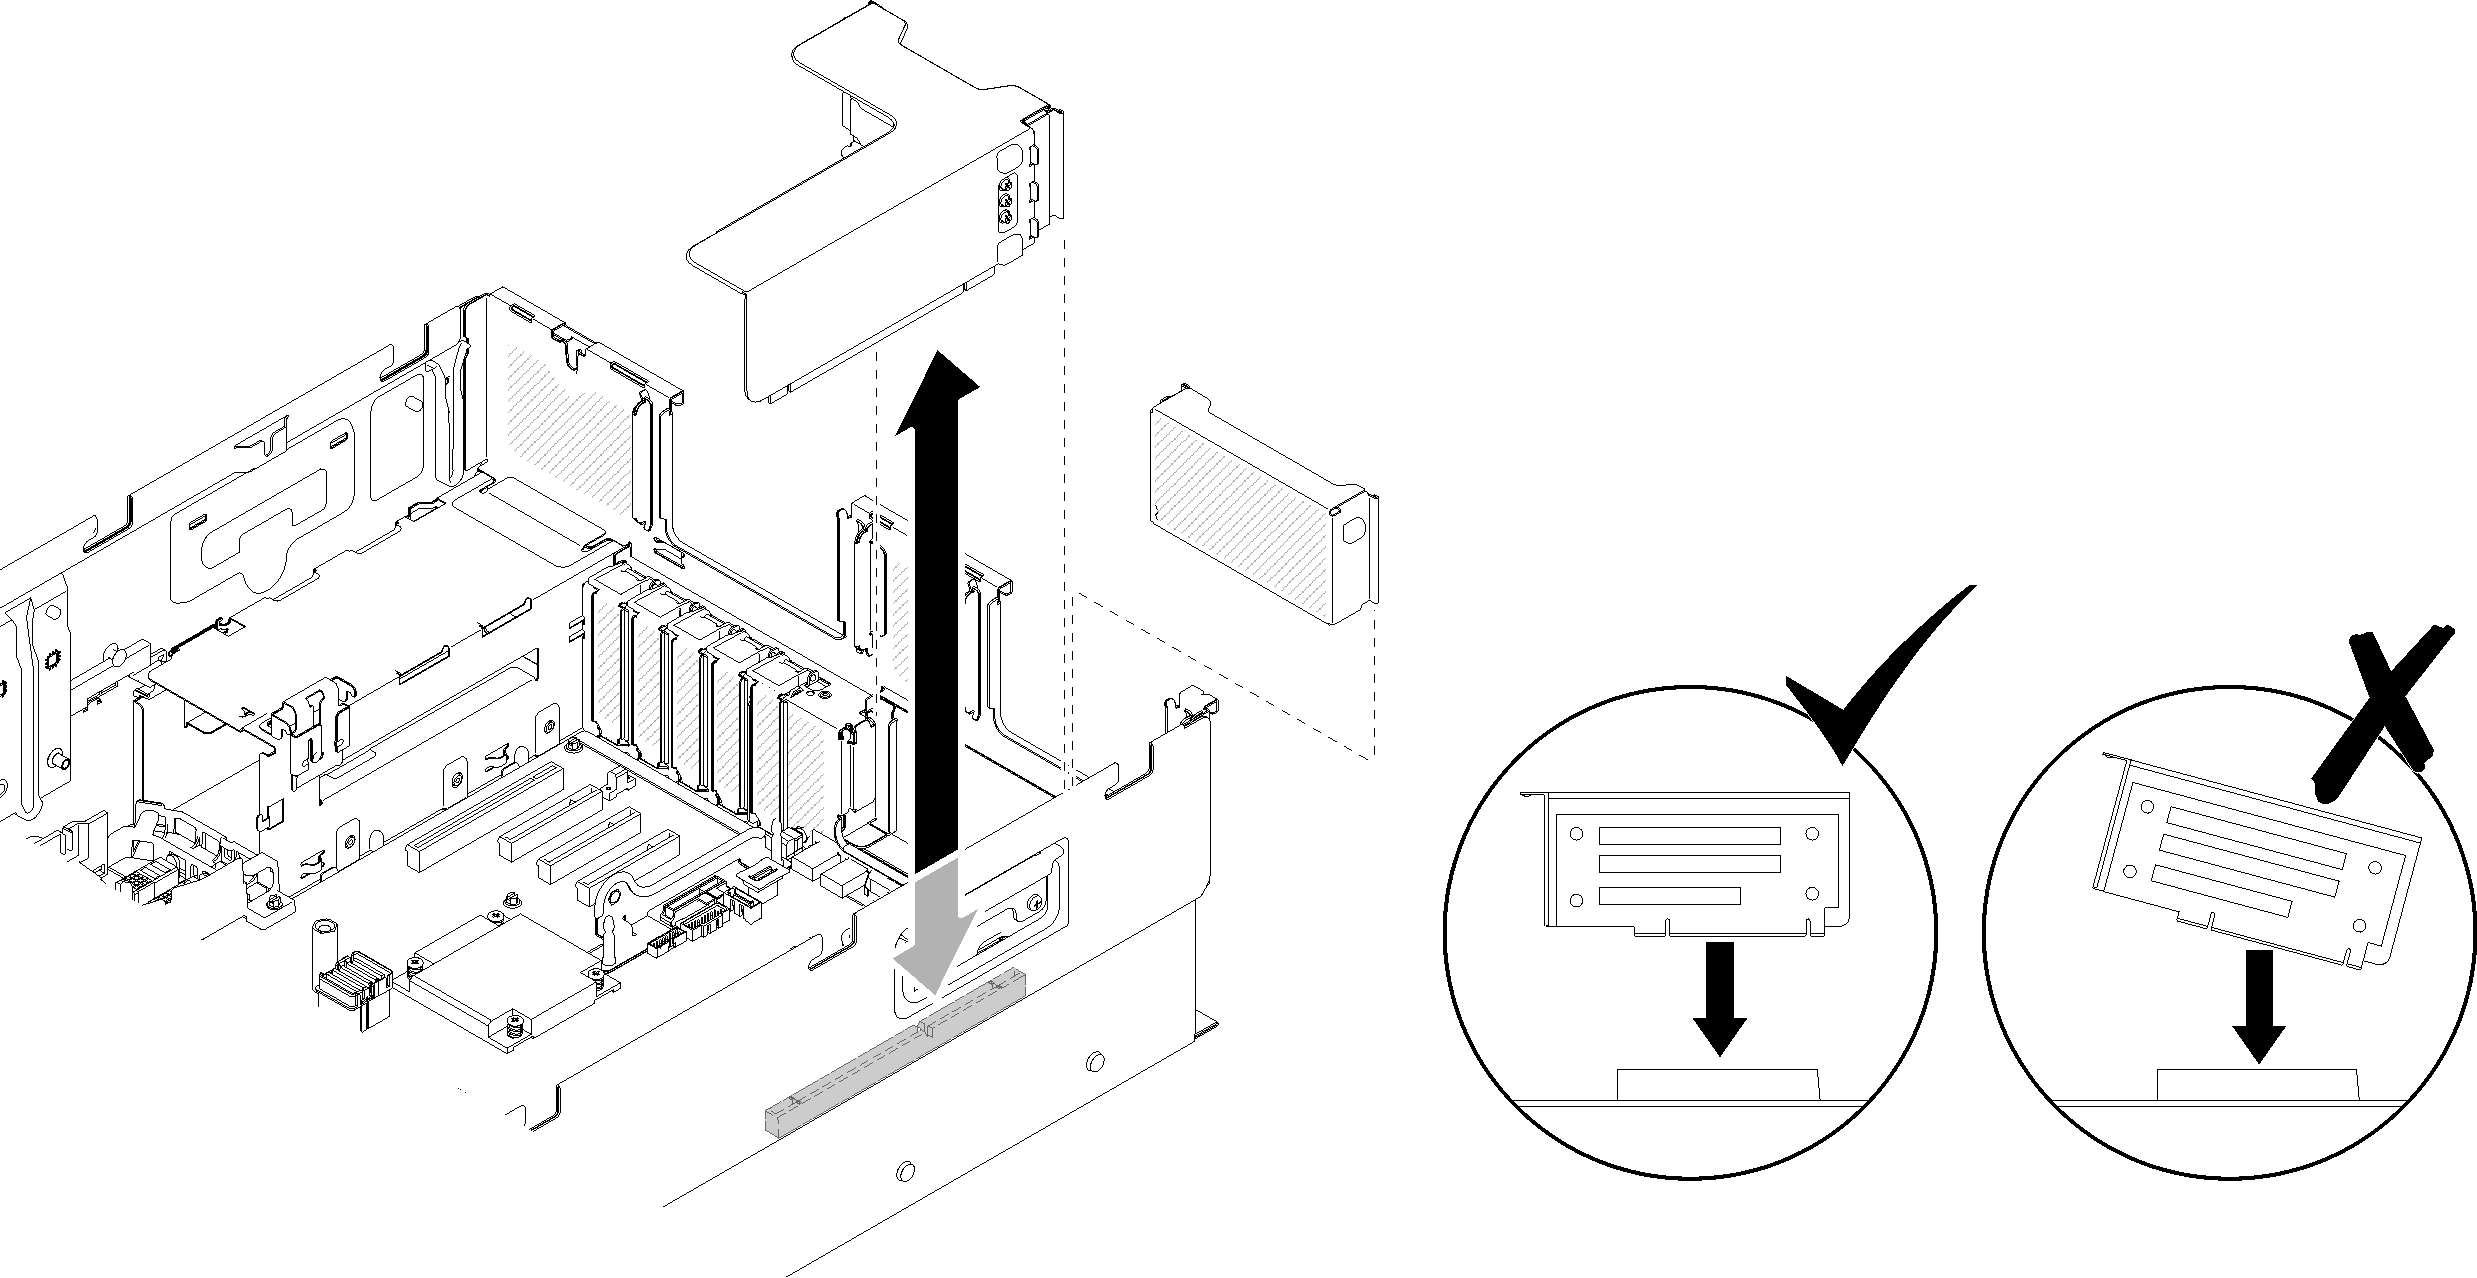
- Align the PCIe riser card assembly with the connector on the system board; then, push it in until it clicks in place.Figure 4. PCIe riser card assembly installation
After installing the PCIe riser card assembly, complete the following steps:
- Reconnect the USB 3.0 cable of operator panel tray assembly vertically to the system board.Figure 5. Installing USB 3.0 connector verticallyRoute the USB 3.0 cable in the cable guide and away from the PCIe slots area (marked in gray).Figure 6. Routing USB 3.0 cable

1 USB 3.0 connector Install the PCIe expansion tray (see Install the PCIe expansion tray).
Install the top cover (see Install the top cover).
Reconnect the power cords and any cables that you removed.
If the server is installed in a rack, reinstall the server into the rack.
Power on the server and any peripheral devices.
Demo video