Install a 2.5-inch hot-swap drive
Use this procedure to install a 2.5-inch drive.
Following are the types of drives supported by this server:
- NVMe solid-state drive
- SATA/SAS solid-state drive
- SATA/SAS hard-disk drive
For a complete list of supported optional device for this server, see Lenovo ServerProven website.
Before installing a 2.5-inch hot-swap drive:
Read the safety information and installation guidelines (see Safety and Installation Guidelines).
Touch the static-protective package that contains the component to any unpainted metal surface on the server; then, remove it from the package and place it on a static-protective surface.
To install a 2.5-inch drive, complete the following steps:
- Determine the available drive bays based on the drive bay labels applied. The following labels indicate that the drive bays support both NVMe and SATA/SAS drives. Otherwise, only SATA/SAS drives are supported.Figure 1. Drive bay labels of both NVMe and SATA/SAS drives
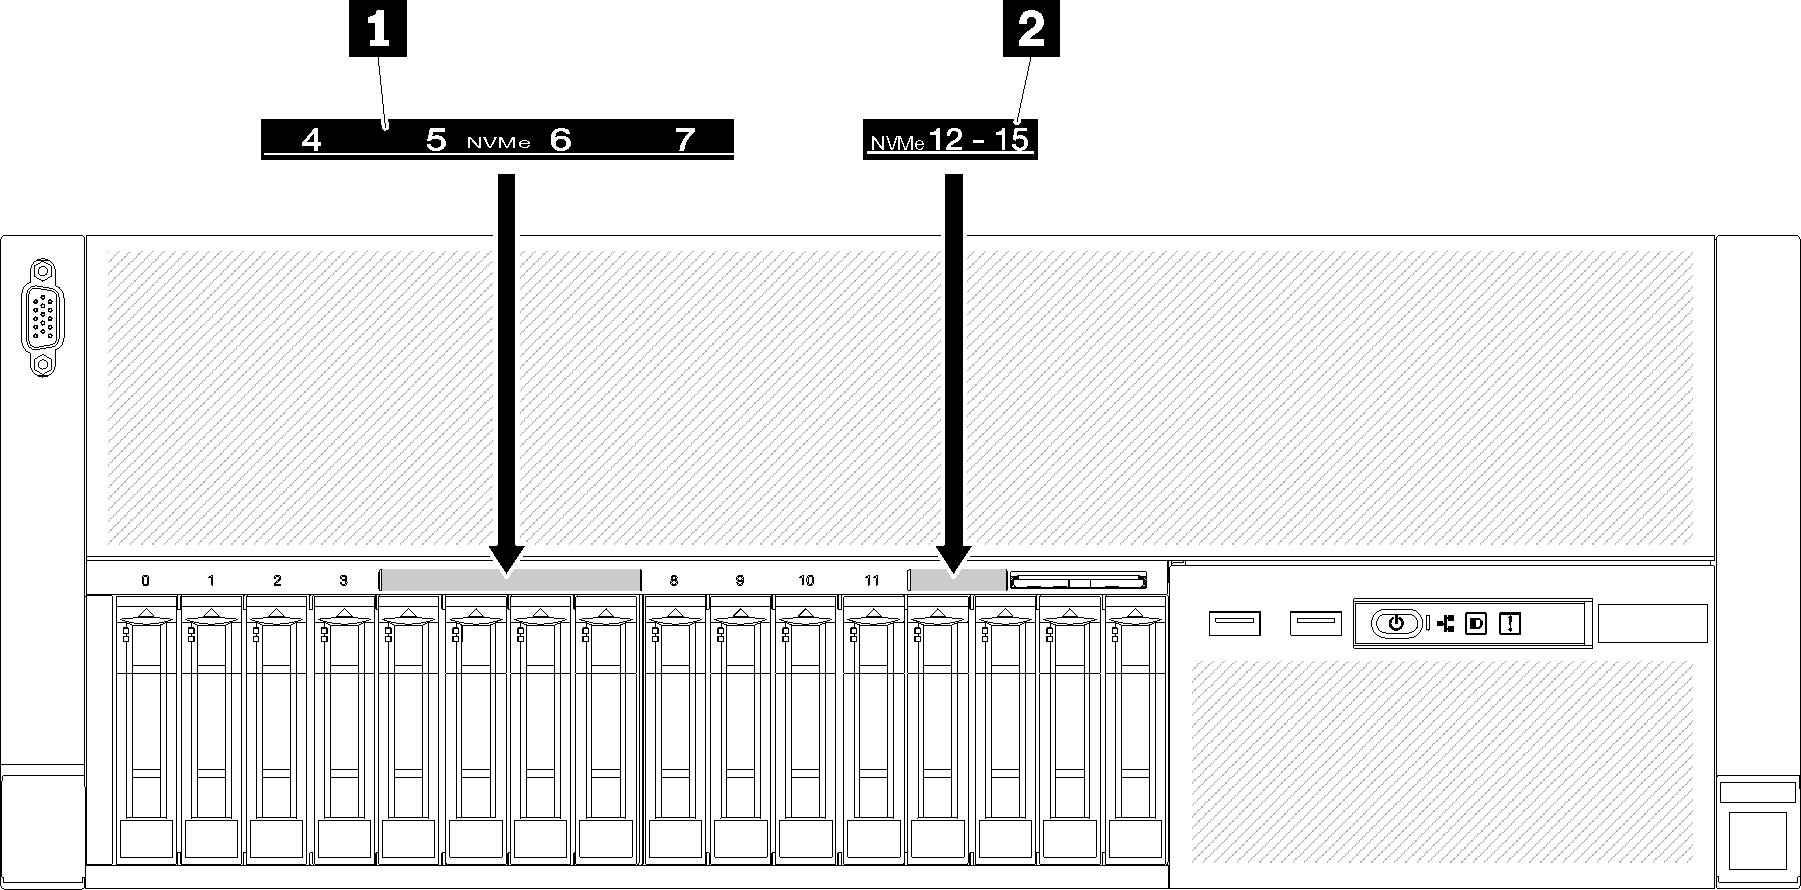
Table 1. Drive bay labels of both NVMe and SATA/SAS drives 1 Drive bay 4-7 label of both NVMe and SATA/SAS drives 2 Drive bay 12-15 label of both NVMe and SATA/SAS drives NoteMake sure to install the correct type of drives into supported by corresponding drive bays. Drive type information is available on the drive.
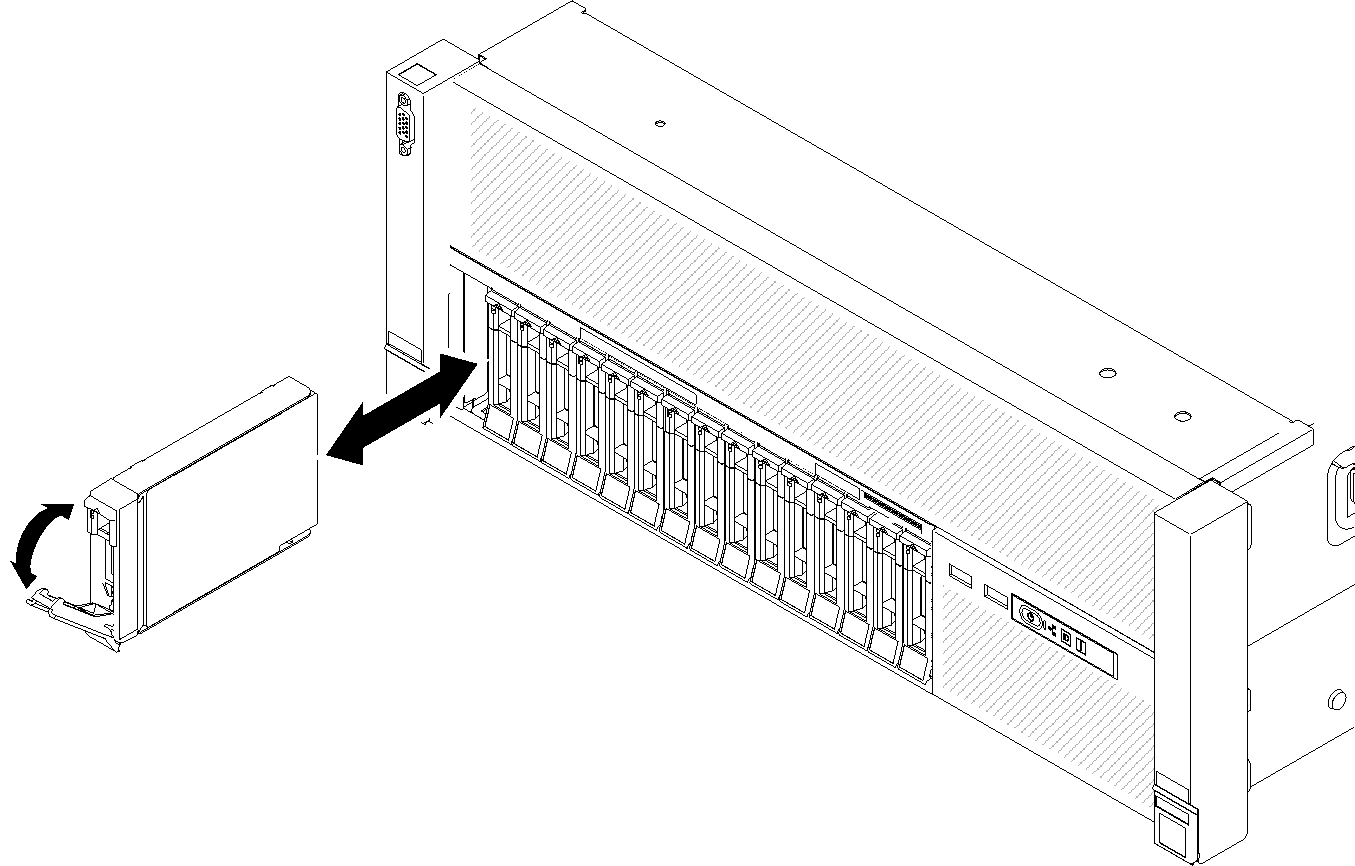
- Slide the drive into the drive bay, and push it until it stops.Figure 2. Drive installation
After installing the 2.5-inch hot-swap drive, check the drive status LED to verify if the drive is operating correctly:
- If the yellow LED is lit continuously, it is malfunctioning and must be replaced.
- If the green LED is flashing, the drive is functioning.
Demo video