安裝儲存體轉插卡(下方匣)
下方儲存體轉插卡位於可從伺服器正面存取的下方運算匣。將儲存體轉插卡插入下方運算匣,並使用螺絲將其固定,然後連接 RAID 卡至儲存體轉插卡,並且安裝風扇機盒及下方運算匣。
S002
注意
裝置上的電源控制按鈕和電源供應器上的電源開關,並不會切斷供應給裝置的電流。此外,裝置也可能有一條以上的電源線。若要切斷裝置的所有電源,必須從電源拔掉所有電源線。
注意
執行此程序前,請確定所有伺服器電源線自其電源拔除。
完成下列步驟以安裝下方儲存體轉插卡:
圖 1. 安裝下方儲存體轉插卡
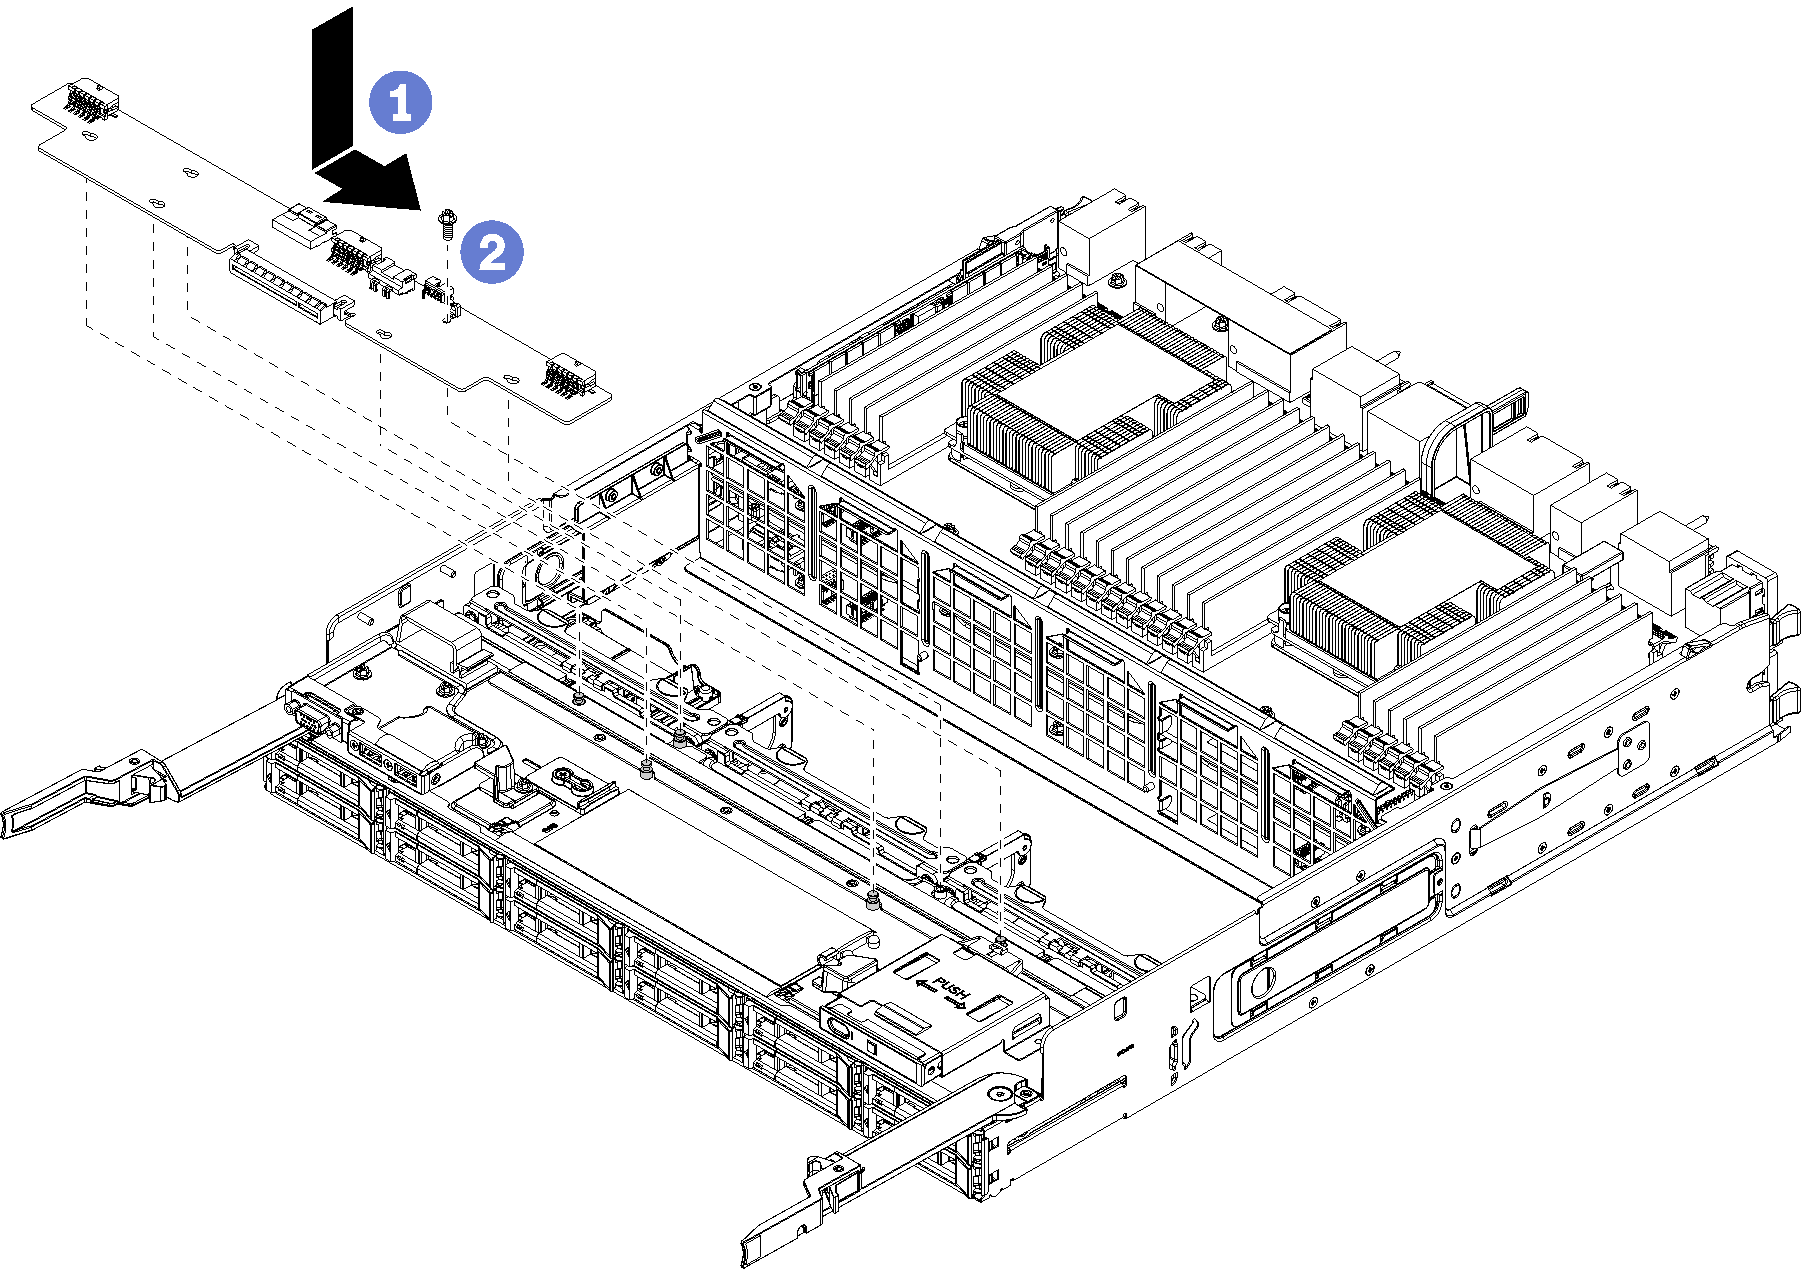
- 將儲存體轉插卡對到運算匣上的插腳,然後將儲存體轉插卡輕推至右側。
- 使用螺絲固定儲存體轉插卡。
- 向下轉動 RAID 卡,並將其對準儲存體轉插卡的接頭,然後將 RAID 卡插入儲存體轉插卡接頭。
- 將電源線和數據線連接到儲存體轉插卡。
提供意見回饋