Install a PCIe adapter
Use this information to install a PCIe adapter.


Depending on the specific type, your PCIe adapter might look different from the illustration in this topic.
Use any documentation that comes with the PCIe adapter and follow those instructions in addition to the instructions in this topic.
ThinkSystem Broadcom NX-E PCIe 10Gb 2-Port Base-T Ethernet Adapter can only be installed in the slot 2.
Before installing a PCIe adapter:
If a bracket is installed in the PCIe slot, remove it. Store the bracket for the PCIe slot in case that you later remove the PCIe adapter and need the bracket to cover the place.
Touch the static-protective package that contains the component to any unpainted metal surface on the server; then, remove it from the package and place it on a static-protective surface.
To install a PCIe adapter, complete the following steps:
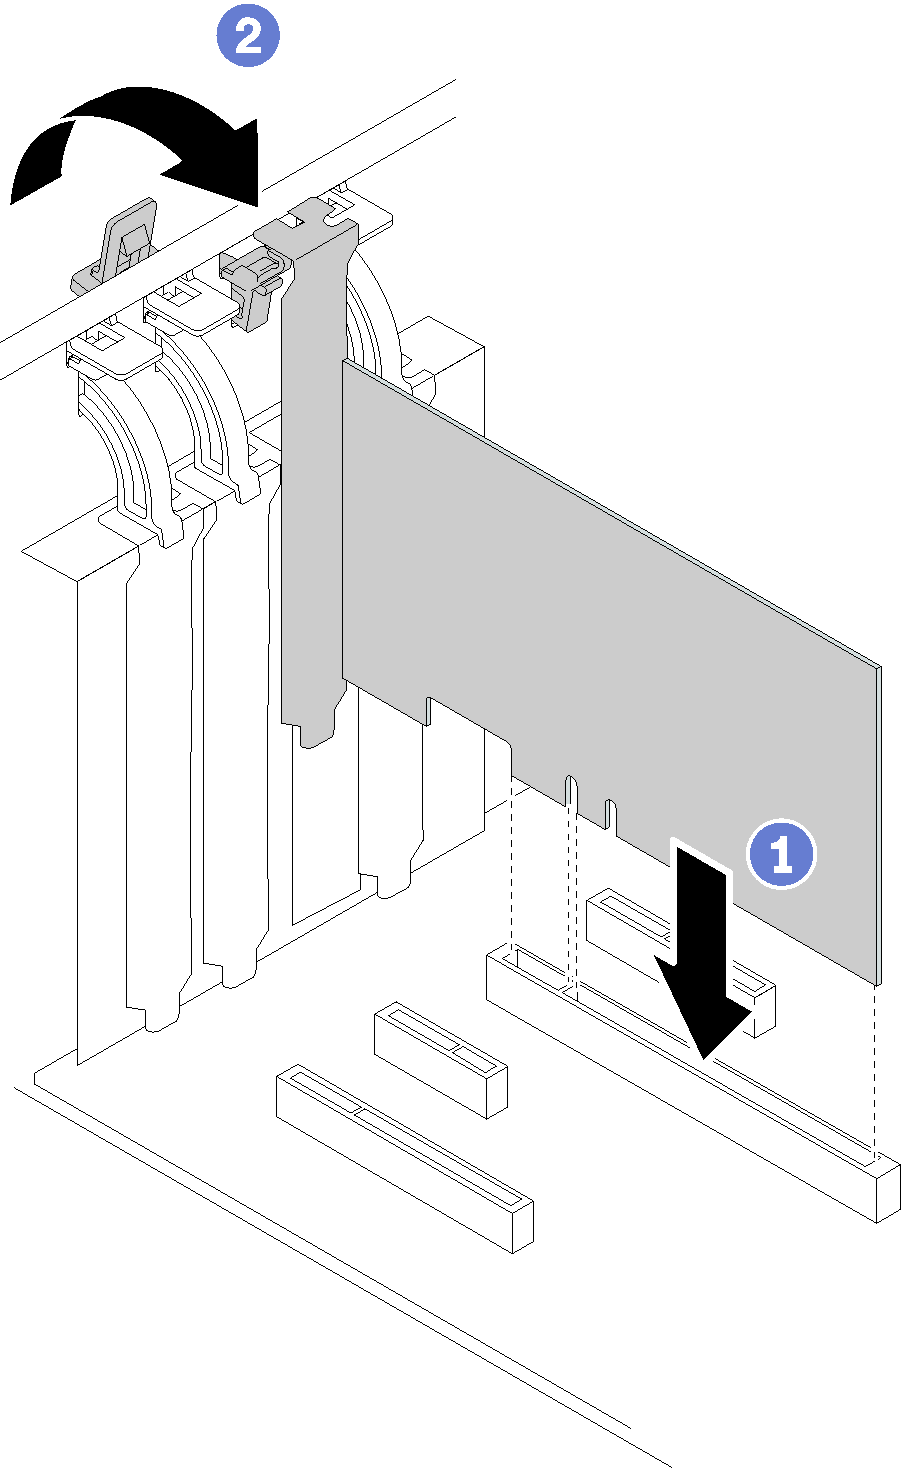
- Open the card latch. Position the new PCIe adapter over the PCIe slot; then, carefully press the PCIe card straight down until it is securely seated in the slot. Close the card latch to secure the PCIe adapter in place.Figure 1. PCIe adapter installation
After installing the PCIe adapter:
Complete the parts replacement. See Complete the parts replacement
Demo video