Install the power distribution board
Use this information to install the power distribution board.


S001
DANGER
danger
Electrical current from power, telephone, and communication cables is hazardous.
To avoid a shock hazard:
- Connect all power cords to a properly wired and grounded electrical outlet/source.
- Connect any equipment that will be attached to this product to properly wired outlets/sources.
- When possible, use one hand only to connect or disconnect signal cables.
- Never turn on any equipment when there is evidence of fire, water, or structural damage.
- The device might have more than one power cord, to remove all electrical current from the device, ensure that all power cords are disconnected from the power source.
Before installing the power distribution board,
Touch the static-protective package that contains the component to any unpainted metal surface on the server; then, remove it from the package and place it on a static-protective surface.
To install the power distribution board, complete the following steps:
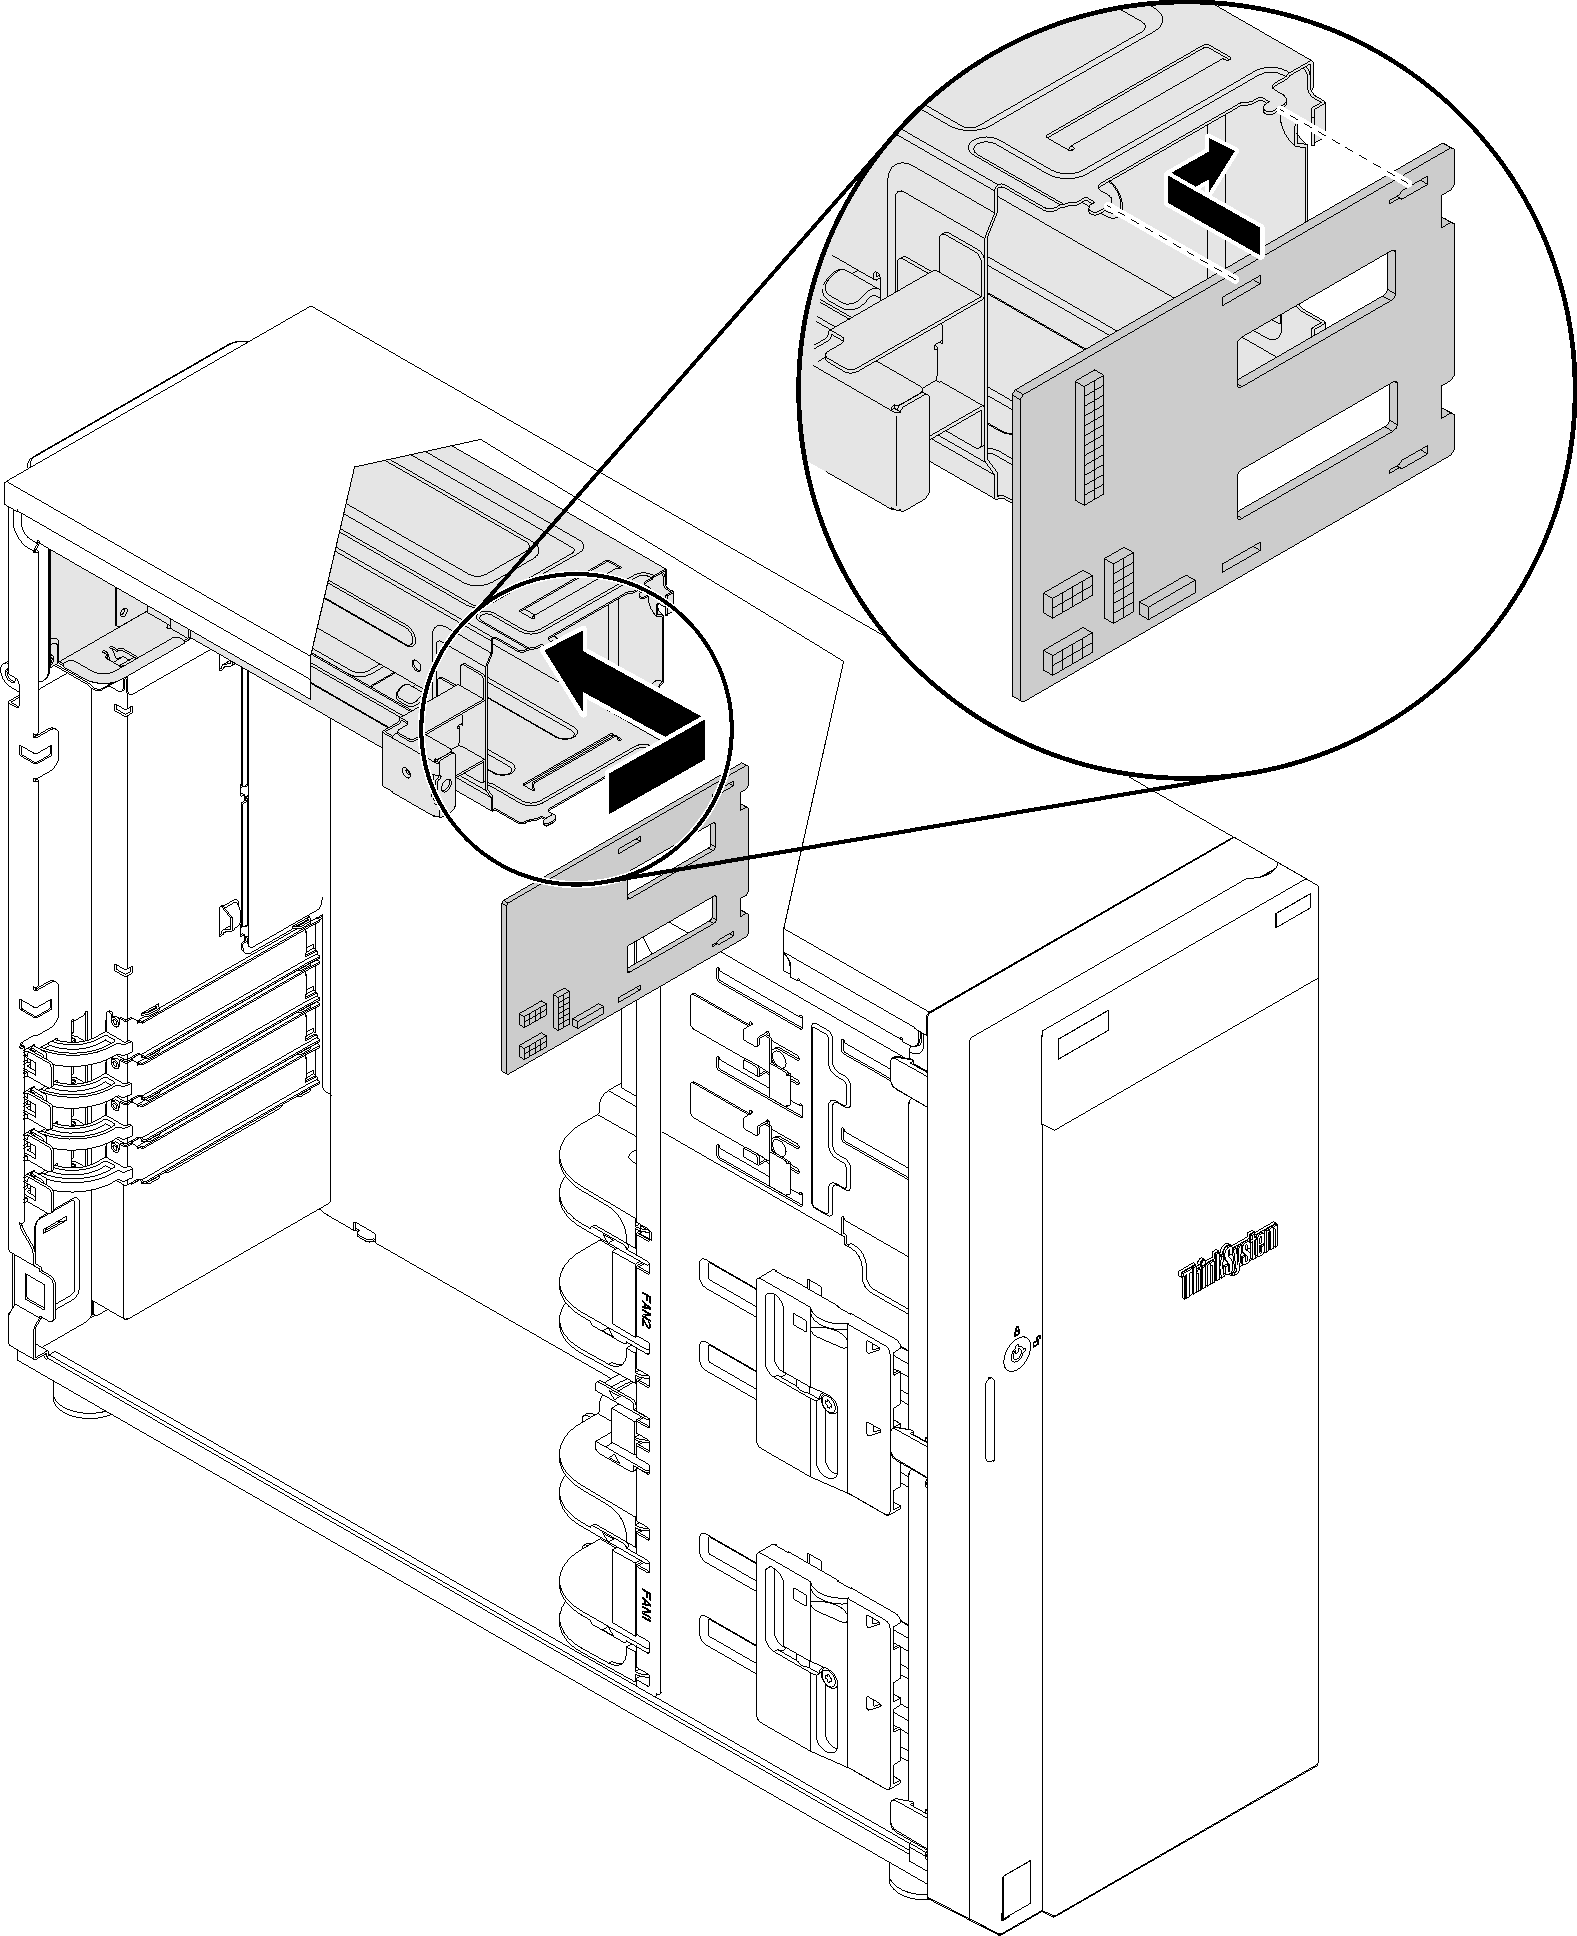
- Hold the power distribution board by its edges and position it to the power supply cage. Ensure that the four tabs on the power supply cage are inserted into the corresponding holes in the power distribution board; then, push the power distribution board inward.Figure 1. Power distribution board installation
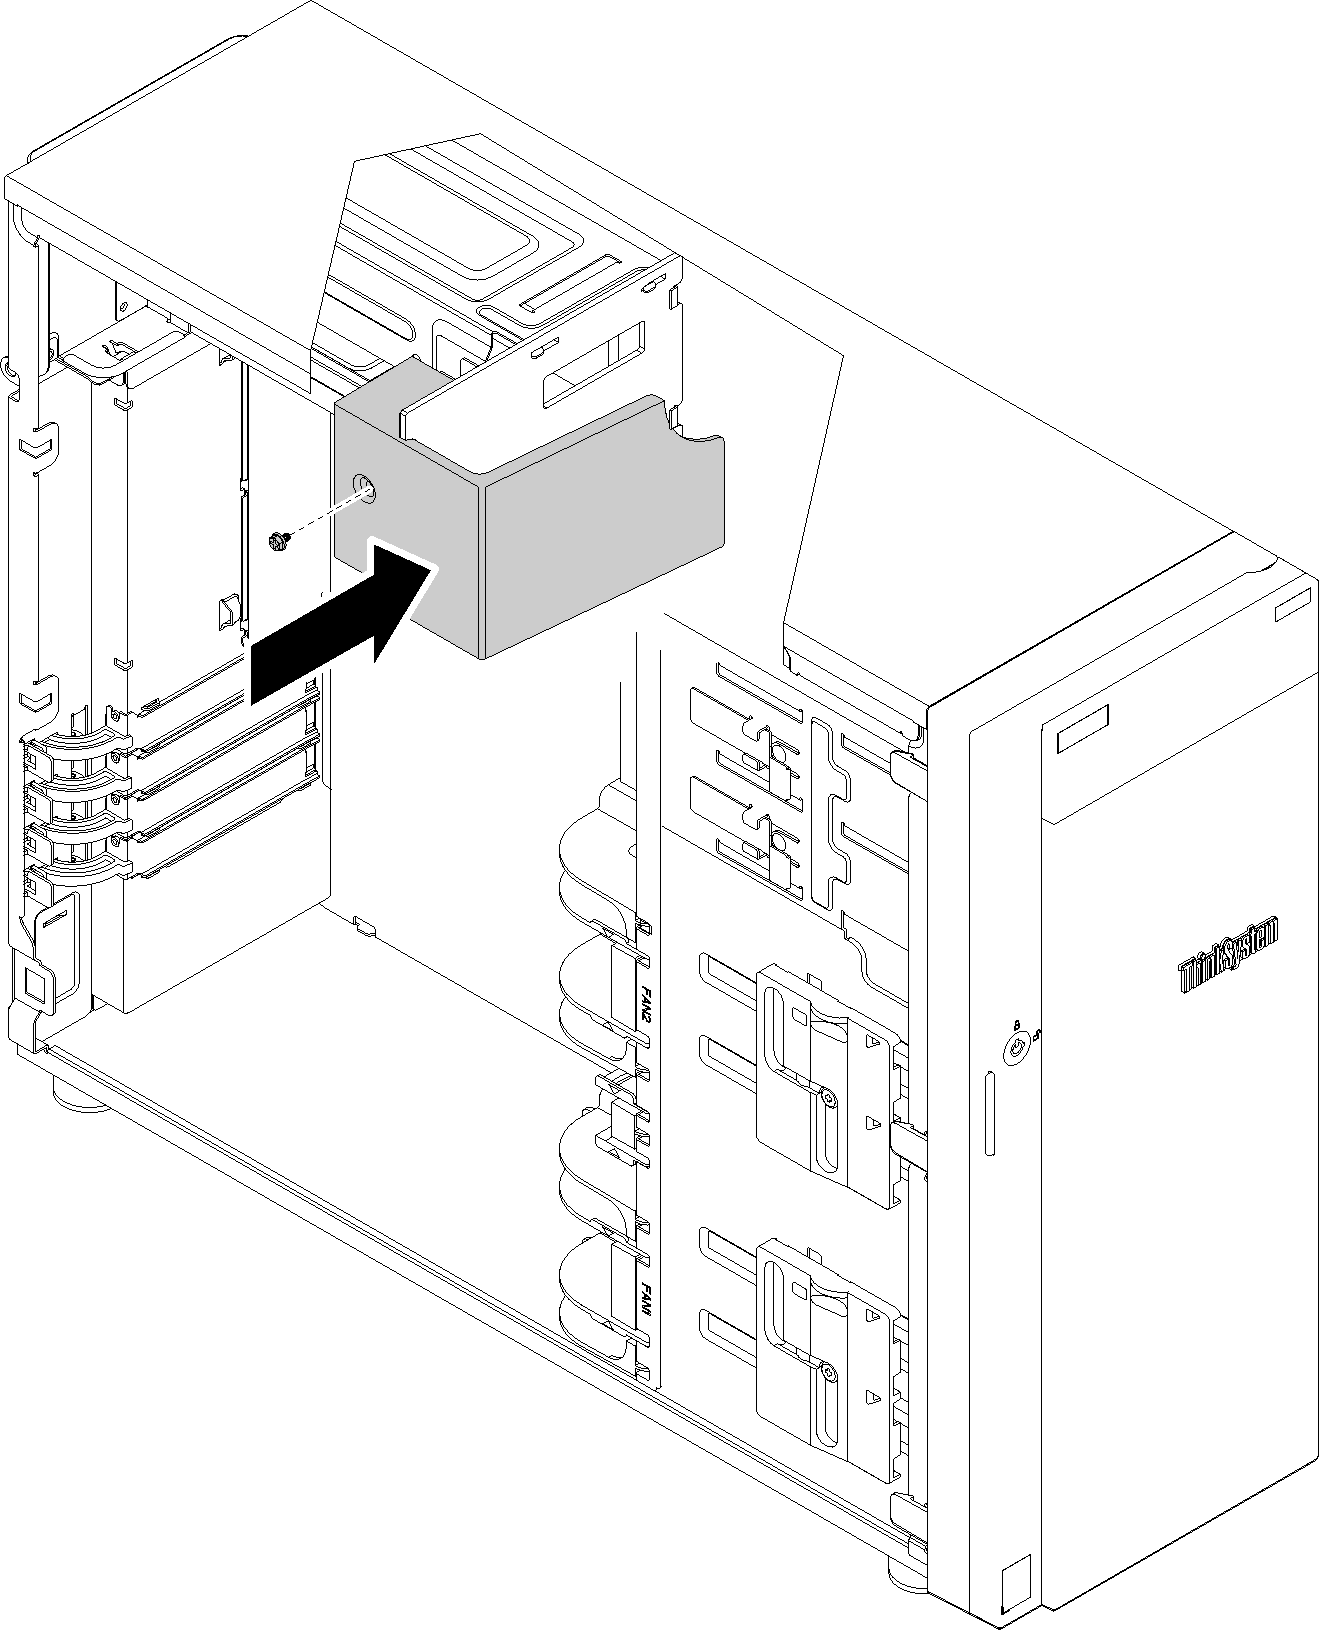
- Ensure that the hole in the power distribution board cover is aligned with the one in the power supply cage; then, install the screw to secure the power distribution board cover.Figure 2. Power distribution board cover installation
After installing the power distribution board:
Complete the parts replacement. See Complete the parts replacement
Demo video
Give documentation feedback