Install the system board
Use this information to install the system board.


Before installing the system board:
Touch the static-protective package that contains the component to any unpainted metal surface on the server; then, remove it from the package and place it on a static-protective surface.
- Tighten the eight screws to secure the system board in place.Figure 1. System board installation (1)
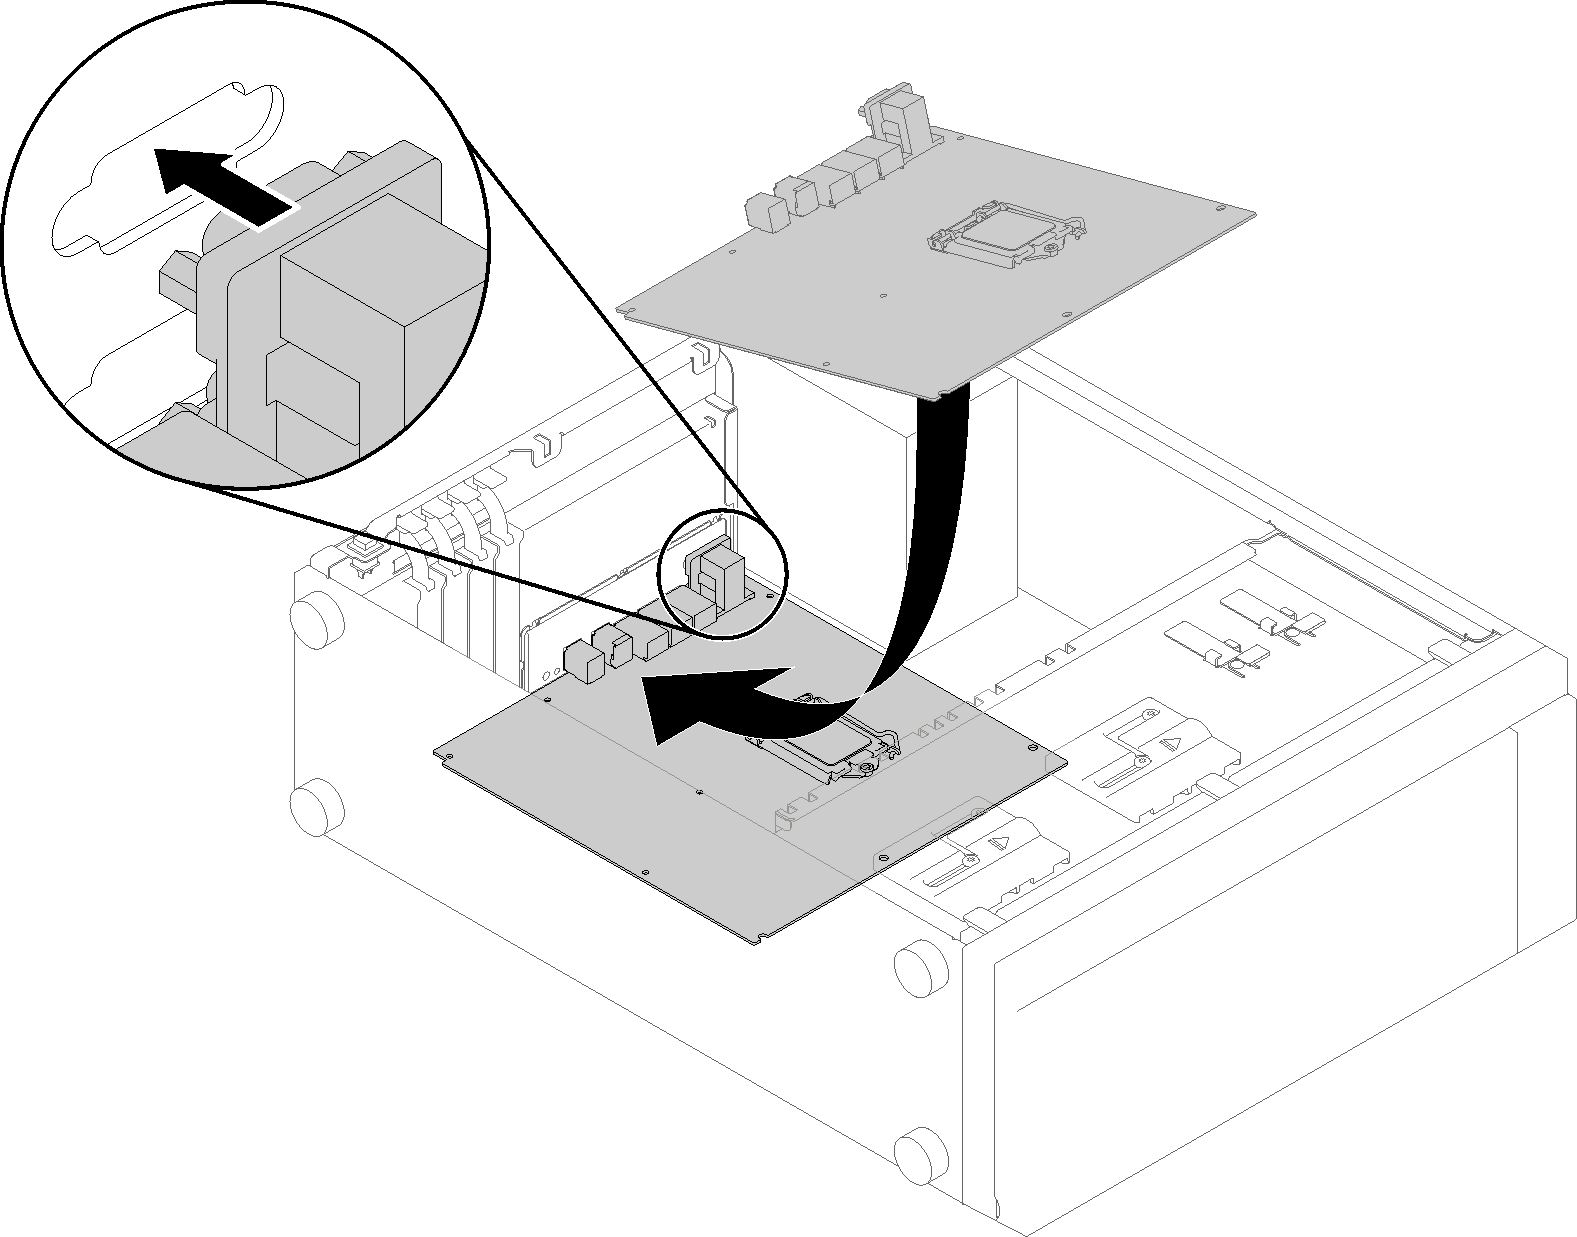 Figure 2. System board installation (2)
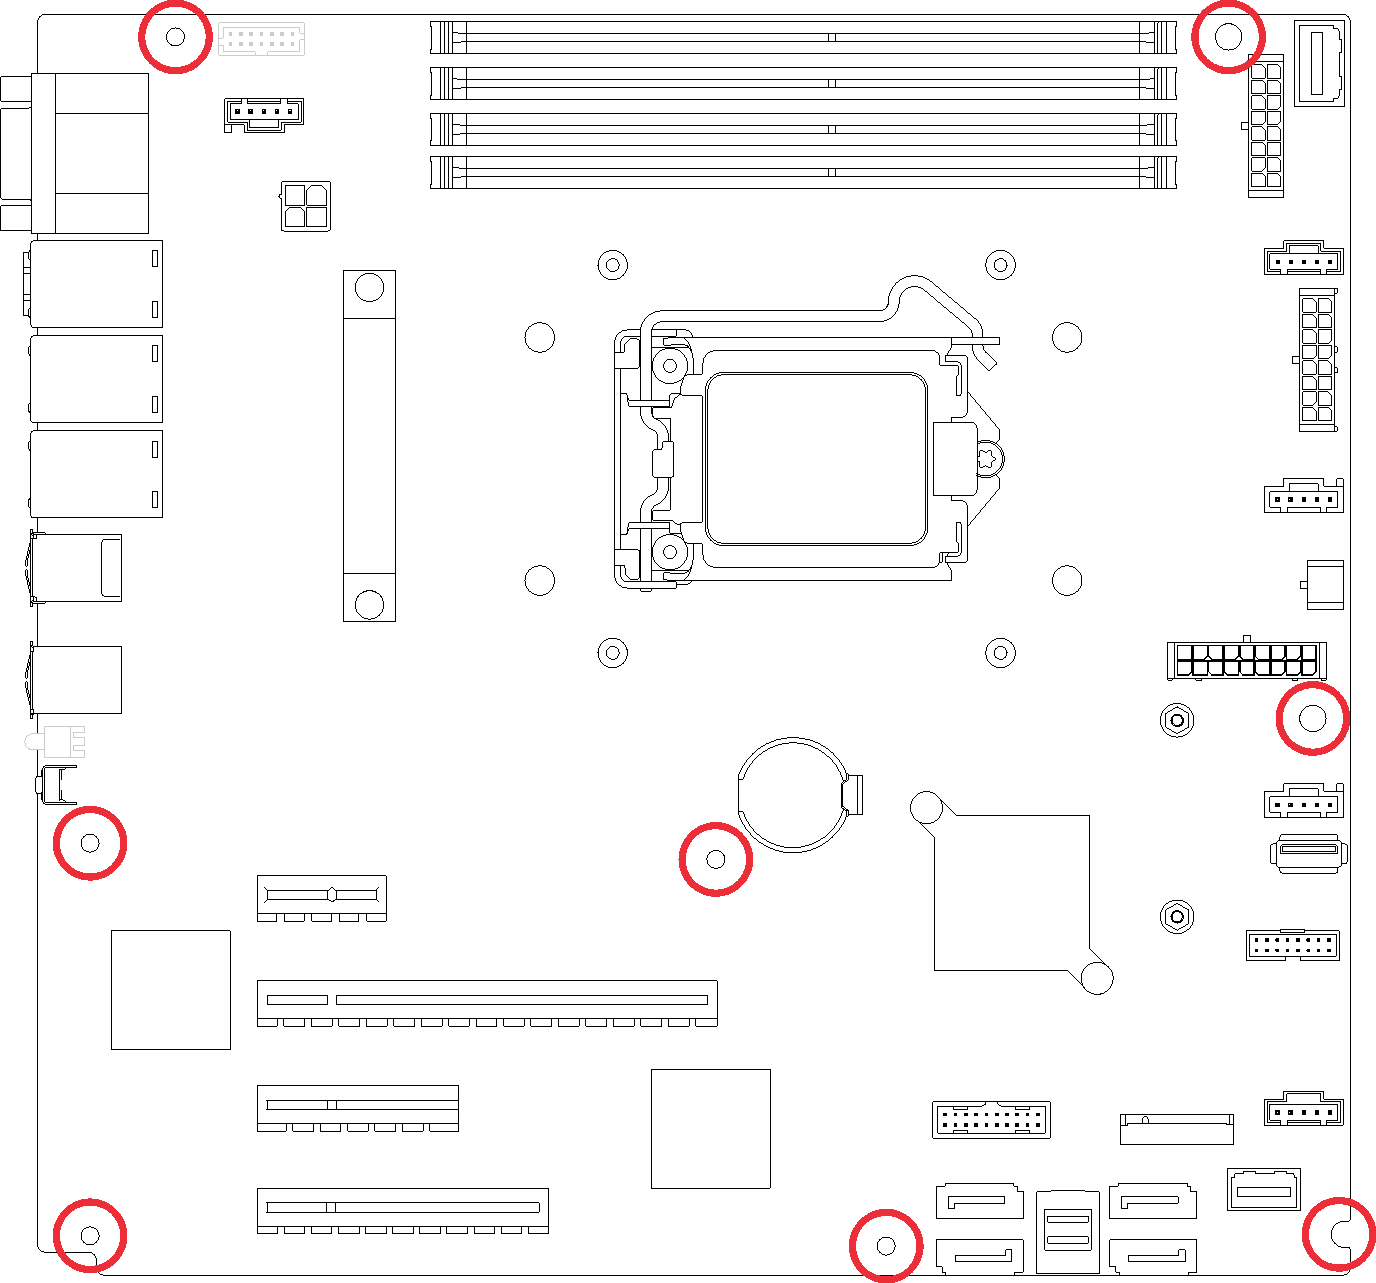
Install any components that you removed from the failing system board. See the related topics in Hardware replacement procedures.
Complete the parts replacement. See Complete the parts replacement
Update the machine type and serial number with new vital product data (VPD). Use the Lenovo XClarity Provisioning Manager to update the machine type and serial number. See Update the machine type and serial number.
Enable TPM/TCM. See Enable TPM/TCM
Optionally, enable Secure Boot. See Enable UEFI Secure Boot.
Demo video