Install the system board (trained technician only)
Follow this procedure to install the system board. This procedure must be executed by a trained technician.


Before installing the system board:
Touch the static-protective package that contains the component to any unpainted metal surface on the server; then, remove it from the package and place it on a static-protective surface.
Install the processor to the system board (see Install the processor).
Install the heat sink and the fan module to the system board (see Install the heat sink and the fan module).
To install the system board, complete the following steps:
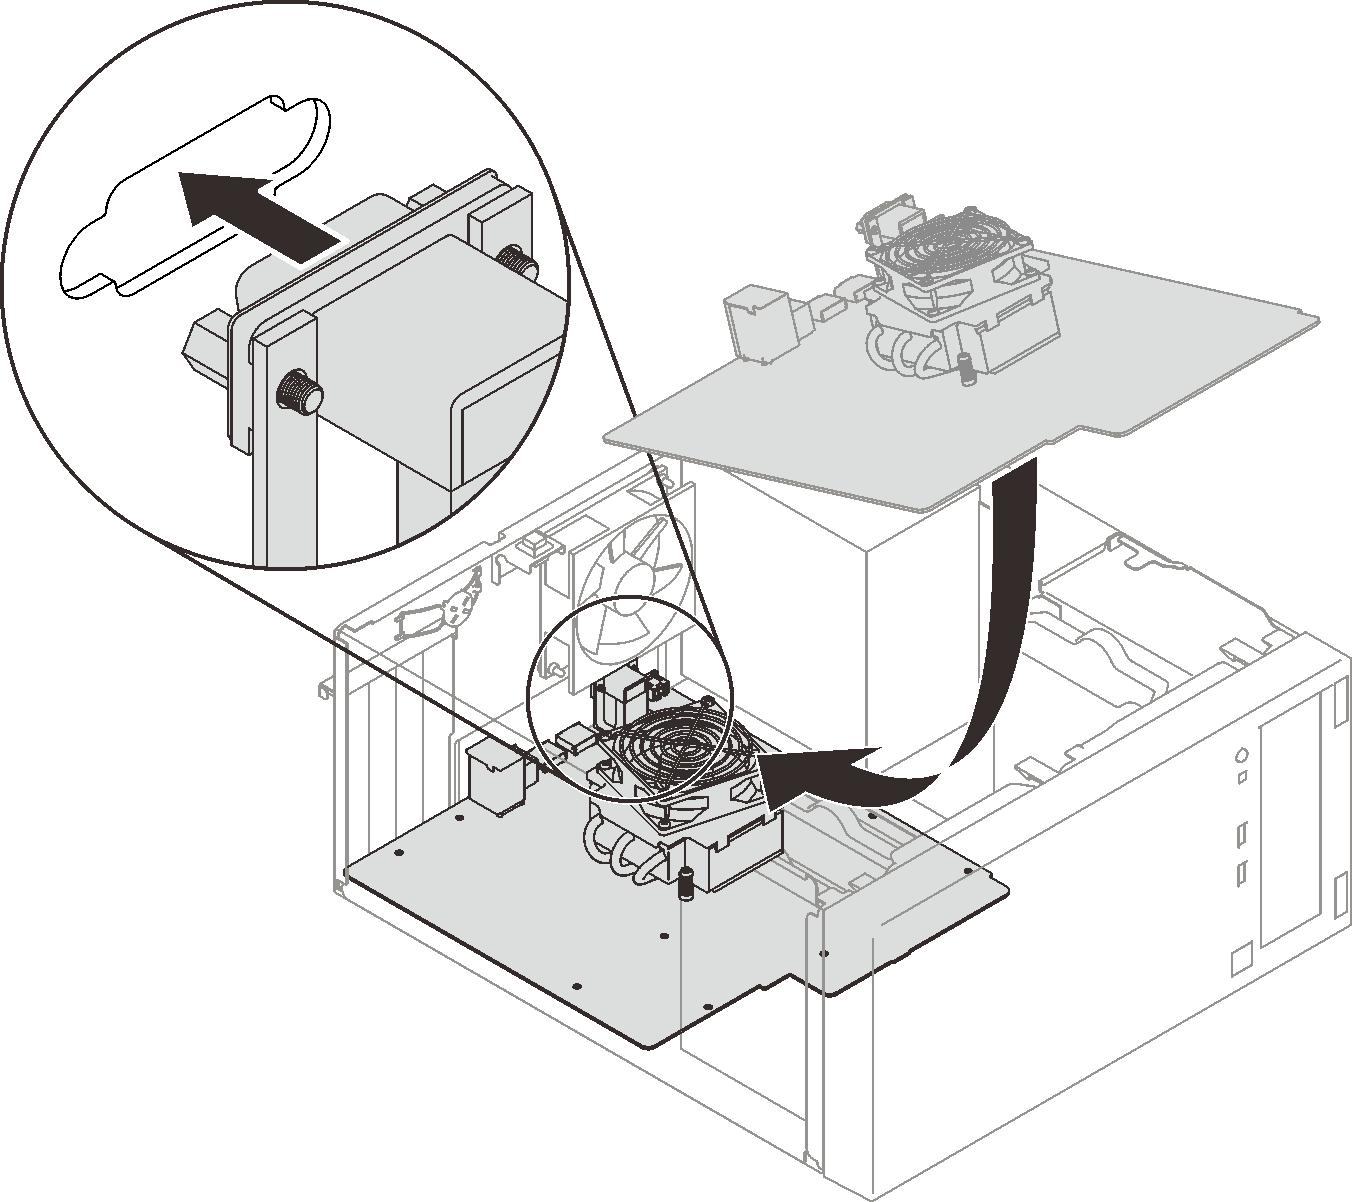
- Align the serial port with the corresponding opening on the rear of the chassis; then, gently lower the system board into the chassis.Figure 1. Installing the system board
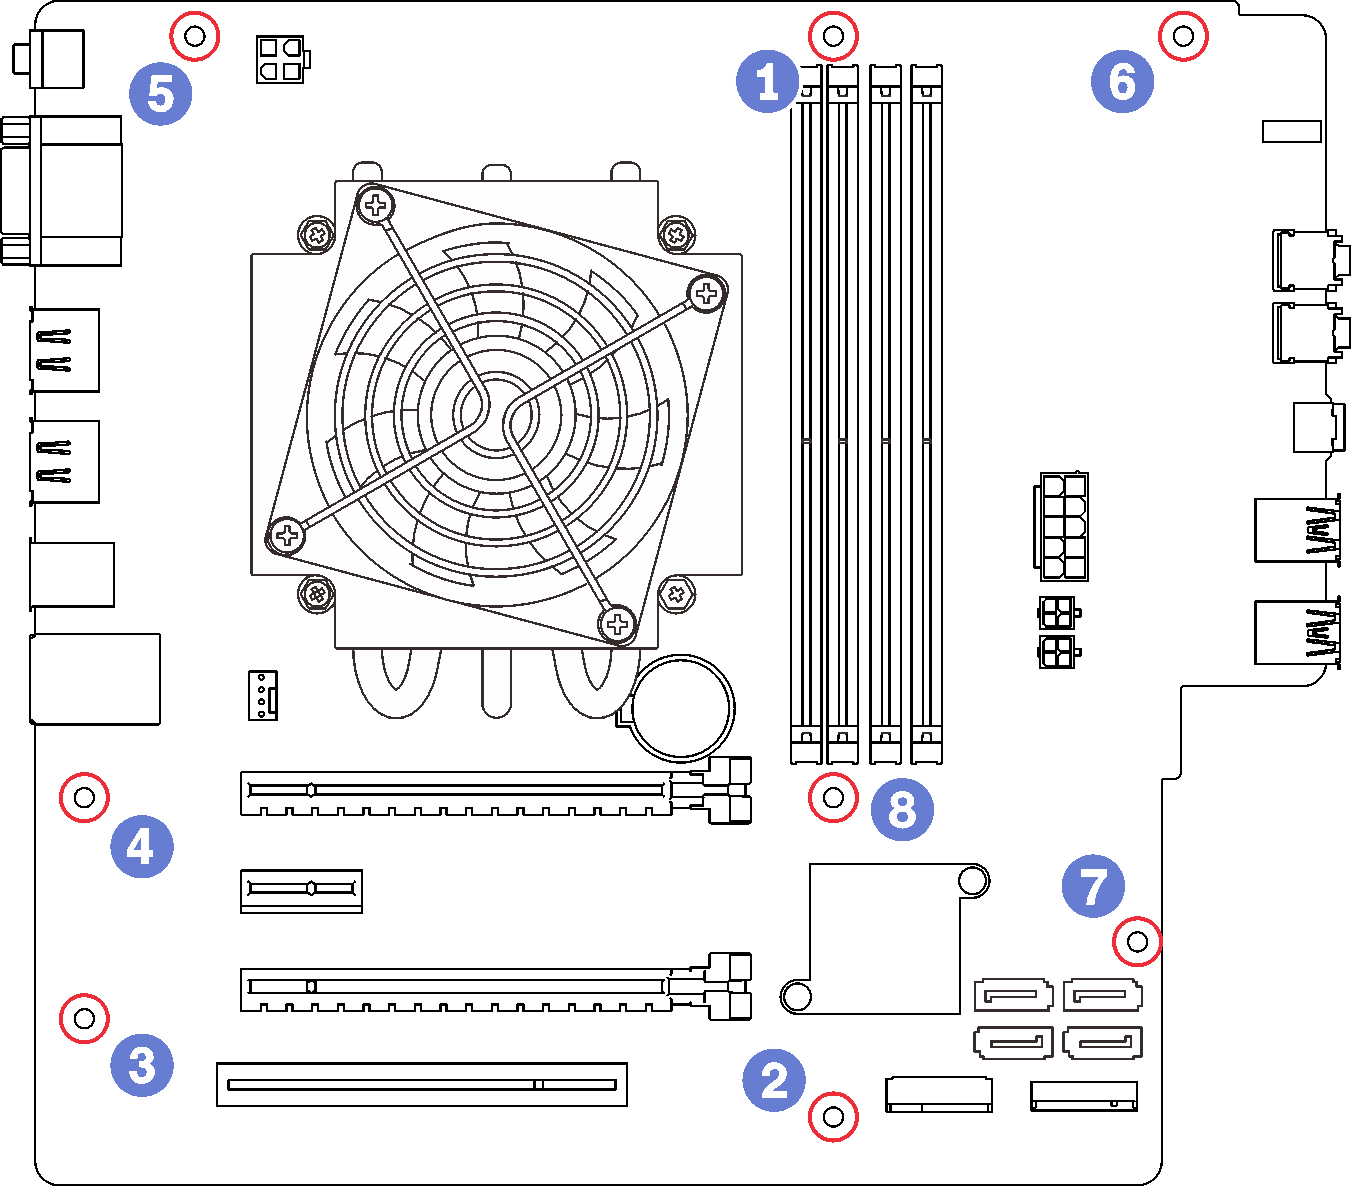
- Secure the system board to the chassis with eight screws in the following order.Figure 2. System board screw installation sequence
Install the CMOS battery if necessary (see Install the CMOS battery).
Install the DIMMs (see Install a DIMM).
Install the PCIe adapters (see Remove a PCIe adapter).
Reconnect all the cables that were disconnected.
Complete the parts replacement. See Complete the parts replacement.
Update VPD (see Update VPD (Vital Product Data)).
Demo video