Install a DIMM
Follow this procedure to install a DIMM.


Locate the DIMM slots and determine DIMM installation order based on DIMM installation rules.
Remove the PCIe adapter installed in slot 1 if necessary (see Remove a PCIe adapter).
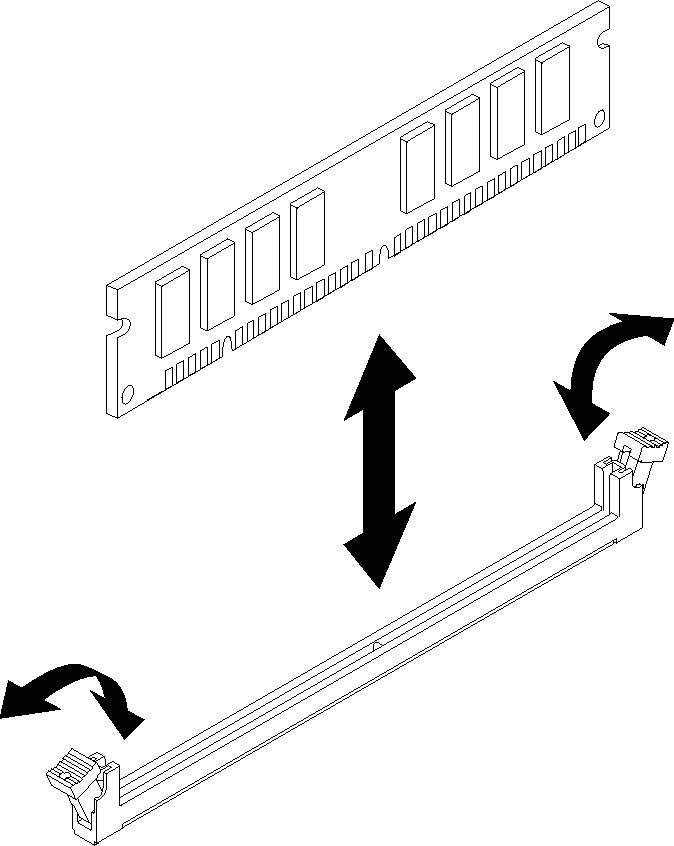
Make sure that both retaining clips on the DIMM connector are in the open position. If not, press and open the retaining clip on both ends of the DIMM slot.
Figure 1. Opening the DIMM retaining clips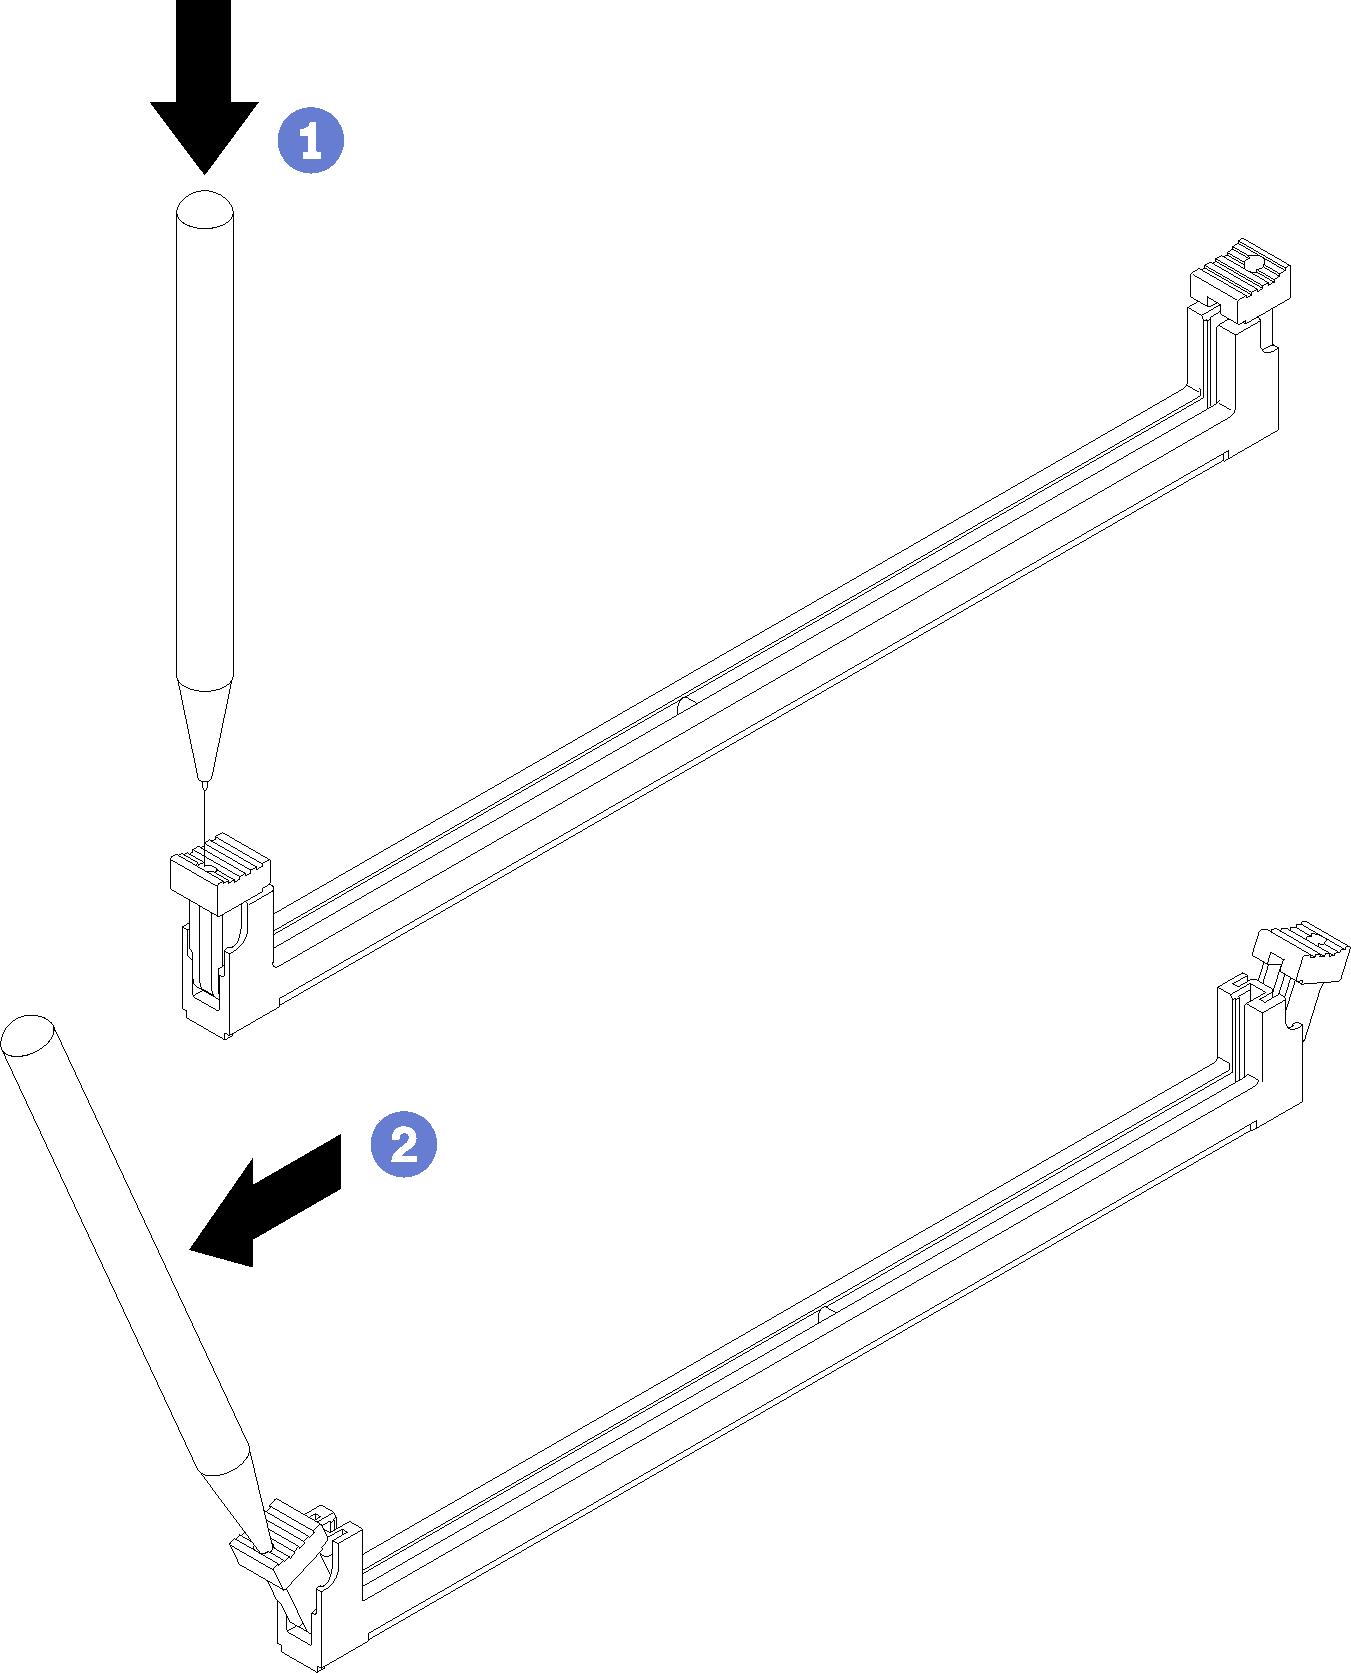 NoteIn the case of space constraints, use a pointed tool to open the retaining clips. Place the tip of the tool in the recess on the top of the retaining clip; then, carefully pivot the retaining clip away from the center of the DIMM connector.
Touch the static-protective package that contains the component to any unpainted metal surface on the server; then, remove it from the package and place it on a static-protective surface.
Always wear an electrostatic-discharge strap when removing or installing DIMMs. Electrostatic-discharge gloves can also be used.
Keep each DIMM separated from one another. Do not stack DIMMs directly on top of each other during storage.
Keep the gold DIMM connector contacts from touching anything.
Handle DIMMs with care: never bend, twist, or drop a DIMM.
To install a DIMM, complete the following steps:
After installing a DIMM:
Install other DIMMs if necessary.
If the PCIe adapter in slot 1 was removed, install it (see Install a PCIe adapter).
Proceed to complete the parts replacement (see Complete the parts replacement).
Reconfigure the DIMMs if necessary.
Demo video