Install the expansion drive cage
Use this information to install the expansion drive cage.


If there is a filler, an optical drive, or a tape drive installed in the bay, remove it. Keep the filler in a safe place for future use. For instructions on how to remove the optical drive or tape drive, see Remove an optical drive or a tape drive.
Touch the static-protective package that contains the new expansion drive cage to any unpainted surface on the outside of the server. Then, take the new expansion drive cage out of the package and place it on a static-protective surface.
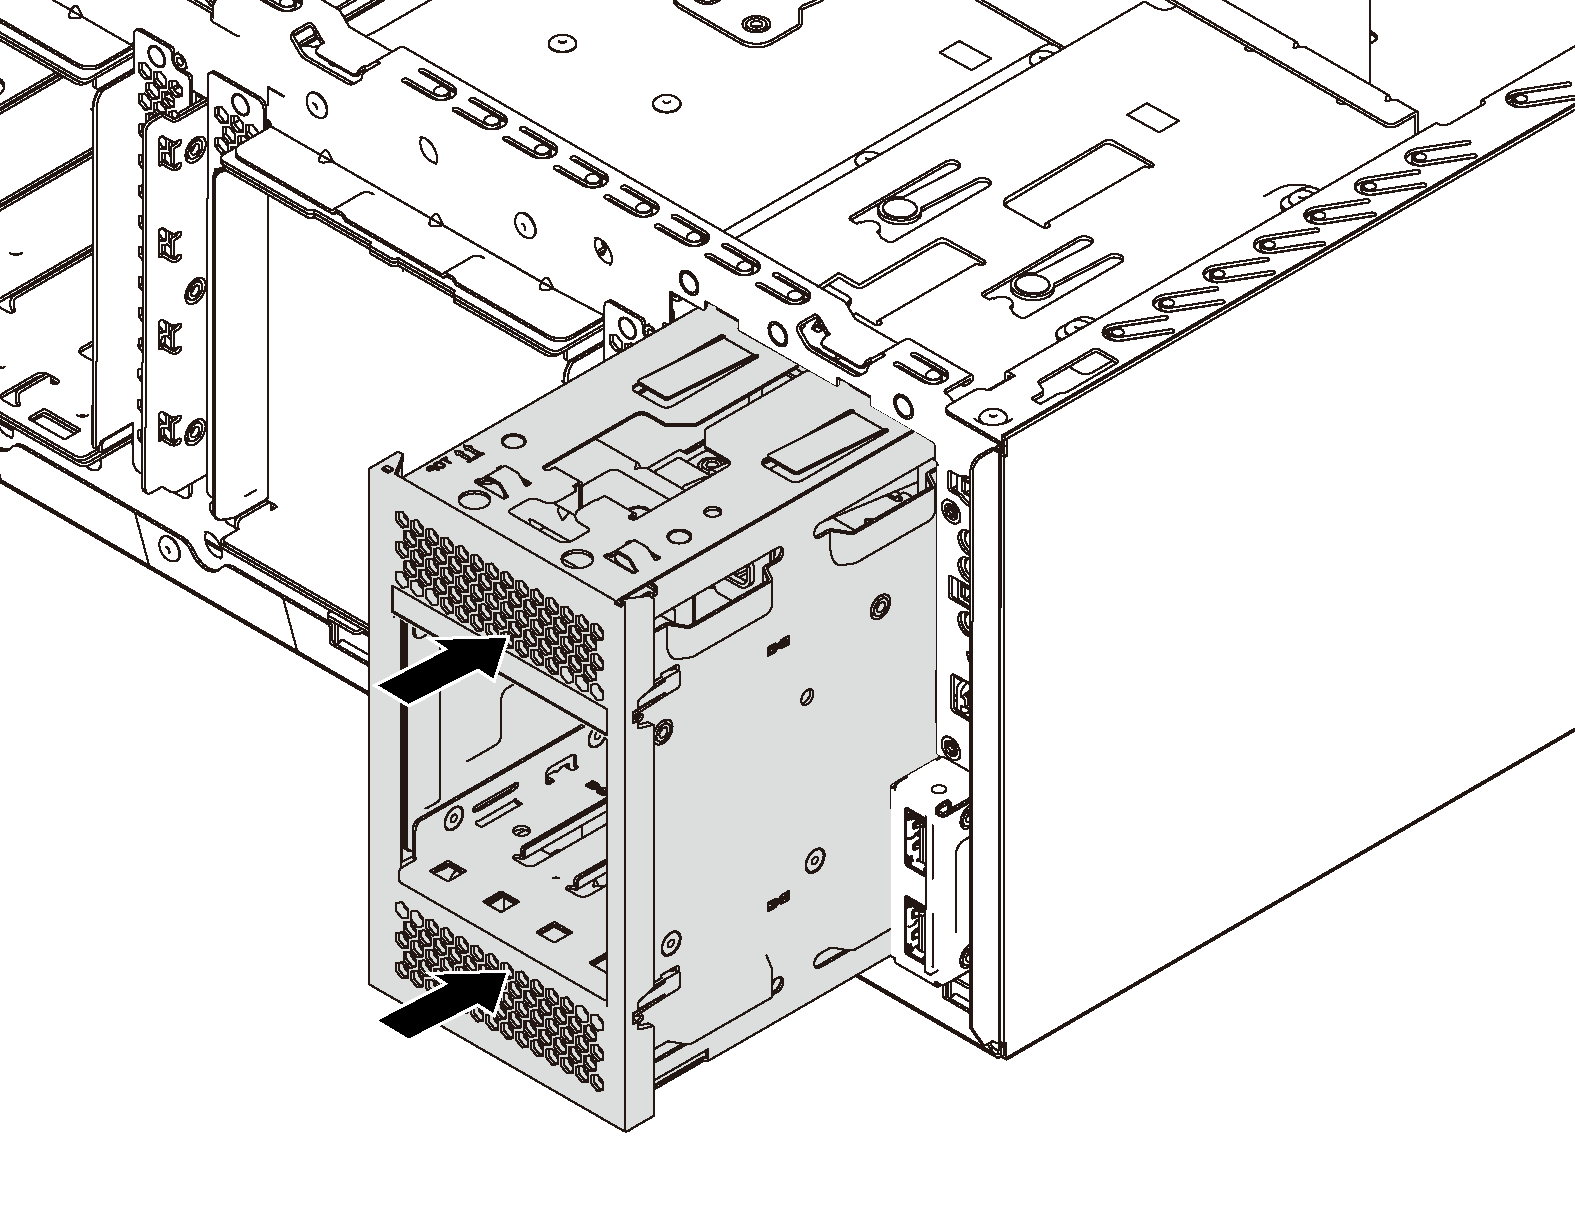
To install the expansion drive cage, complete the following step:
Ensure that the signal cables are secured by the clips 1 and are bound correctly by the Velcro strap.
Figure 2. Securing and binding the signal cables correctly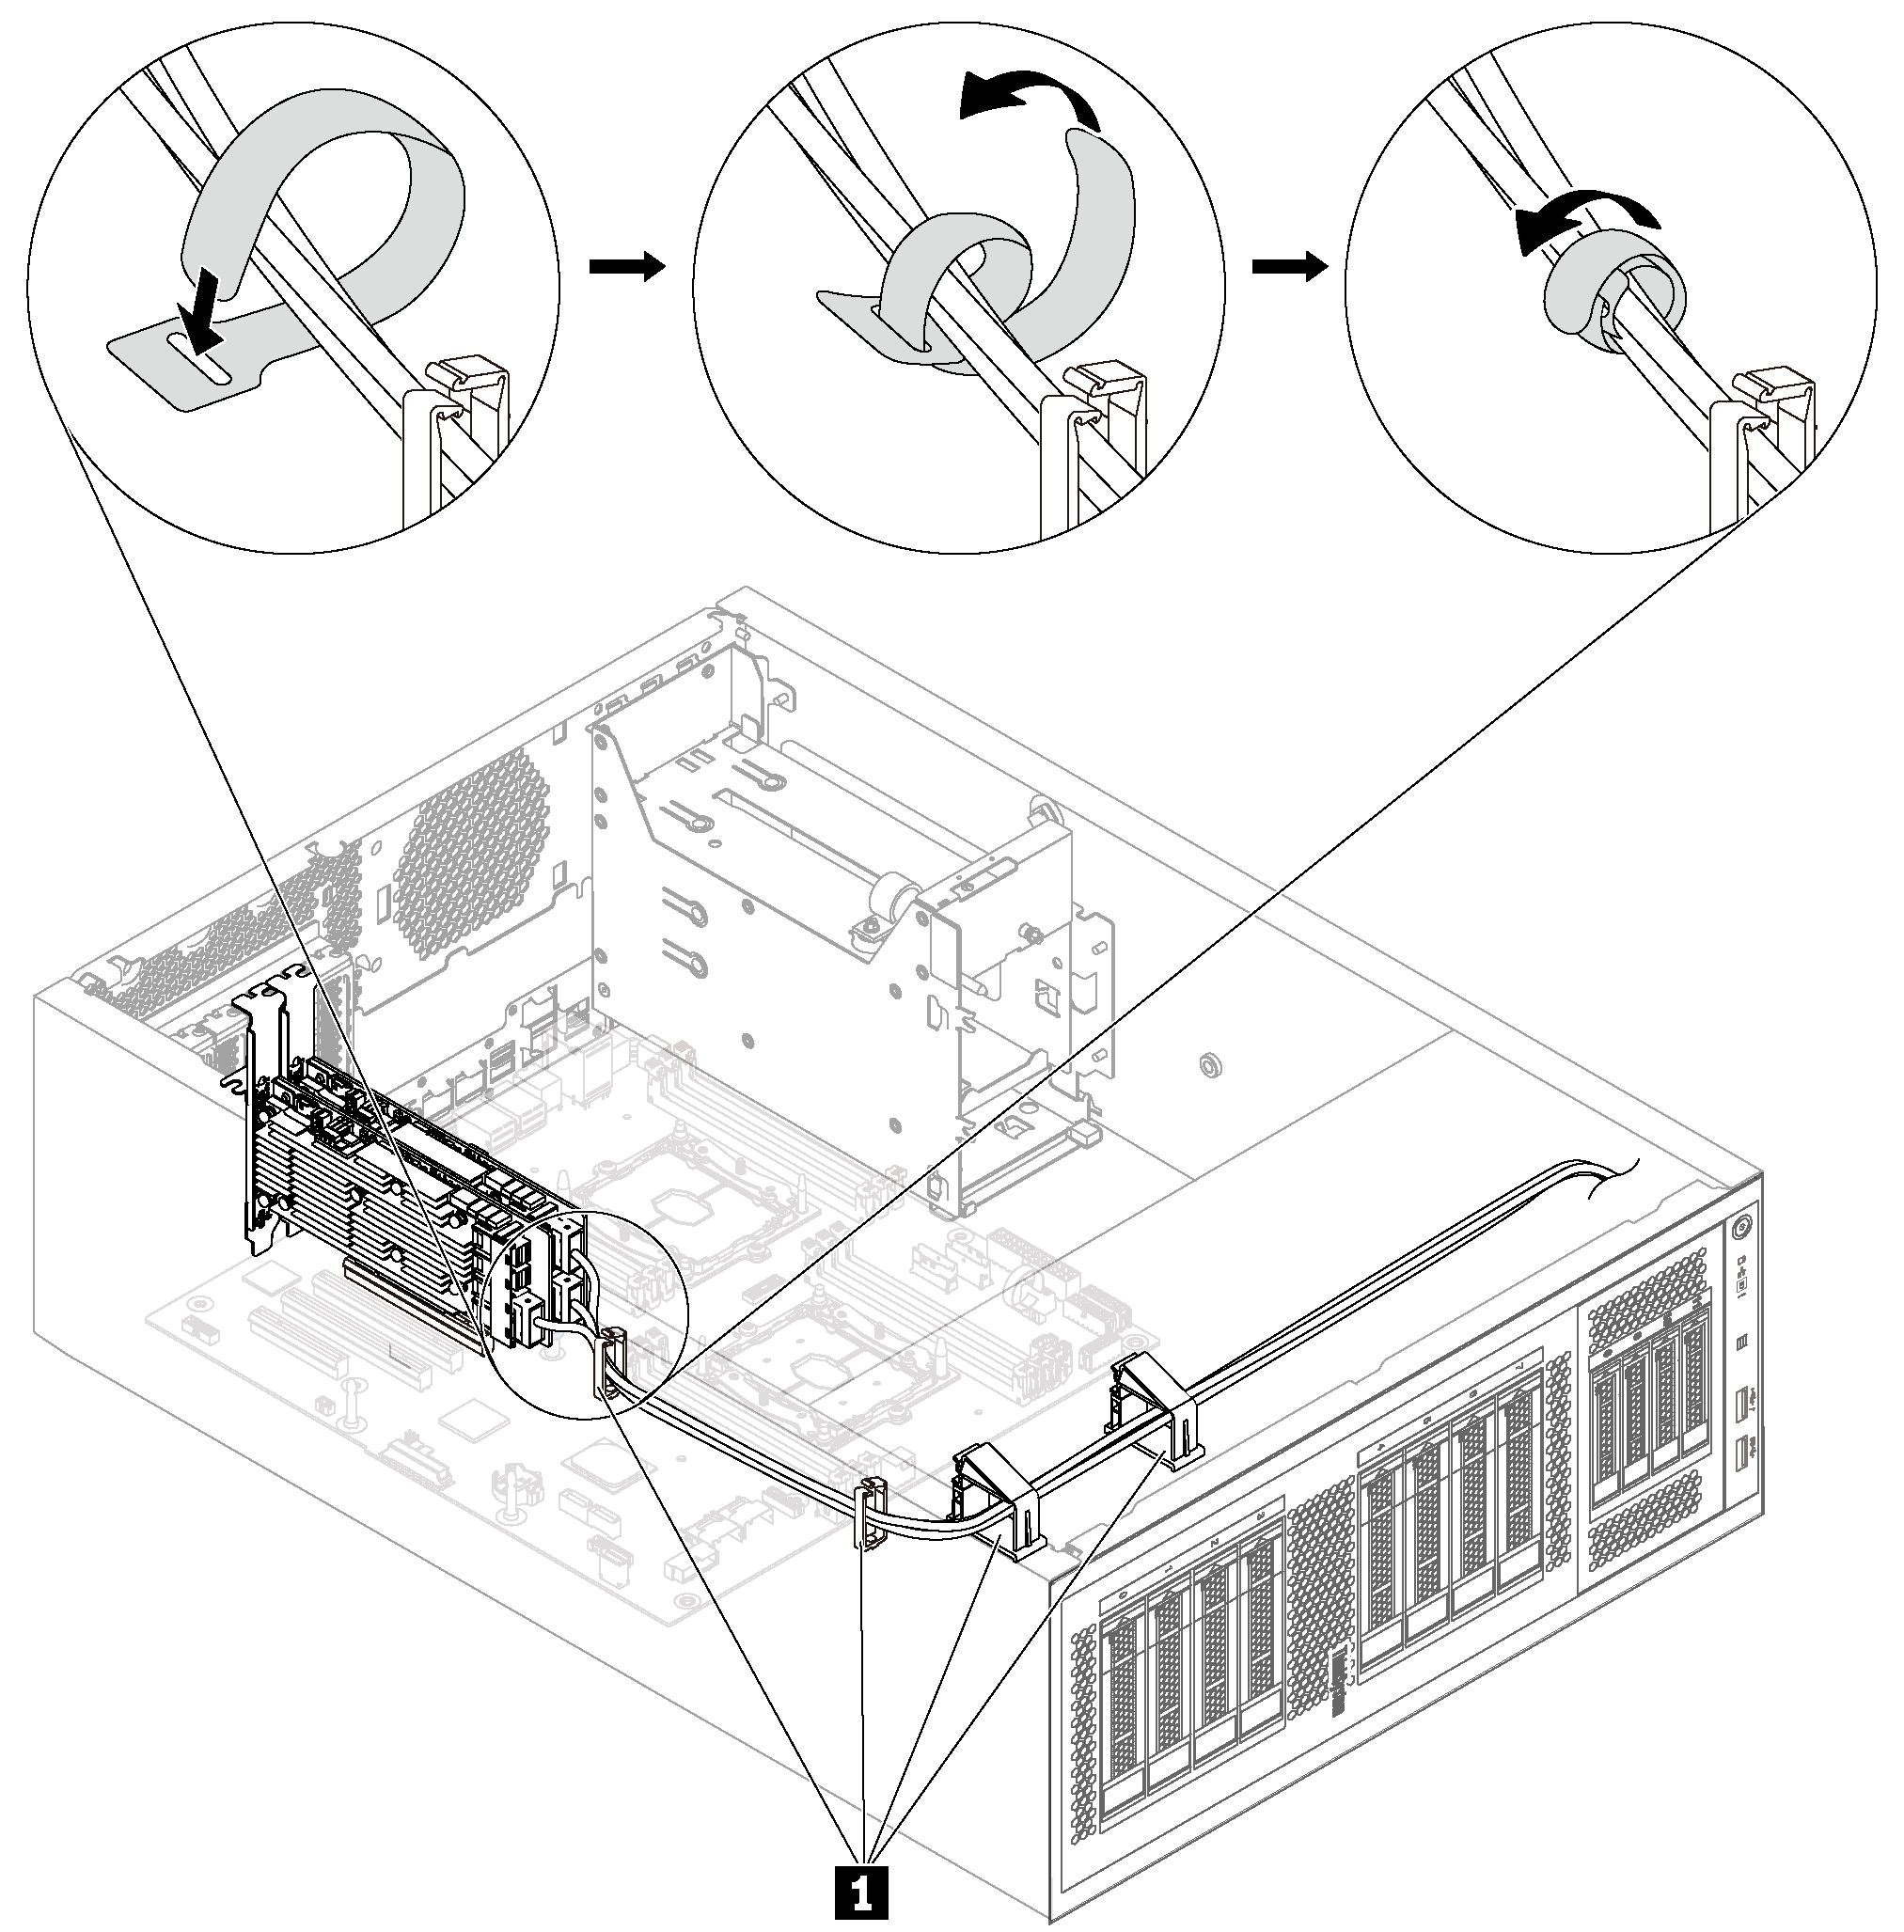
Complete the parts replacement. See Complete the parts replacement.