Remove an optical drive or a tape drive
Use this information to remove an optical drive or a tape drive.


If the server is installed in a rack, extend the server from the rack.
Remove the server cover. See Remove the server cover.
If your server has the front door installed, remove the front door. See Remove the front door.
Remove the front bezel. See Remove the front bezel.
Remove the air baffle. See Remove the air baffle.
If the Fan 3 impedes your access to the optical drive or tape drive, remove it. See Remove a front fan.
To remove an optical drive or a tape drive, complete the following steps:
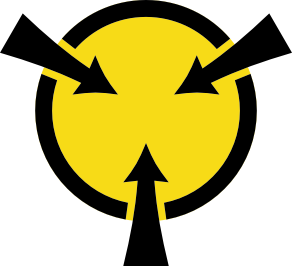
- Press and hold the release tab and push the optical drive or the tape drive forward to remove it from the chassis.Figure 1. Optical drive removal
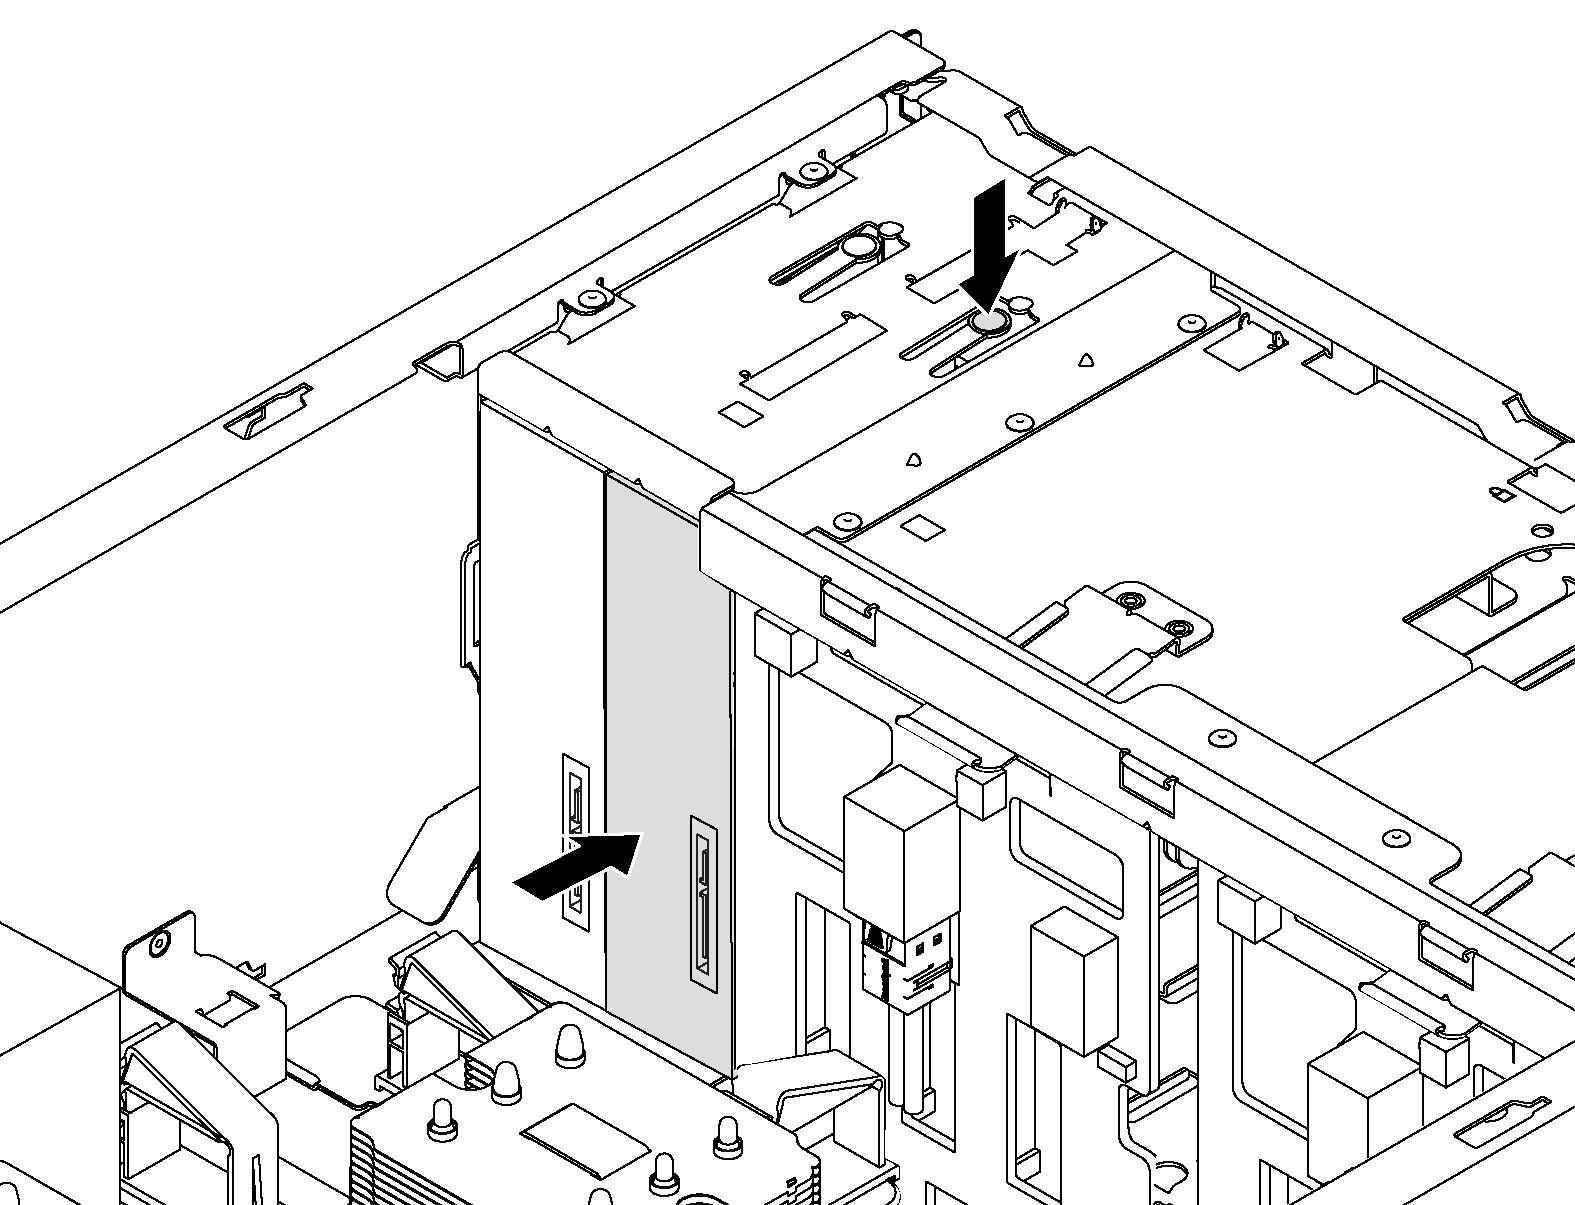
- Install a new optical drive or tape drive, or install a filler to cover the drive bay. To install a new optical drive or a tape drive, see Install an optical drive or a tape drive. To install a filler, complete the following steps:
Insert the filler to the vacant drive bay.
Figure 2. Drive bay filler installation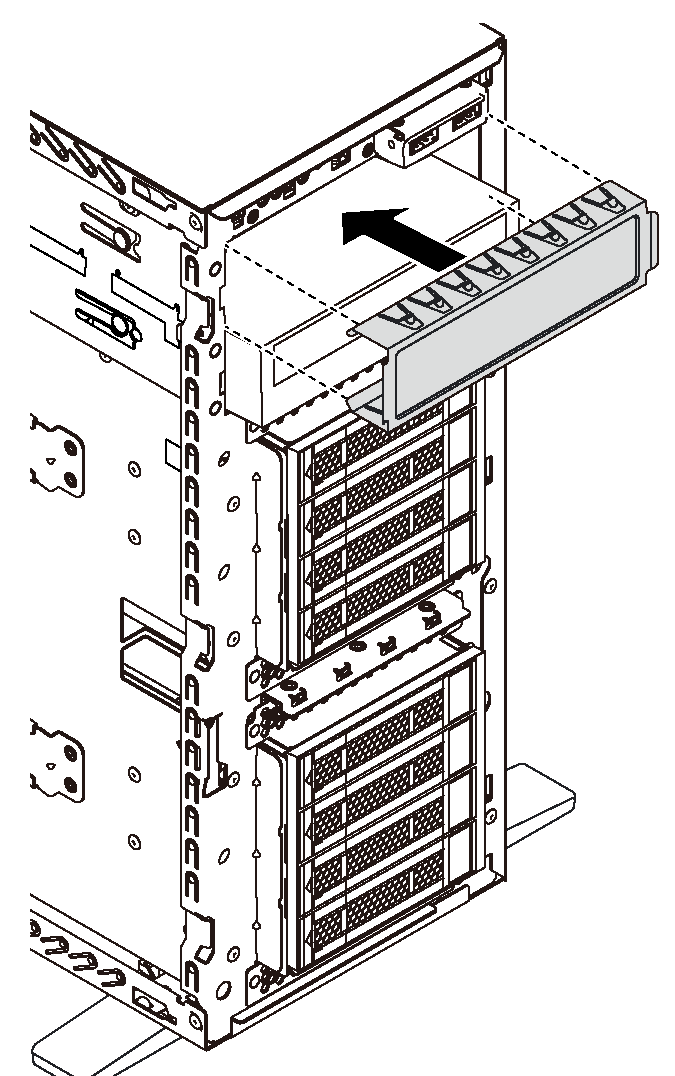
Install the cover of the drive bay filler to the front bezel. Then, install the front bezel to the chassis.
Figure 3. Drive-bay-filler cover installation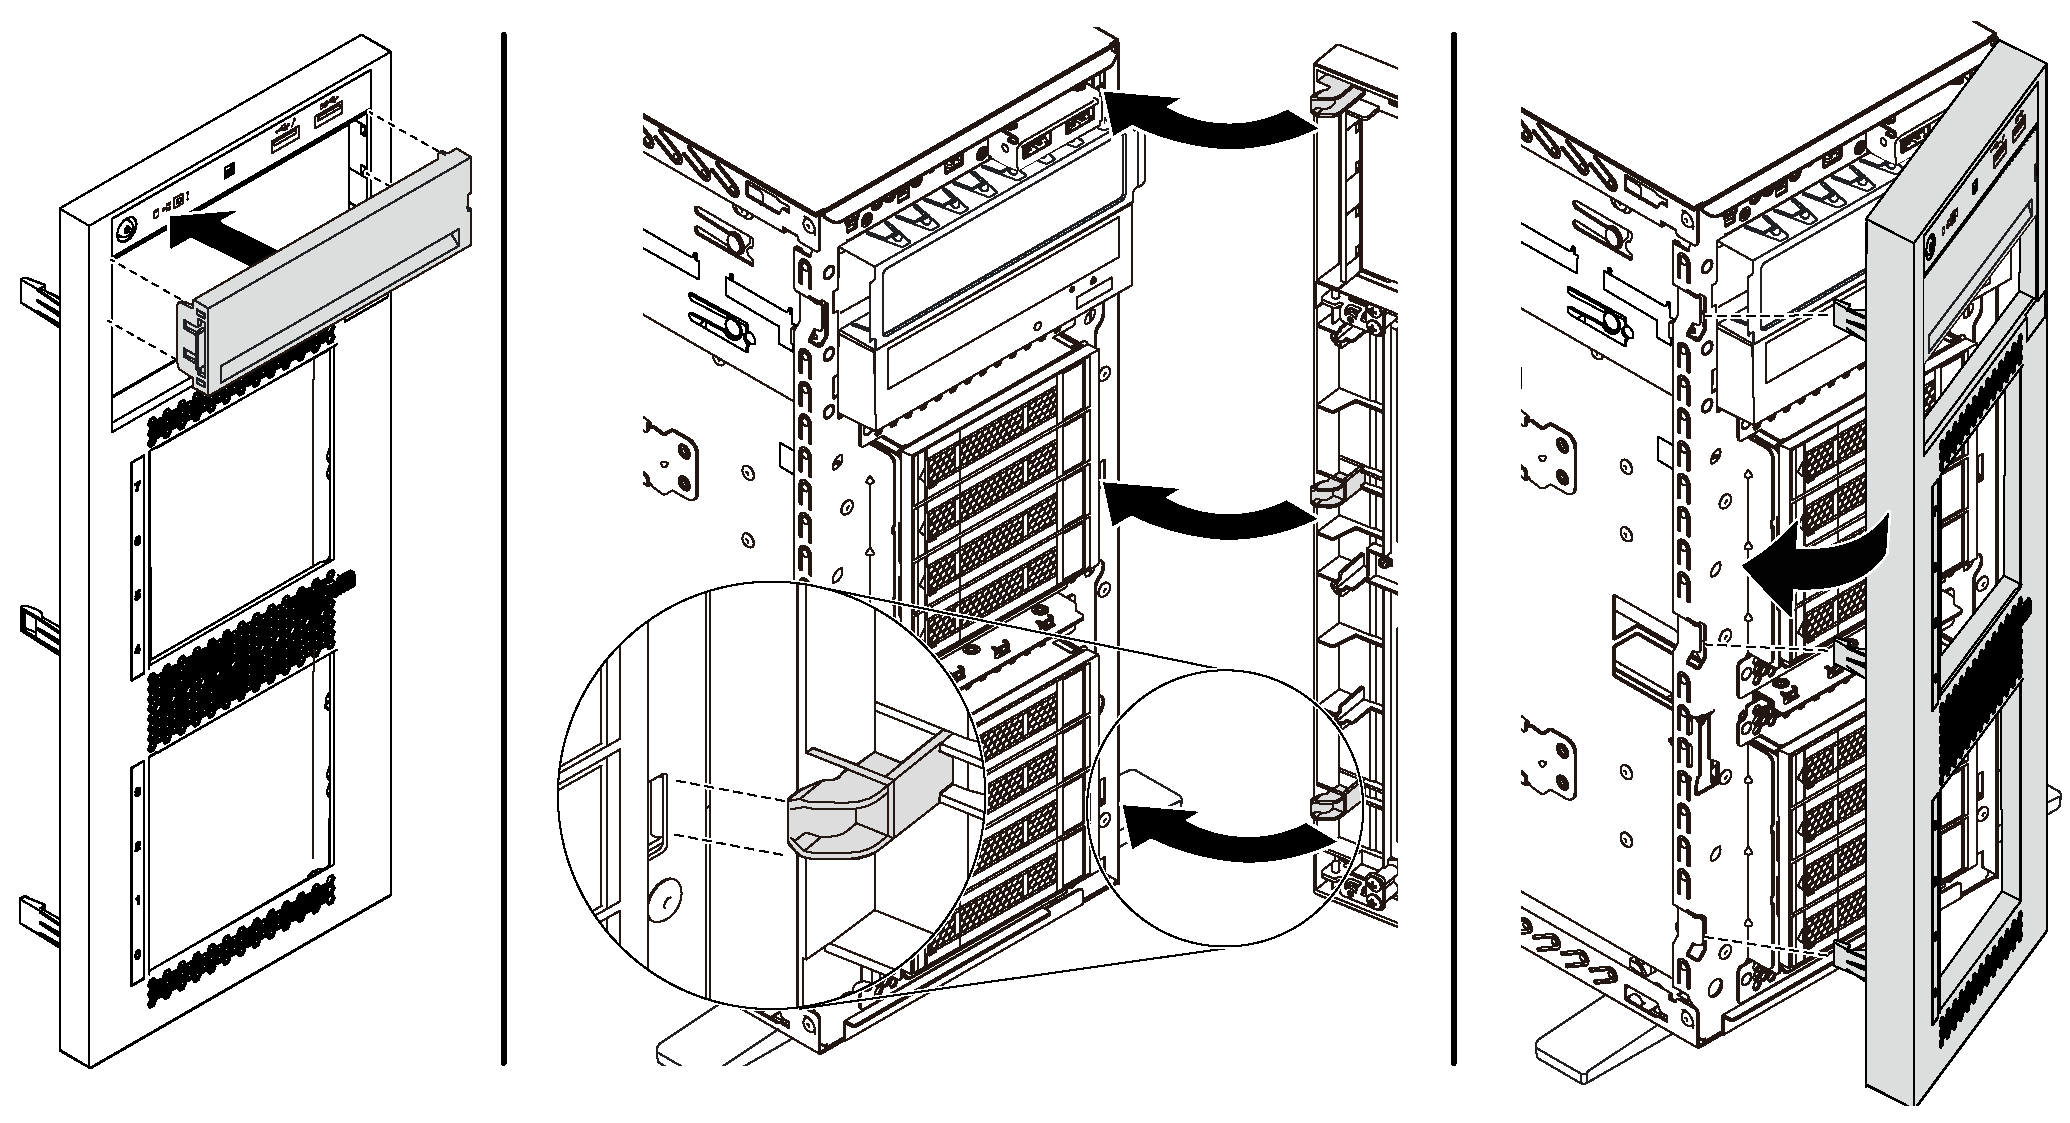
Remove the retainer from the removed optical drive or tape drive, and then install the retainer to the chassis.
Figure 4. Drive retainer installation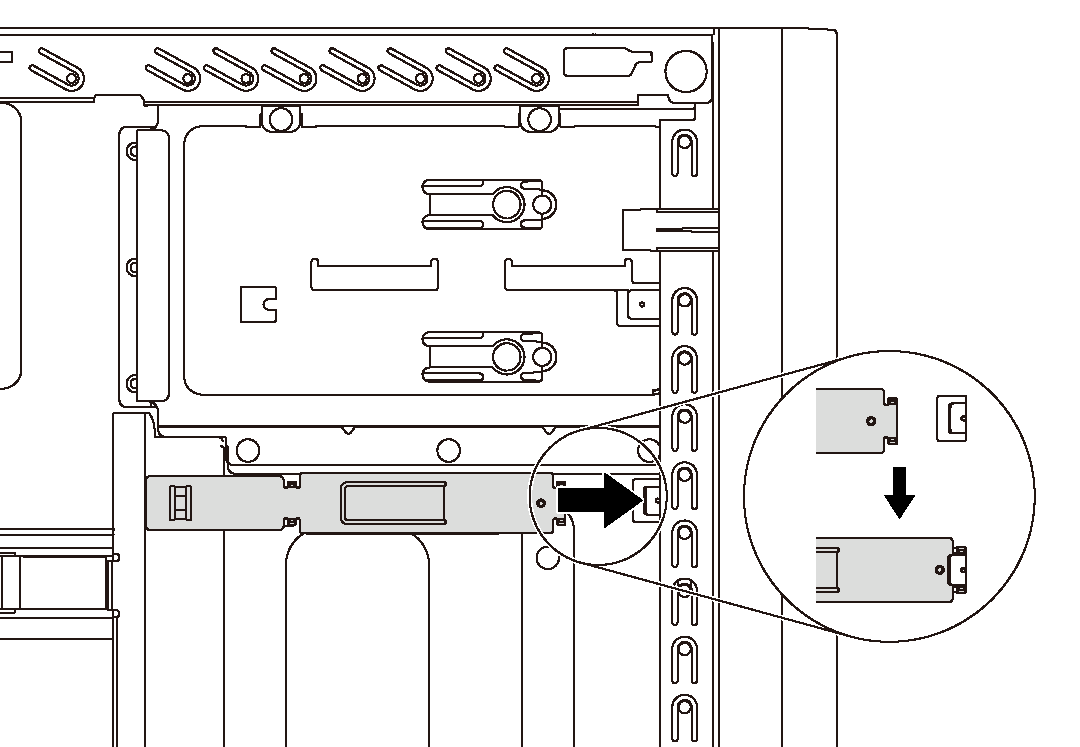
If you are instructed to return the old optical drive or tape drive, follow all of the packaging instructions and use any packaging materials that are provided.