Install the rails to the rack
See this section to learn how to install the rails to the rack.
Note
For tower server installation, apply the latch and rail covers to the rails before rack installation. For cover installation and other tower to rack conversion kit instructions, refer to the Setup Guide for your tower server.
Procedure
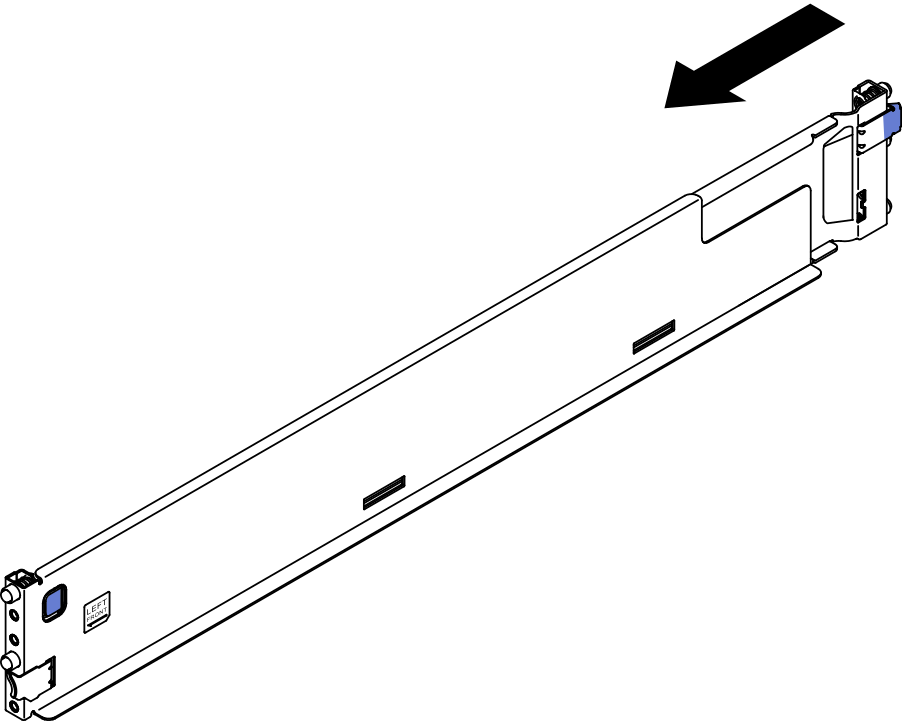
- Grab the rear end of one rail and compress it to the minimal length.Figure 1. Compressing rail
- Align the posts, that are extending from the rear end of the rail, to the holes in the rear EIA flanges; then, push the rail until the latch clicks into place around the edge of the EIA flange.Figure 2. Installing rear end of rail
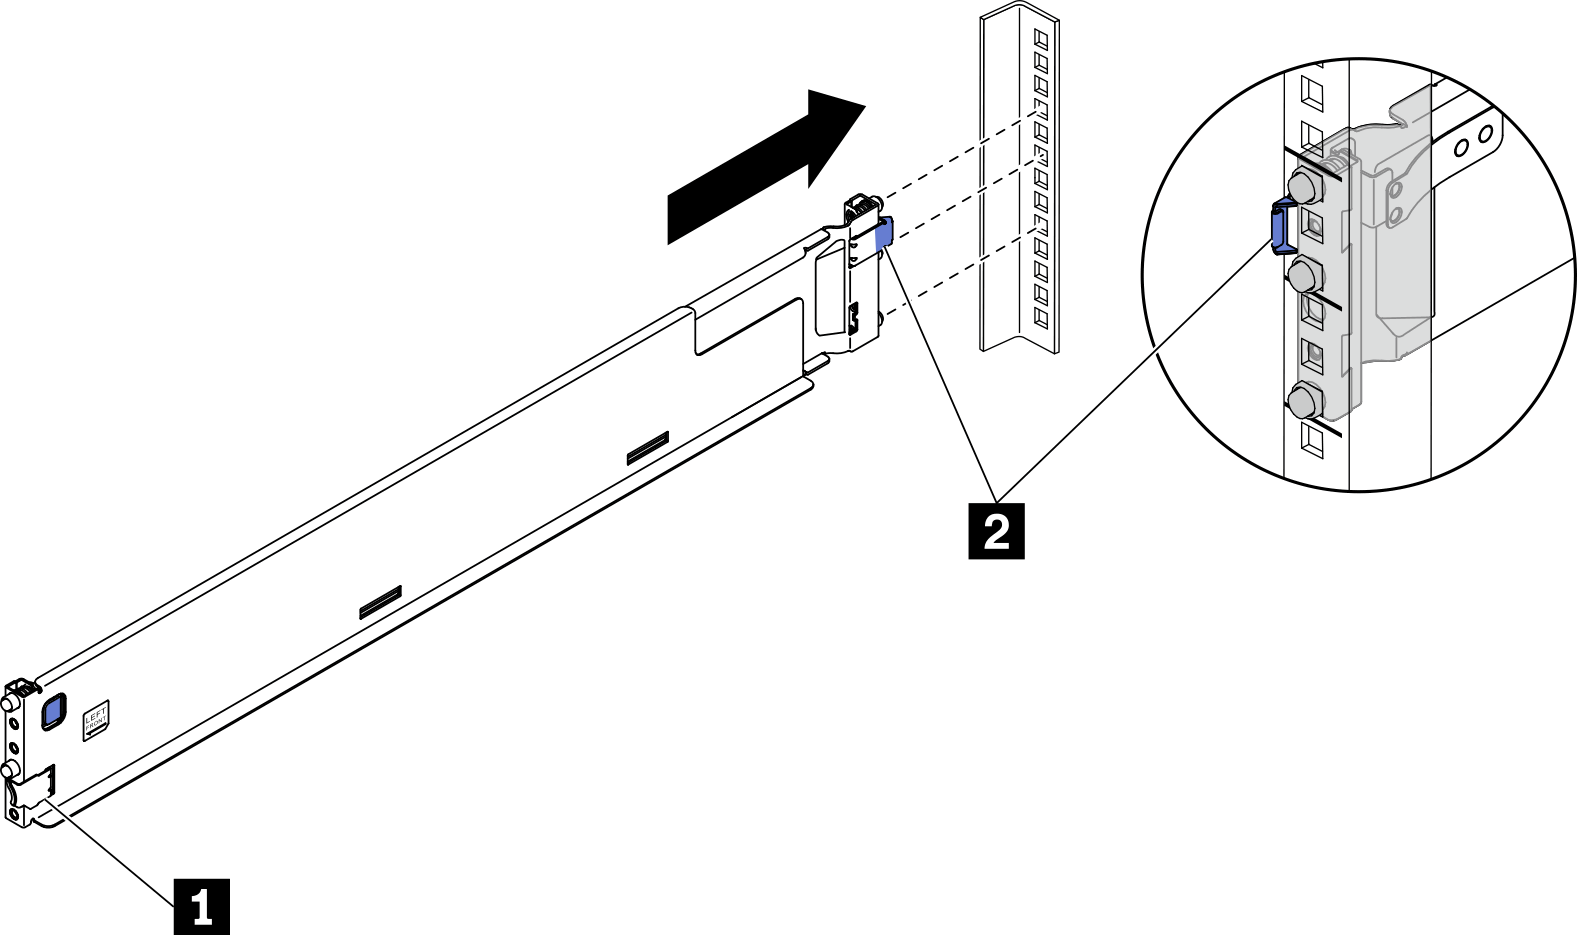
1 Front latch 2 Rear latch - Install the front end of the rail.Figure 3. Installing front end of rail
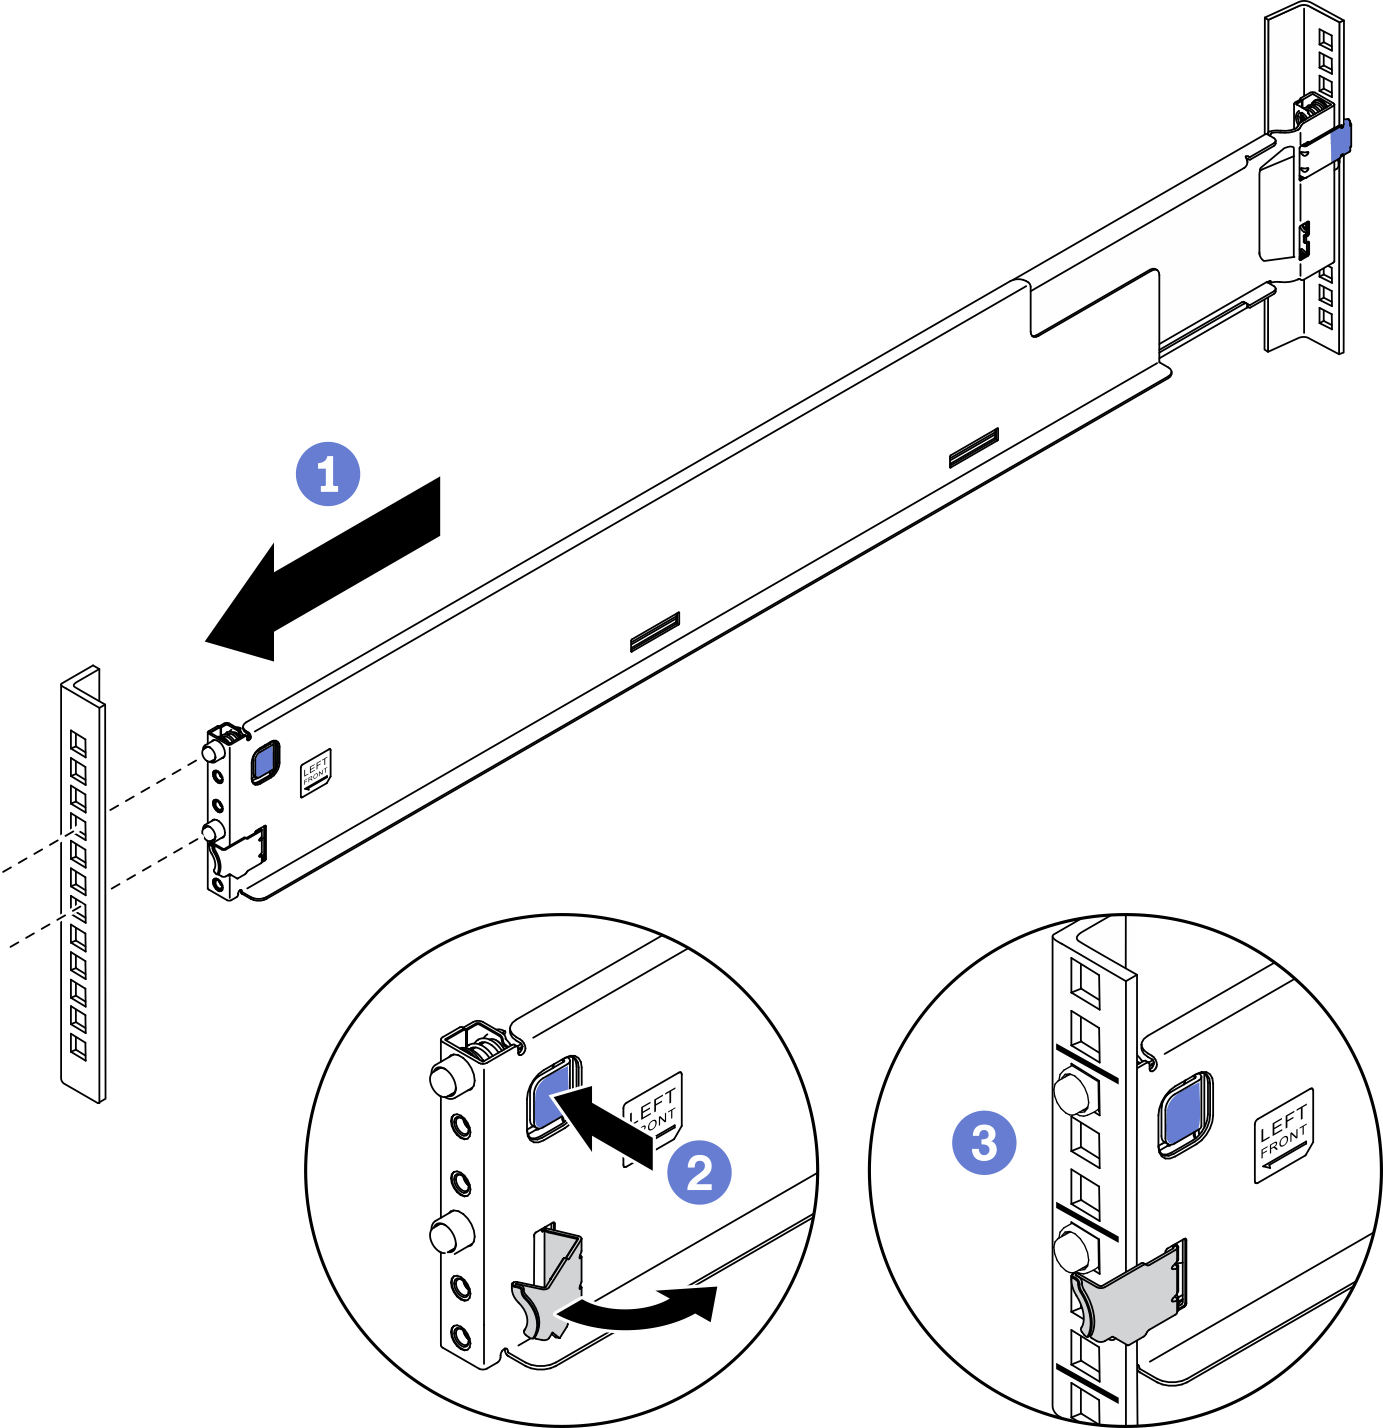
 Pull the rail towards the front.
 Press and hold the blue button to open the front latch.
 Align the pins on the front end of the rail to the holes in the front EIA flange and pull the rail forward; then, release the blue button so the latch catches over the EIA flange.
NoteTo make sure the rails are secured to square hole racks, examine the pins to see if the collars are fully in the mounting flange holes. If not, gently shake the rails until all the collars are visible in the mounting flange holes. Examine both ends to make sure the rails are secured.Figure 4. Pins in square mounting flange holes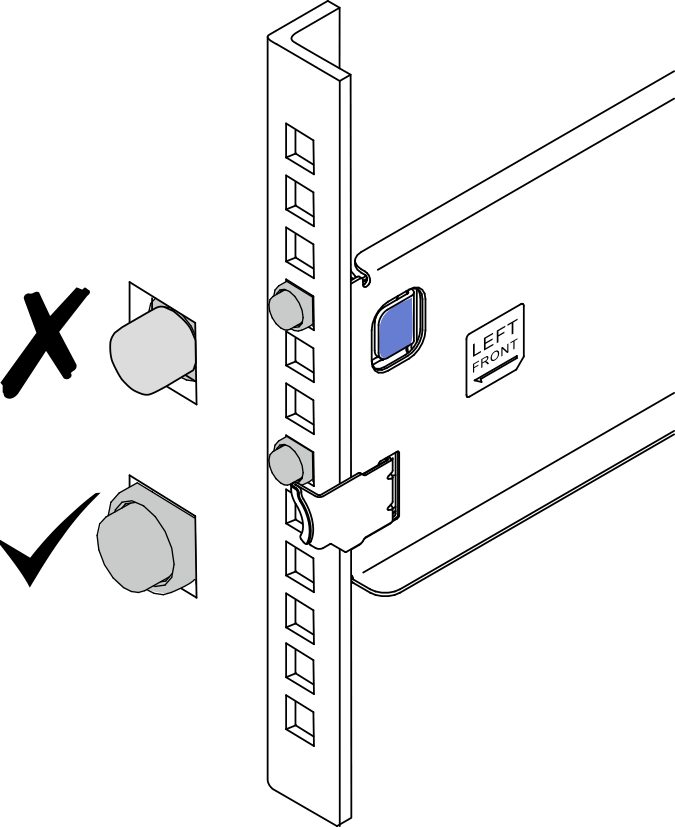 Figure 5. Pins in round mounting flange holes
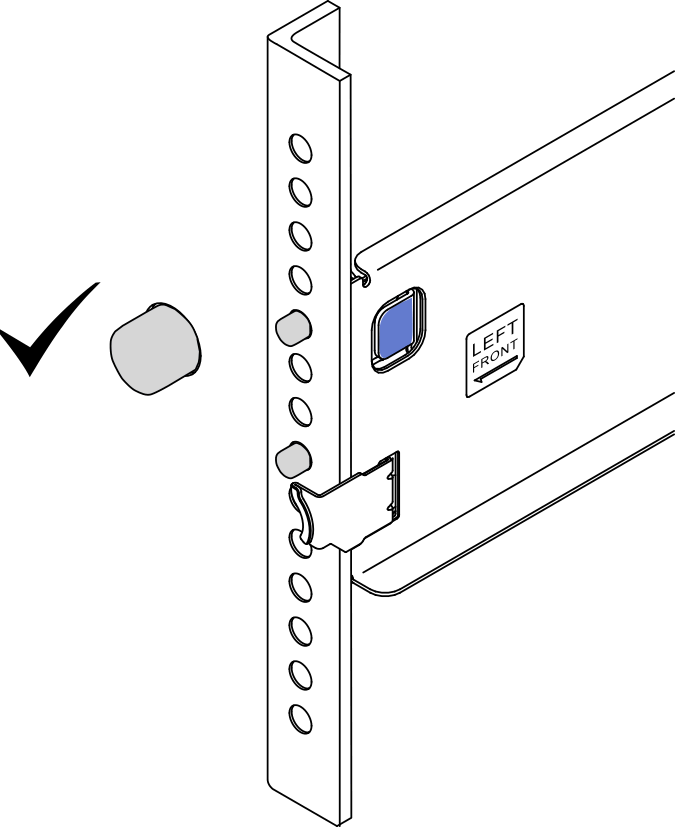
Give documentation feedback