Create a VNET before configuring a custom NFV instance.
Complete the following steps to create a VNET:
- Log in to the ThinkAgile CP Cloud Controller as an infrastructure manager user.
- In the left navigation, click .
Alternatively, in the left navigation, you can expand Networks and click .
- Enter the following values (based on Figure 1):
- VNET Name: VNET-ID-01
- Network Address: 100.127.4.0
- Netmask: 255.255.255.0
- Default Gateway: 100.127.4.254
- For Network Services, select Manual.
- Click Create VNET.
Figure 1. Create a VNET Example 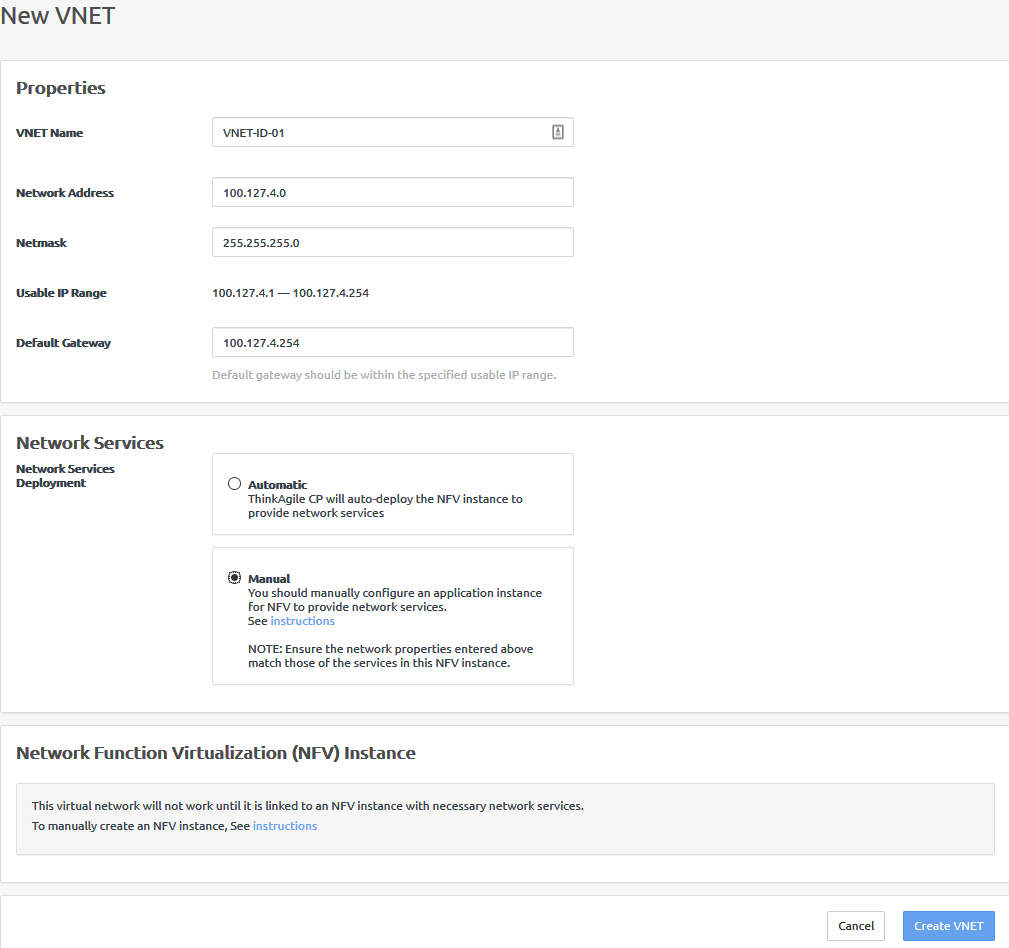
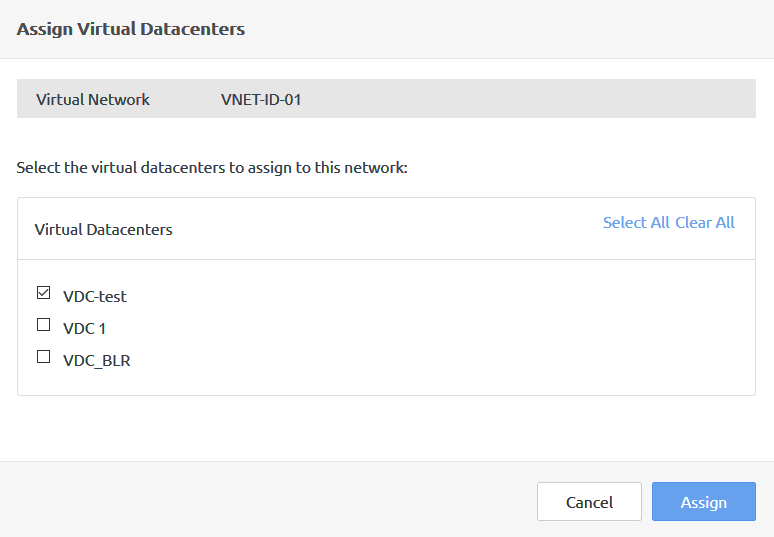
- On the Networks page, click the newly created VNET, VNET-ID-01.
- Click the Assigned Virtual Datacenters tab.
- Click Assign Virtual Datacenters. The Assign Virtual Datacenters dialog box opens.
- Select a virtual datacenter and click Assign (VDC-test is used for this example).
Figure 2. The Assign Virtual Datacenters dialog box