Make the secondary interconnect switch the primary interconnect
Procedure for making the secondary ThinkAgile CP interconnect switch into the primary interconnect.
You have between 6 and 12 hours to fix the primary interconnect before you notice network connectivity problems, as that is the default lease time of the DHCP server. If you cannot replace the interconnect or DHCP server within 6 to 12 hours, you should attempt to make existing DHCP users static IPs.
If the primary interconnect is still accessible, back up /etc/dhcp/dhcp-failover.conf.
If the primary interconnect is still accessible, back up /var/lib/dhcp/dhcpd.leases) and hardware management network settings in /etc/dhcp/vlan-mgmt.conf and /etc/dhcp/vlan-main.conf.
Obtain the hardware management network settings (BMC_ DHCP_START, BMC_DHCP_END, BMC_ROUTER_IP, BMC_PREFIX) from the primary network interconnect (if still accessible) or from the customer install journal. These settings are not backed up in the Cloud Controller. If these settings are not available, pick a new range for this network (for example, 10.65.0.0/24) since it is internal to the network stack.
Obtain the hypervisor network settings (DHCP_RANGE_START, DHCP_RANGE_END, DHCP_ROUTER_IP, DHCP_NETMASK, PRIMARY_DNS, SECONDARY_DNS) from the primary interconnect. This information comes from the configuration file and is located in the configuration spreadsheet provided before installation.
This procedure can be performed only under supervision of or with help from Lenovo Support.
Execution: On hardware only
Performed by: Lenovo Support
Background: Dual interconnect configuration (DS-V3) is active-active. A DHCP server runs on both interconnect switches, and the DHCP lease file is synchronized between the two interconnect. In the event that the primary interconnect switch goes down, the DHCP server on the secondary interconnect begins to service IP requests.
This only works on the Hypervisor Network. DHCP High Availability does not function on the Management Network.
This procedure requires physical intervention on the hardware.
Ensure that the primary interconnect is shut down when running these steps. Having two DHCP servers in split-brain configuration causes severe disruptions on the stack network.
To make the secondary interconnect switch into the primary interconnect, follow these steps:
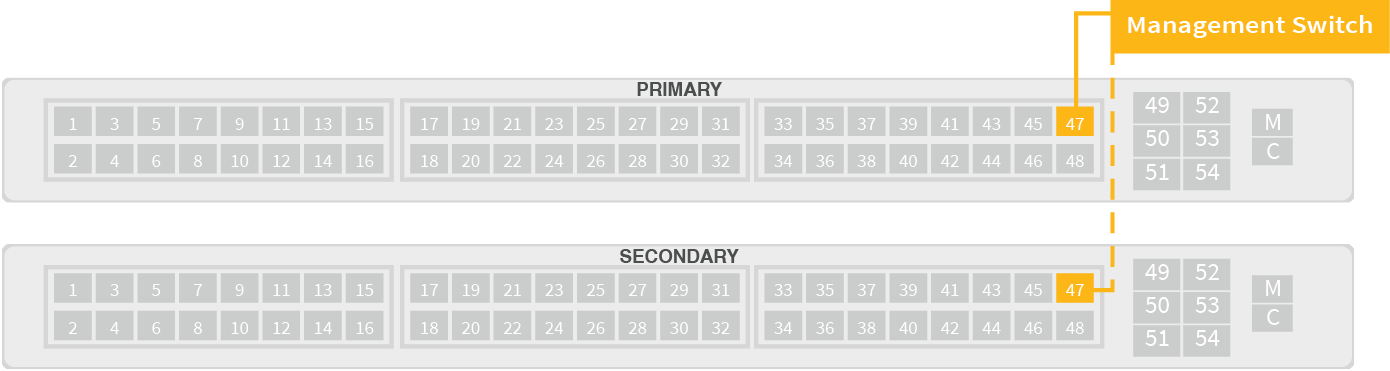
- Disconnect the hardware management network cable from the former primary interconnect and connect it to the current primary (former secondary) interconnect.Figure 1. Recabling management switch from primary to secondary interconnect