Configure XCC settings
The following XCC settings are critical for establishing secure communication to the nodes:
IPv6 must be Enabled in Ethernet Configuration
Ethernet Over USB must be Enabled
REST Over HTTPS must be Enabled
Security Mode must be set to “Compatibility”
IPMI over KCS Access must be Enabled
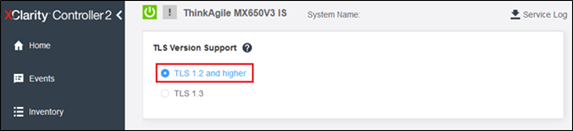
TLS Version Support must be set to “TLS 1.2 and Higher”
Log in to the XCC browser interface, expand BMC Configuration in the left navigation pane, and then select Network.
- In the Ethernet Configuration area, click to Enable IPV6 on the right side of the user interface, and then click Apply. The IPv4 settings on the left side of the user interface can be configured according to your needs.Important
Important Note for Lenovo ThinkAgile MX Premier Solutions
Before deploying a Lenovo ThinkAgile MX Premier Solution, ensure that IPV6 is Enabled in the Ethernet Configuration section of the XCC browser interface (navigate to BMC Configuration > Network). Other BMC Network settings should not be changed. Simply ensure that IPV6 is Enabled and Apply the setting if necessary.
Figure 1. Enable IPv6 configuration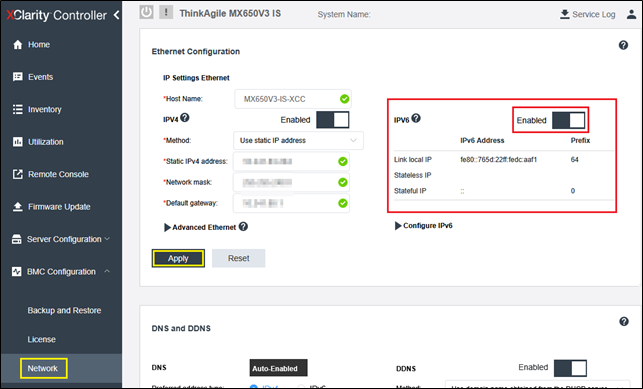
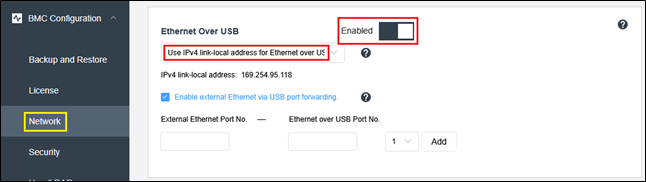
- While still on the Network pane, scroll down to the Ethernet Over USB section and ensure that Ethernet over USB is set to Enabled. Ensure that the “Use IPv4 link-local address for Ethernet Over USB” option is selected in the drop-down list. The default IP address starting in 169.X.X.X should be left unchanged as the CAU and SBE processes depend on this default IP.Figure 2. Enable Ethernet over USB
 NoteBefore proceeding with a deployment/update with SBE, the following validation guidance must be followed to ensure proper network communication via Ethernet over USB during SBE health checks:
After enabling Ethernet over USB from XCC settings, log into the operating system and check the IP address assigned to the IBM NDIS network adapter interface. If the IP address is 169.254.95.120, run “ping 169.254.95.118” (note the last octet is .118 for the ping). If ping is successful, you can proceed with configuring the rest of the XCC settings requirements.
If the default IP address is NOT 169.254.95.120 on the IBM NDIS network adapter interface, please follow the rest of the instructions below.
Run the following command calls to clean up the IP address assignment:
Get-NetAdapter -InterfaceDescription "IBM USB Remote NDIS Network Device*" | Remove-NetIPAddress

Get-NetAdapter -InterfaceDescription "IBM USB Remote NDIS Network Device*" | New-NetIPAddress -IPAddress "170.254.95.120" -PrefixLength "16"
Figure 3. Clean up IP address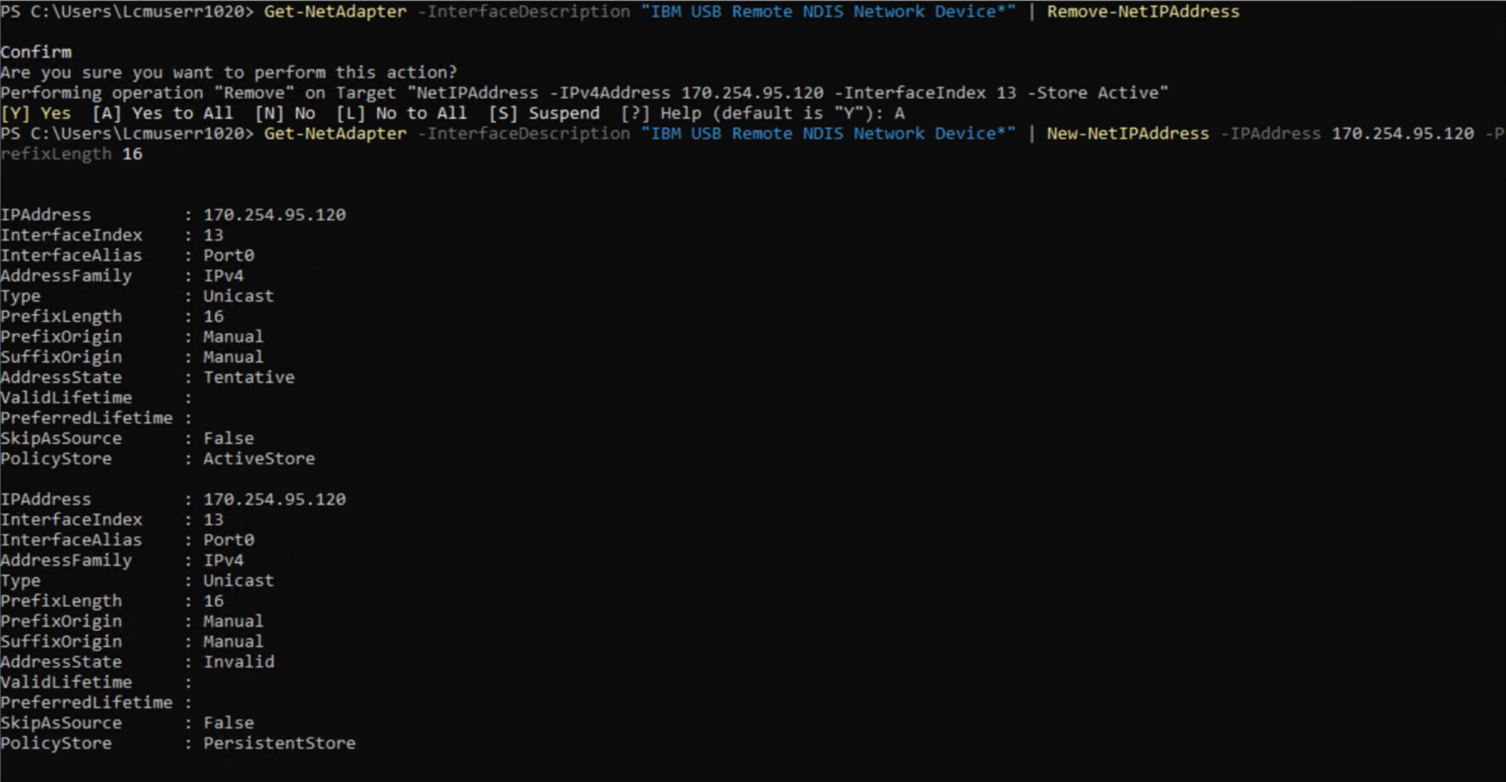
Navigate back to the BMC configuration section in the XCC web portal, navigate to the Ethernet over USB settings under the Networking section and copy the following settings, including each specific IP address for BMC (170.254.95.118) and OS (170.254.95.120).
Figure 4. Specify IP address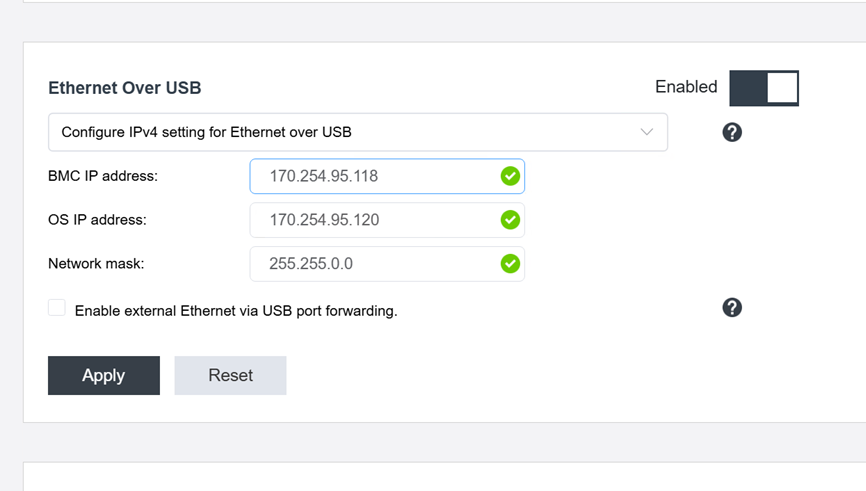
After applying the Ethernet over USB from XCC settings above, log back into the operating system and verify the new IP address assigned to the IBM NDIS network adapter interface. Ping 170.254.95.118 and run Test-NetConnection (note the last octet is .118 for the ping) to confirm all routing is correct. If the network test is successful, you can proceed with onboarding the solution and begin Azure Local Provisioning.
ping 170.254.95.118

Test-NetConnection 170.254.95.118 -Port 443
If there is an existing subnet in the customer environment that starts with 170.X.X.X, please defer to the next available subnet address, e.g. 171.X.X.X or 172.X.X.X and so on.
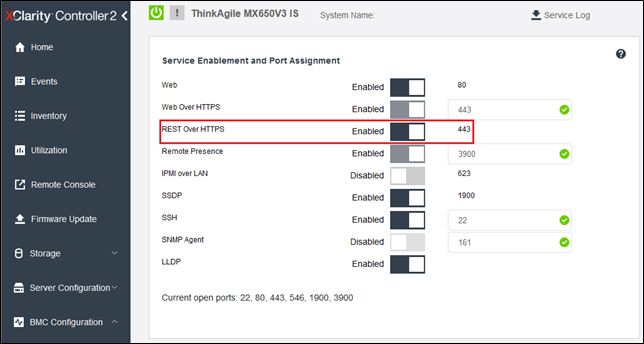
- While still on the Network pane, scroll down to the Service Enablement and Port Assignment settings to ensure that REST Over HTTPS is Enabled. This is the default setting but should be verified.Figure 5. Enable REST Over HTTPS
In the left navigation pane, select Security.
In the Security Mode area on the right, ensure that Compatibility is selected and Compliant is checked.
- In the IPMI over KCS access section, ensure that IPMI over KCS access is Enabled.Figure 6. Security mode configuration

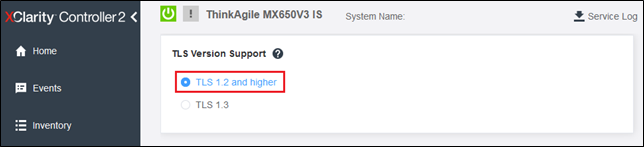
- While still on the Security pane, scroll down to the bottom of the list of settings to ensure that TLS Version Support is set to “TLS 1.2 and higher”. This is the default setting but should be verified.Figure 7. TLS Version Support
MX650 V4 or later (XCC3) Settings
IPv6 must be Enabled in Ethernet Configuration
Ethernet Over USB must be Enabled
HTTPS (Web/Redfish) must be Enabled
Security Mode must be set to “Compatibility”
IPMI over KCS Access must be Enabled
TLS Version Support must be set to “TLS 1.2 and Higher”
Log in to the XCC browser interface, expand BMC Configuration in the left navigation pane, and then select Network.
In the Ethernet Configuration area, click to Enable IPv6 on the right side of the user interface, and then click Apply. The IPv4 settings on the left side of the user interface can be configured according to your needs.
ImportantImportant Note for Lenovo ThinkAgile MX Premier Solutions
Before deploying a Lenovo ThinkAgile MX Premier Solution, ensure that IPv6 is Enabled in the Ethernet Configuration section of the XCC browser interface (navigate to BMC Configuration>Network). Other BMC Network settings should not be changed. Simply ensure that IPv6 is Enabled and Apply the setting if necessary.
Figure 8. Enable IPv6 configuration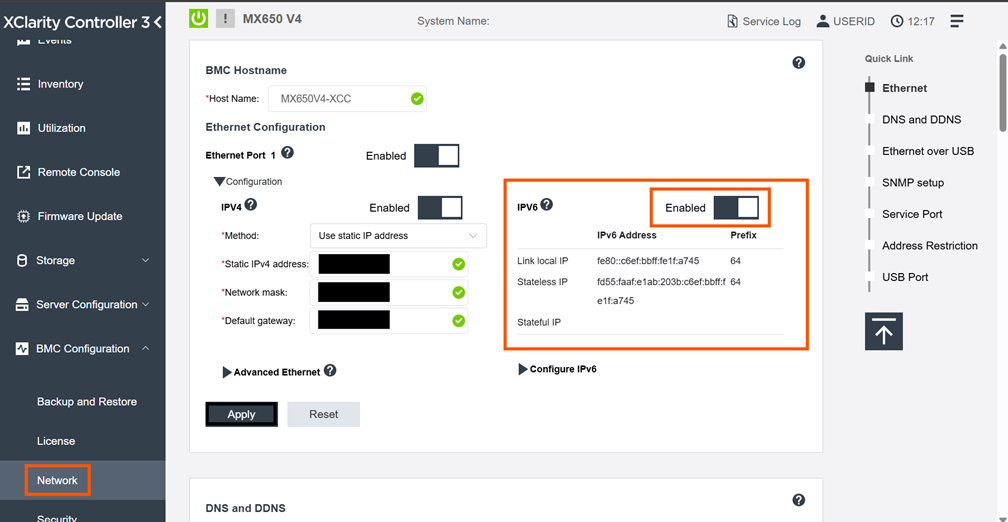
While still on the Network pane, scroll down to the Ethernet Over USB section and ensure that Ethernet over USB is set to Enabled. Ensure that the “Use IPv4 link-local address for Ethernet Over USB” option is selected in the drop-down list. The default IP addresses starting in 172.X.X.X should be left unchanged as the CAU and SBE processes depend on these default IPs.
Figure 9. Enable Ethernet over USB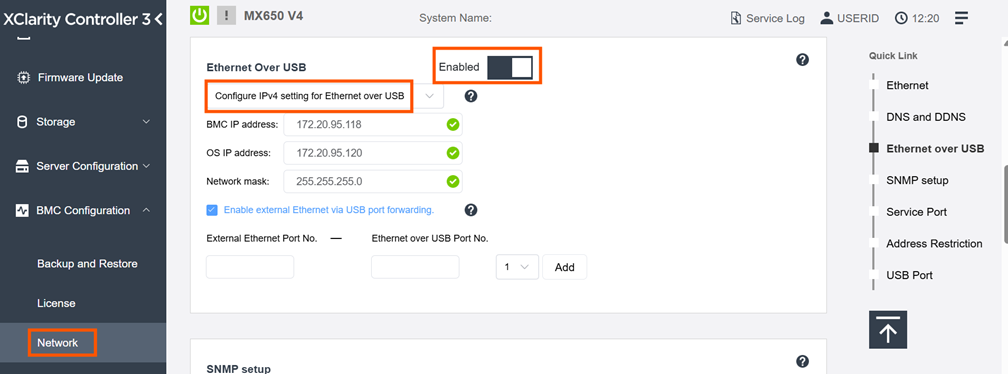 NoteBefore proceeding with a deployment/update with SBE, the following validation guidance must be followed to ensure proper network communication via Ethernet over USB during SBE health checks:
Click here to follow the validation guidance steps. While still on the Network pane, scroll down to the Service Enablement and Port Assignment settings to ensure that HTTPS (Web/Redfish) is Enabled. This is the default setting but should be verified.
Figure 10. Enable HTTPS (Web/Redfish)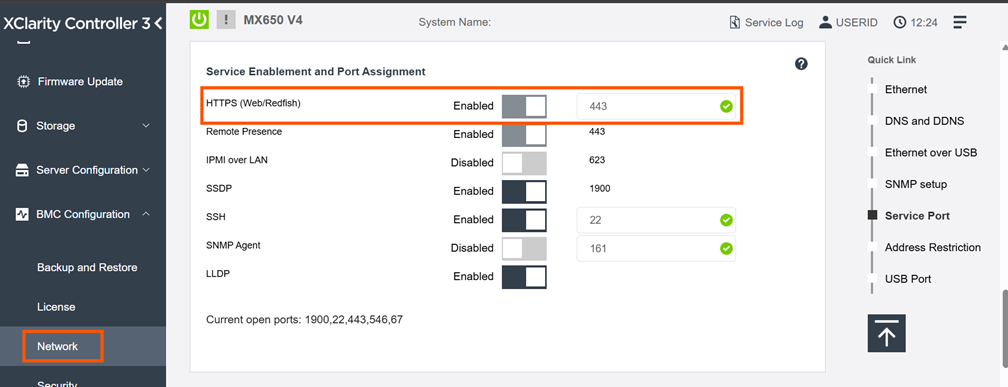
The following Security instructions remain the same as before:
In the left navigation pane, select Security.
In the Security Mode area on the right, ensure that Compatibility is selected and Compliant is checked.
In the IPMI over KCS access section, ensure that IPMI over KCS access is Enabled.
Figure 11. Security mode configuration
While still on Security pane, scroll down to the bottom of the list of settings to ensure that TLS Version is set to “TLS 1.2 and higher” This is the default setting but should be verified.
Figure 12. TLS Version Support