Removing a system fan

Use this information to remove a system fan in the server.

Read the safety information in Safety and Installation guidelines.

If you are replacing a server component in the server, you need to turn off the server and peripheral devices, and disconnect the power cords and all external cables.

Attention
Static electricity that is released to internal server components when the server is powered-on might cause the server to halt, which might result in the loss of data. To avoid this potential problem, always use an electrostatic-discharge wrist strap or other grounding system when you work inside the server with the power on.

To remove a system fan, complete the following steps.

  1. Remove the cover (see Removing the cover).
  2. Remove the air baffle if installed (see Removing the air baffle).
  3. Reconnect the power cord; then, turn on the server.
    Attention
    Operating the server for extended periods of time (more than 30 minutes) with the top cover removed might damage server components.
  4. Determine which fan to replace by checking the LEDs on the system board (see System-board LEDs); a lit LED indicates the fan to replace.
  5. Turn off the server; then, disconnect the power cord again.
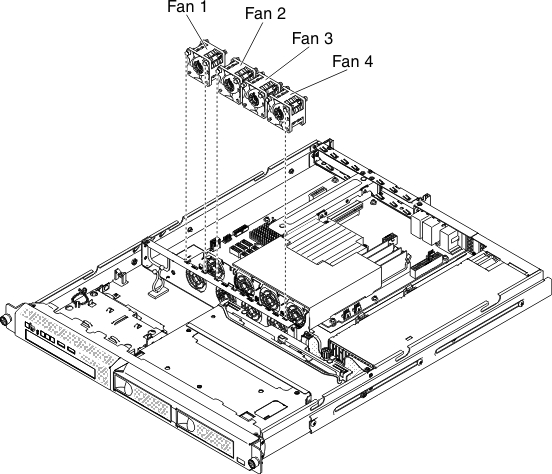
  6. Remove the failed fan from the server:
    1. Disconnect the fan cable from the system board. You may need to disengage the cables from cable retention clips or cable holder. Note the routing of the fan cable to the connector; you will have to route the fan cable the same way when you install the fan.
    2. Grasp the top of the fan with your index finger and thumb and lift the fan out of the server.
      Figure 1. System fans
      System fans

If you are instructed to return the server component or optional device, follow all packaging instructions, and use any packaging materials for shipping that are supplied to you.