Installing the 16x1.8-inch SSD assembly kit
Use this information to install the 16x1.8-inch SSD assembly kit.
To order the 16x1.8-inch SSD assembly kit, contact your Lenovo sales representative or Lenovo reseller.
The 16x1.8-inch SSD assembly kit contains the following components:
- Two 1.8-inch solid-state-drive backplane assemblies
- One power cable
- One configuration cable
- Four mini-SAS cables (820 mm)
To install the 16x1.8-inch SSD assembly kit in the server, complete the following steps.
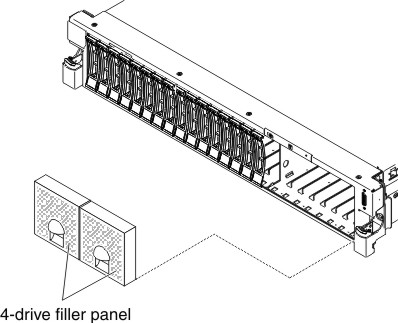
- Remove the two 4-drive filler panels from the right side.Figure 1. Filler panels removal
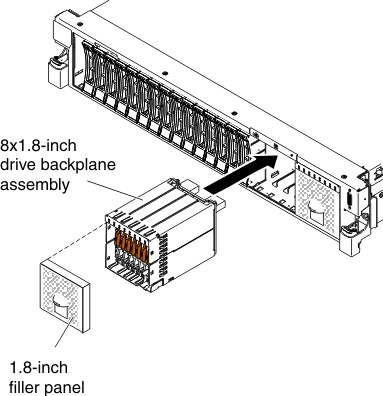
- Install the 1.8-inch backplane assemblies.Figure 2. 1.8-inch backplane assembly installation
- Connect the following cables in the order listed:
- Configuration cable
- Mini-SAS cables
- Power cable
Figure 3. Cables connection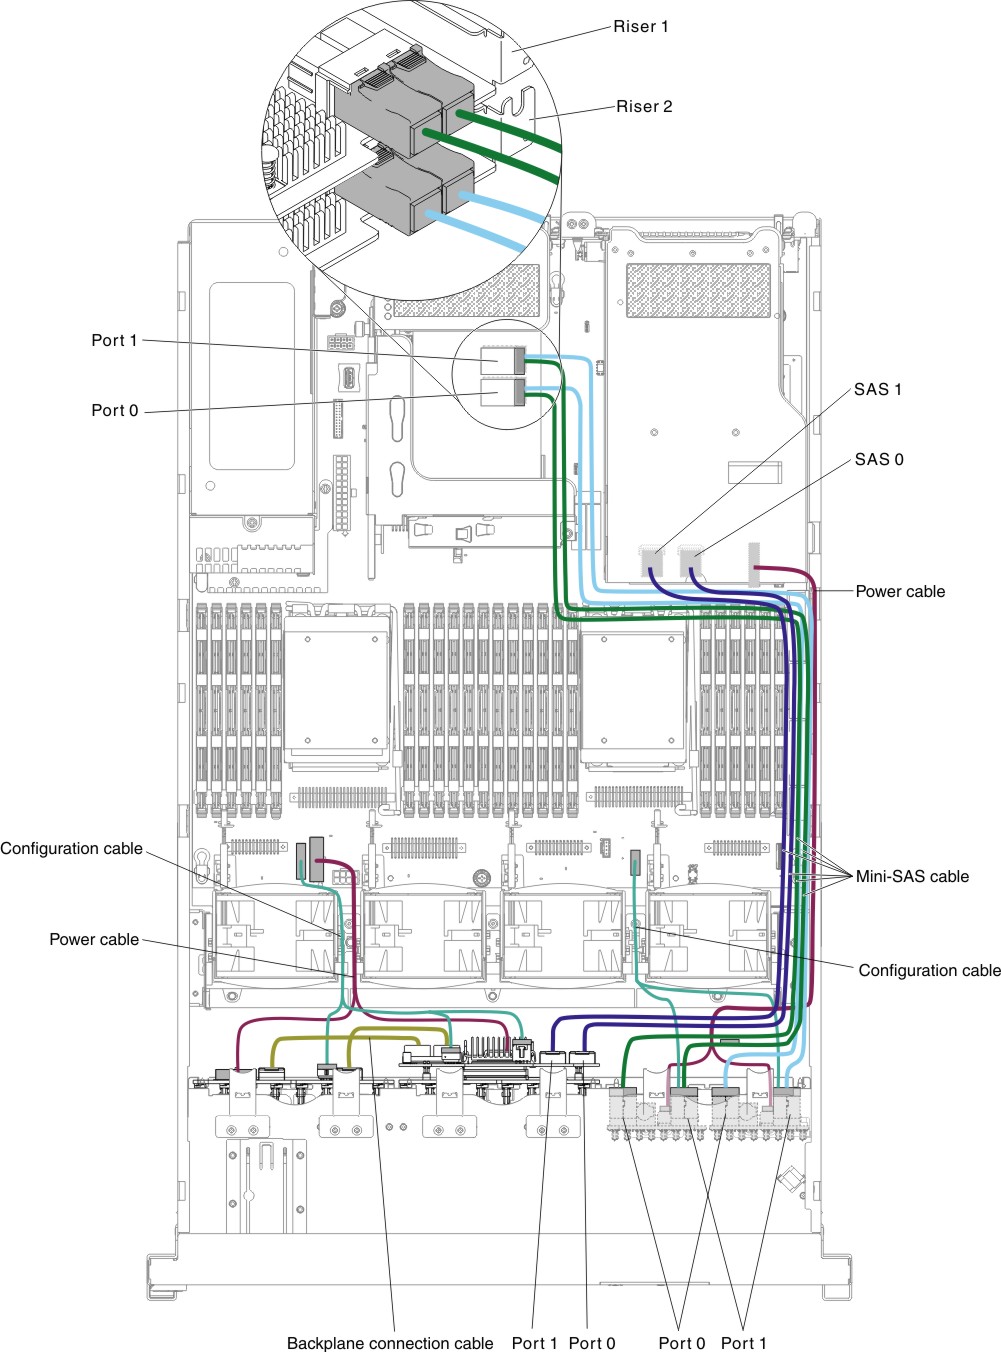 Figure 4. Backplanes cable connection
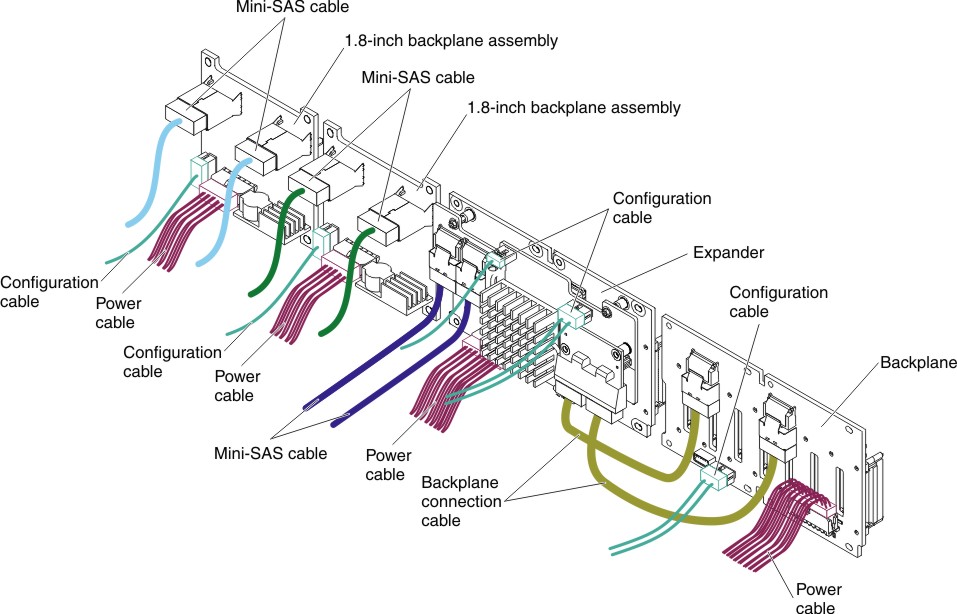
If you have other devices to install or remove, do so now. Otherwise, go to Completing the installation.
Give feedback