
Installing the 4x2.5-inch hot-swap drive backplane

Use this information for instructions on how to install the 4x2.5-inch hot-swap drive backplane assembly.

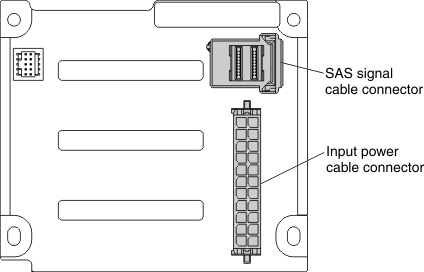
The following is an illustration of the 4x2.5-inch drive backplane:


Illustration of the 4x2.5-inch drive backplane

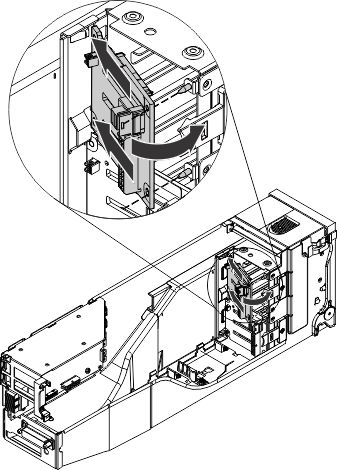
To install the 4x2.5-inch hot-swap drive backplane, complete the following steps:

  1. Before you begin, read Safety and Installation guidelines.
  2. Turn off the server (see Turning off the server) and all attached peripheral devices. Disconnect all power cords; then, disconnect all external cables from the server.
  3. Remove the storage book from the server (see Removing the storage book).
  4. If a backplane filler panel is installed in the backplane bay in which you are installing the backplane, remove the backplane filler panel.
  5. Insert the backplane tabs into the slots on the left side of the backplane cage and rotate the drive backplane assembly forward until the backplane locks in place in the retention latch.

    Illustration of installing the 4x2.5-inch drive backplane
  6. Connect the power cable to the power connector on the drive backplane.
    Note
    To ensure that the hard disk drive ID numbering matches the drive ID numbering on the front of the server, make sure that you connect the shorter blue power cable connector to the bottom backplane and connect the grey power cable connector to the top backplane.
  7. Connect the SAS/SATA signal cable to the backplane and to the adapter.

If you have other devices to install or remove, do so now. Otherwise, go to Completing the installation.