Installing the 8x1.8-inch hot-swap drive backplane assembly
This information provides instructions on how to install the 8x1.8-inch drive backplane in the server.
Note
- The SAS/SATA adapter that you install in the server to control the backplane must be capable of supporting two internal, 4-lane SAS/SATA signal connectors.
- The server must have a minimum of two compute books with microprocessors and memory installed to support the controller, backplane, and drives.
- When you install a 8x1.8-inch drive backplane assembly, the drive IDs that are indicated on the server front bezel will no longer be valid. Use the drive labels that come with the backplane to renumber the drive IDs on the bezel.
- For more information about drive IDs, see Drive IDs. For more information about the supported drive backplane configurations, see Supported drive backplane configurations.
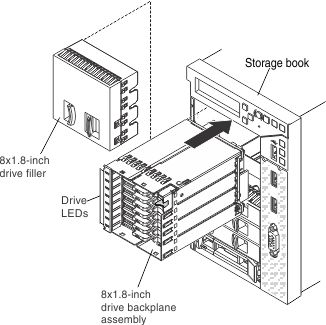
To install the 8x1.8-inch hot-swap drive backplane assembly, complete the following steps:
- Align the backplane assembly with the backplane bay in which you are installing the assembly.
If you have other devices to install or remove, do so now. Otherwise, go to Completing the installation.
Give documentation feedback