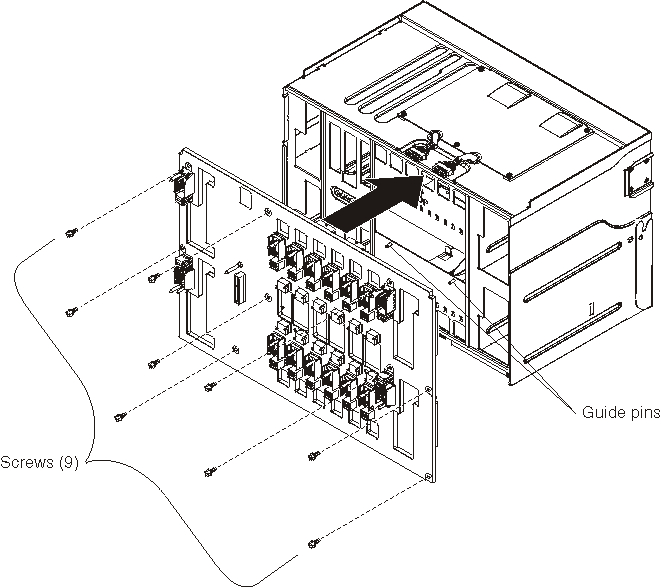
Installing the midplane
The installation of a midplane should only be performed by a trained service technician.

- Make sure the release handles are closed and position the SPC chassis (shuttle) so that the location where the midplane will be placed is facing up.
- Carefully place the midplane onto the SPC chassis, aligning the screw holes on the midplane with the holes in the SPC chassis.
- Install the nine screws that attach the midplane to the SPC chassis.
- Reconnect the two upper fan-to-midplane cable plugs to the midplane connectors.
- Reconnect the two lower fan-to-midplane cable plugs to the midplane connectors.
- Install the SPC chassis into the BladeCenter S chassis (see Installing the SPC chassis (shuttle)).
- Update the vital product data (VPD) for the BladeCenter unit:
- Log into the advanced management module Web interface.
- In the navigation pane, click Monitor → Hardware VPD.
- Click Chassis.
- Click Edit BladeCenter System Vital Product Data.
- Obtain the model number and serial number on the ID label on the BladeCenter; then, enter the information in the Type/Model and Serial Number fields.
- If the advanced management module is using firmware version BPET54R or older, restart the advanced management module.
Give documentation feedback