The removal of a midplane-to-fan cable should only be performed by a trained service technician.
There are four midplane-to-fan cables in the BladeCenter S chassis.
- Remove the SPC chassis (shuttle) from the BladeCenter S chassis (see Removing the SPC chassis (shuttle)).
- Remove the midplane from the SPC chassis (see Removing the midplane).
- Remove the midplane-to-fan cable from the midplane.
- Disconnect the midplane-to-fan cable plug from the midplane connector.
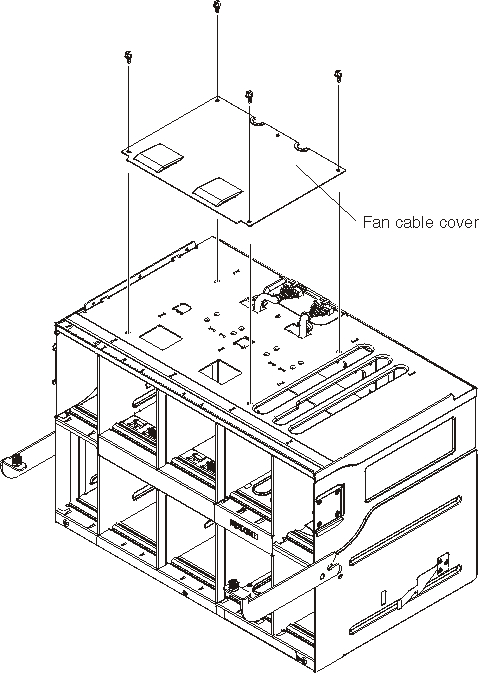
- Remove the fan cable cover.
- Push the cable plug back down through the fan cable hole in the SPC chassis.
- Remove the midplane-to-fan cable from the BladeCenter S chassis.
- Position the SPC chassis so that you are facing the front of the SPC chassis. You will be able to see the air flow dampers in the fan module bays.
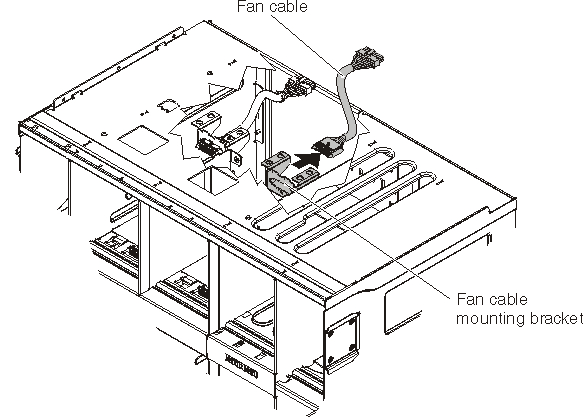
- Depress the air flow damper in a fan module bay so that you can see the midplane-to-fan cable and fan cable mounting bracket.
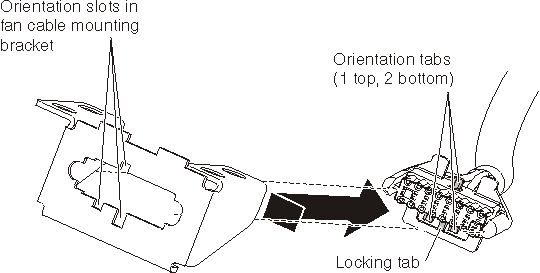
- Using a tool such as a small screw driver, carefully depress the locking tab on the midplane-to-fan cable.
If you depress the locking tab too hard, it is easy to break off the locking tab.
- Slide the cable plug to the right to align the one top and two bottom orientation tabs on the cable plug with the slots in the fan cable mounting bracket.
- Remove the midplane-to-fan cable from the fan cable mounting bracket.
- Remove the midplane-to-fan cable from the BladeCenter S chassis.


