Replacing a hot-swap hard disk drive backplane
Use this information to replace a hot-swap hard disk drive backplane.
To install the replacement hot-swap hard disk drive backplane, complete the following steps:
- Install the hot-swap hard disk drive backplane.
- Carefully lower the hard disk drive backplane until it is fully seated in the chassis.Figure 1. Four 2.5-inch hot-swap-drive backplane installation
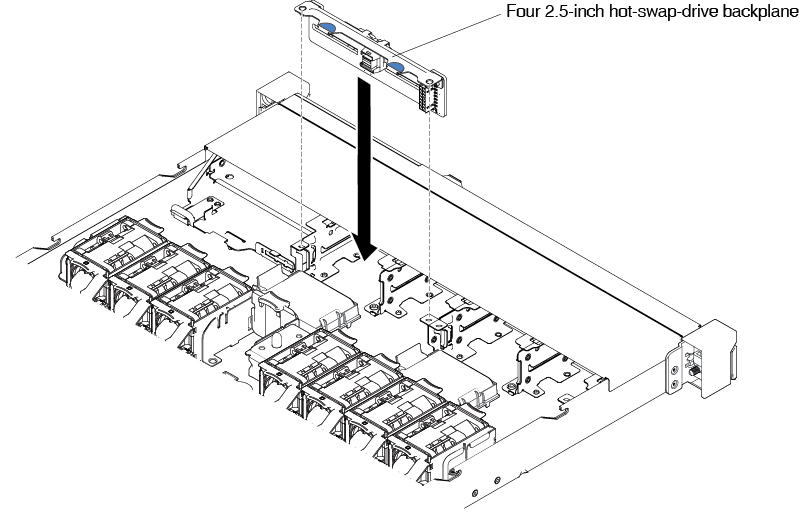
- Carefully lower the hard disk drive backplane until it is fully seated in the chassis.
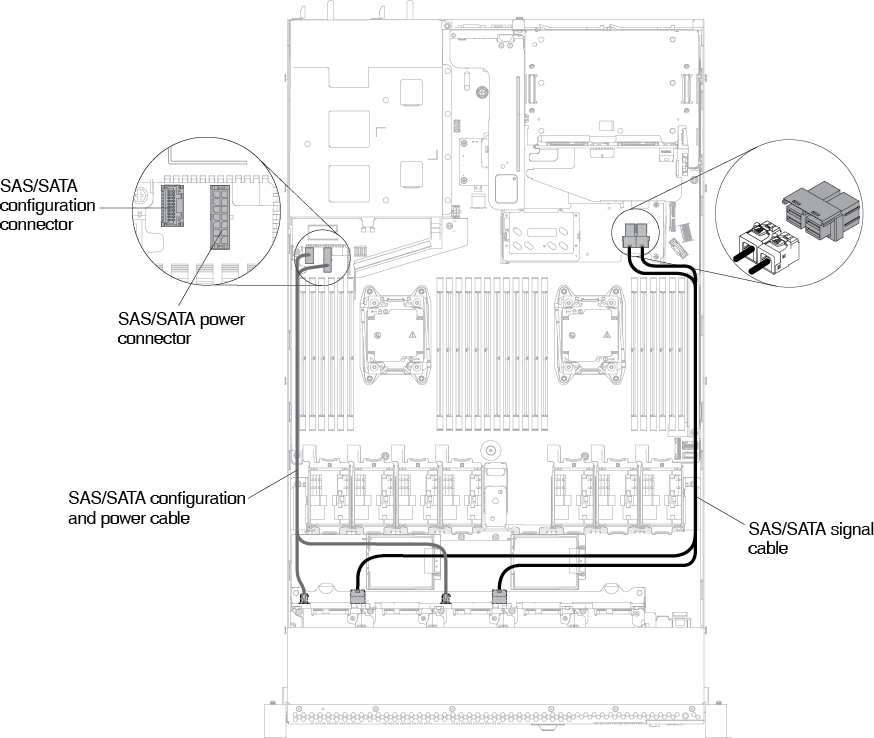
- The following illustrations show the cable routing and connectors for the 2.5-inch hot-swap backplane.Figure 2. Eight 2.5-inch hot-swap backplane cable connection
Give documentation feedback