Installing a 1-bay compute node
You can install up to fourteen 1-bay compute nodes in the Flex System Enterprise Chassis. Compute nodes are installed in the front of the Flex System Enterprise Chassis.
Before you install a compute node in the Flex System Enterprise Chassis, complete the following steps:
- Verify that the compute node is compatible with the chassis. See the Lenovo ServerProven website.
- Make sure that enough power supplies and fan modules are installed in the chassis to support the compute node. See Installing components to determine the number of power supplies and 80 mm fan modules that are required and where they should be installed in your chassis configuration.
- Read the instructions that come with the compute node.
- Make sure that you have installed any optional hardware devices in the compute node.
- Select the bay for the compute node.
To install a 1-bay compute node, complete the following steps.
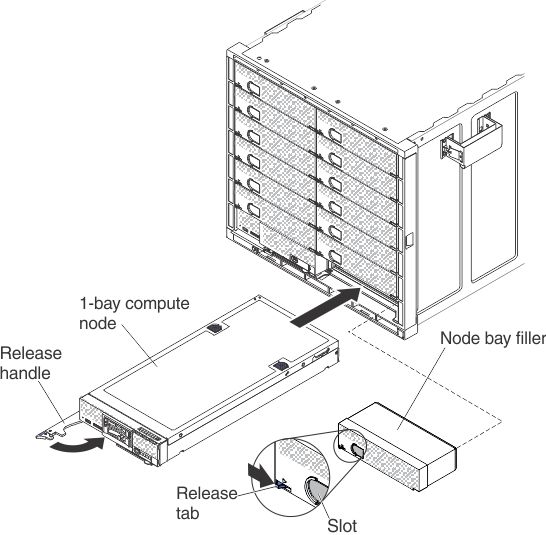
- Remove the node bay filler, if one is installed. Push the filler release tab to the right; then, grasp the filler by the slot and pull it out of the bay.
- Open the release handle (rotate the handle to the left).
- Slide the compute node into the node bay until it is seated.
- Close the release handle (rotate the handle to the right).
After you install the compute node, make a note of the compute node identification information on one of the labels that come with the Flex System Enterprise Chassis. Place a label on the node label tab and on the adjacent chassis label plate, to the right or left of the compute node (depending on the bay in which the compute node is installed). See User labels for more information.
Important
Do not place the label on the compute node or in any way block the ventilation holes on the chassis.
Give documentation feedback