Install the baying kit
More than one rack cabinets could be connected into a suite. See this topic to learn how to attach rack cabinets into a suite with the baying kit.
About this task
Note
To maintain balance of the rack cabinet, do not remove the outriggers except the following situations:
- when two or more rack cabinets are connected with the baying kit.
- when the rack cabinet is secured to the floor with stabilizer.
R002

DANGER
danger
- Always lower the leveling pads on the rack cabinet.
- Always install stabilizer brackets on the rack cabinet.
- Always install the heaviest devices in the bottom of the rack cabinet.
- Always install servers and optional devices starting from the bottom of the rack cabinet.
Procedure
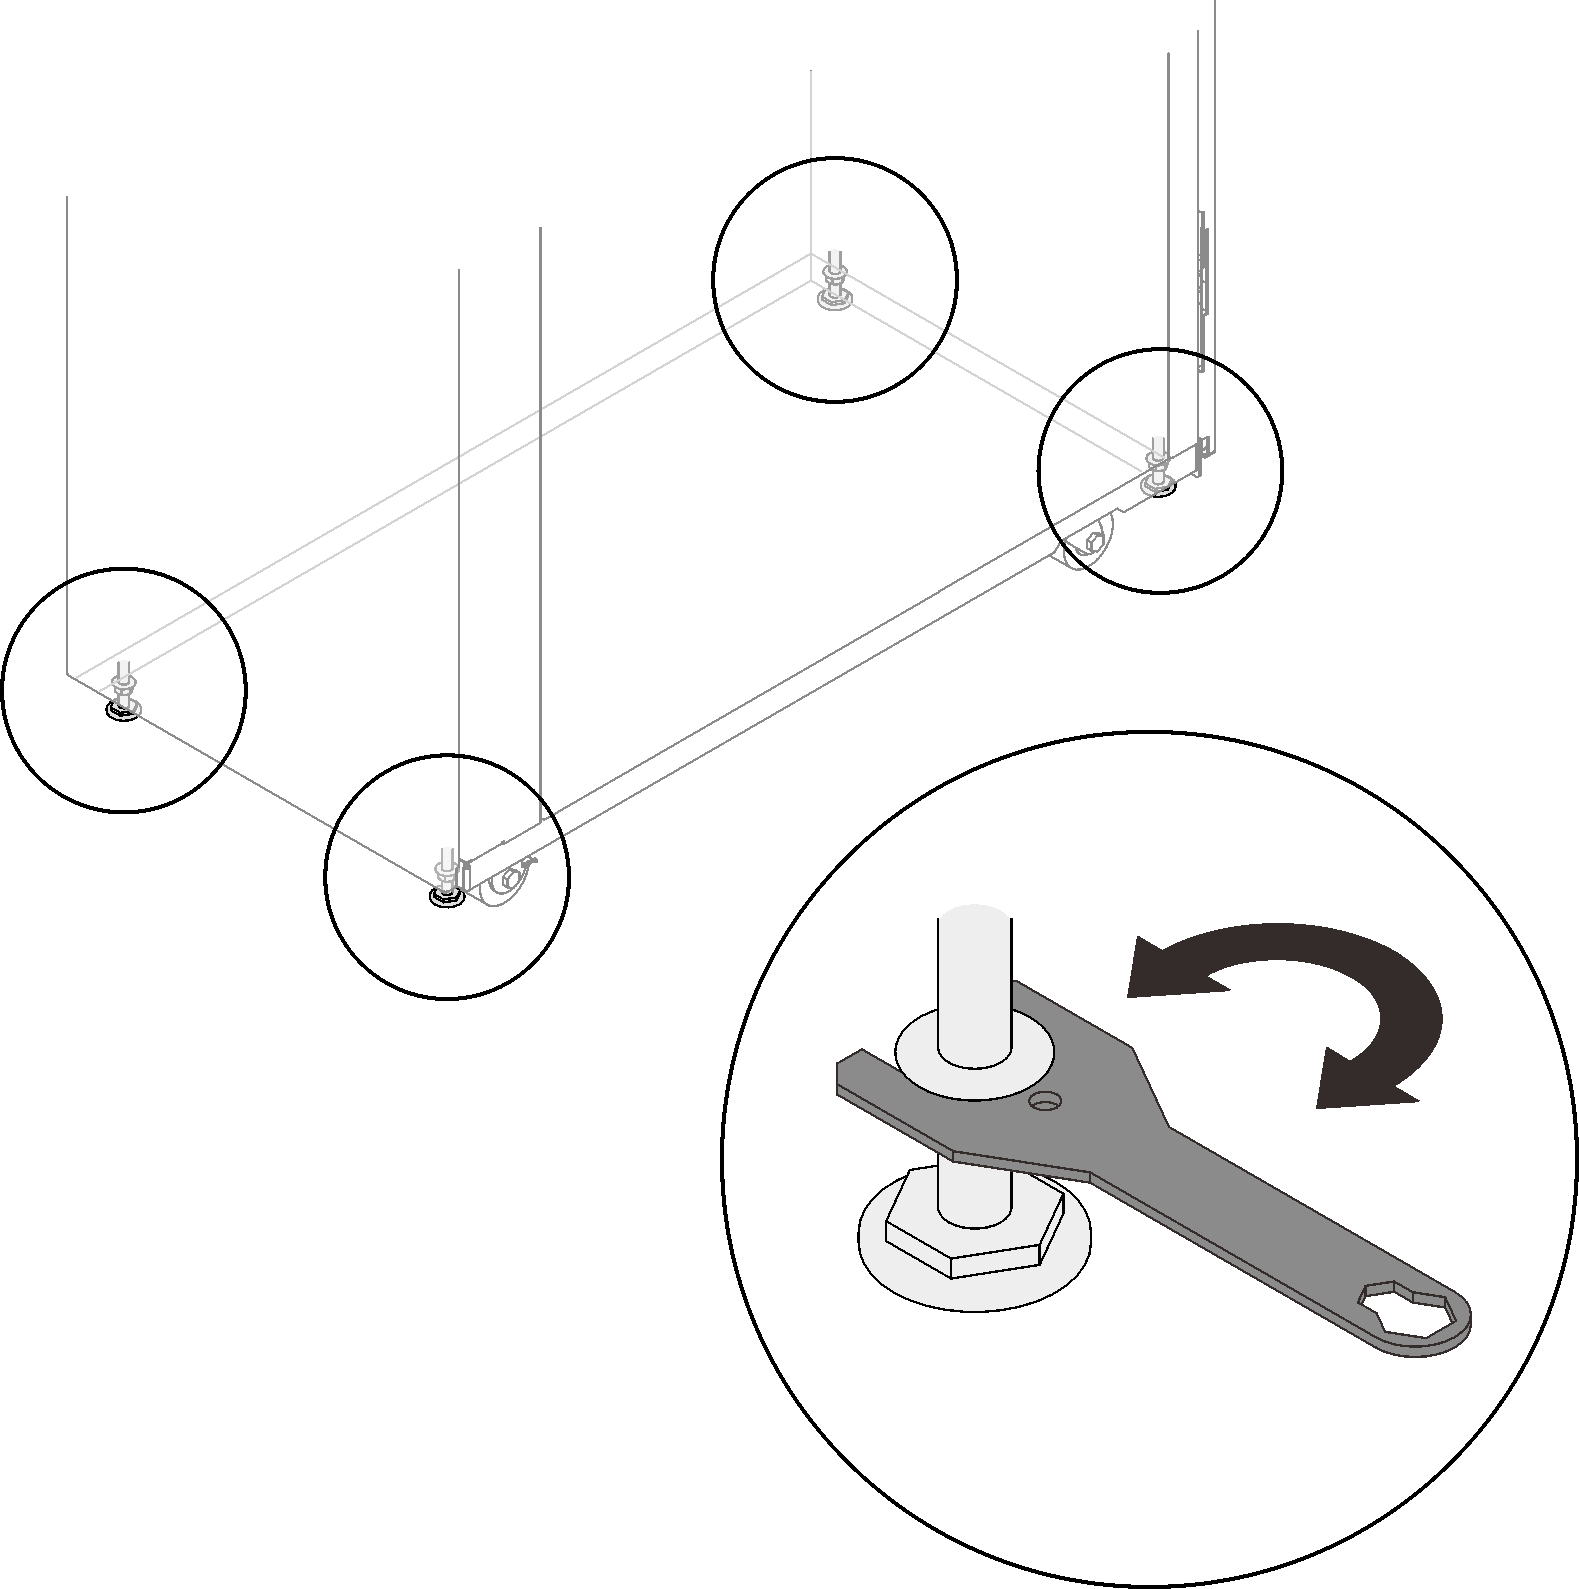
- Extend each of the four leveling pads in turns until they firmly contact the floor and support the rack cabinet. Make sure the cabinet is balanced by gently pushing the cabinet. If it tilts, adjust the length of the leveling pads until the cabinet is well balanced.Figure 1. Lowering the leveling pads
- Remove the outrigger stabilizing bars, and remove them.Figure 2. Removing the outrigger stabilizing bars
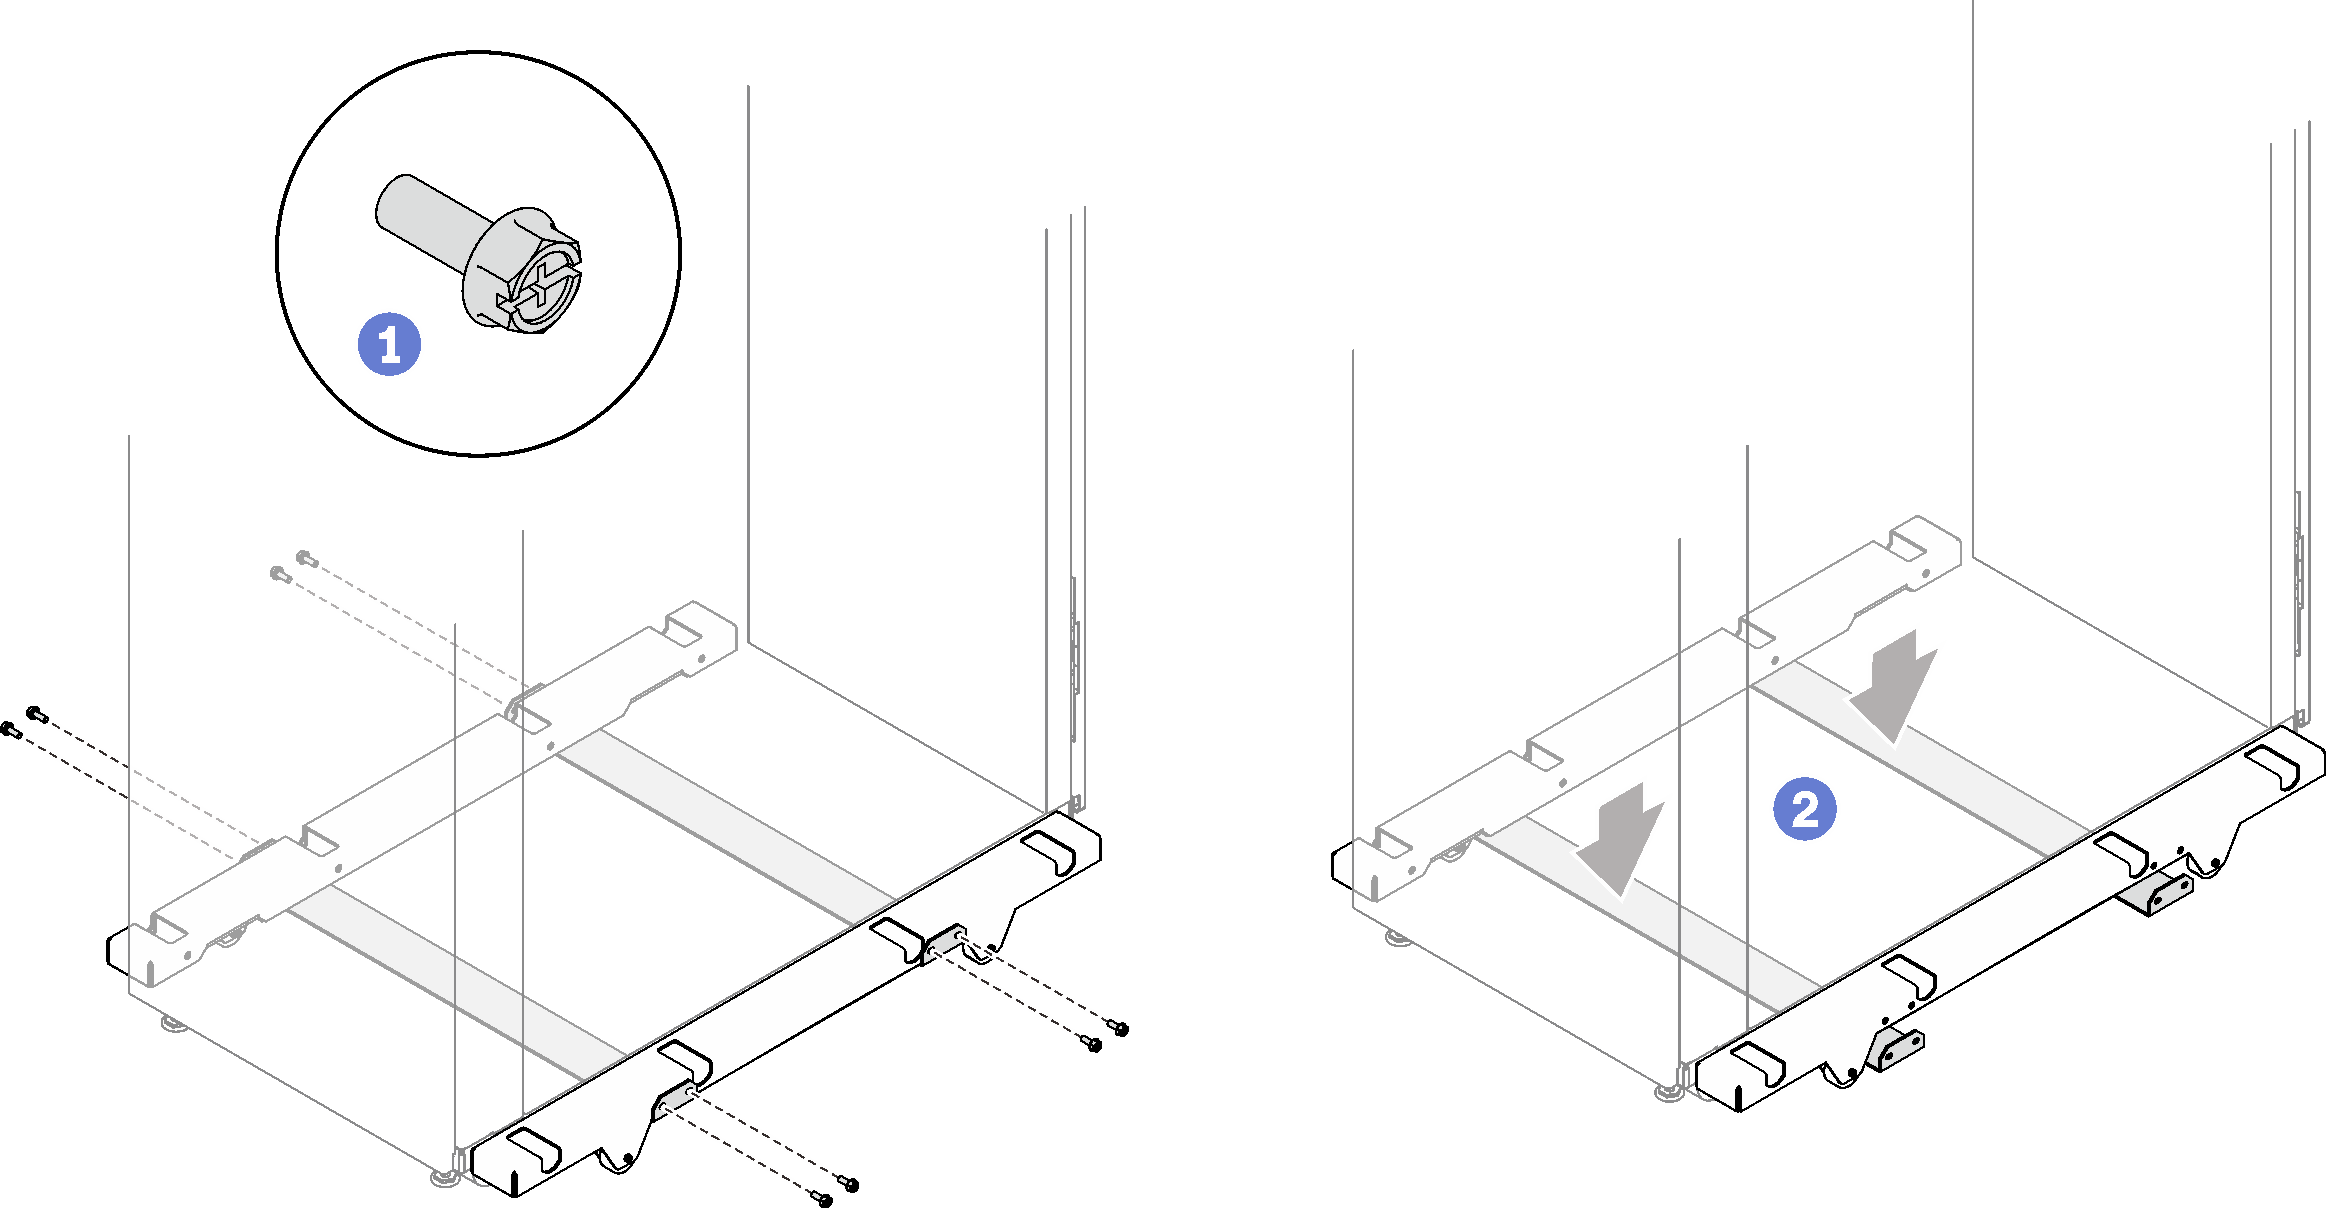
 Remove the eight screws that secure the two bars to the rack cabinet.
 Place the two stabilizing bars on the ground, and remove the bars.
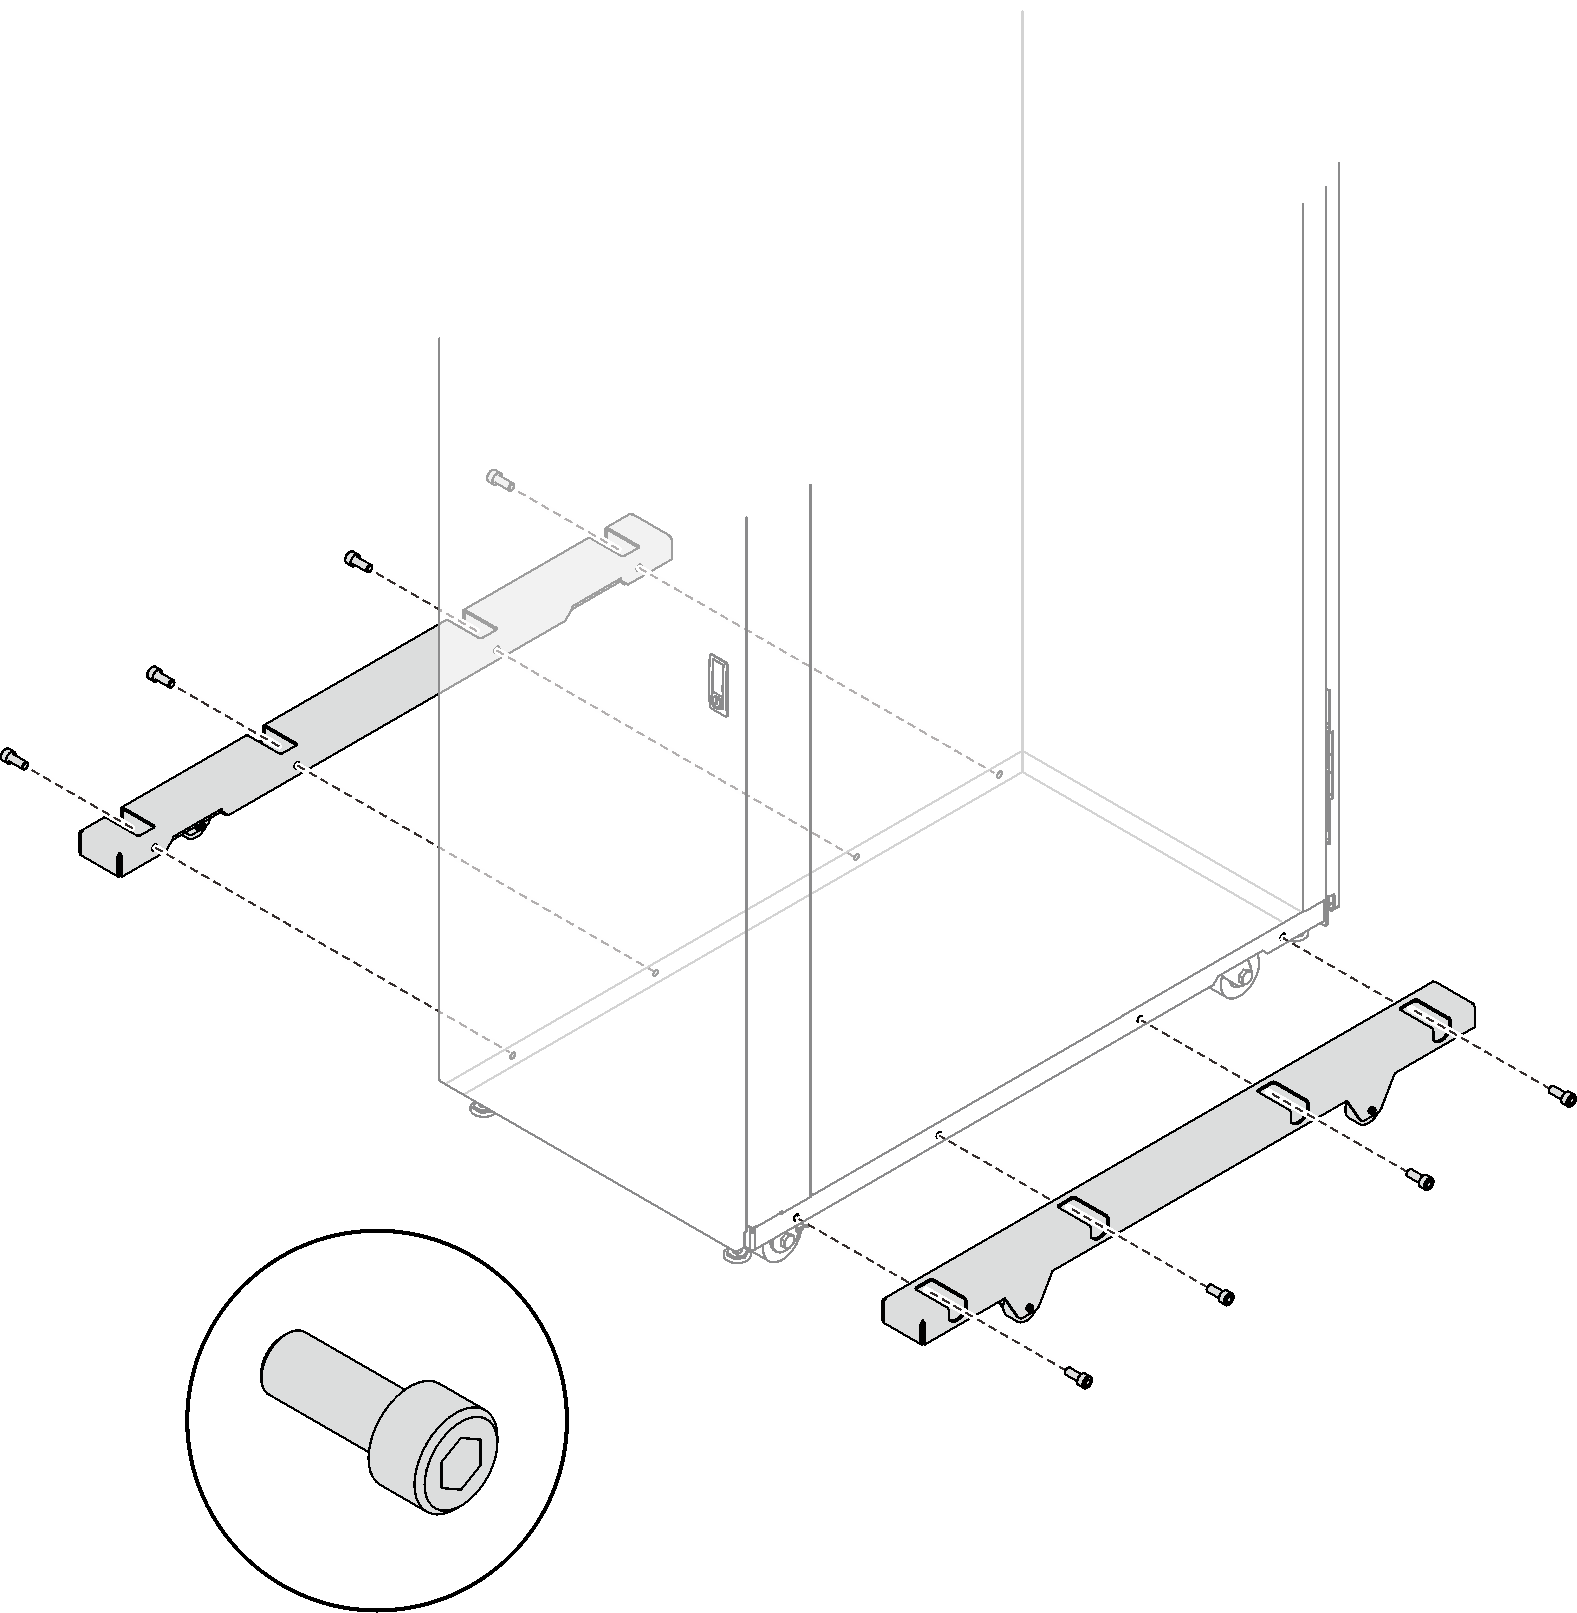
- Remove the four screws that secure each of the outriggers, and remove the outriggers.Figure 3. Removing the outriggers
- Remove the front and rear doors of every rack cabinet that is to be part of the suite.Figure 4. Removing a door
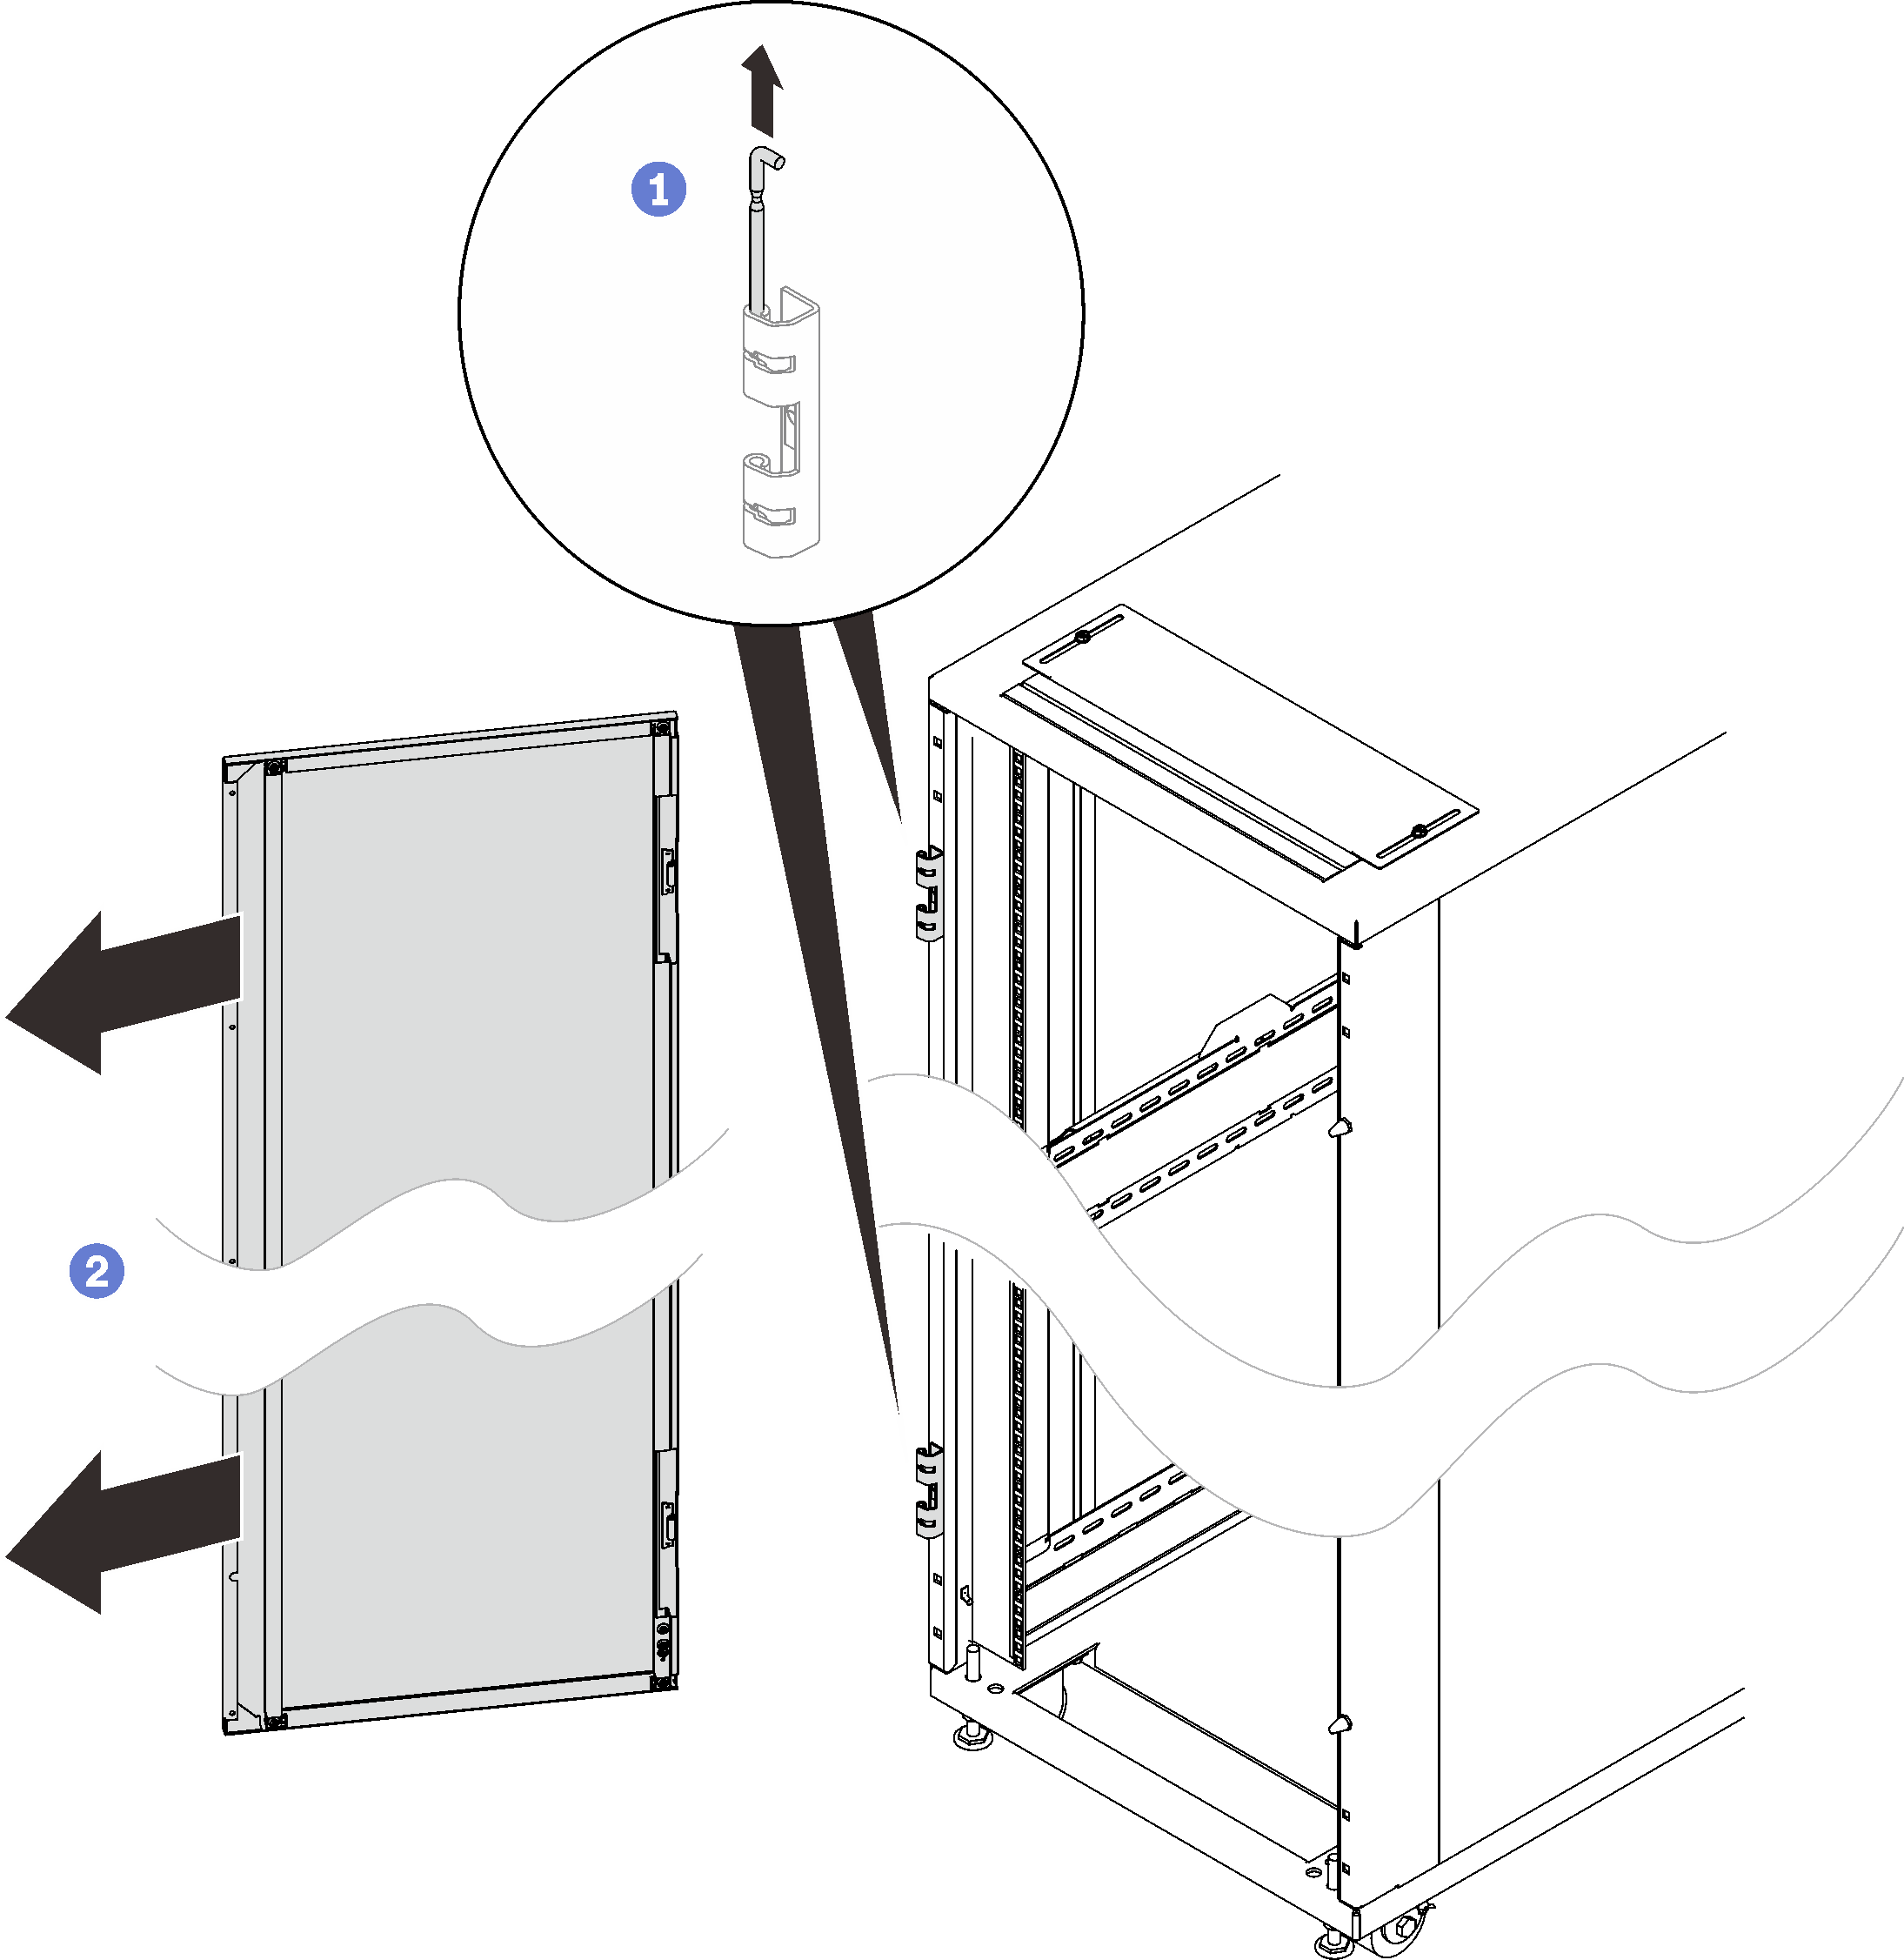
- Hold the door in place, and lift both hinge pins until they lock in the open position so that the door is disengaged.
- Remove the door from the rack cabinet frame.
- (Optional) Remove all the sides covers that will contact each other in the suite.Figure 5. Removing a side cover
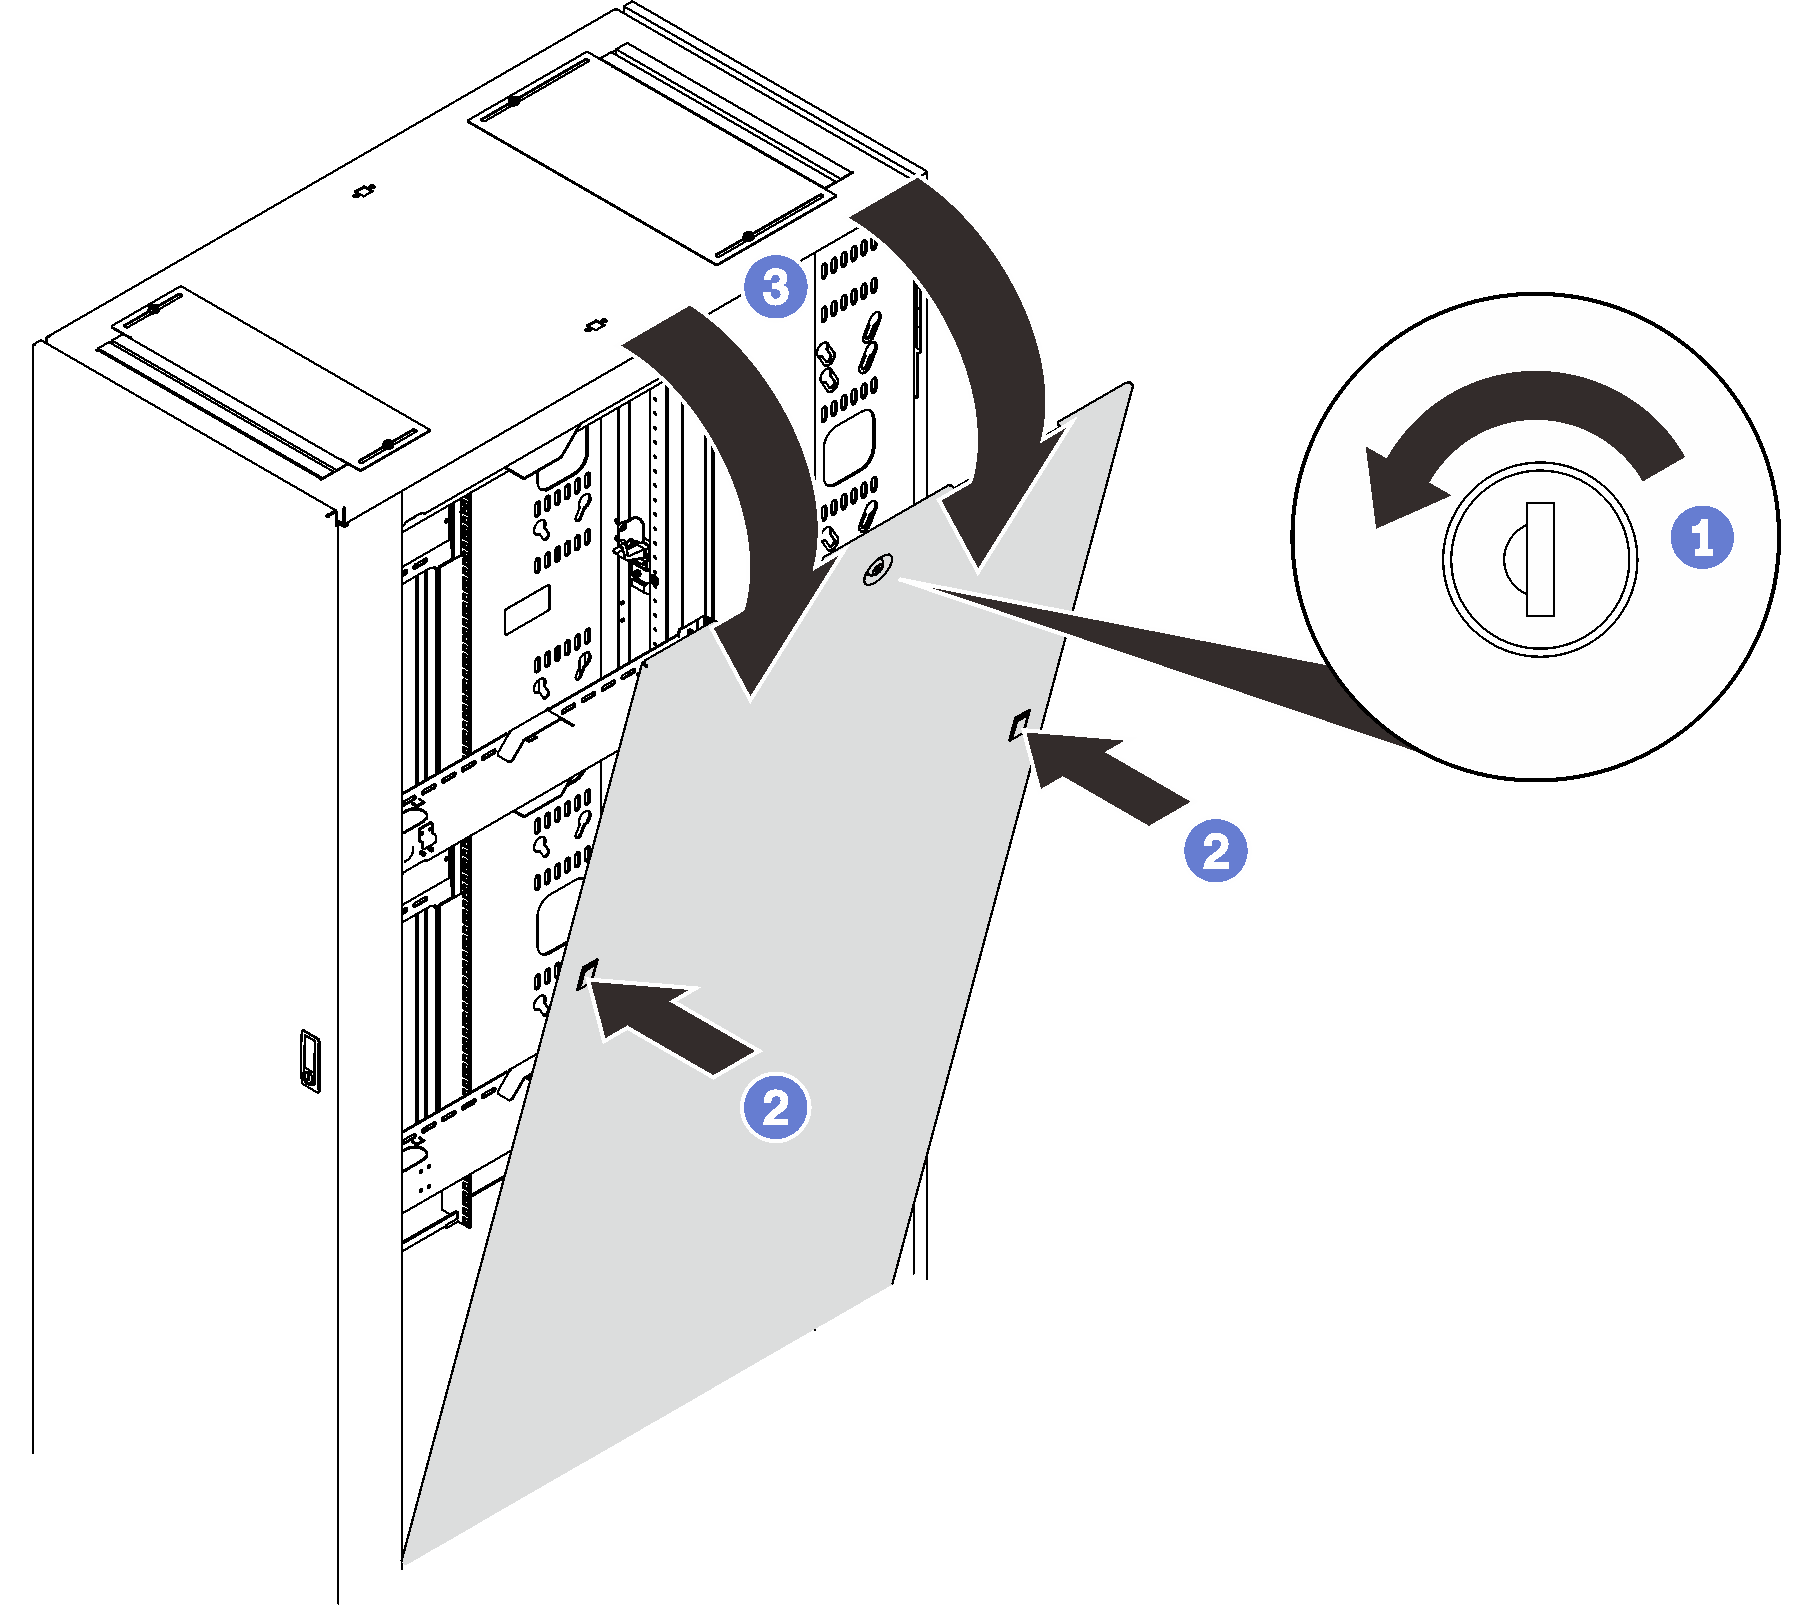
- Unlock the side cover with the key.
- Press on the two latches on both sides of the cover to disengage it from the rack.
 Rotate the top of the side cover away from the rack, and remove it.
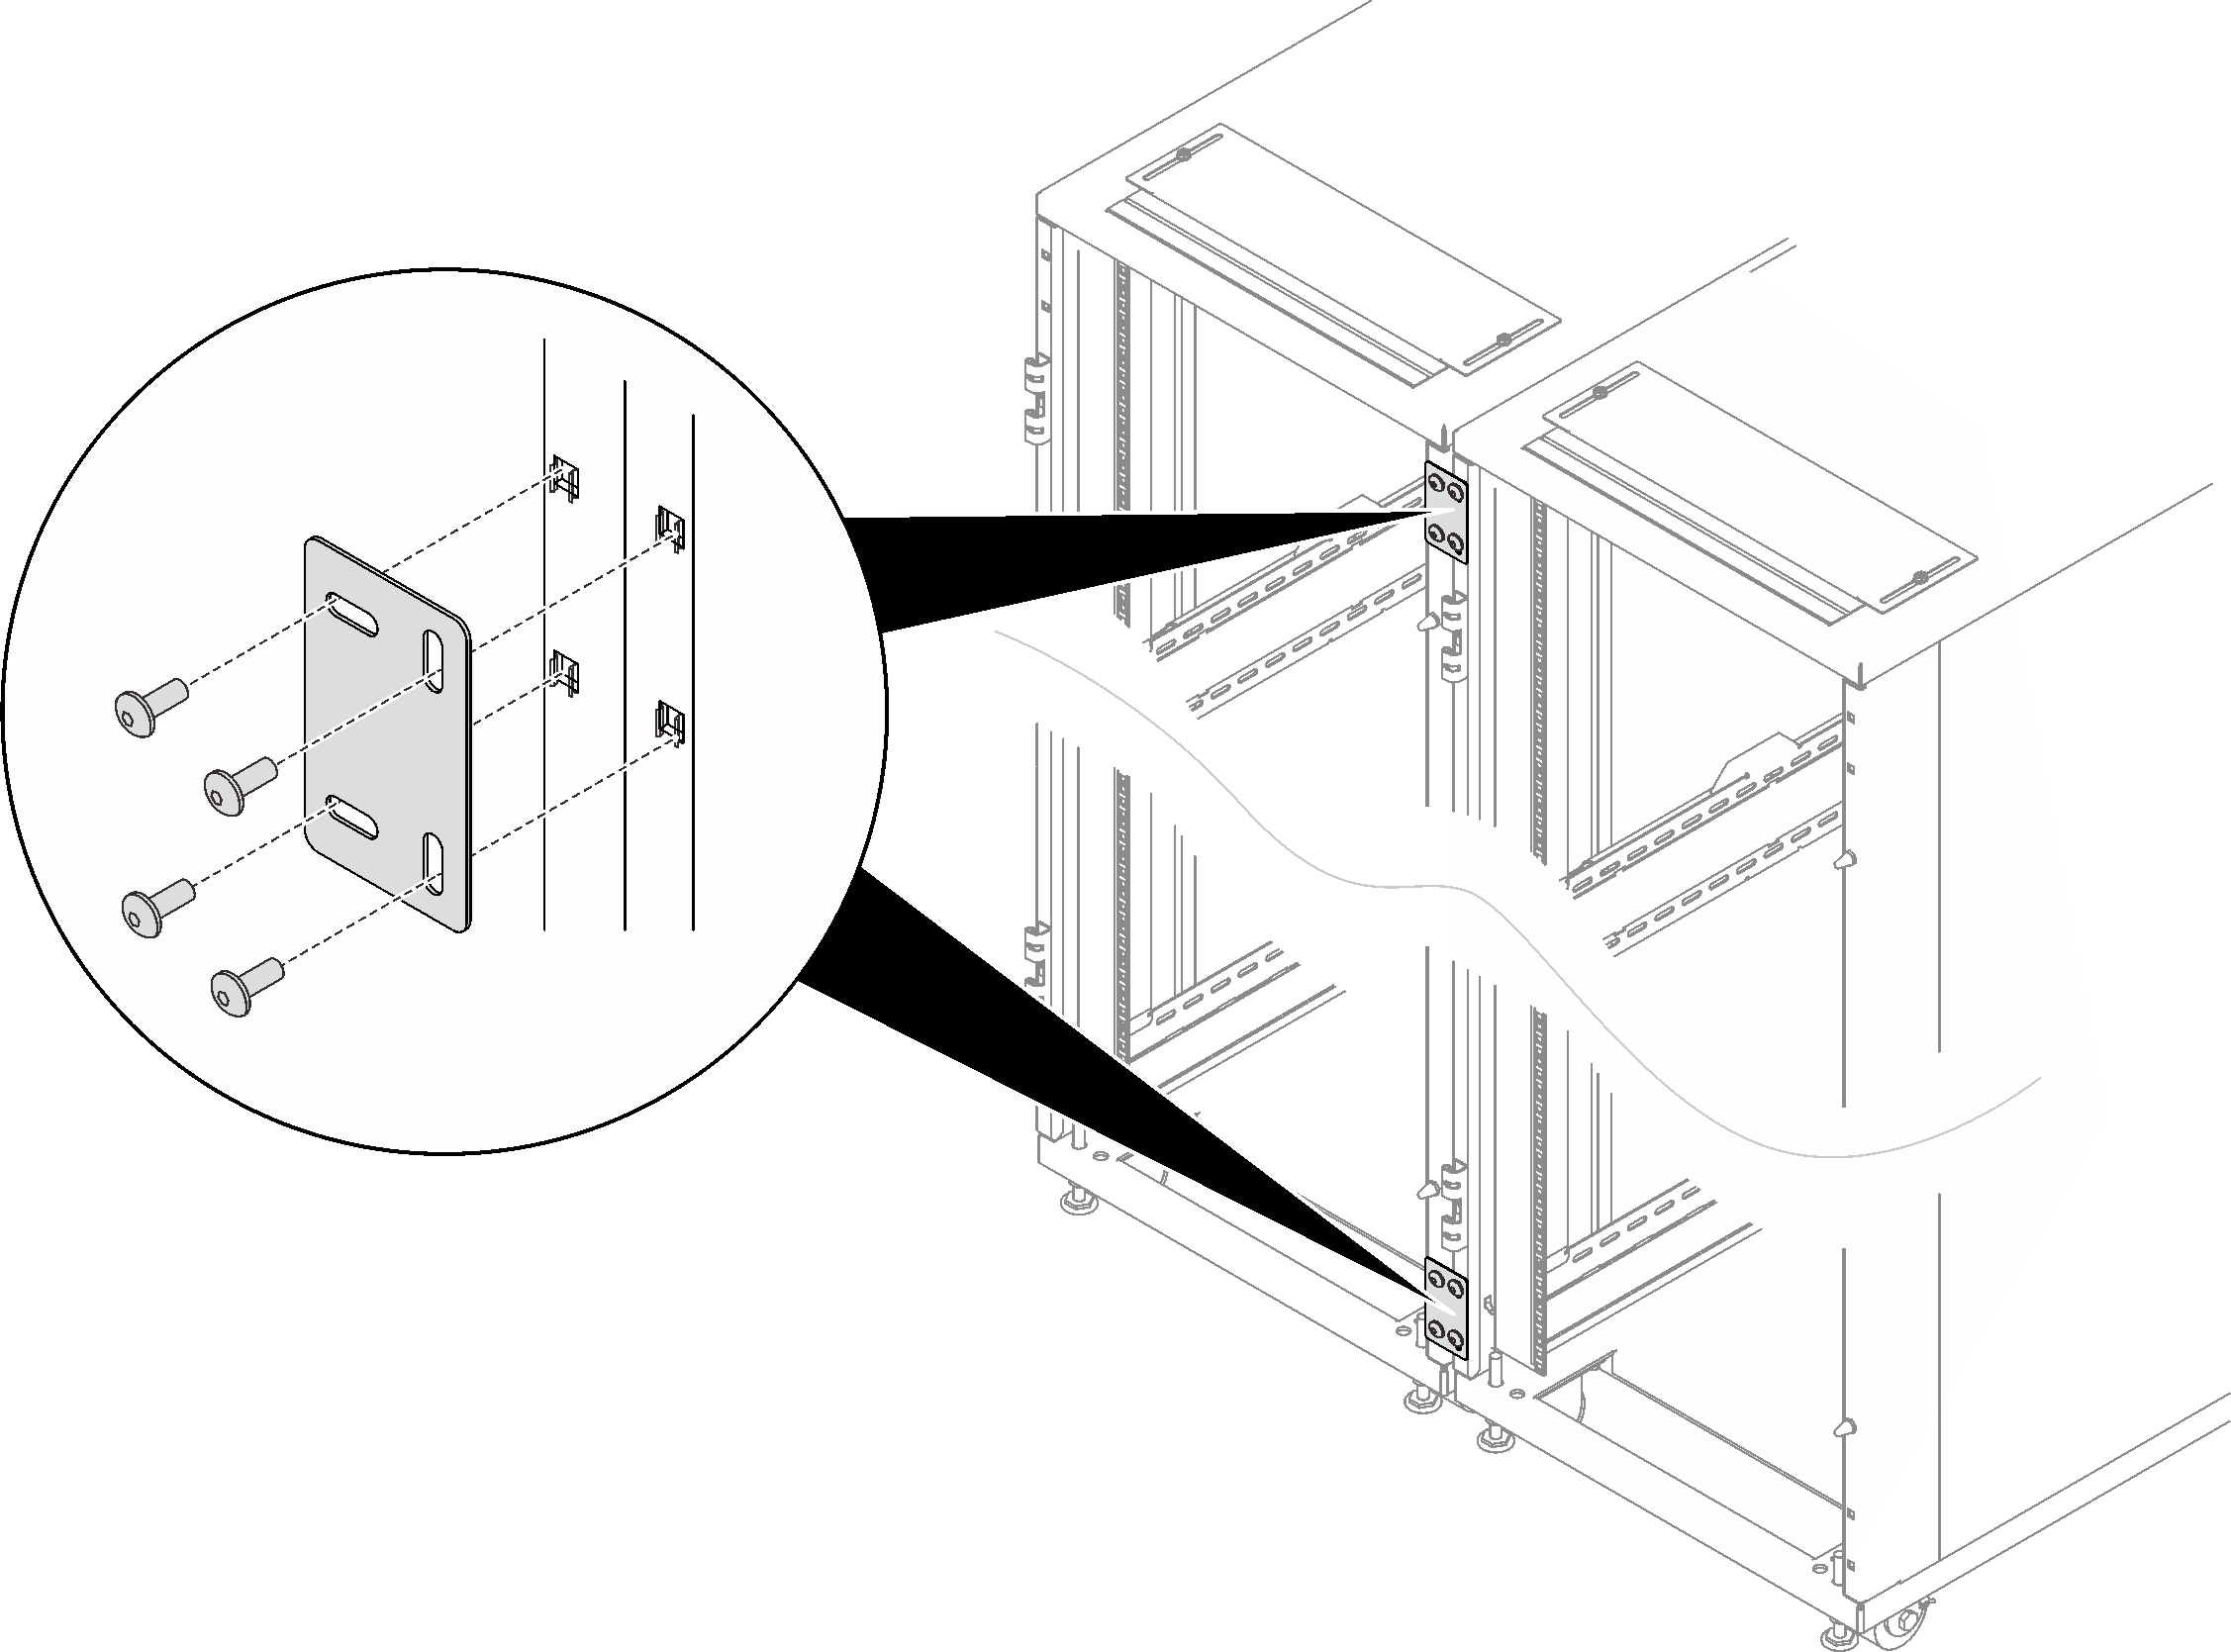
- Install four cage nuts on upper and lower locations on the side of adjacent cabinets as preparation for baying kit installation. Use the cage nuts that come with the baying kit.Figure 6. Installing the cage nuts

See Install nuts on the mounting flanges for details.
- Align the four screw holes of two attachment brackets with the holes in the adjacent cabinets, and secure each bracket to the racks with four screws.NoteDo not fully tighten the screws on the first bracket until securing the second bracket.Figure 7. Installing attachment brackets
- If there is a plan to install extension kit on only one of the cabinets, remove the two screws from the upper and lower side of the cabinet that will be installed with the extension kit. Then, proceed with the actual extension kit installation procedure. See Install 42U Standard Rack Extension Kit.Figure 8. Removing screws to prepare for extension installationOtherwise, reinstall all the doors that have been removed.
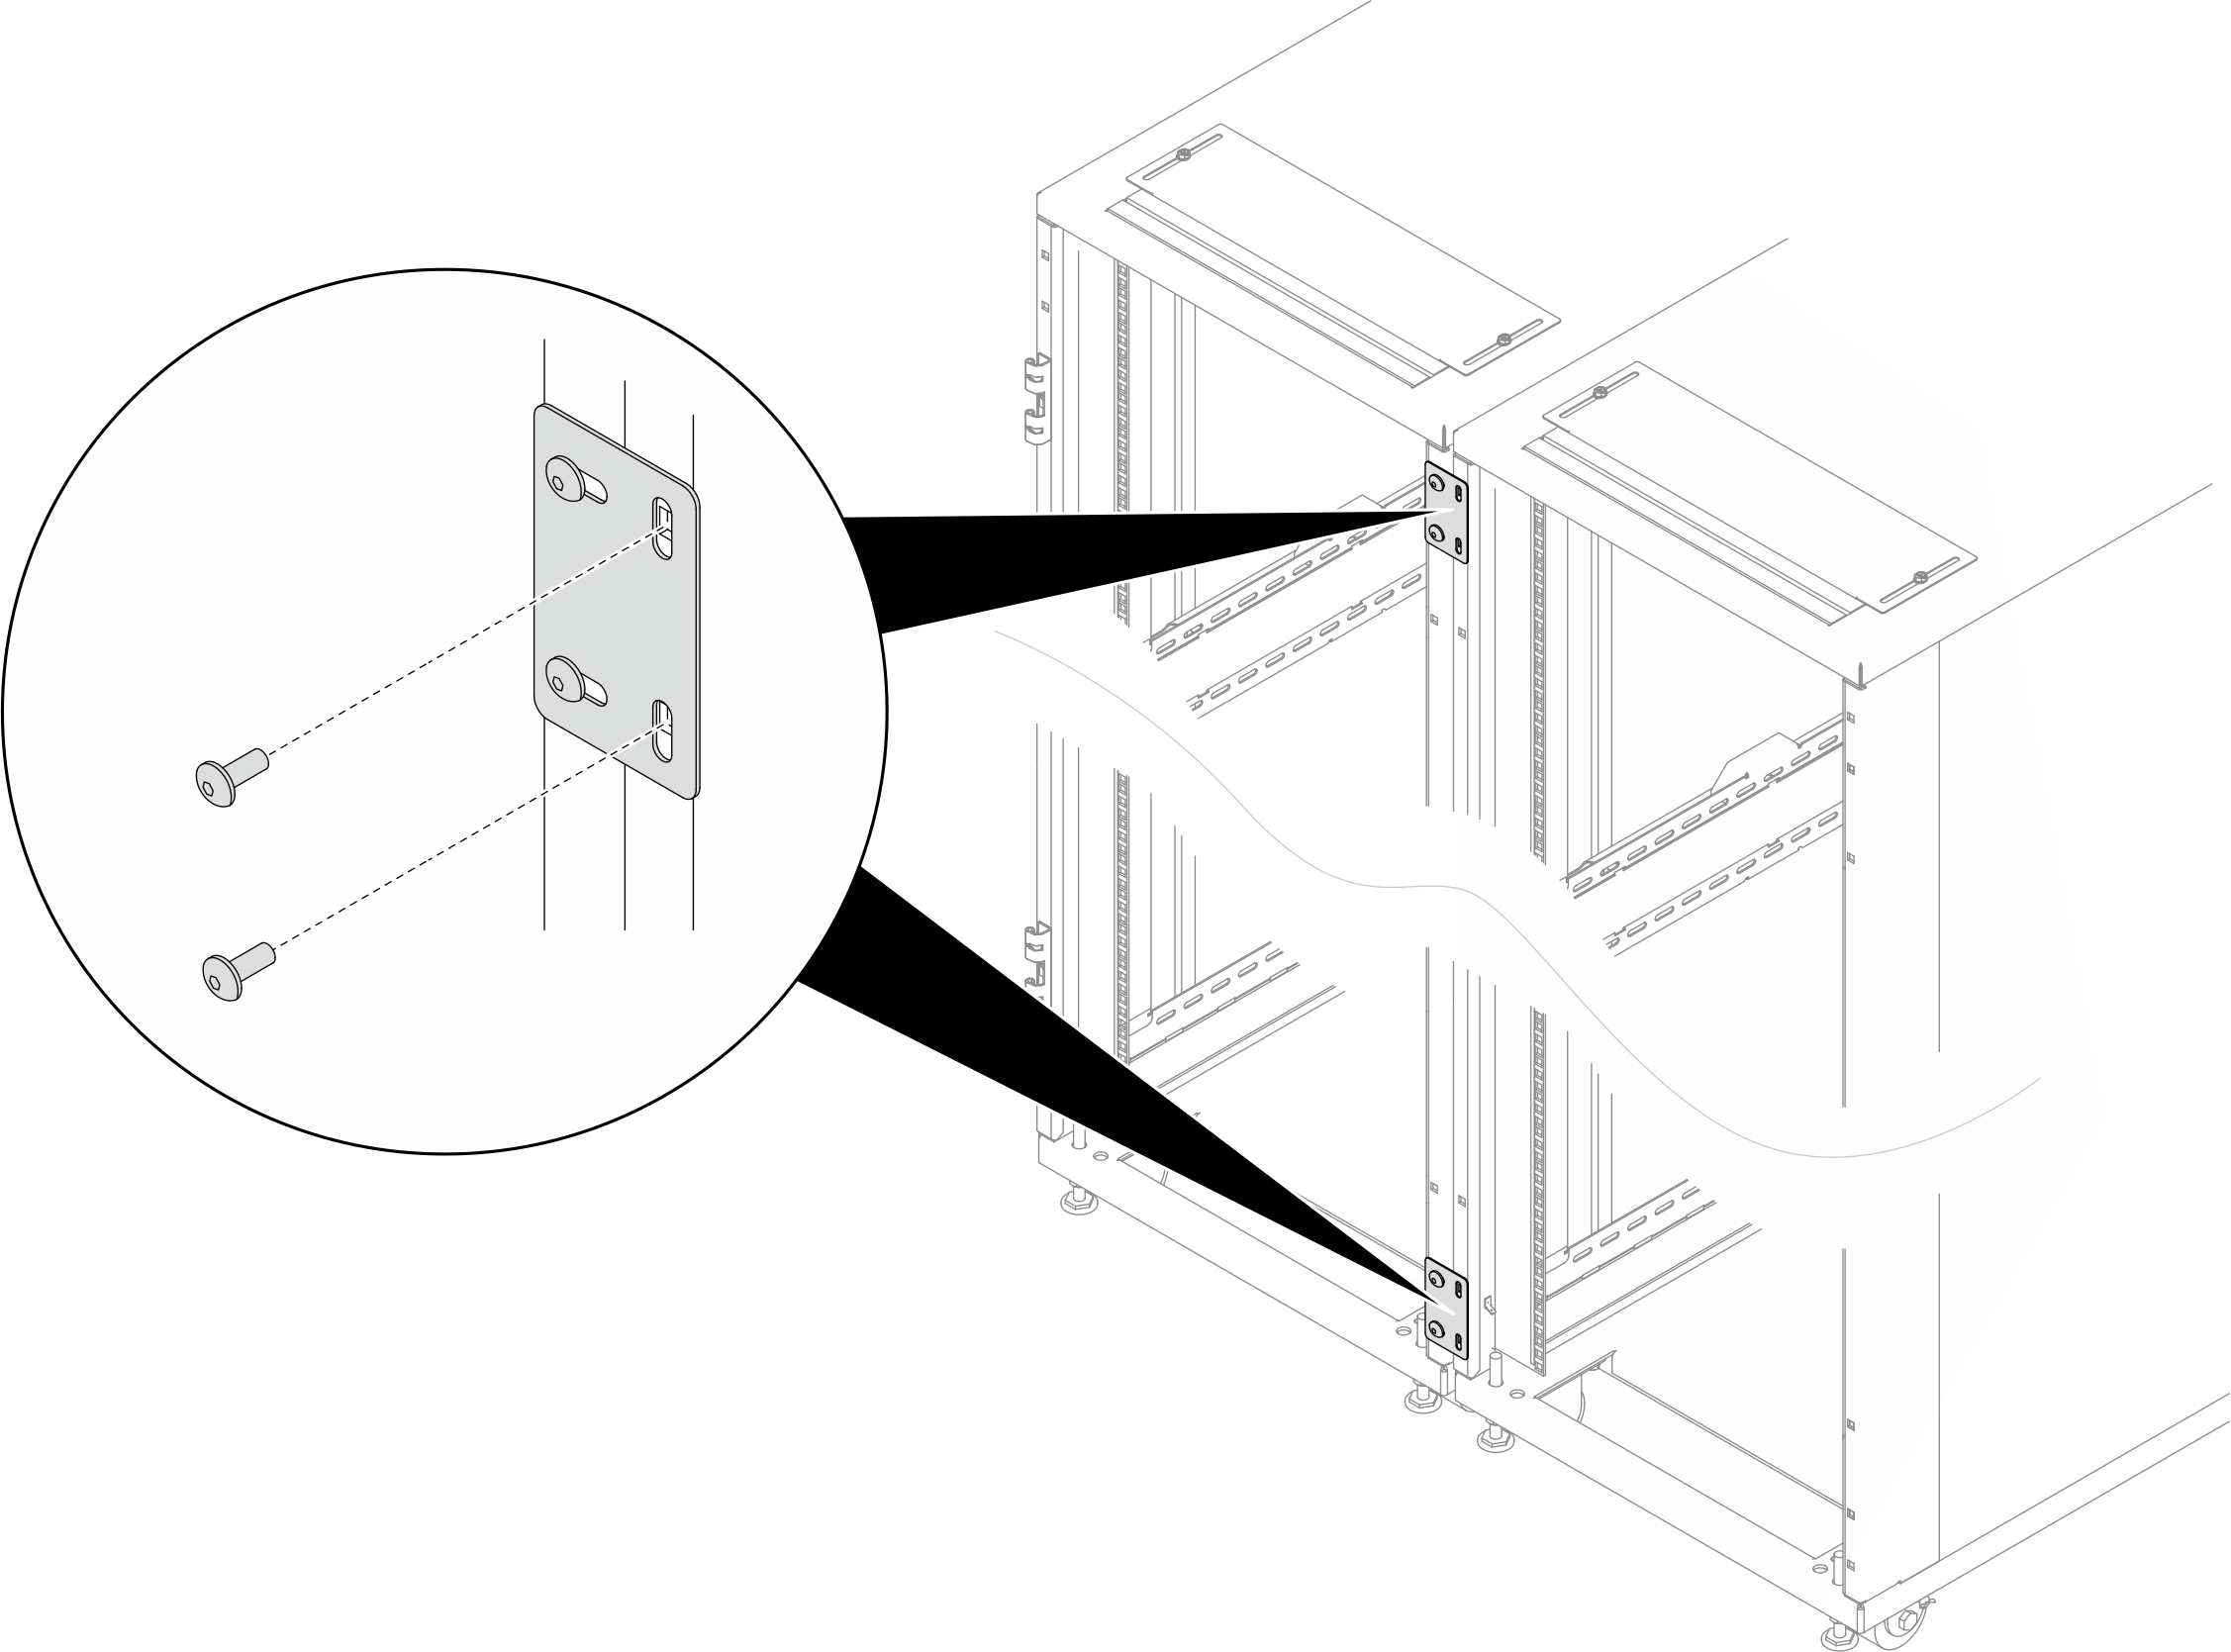 Figure 9. Installing a door
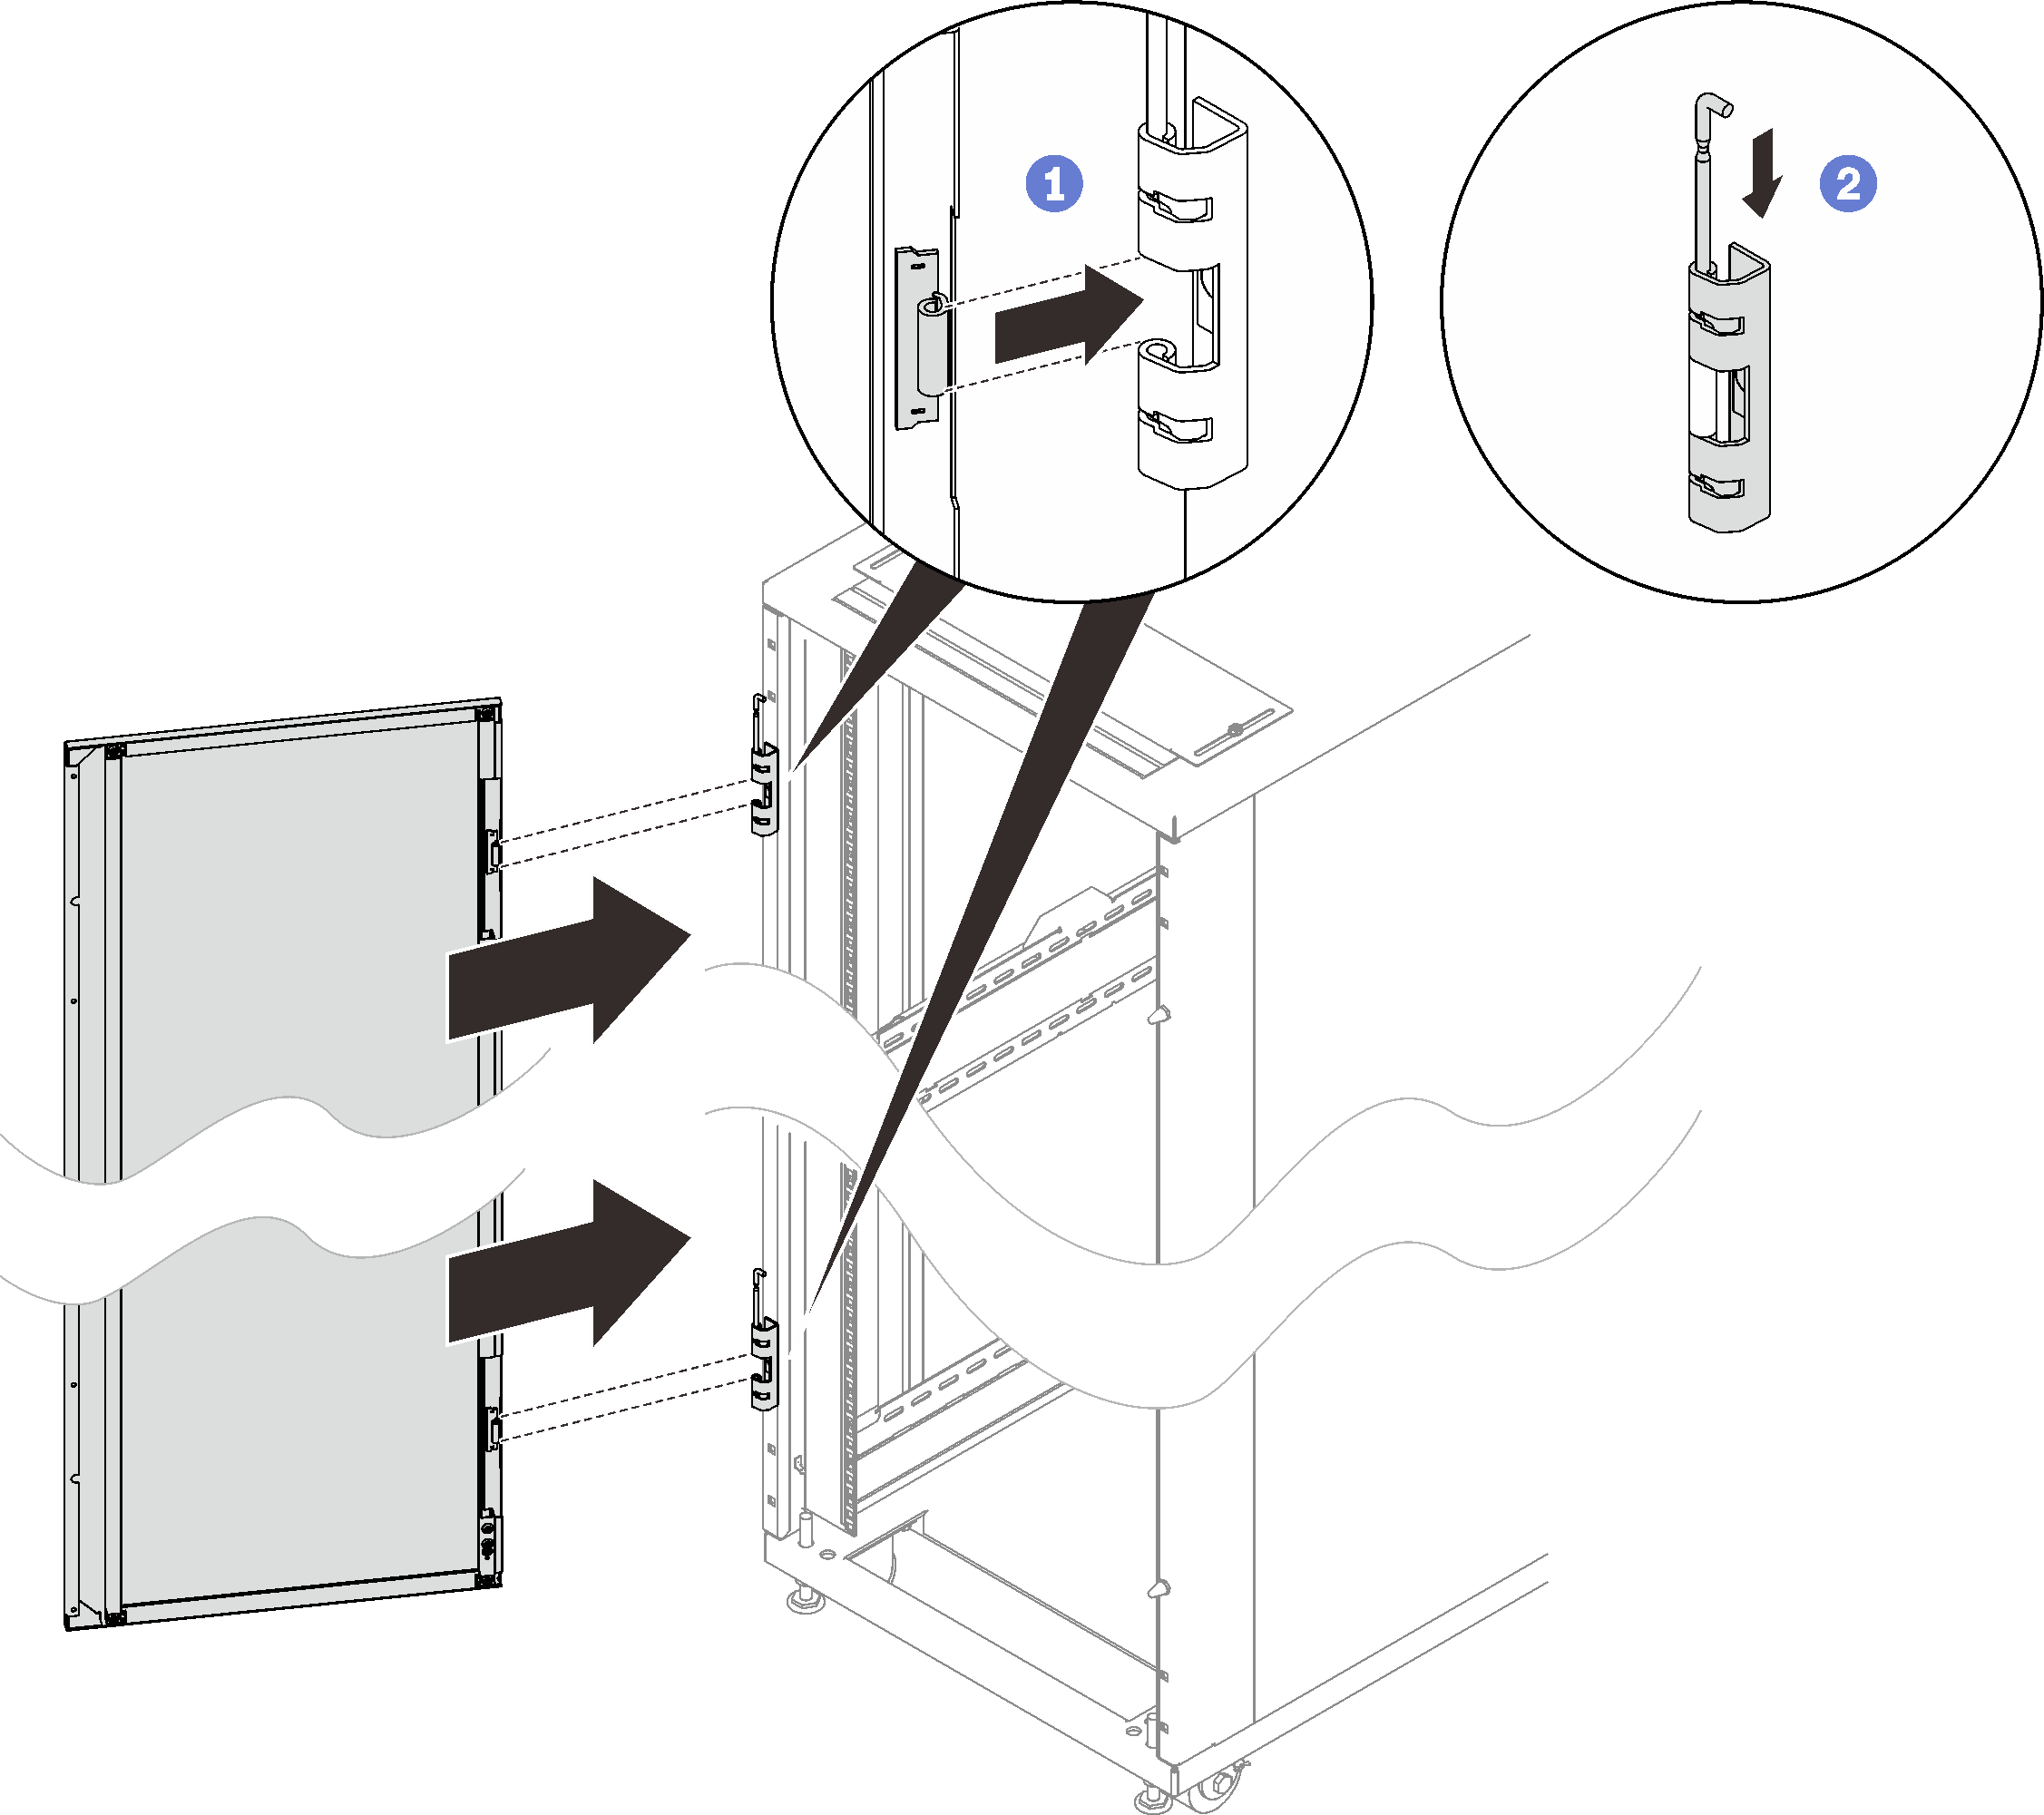
- Align the door with the hinges, and hold the door in place.
- Push the hinge pins down to the closed position so that the door is secured.
Give documentation feedback