Unpack the rack cabinet
See this topic to learn how to unpack the rack cabinet.
About this task
S037
 | CAUTION The weight of this part or unit is more than 200 kg (441 lb). It takes specially trained persons, a lifting device, or both to safely lift this part or unit. Make sure to follow fork-lift truck operating regulations to prevent overturning of the rack cabinet. |
Note
Space requirement: You will need minimum of 2885 mm (113.6 inch) on the rear side of the pallet to unpack the rack cabinet.
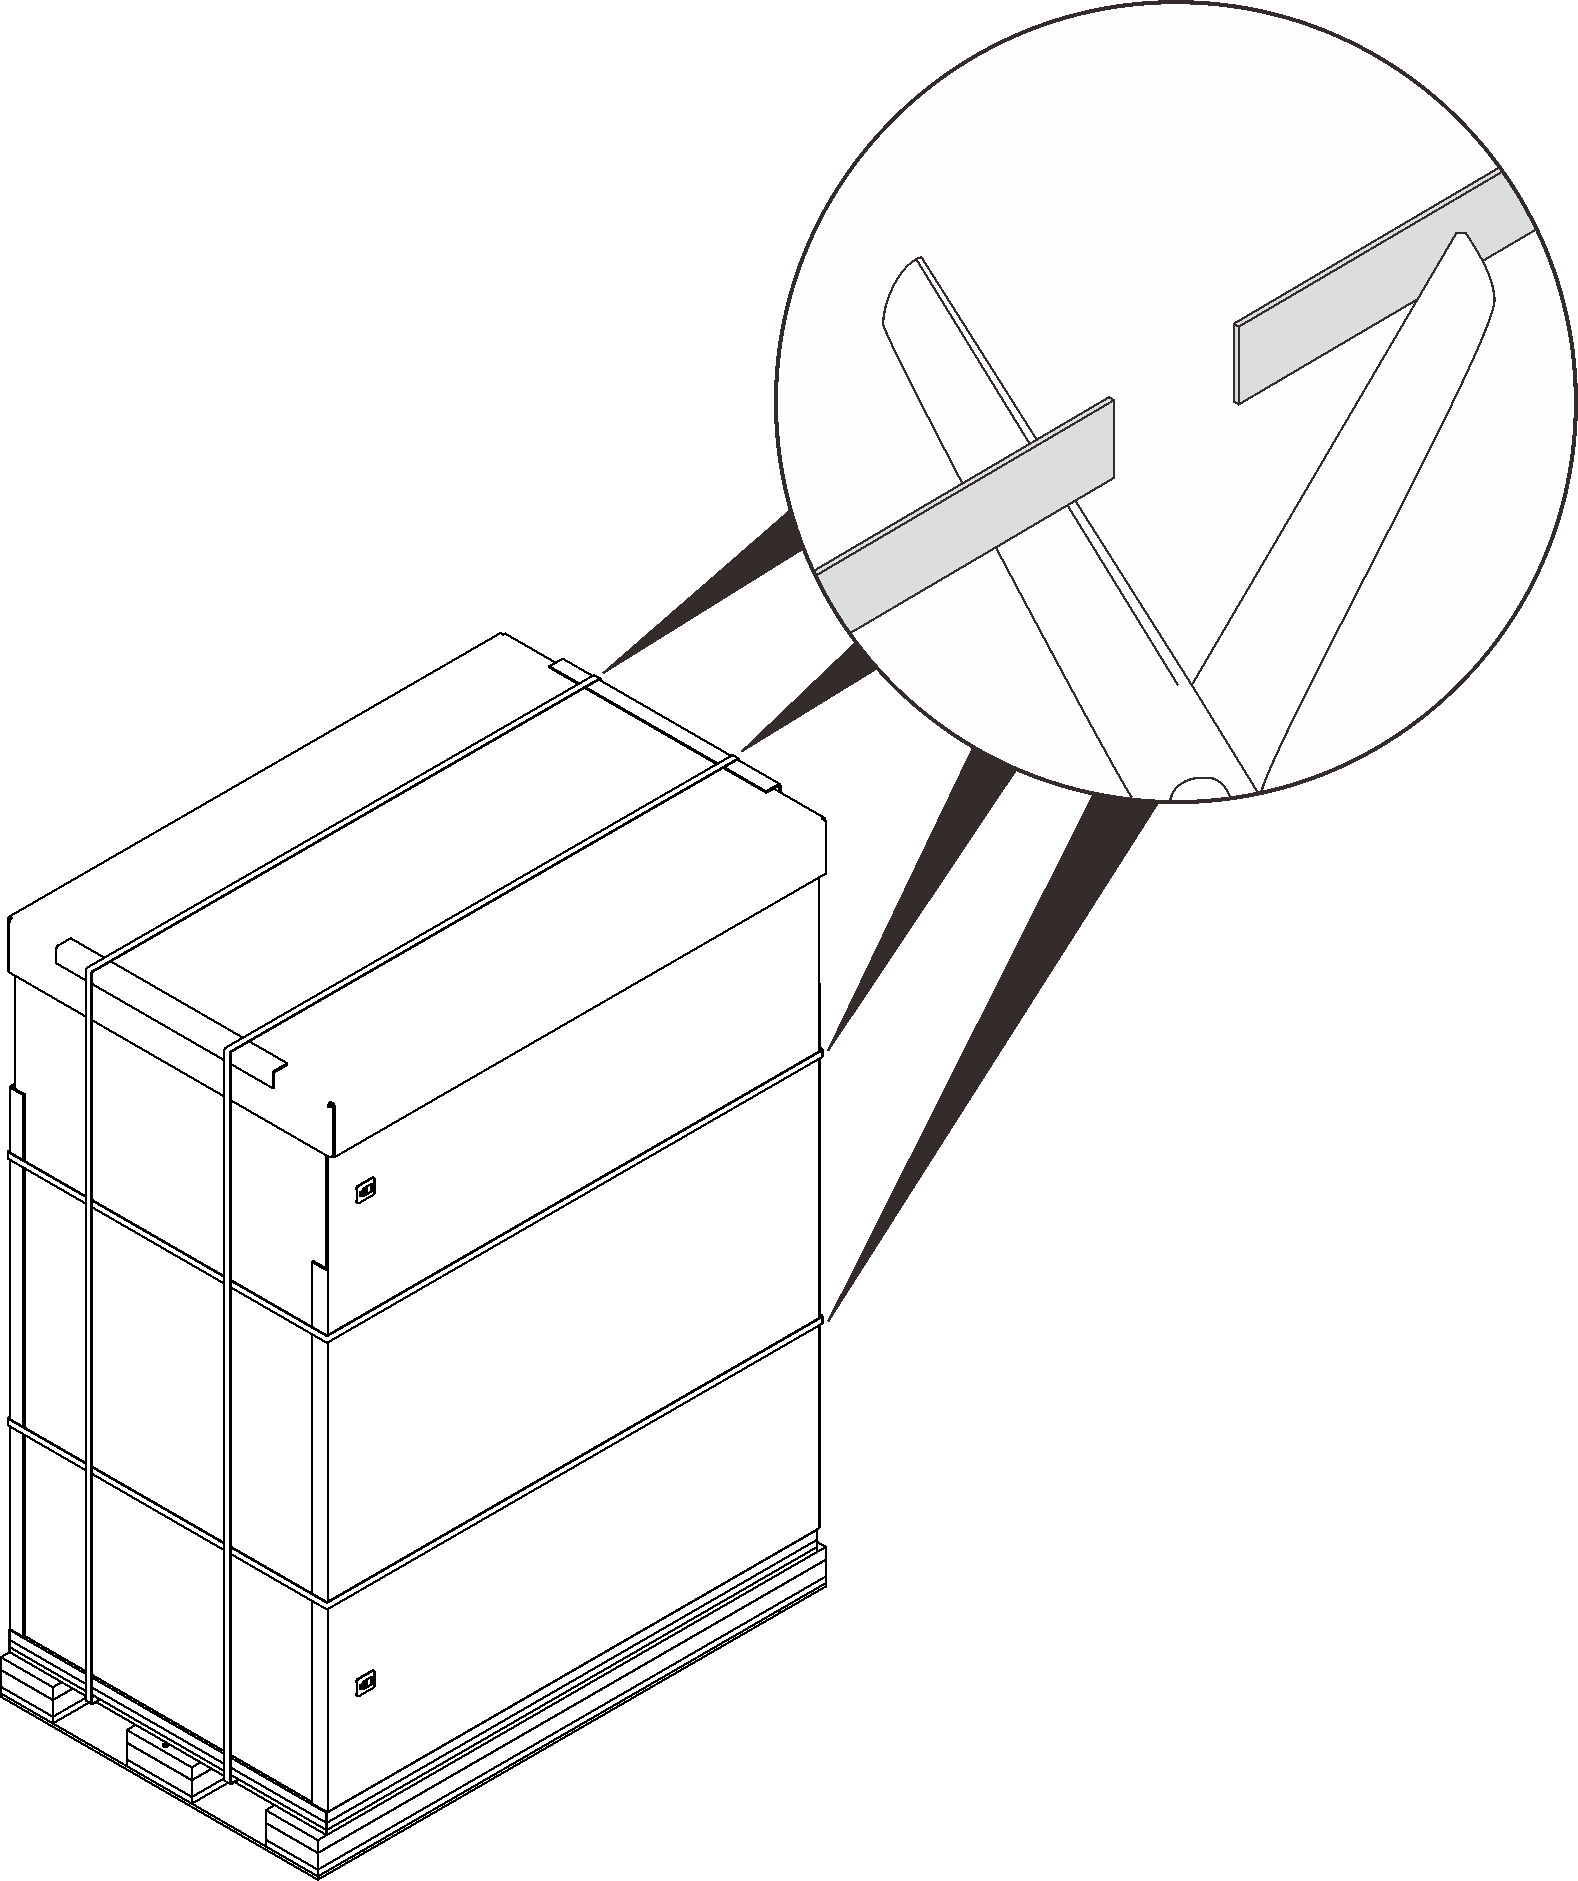
Tool requirement: You will need one sharp tool.
Forklift requirements:
NoteOnly the front side of the pallet is available for the forklift.Figure 1. Forklift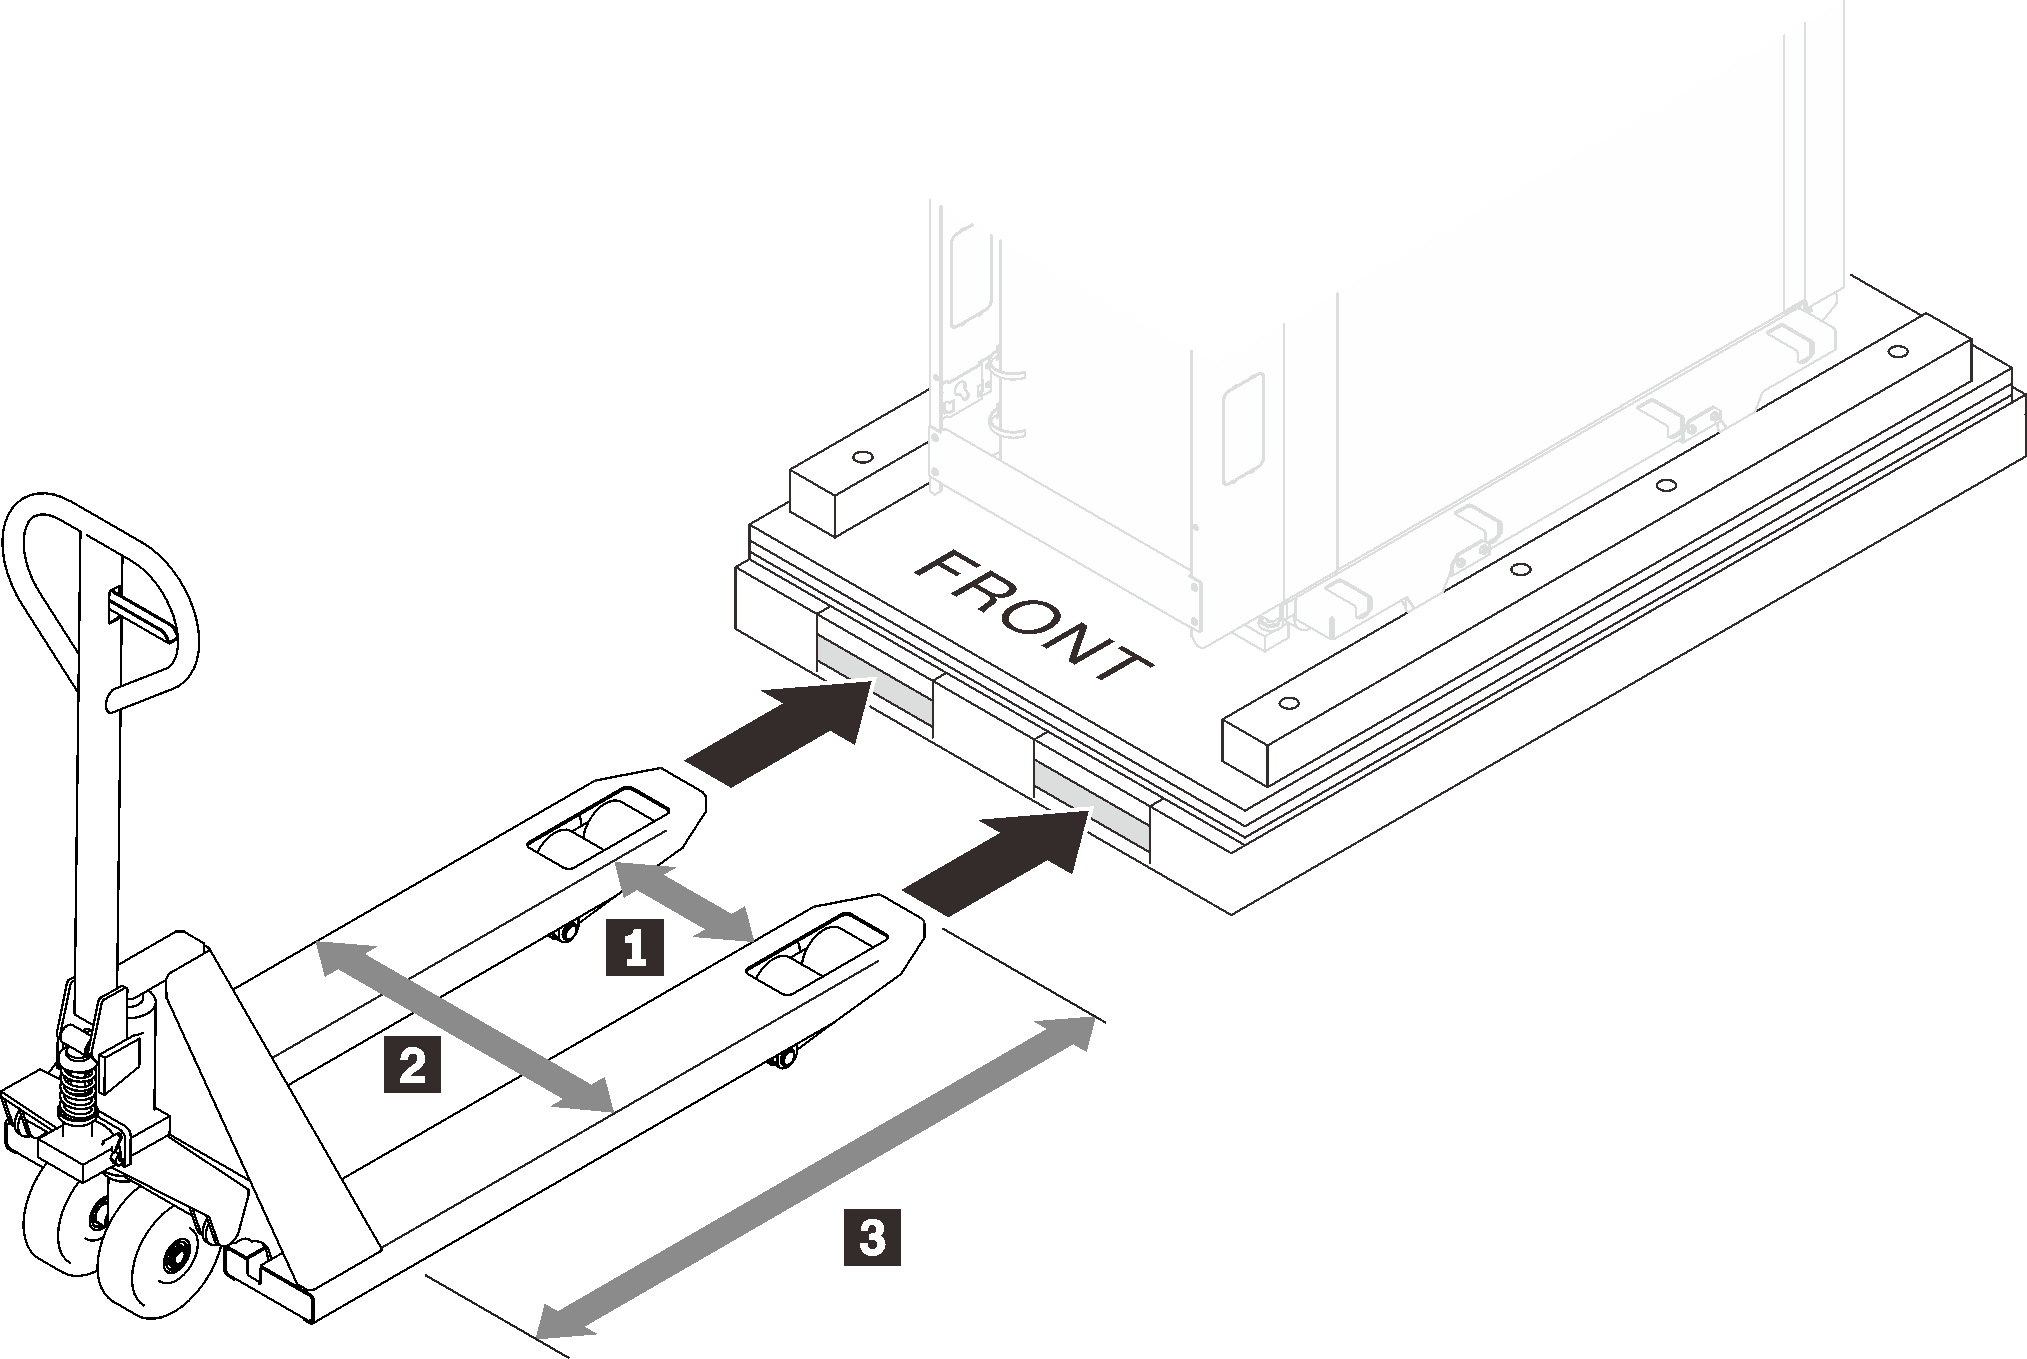
- 1 must be longer than 350 mm.
- 2 must be shorter than 700 mm.
- 3 must be between 1450 to 1650 mm.
- Loading capacity must be larger than 3000 kg.
Procedure
- Cut the four straps with a sharp tool.Figure 2. Cutting the straps
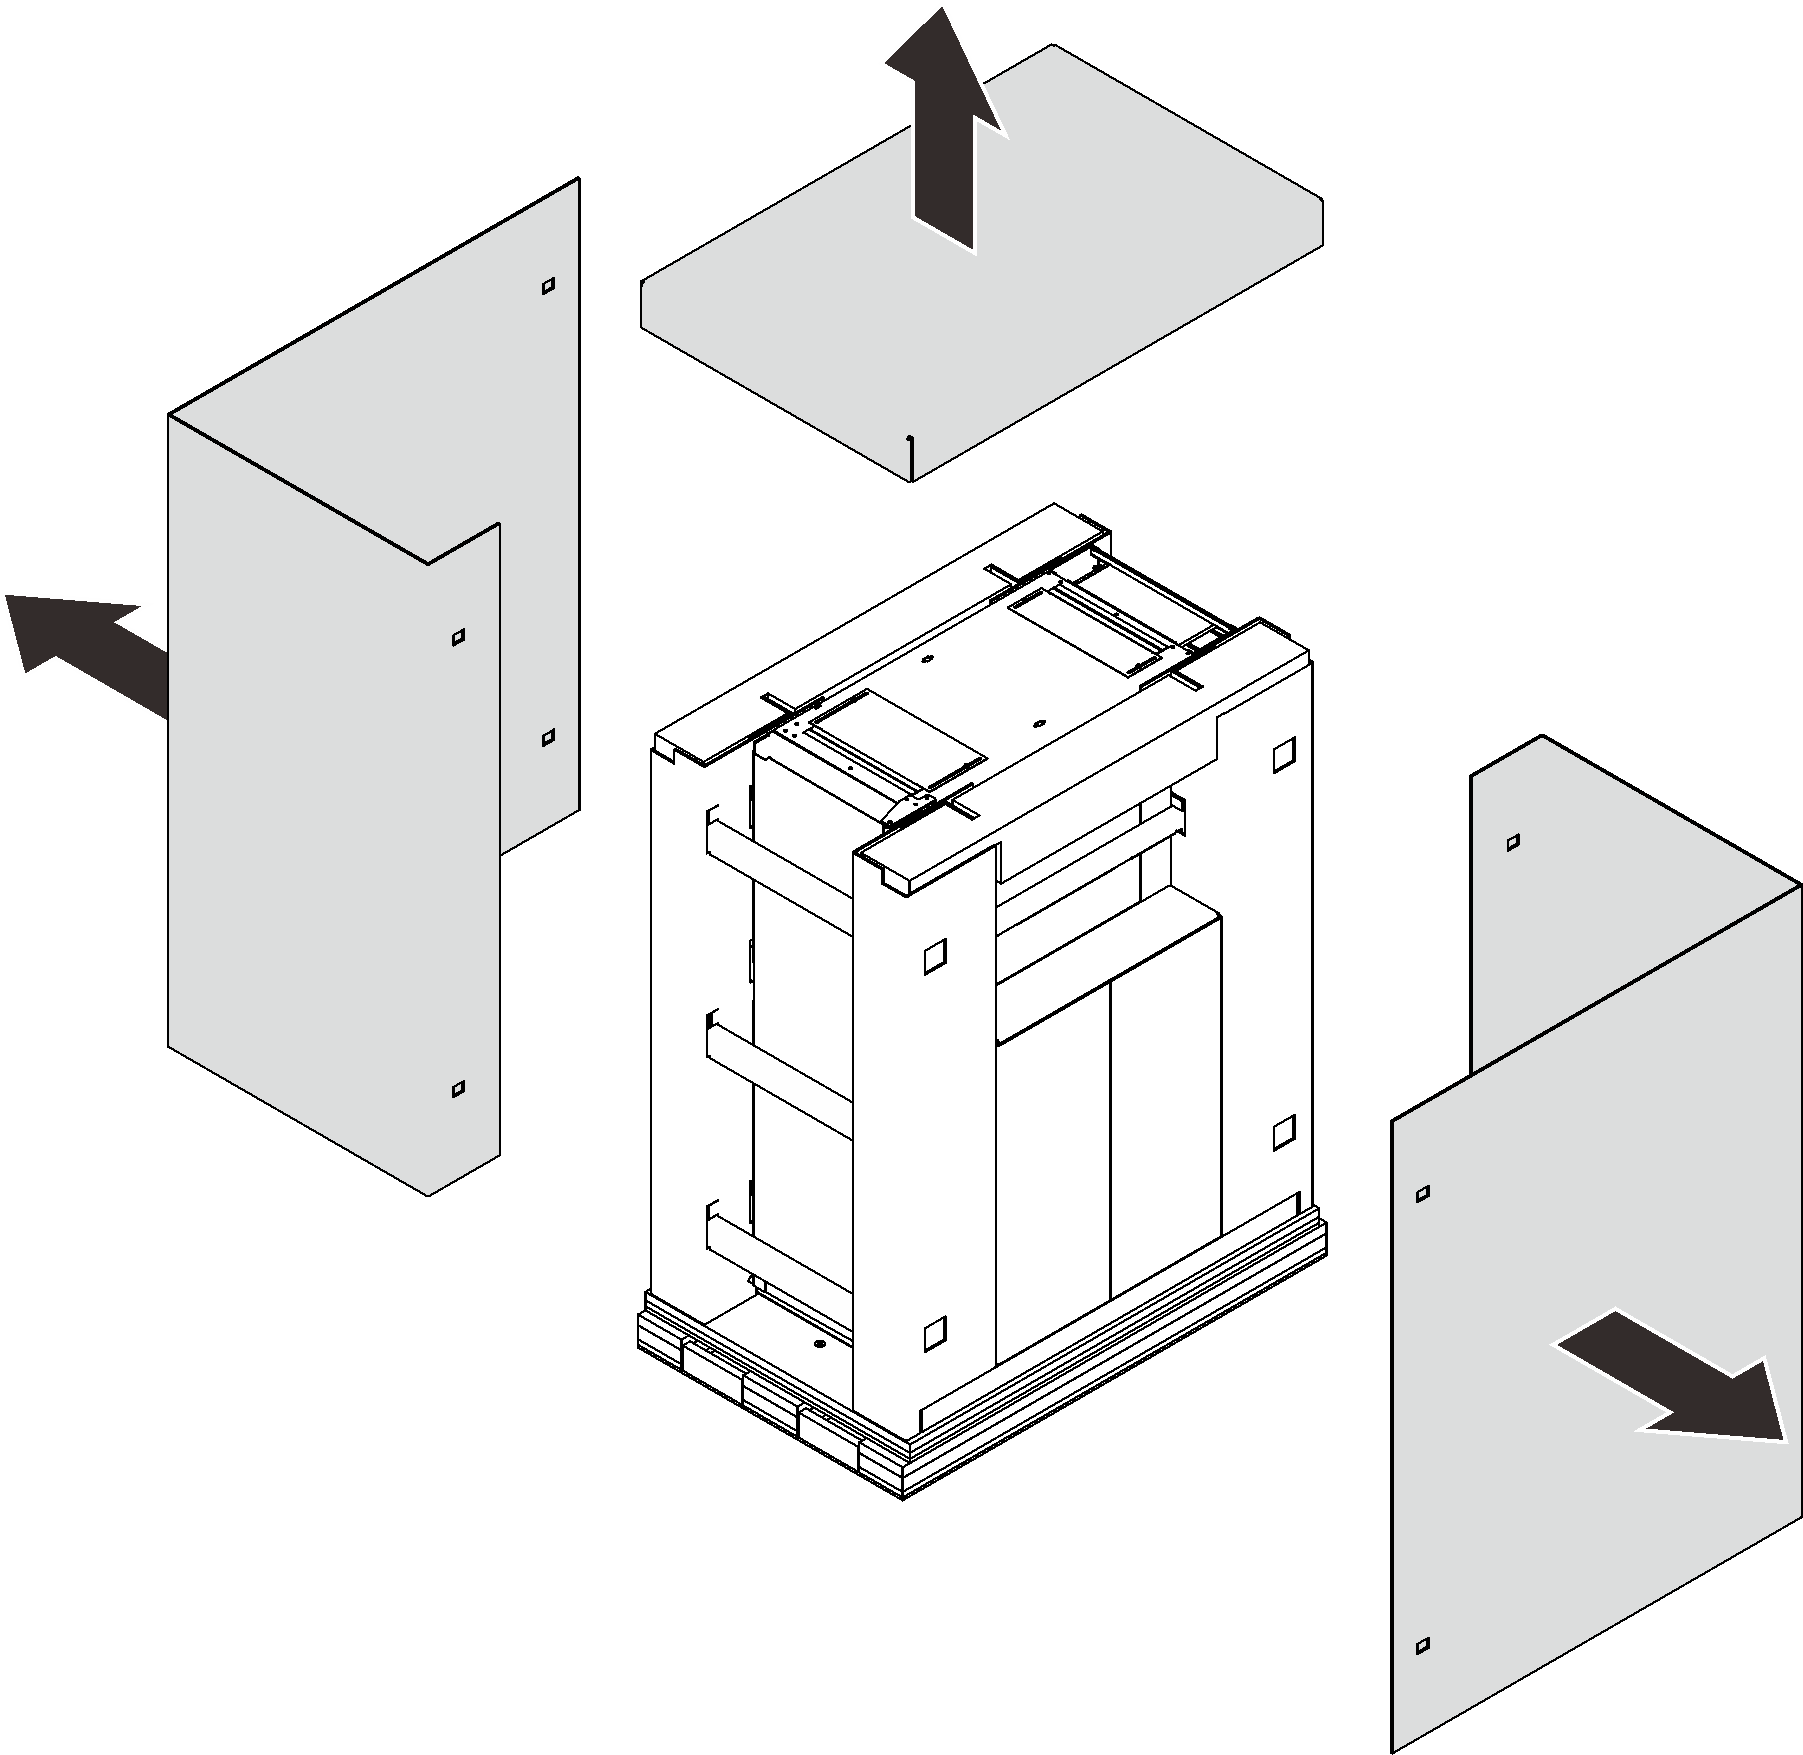
- Remove the top cover and side cardboards.Figure 3. Removing the cardboards
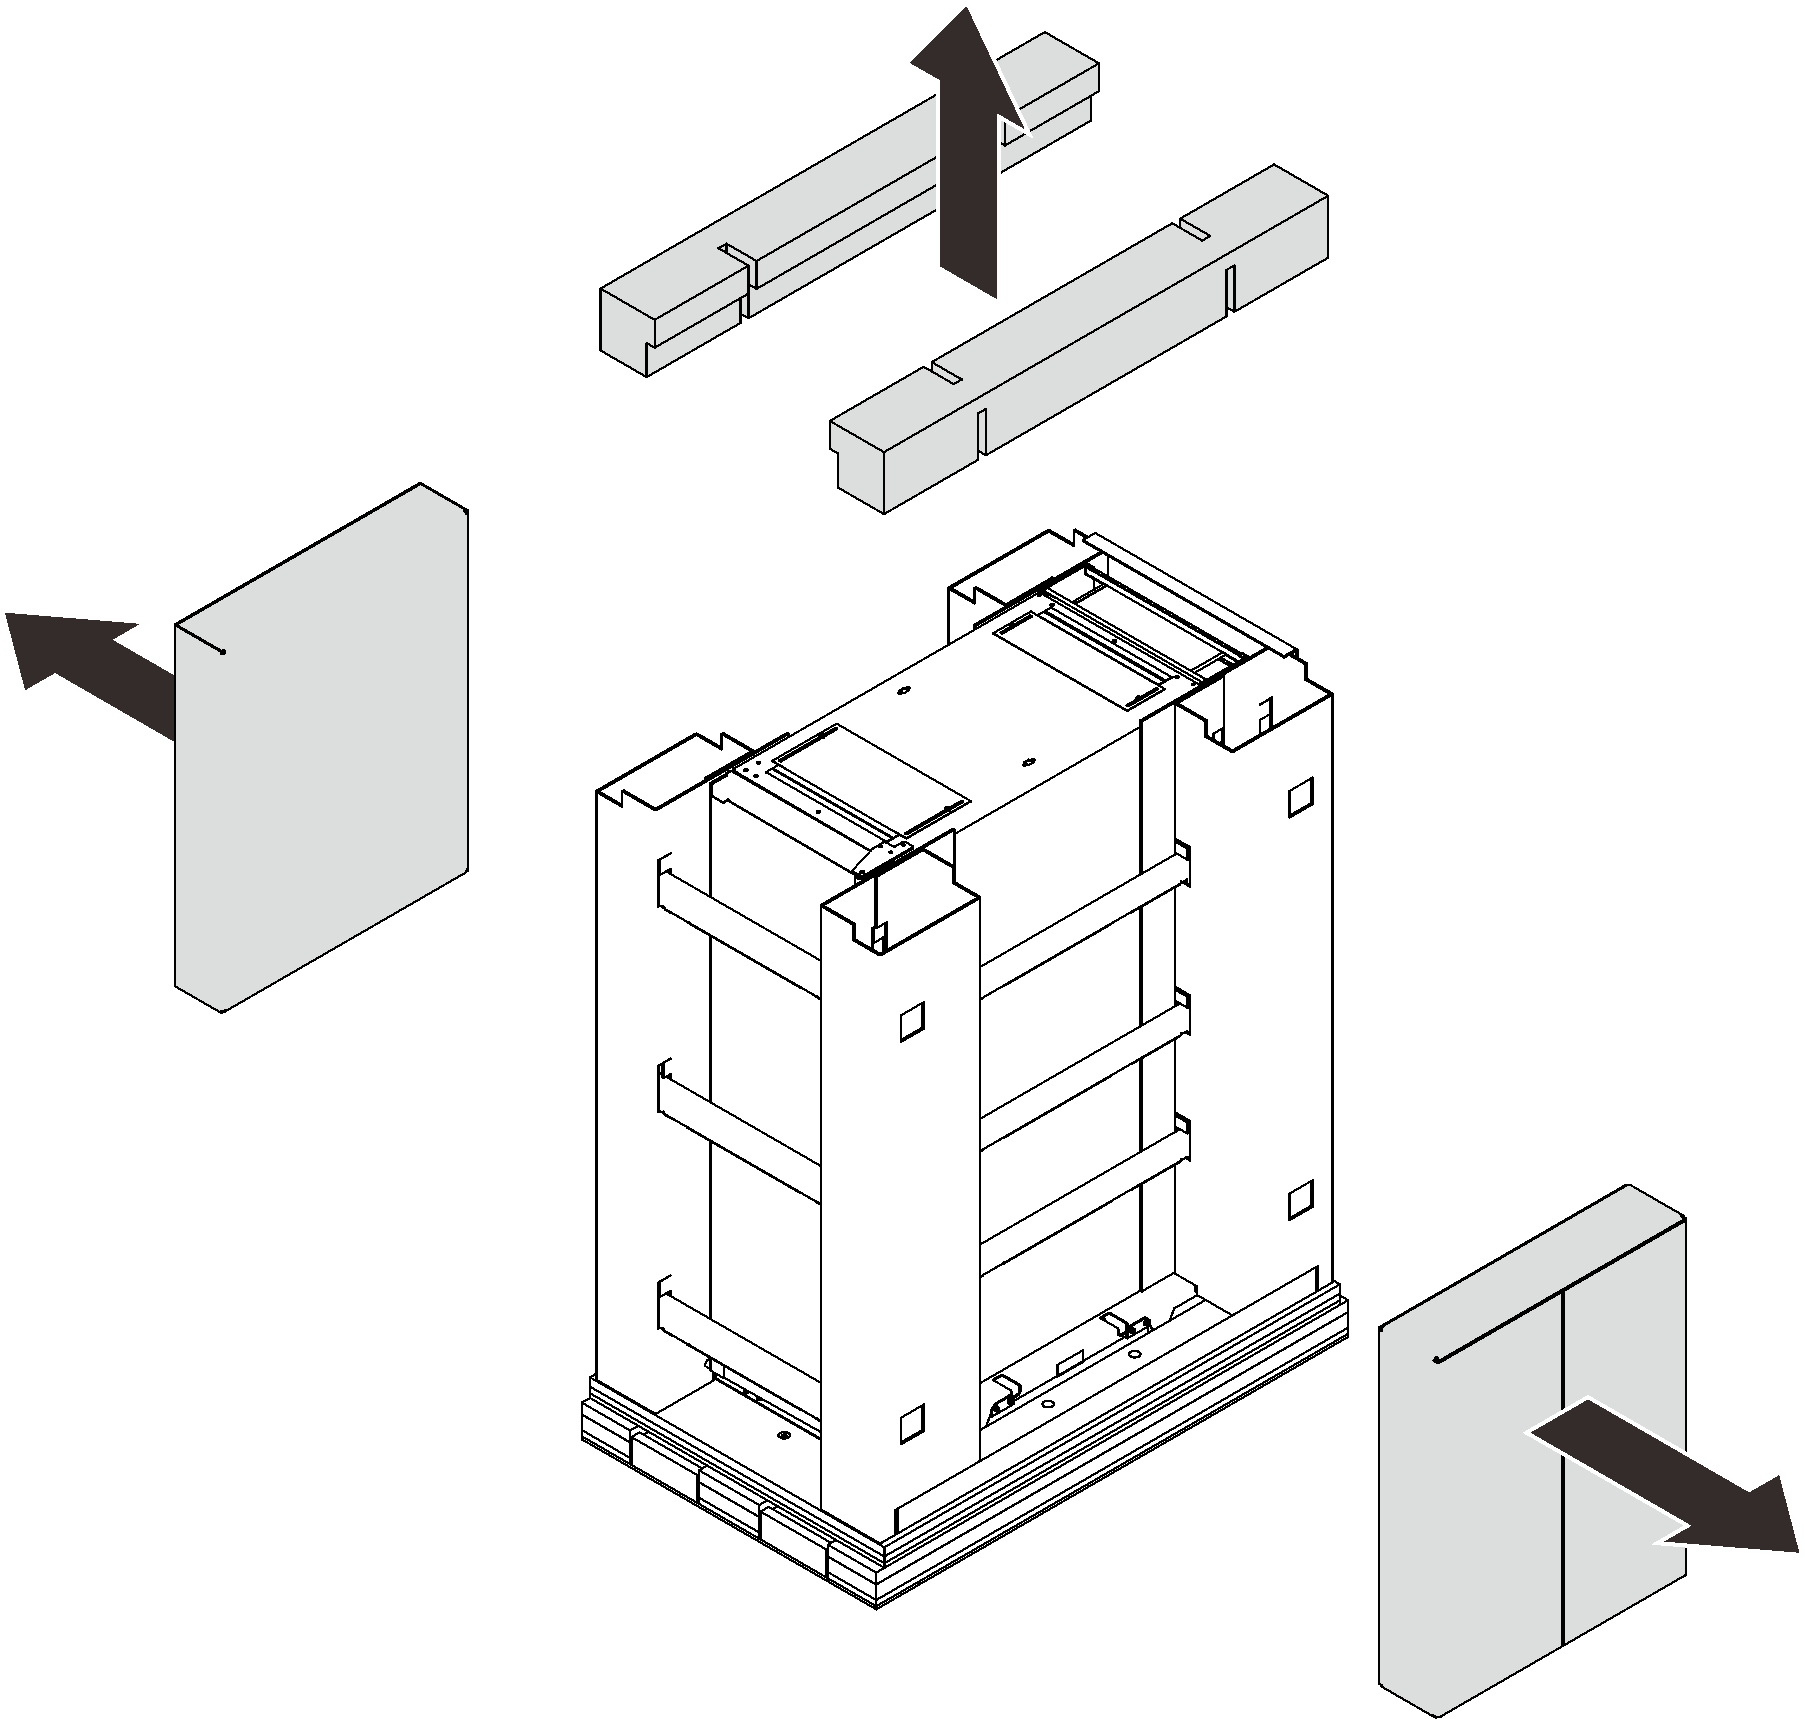
- Remove the top bars and side boxes.NoteOne of the side cartons contains the ramps and is quite heavy. Lifting it requires two people.Figure 4. Removing the top bars and side boxes
- Release and remove the side frames.Figure 5. Removing the side frames
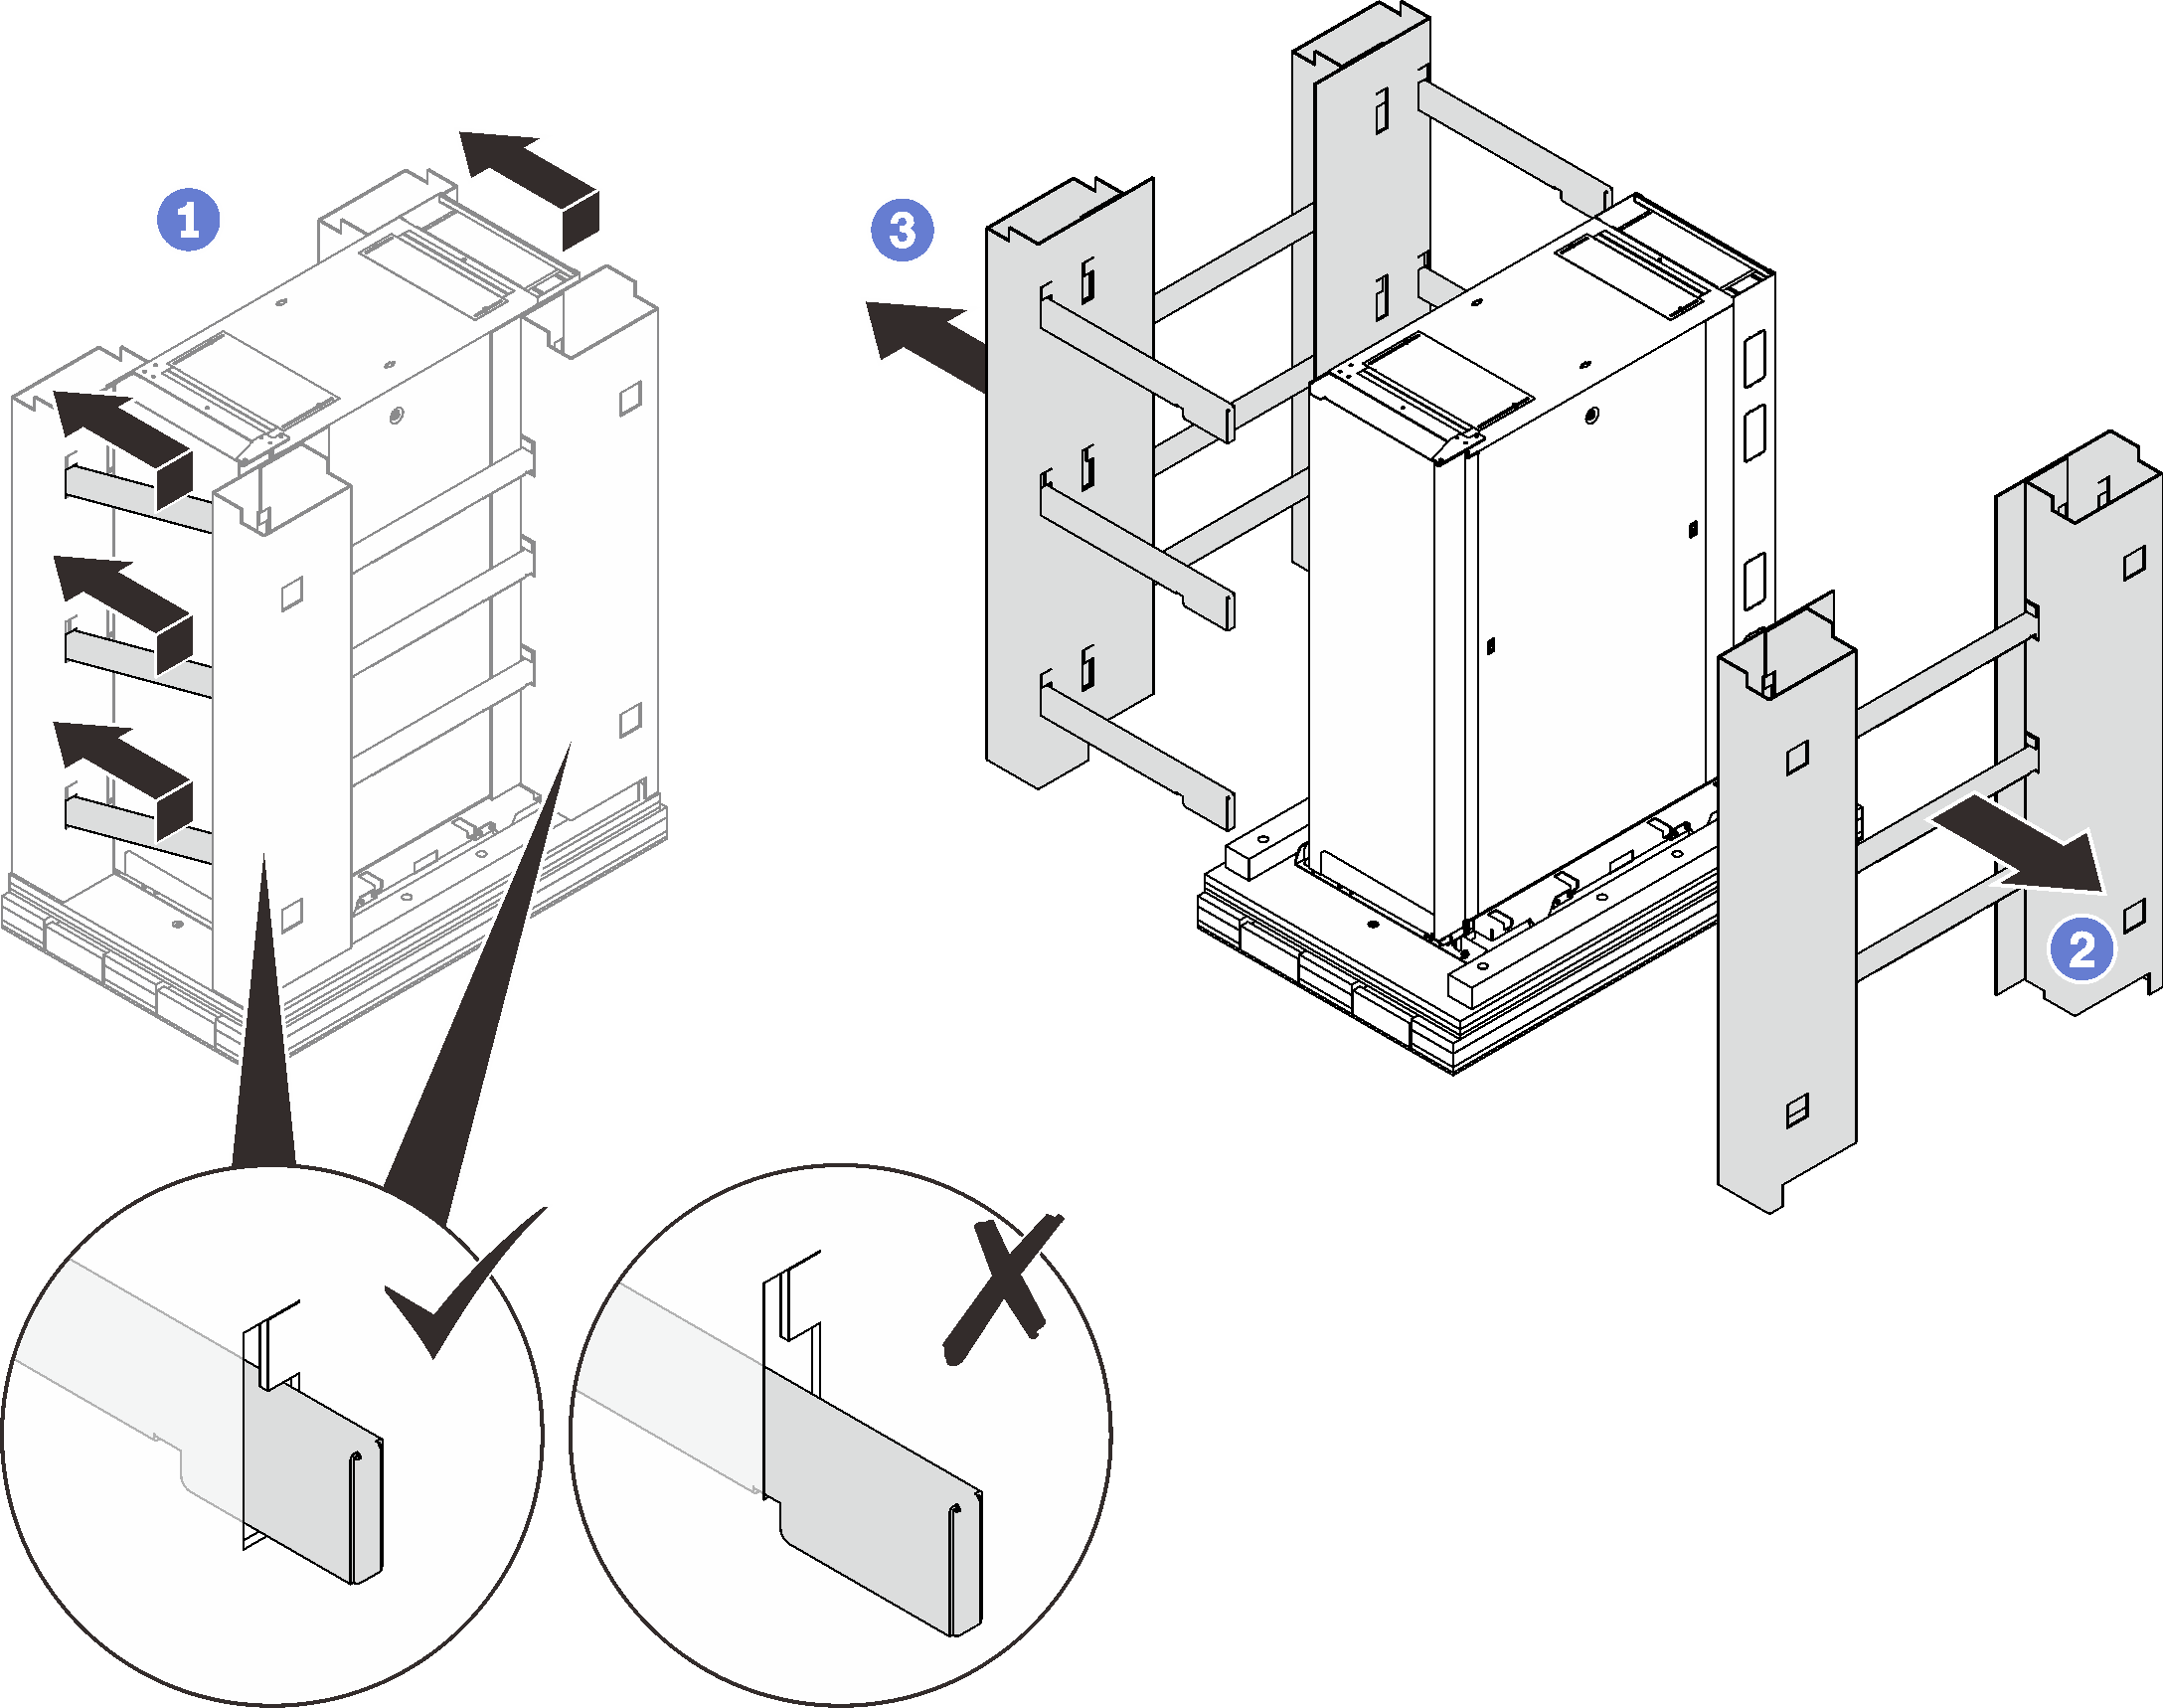
 Slightly lift and slide the six horizontal bars left to disengage their right ends from the slots on the right frame.
 Remove the right frame along with the three horizontal bars.
 Remove the left frame along with the nine horizontal bars.
- Open the front door, and remove the following:
- Remove the two bolts with wrench for 10, 14, 5, 18, 26.
- Remove the four M6 screws with wrench for 8, 9, 2
- Remove the eight M10 screws with wrench for 8, 9, 2.
Figure 6. Removing the front shipping bracket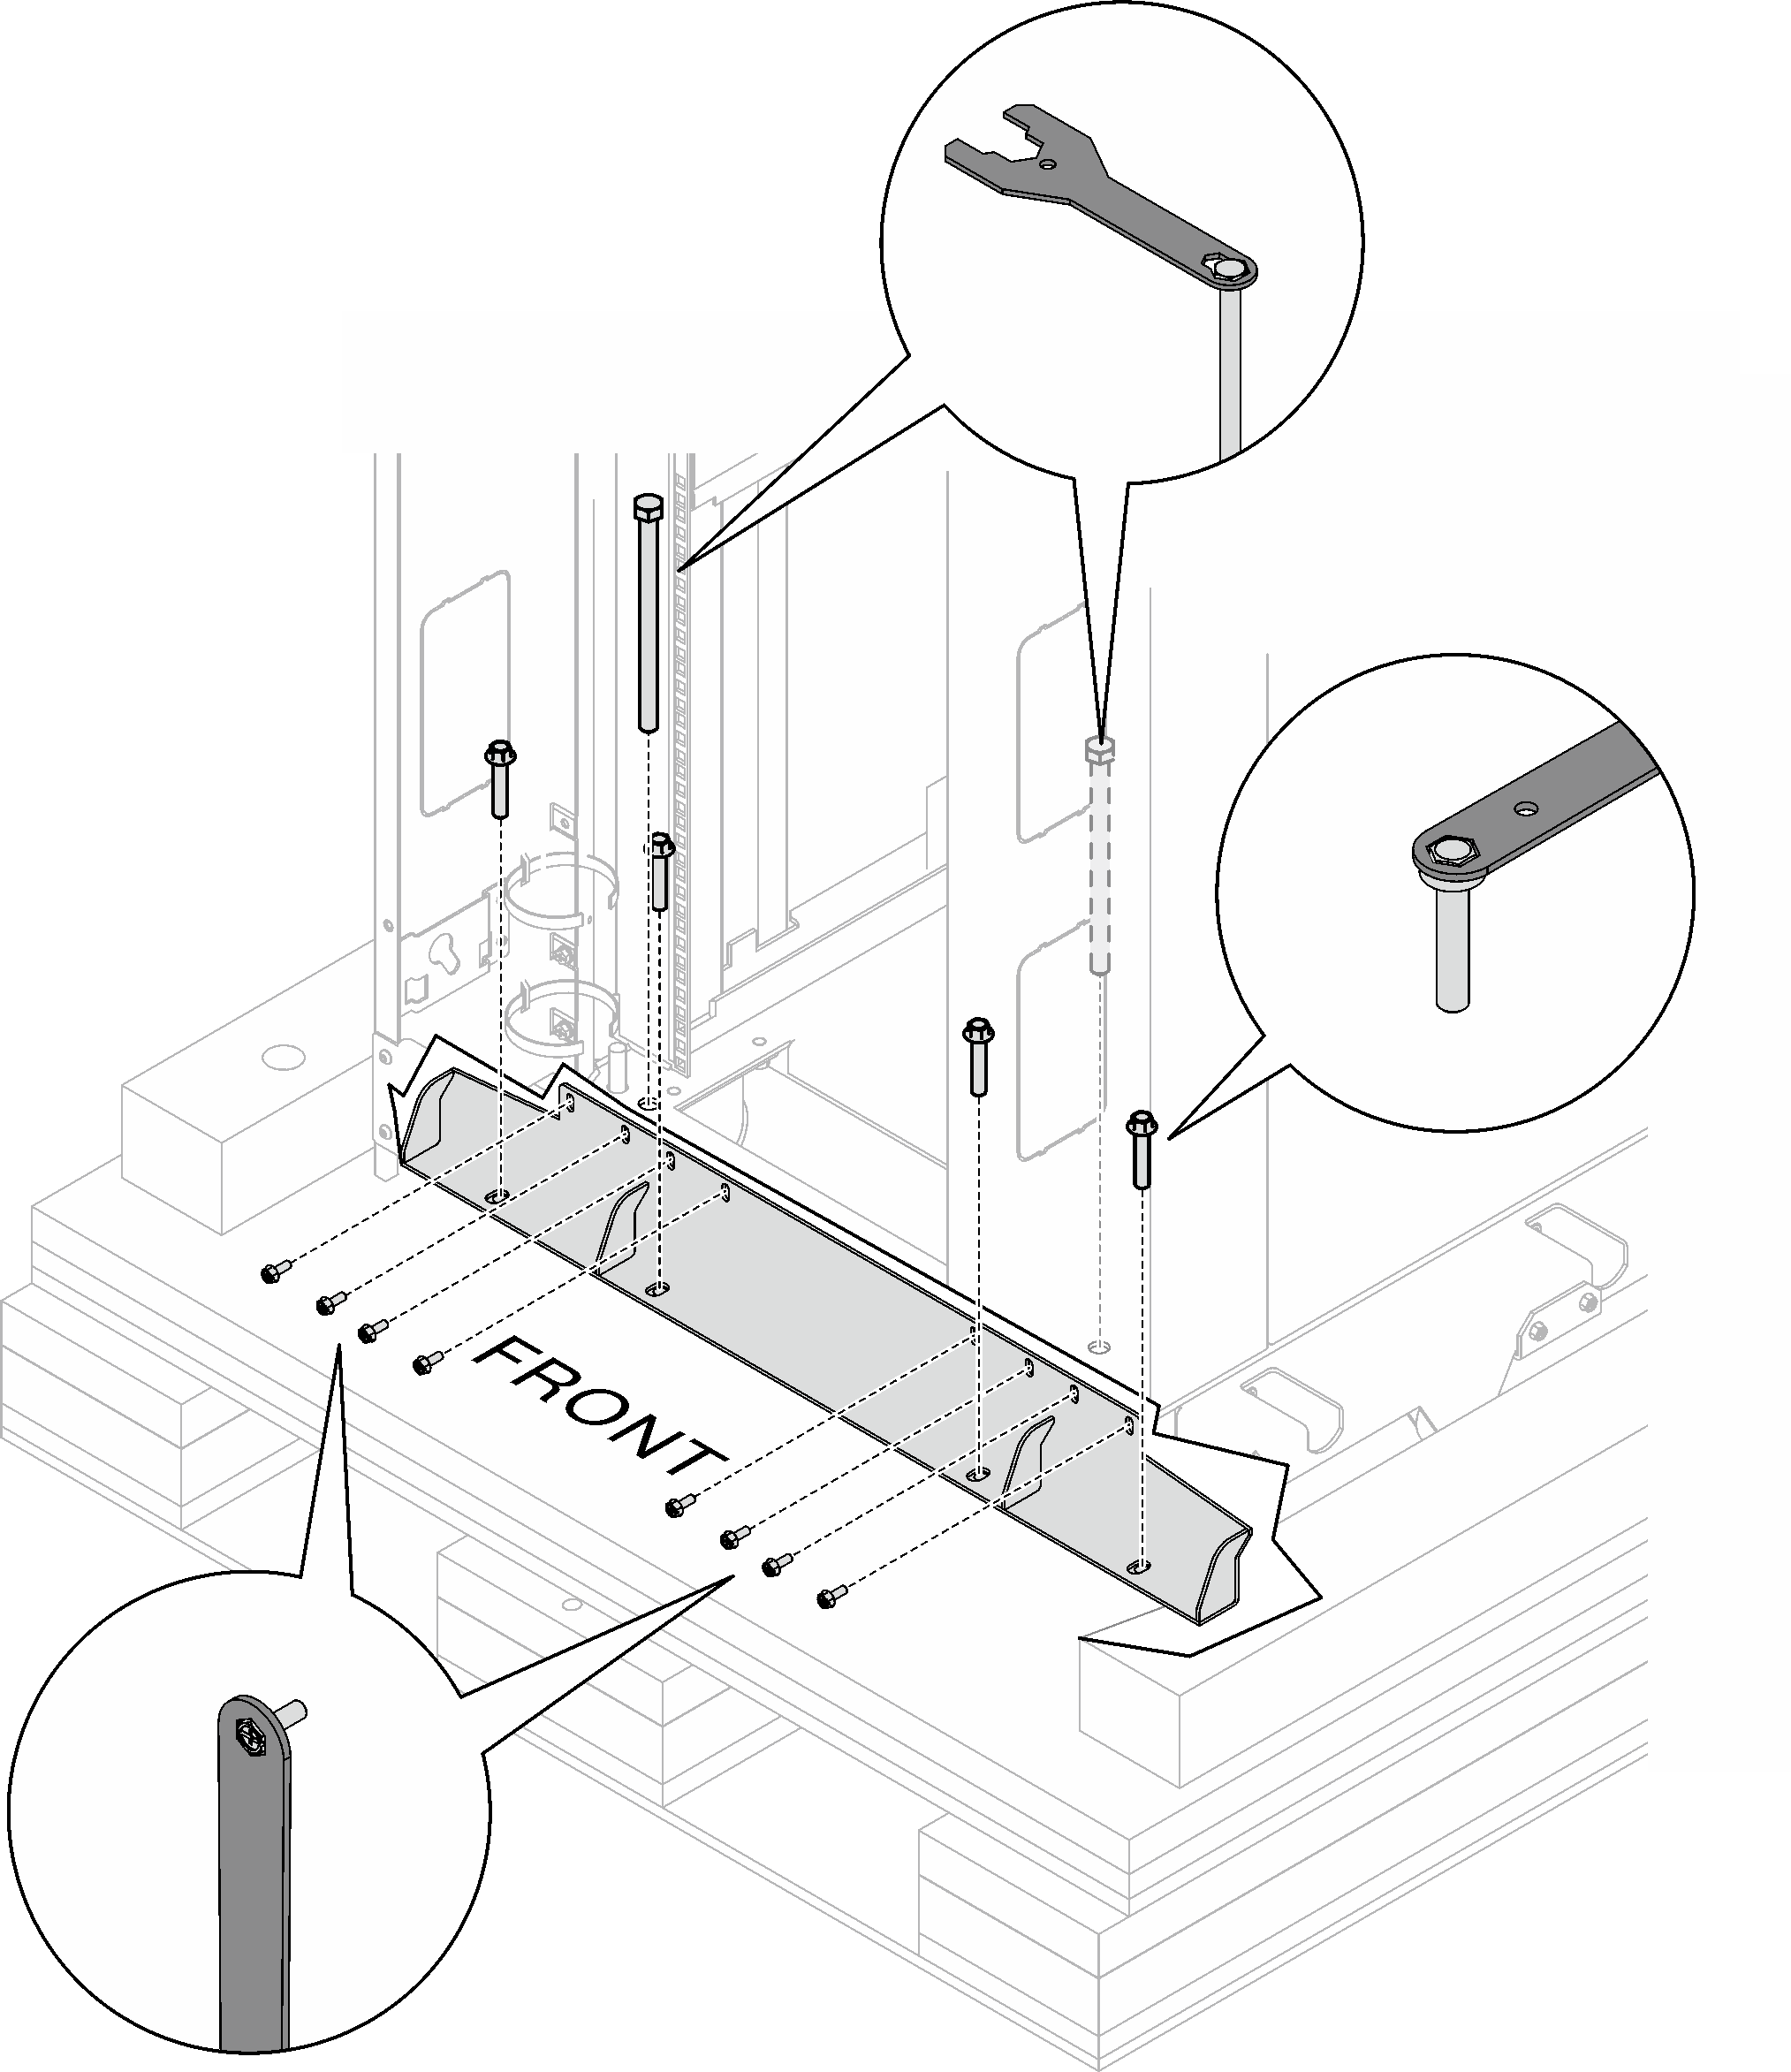
- Open the rear door, and remove the following:
- Remove the two bolts with wrench for 10, 14, 5, 18, 26.
- Remove the four M6 screws with wrench for 8, 9, 2
- Remove the six M10 screws with wrench for 8, 9, 2.
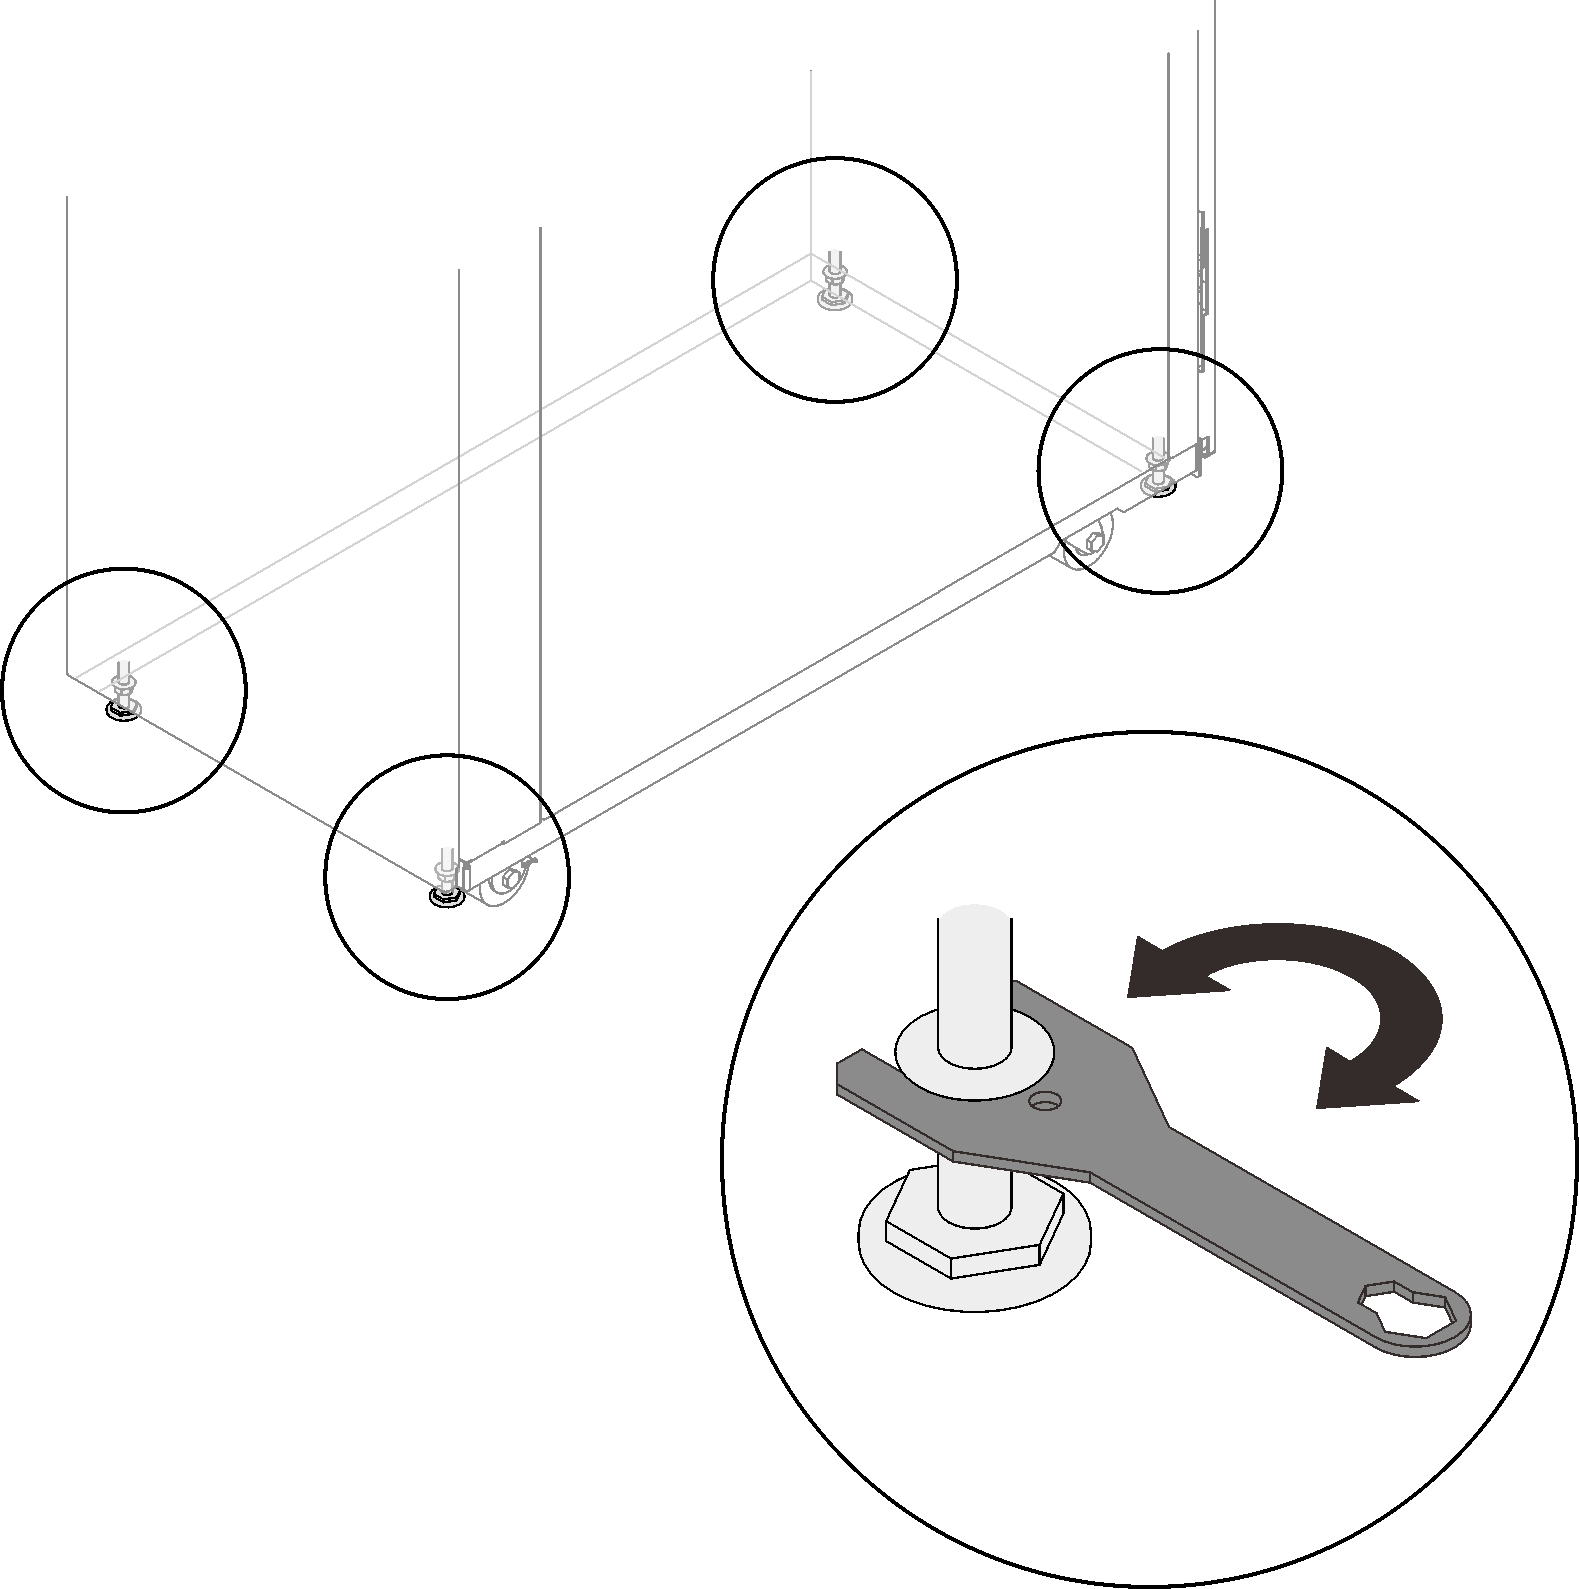
Figure 7. Removing the rear shipping bracket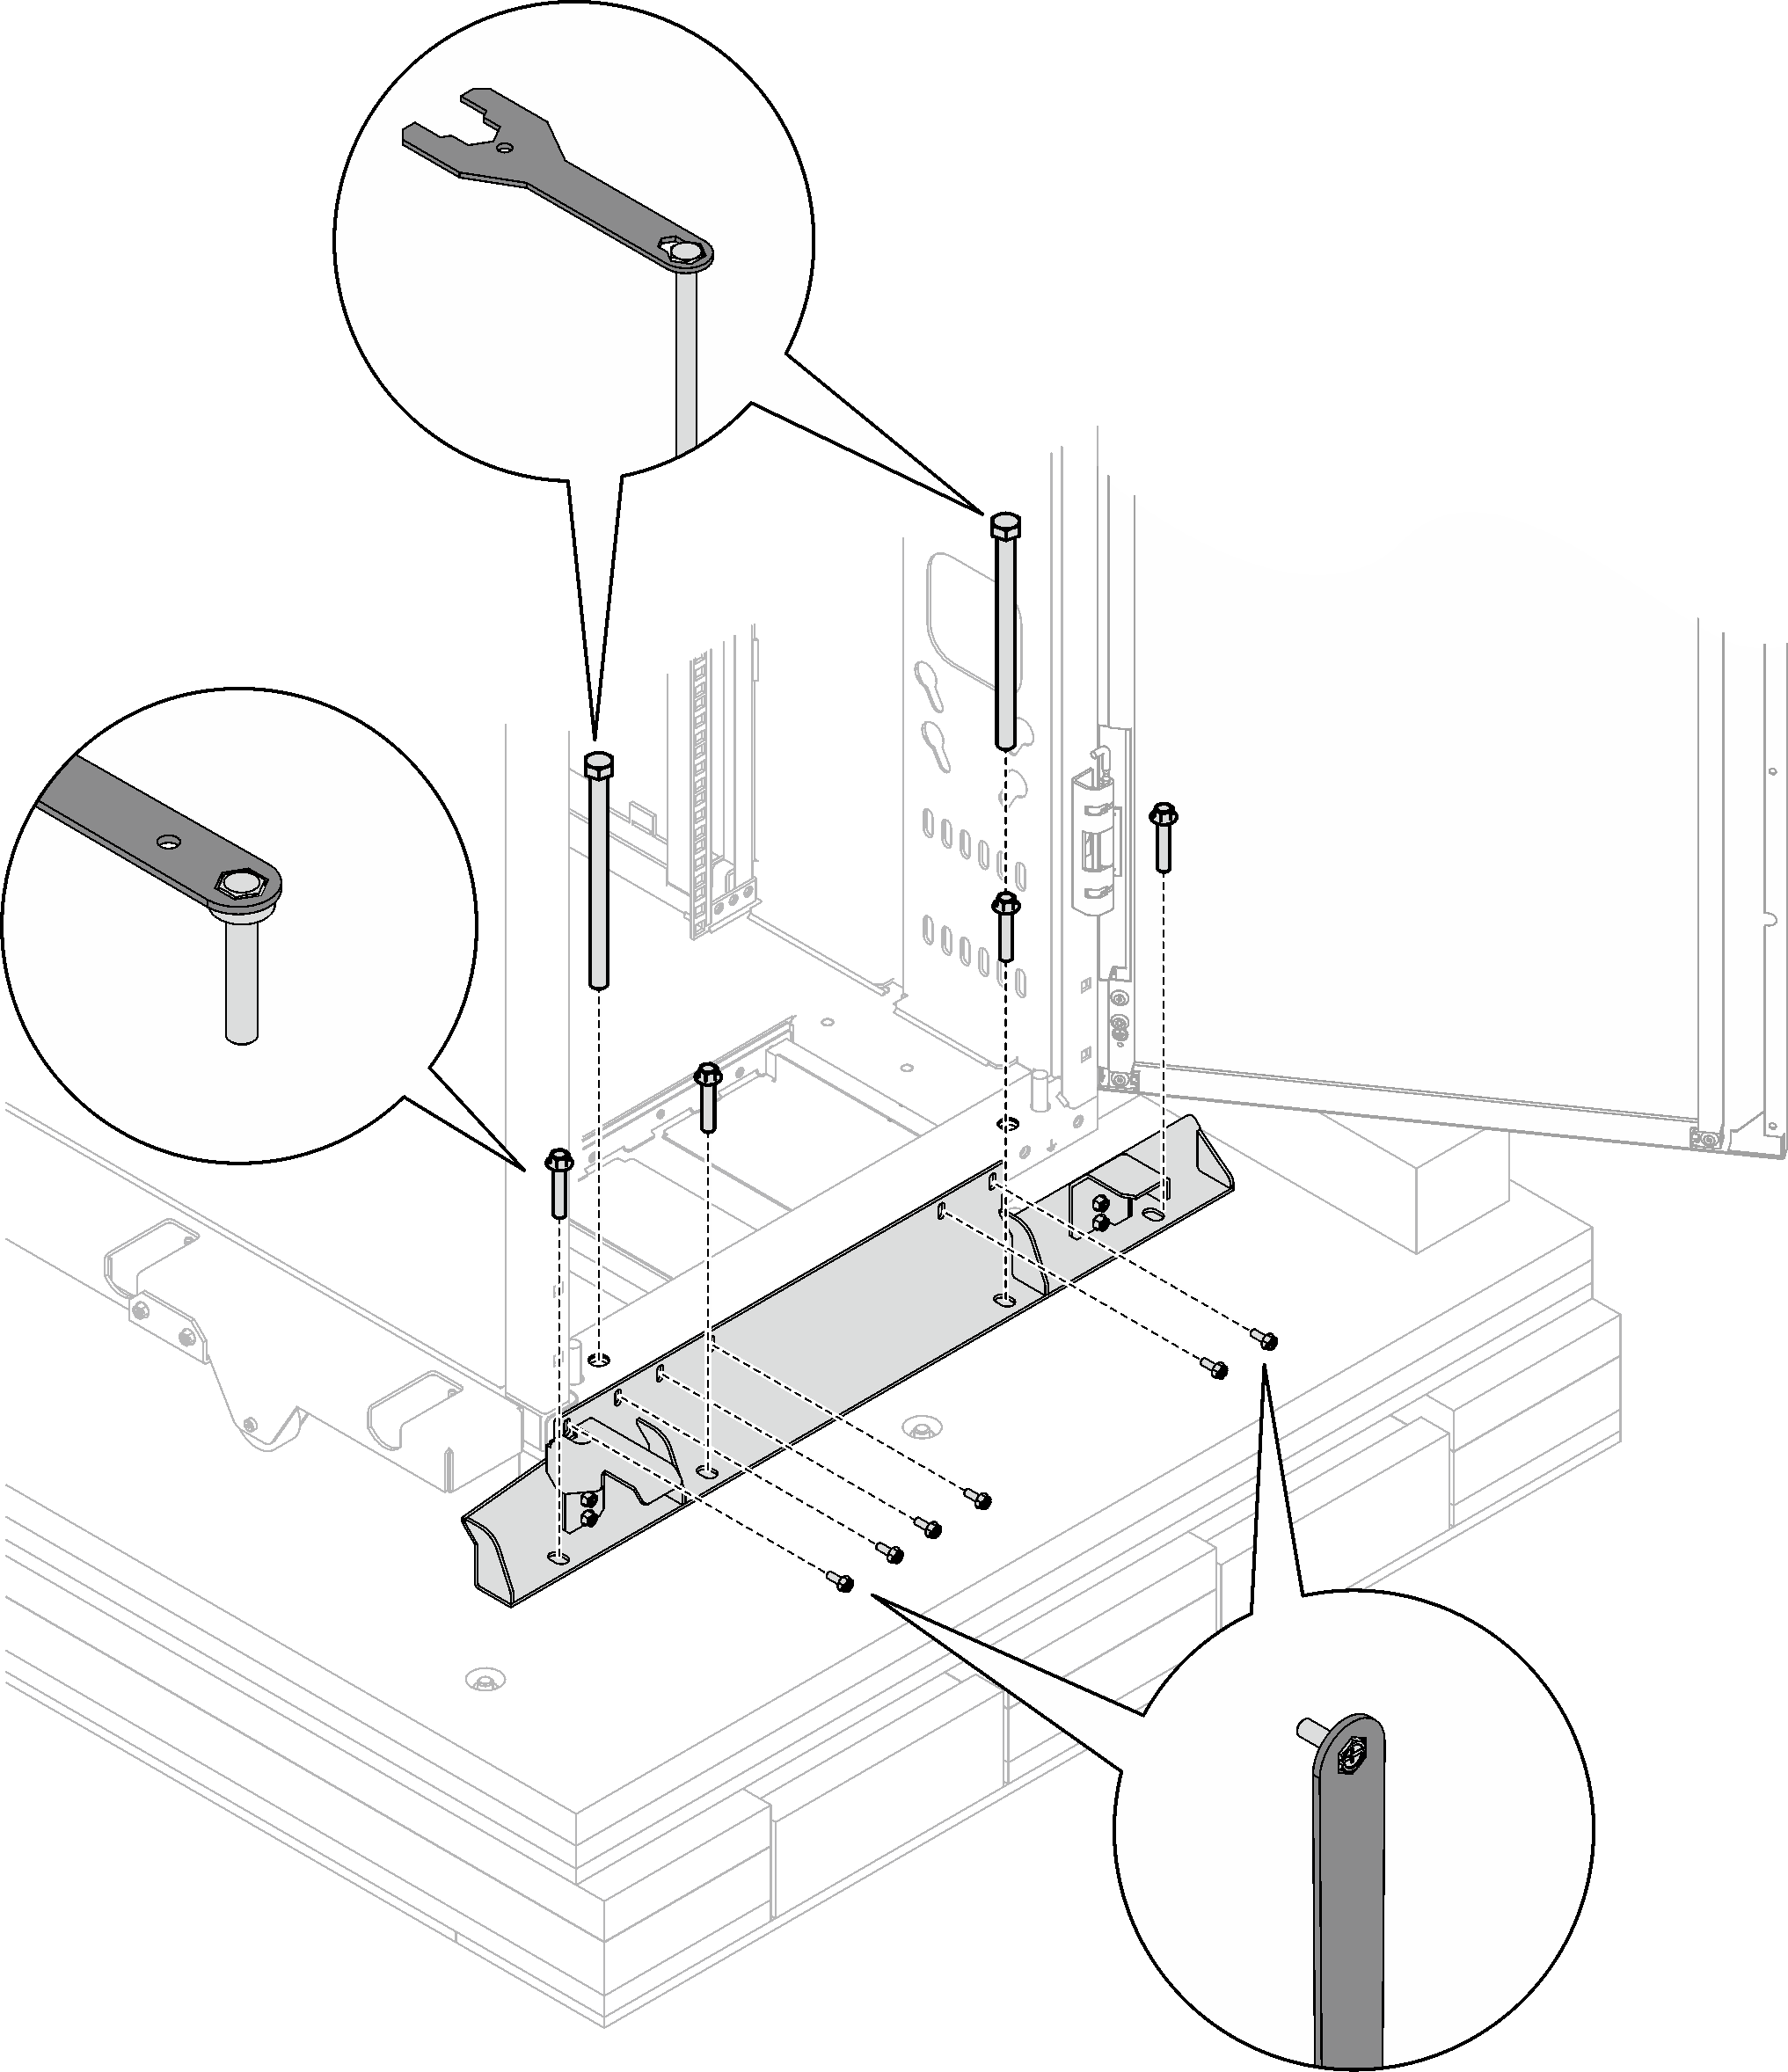 NoteKeep at least one bolt for later use.
 - Rise each of the four leveling pads with wrench for 10, 14, 5, 18, 26 in turns until they no longer bear the weight of the rack cabinet.Figure 8. Rising the leveling pads
- Secure the two metal plates to the ramp with the eight screws that come in a small bag attached to the plates.Figure 9. Securing the two plates to the ramp
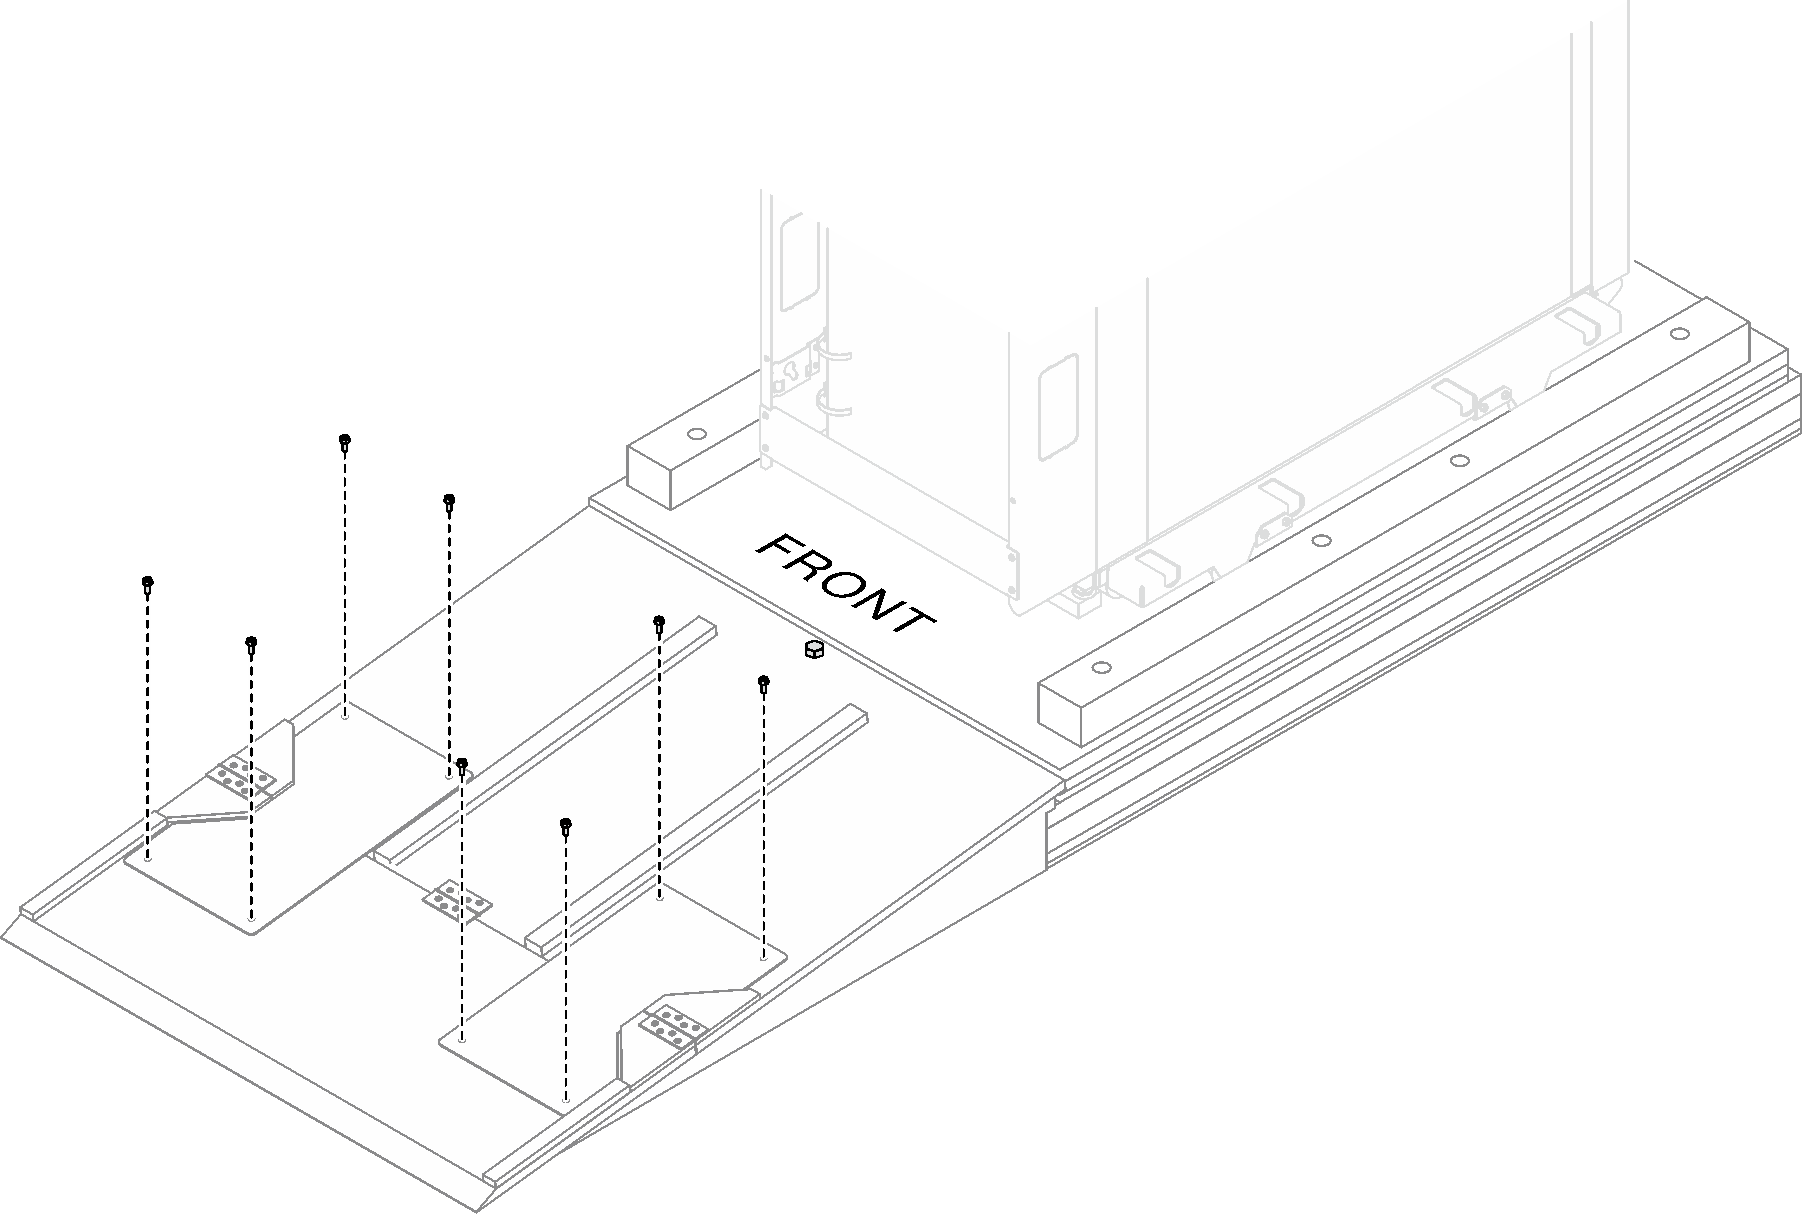
- Secure the ramp to the pallet with one of the bolts that have been removed previously with wrench for 10, 14, 5, 18, 26.Figure 10. Securing the ramp to the pallet

- Place the ramp next to the cabinet front door, and slowly slide the rack cabinet down from the pallet to the designated location.Figure 11. Moving the cabinet

Complete the following optional steps based on the space planning.
- Remove the outrigger stabilizing bars, and remove them.Figure 12. Removing the outrigger stabilizing bars
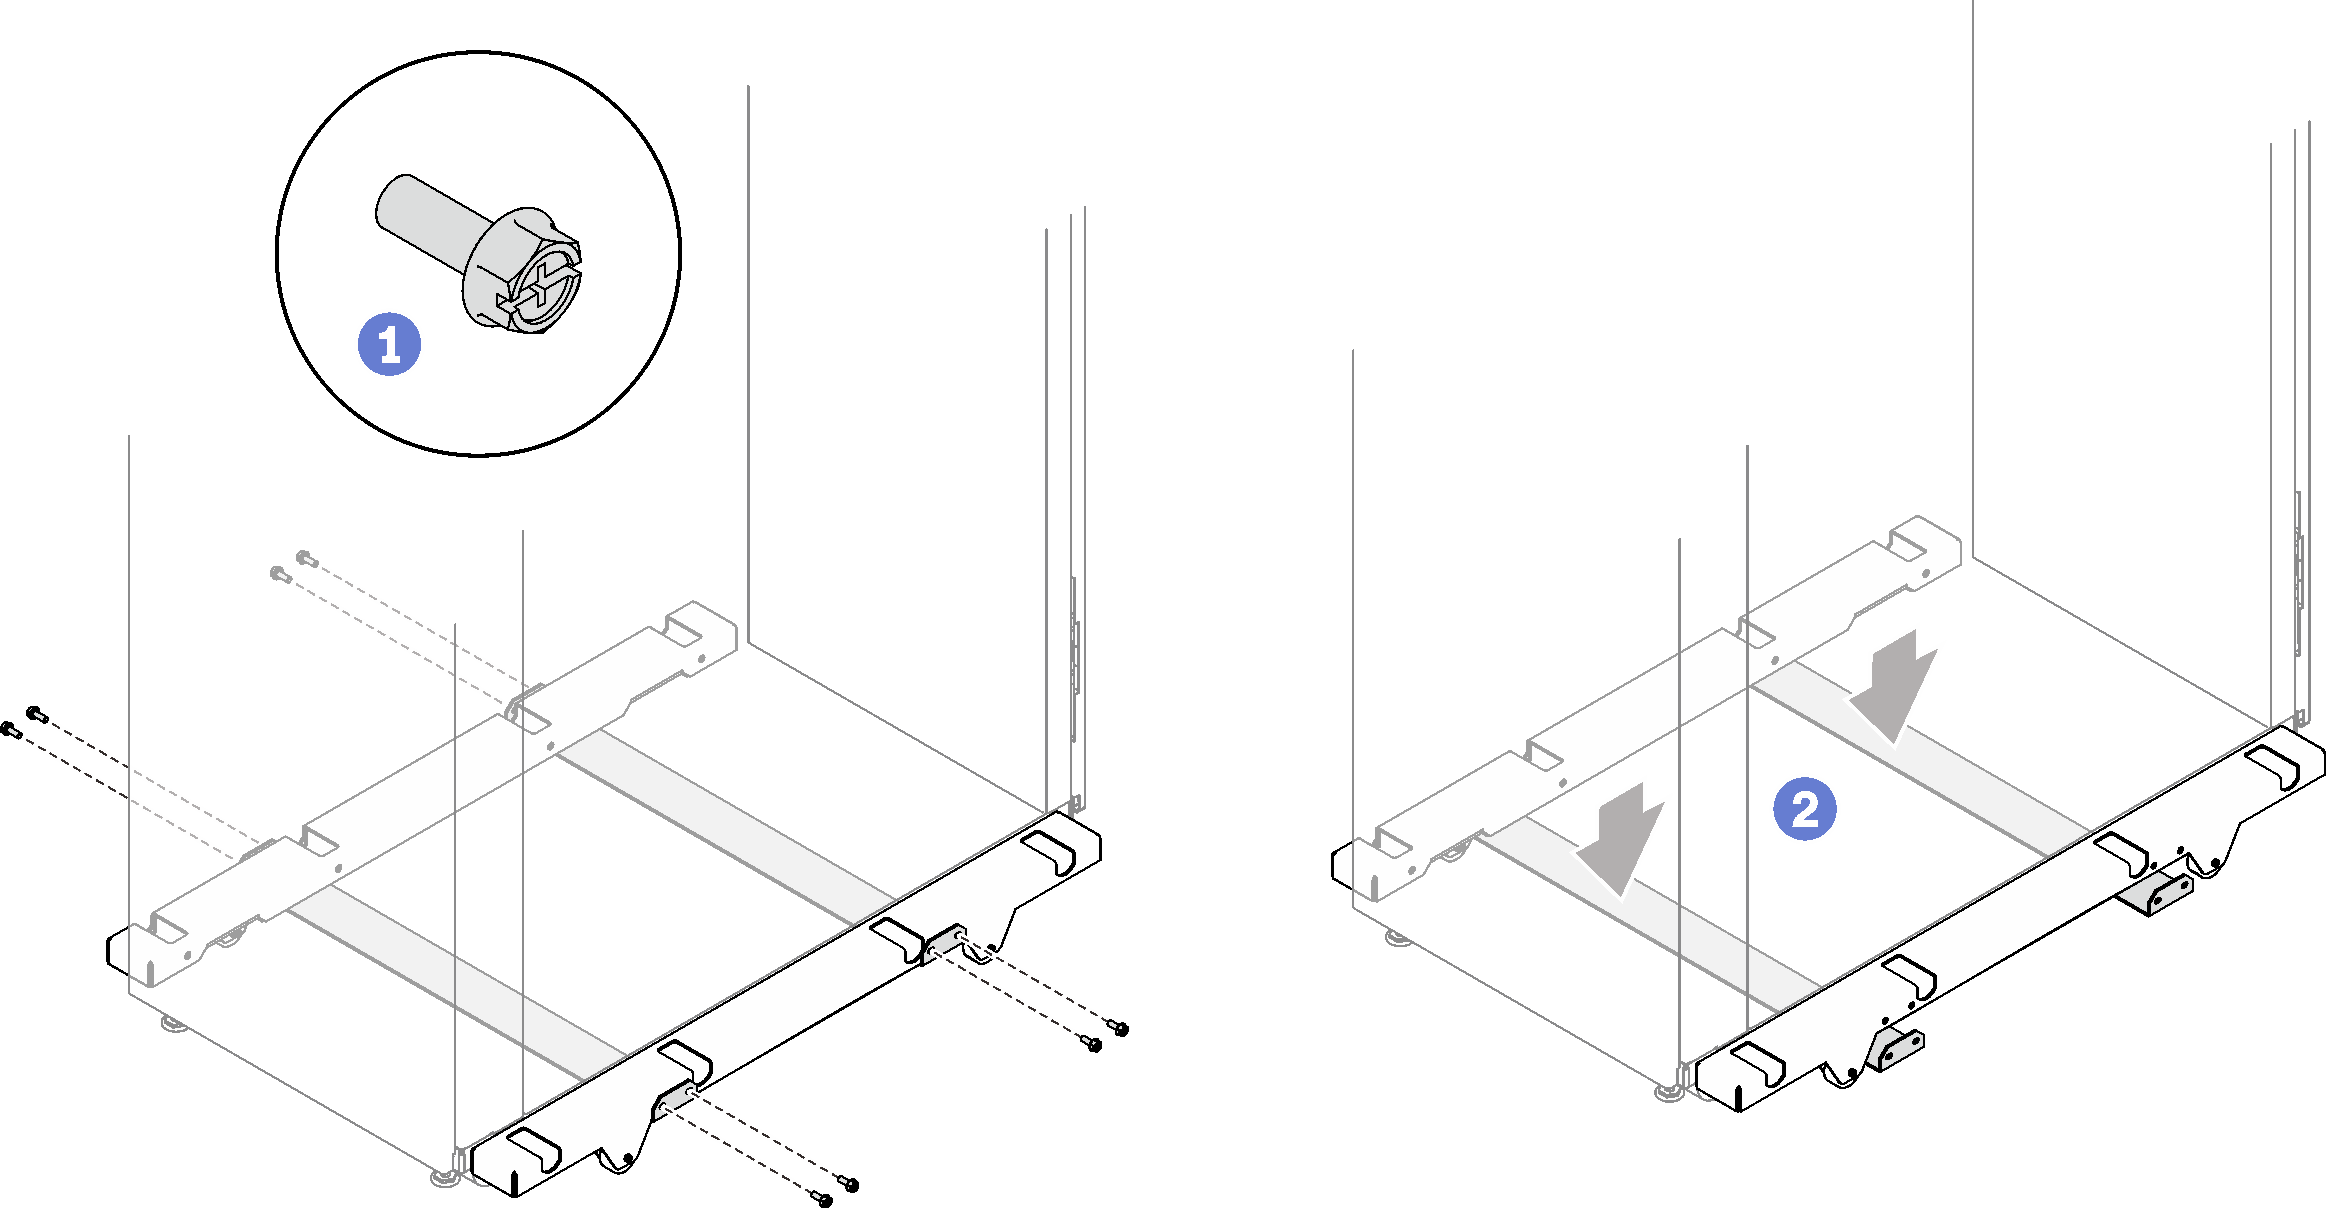
- Remove the eight screws that secure the two bars to the rack cabinet.
- Place the two stabilizing bars on the ground, and remove the bars.
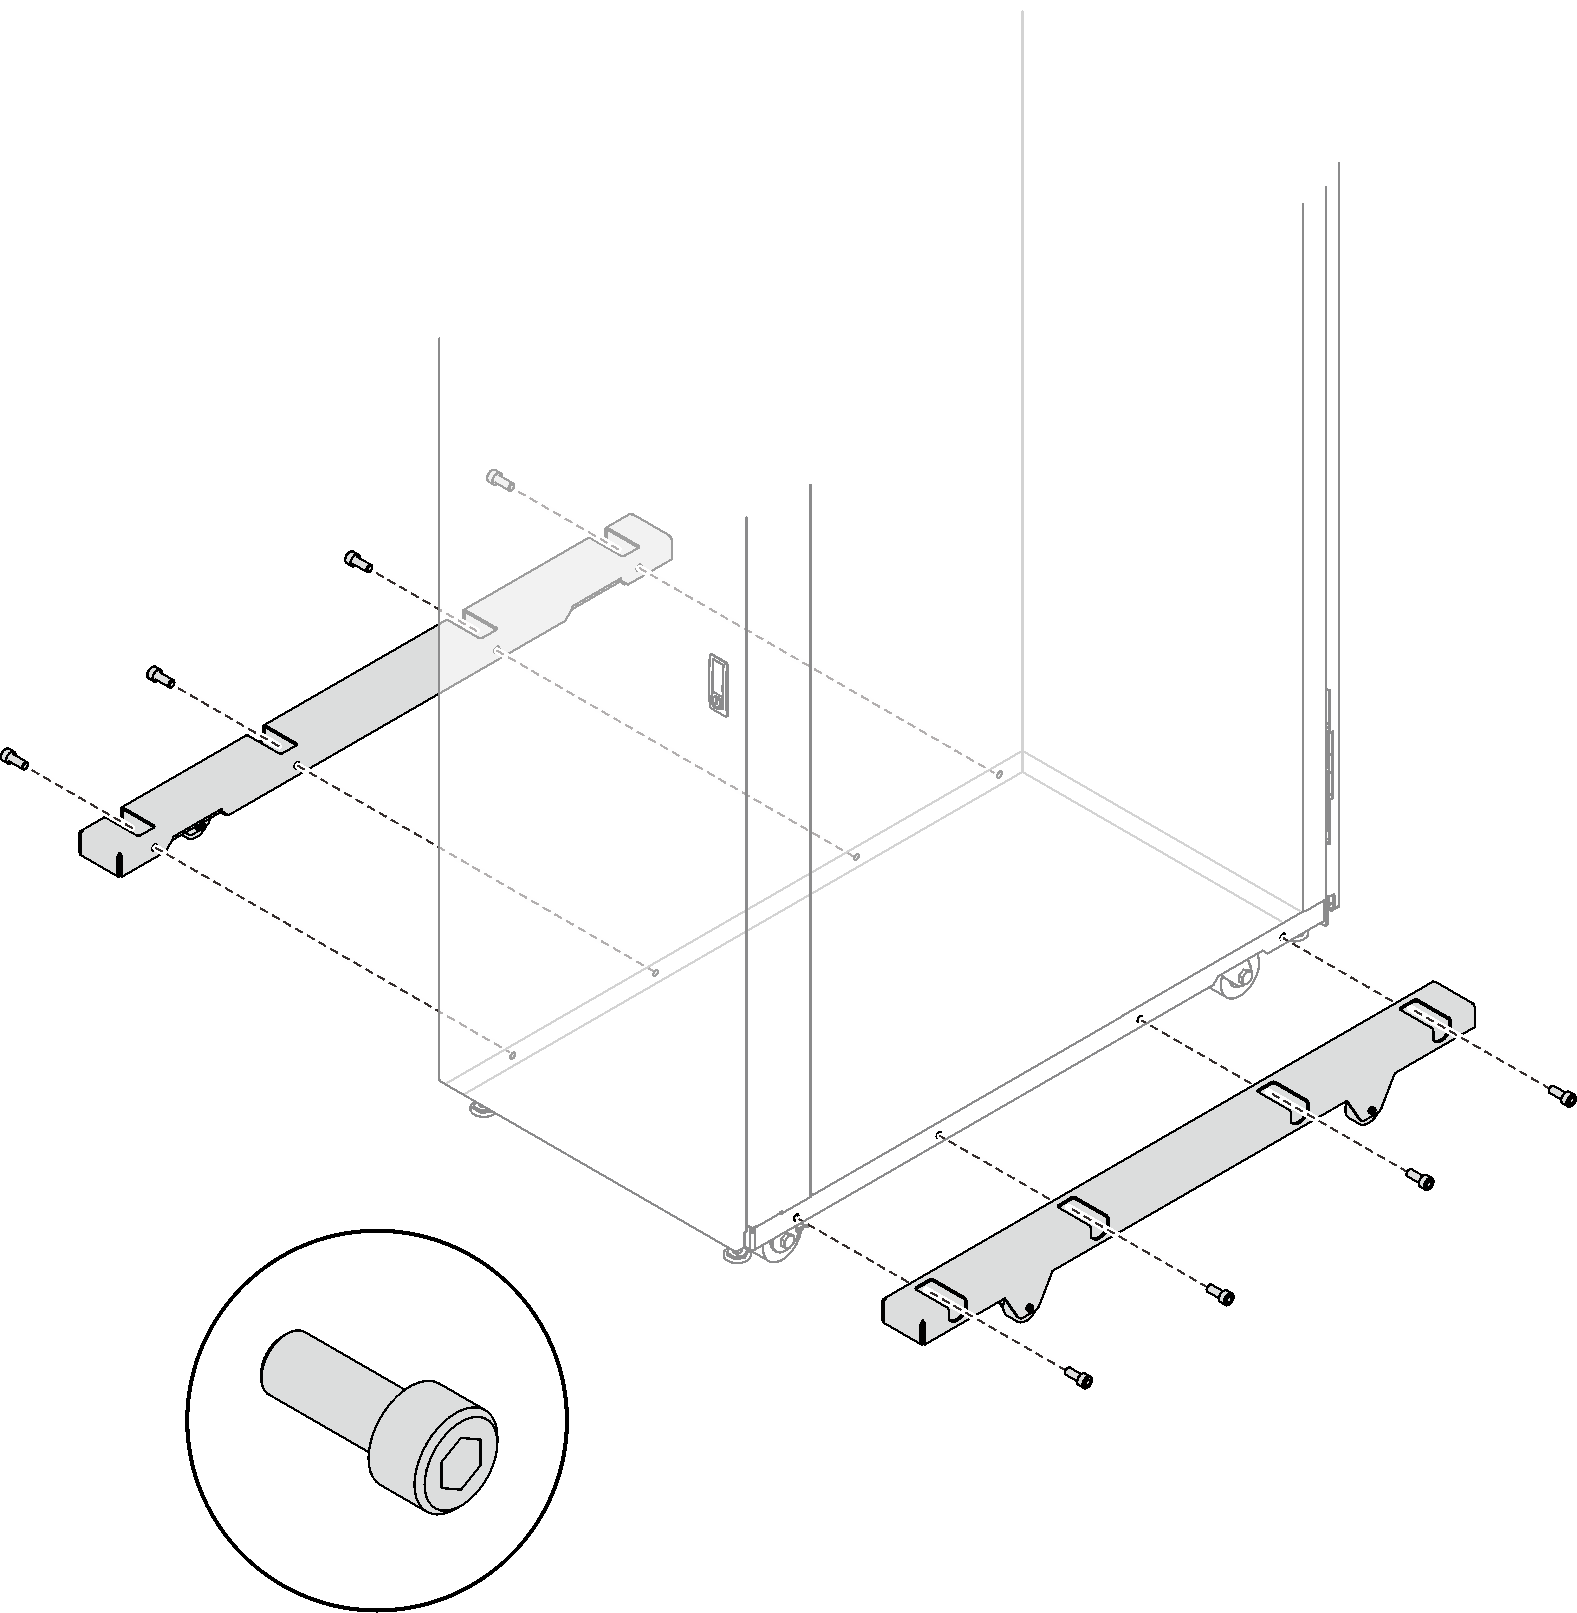
- Remove the four screws that secure each of the outriggers, and remove the outriggers.Figure 13. Removing the outriggers
- Secure the stabilizer and recirculation prevention plate to the front of the rack cabinet with four screws.Figure 14. Installing the front stabilizer and recirculation prevention plate

- Secure the stabilizer to the floor with two screws.Figure 15. Securing the stabilizer to the floor
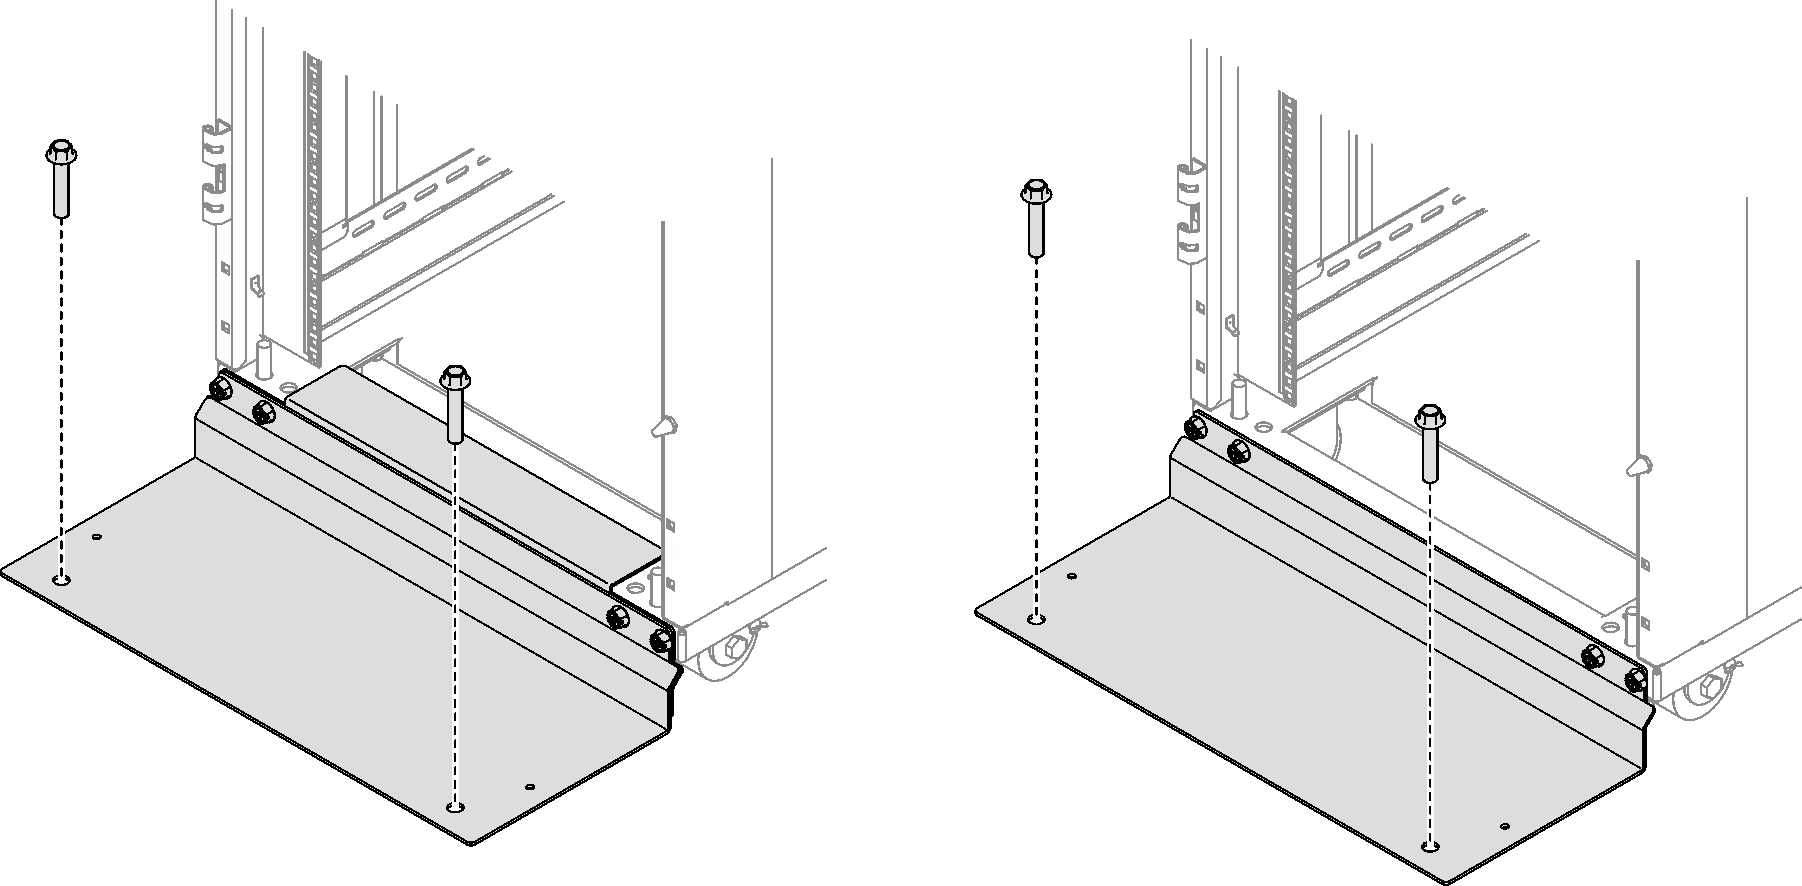 Figure 16. Rack cabinet with stabilizer installed
Front 
Rear
Give documentation feedback