Install insulation foams on-site
See this topic to learn how to install insulation foams on-site.
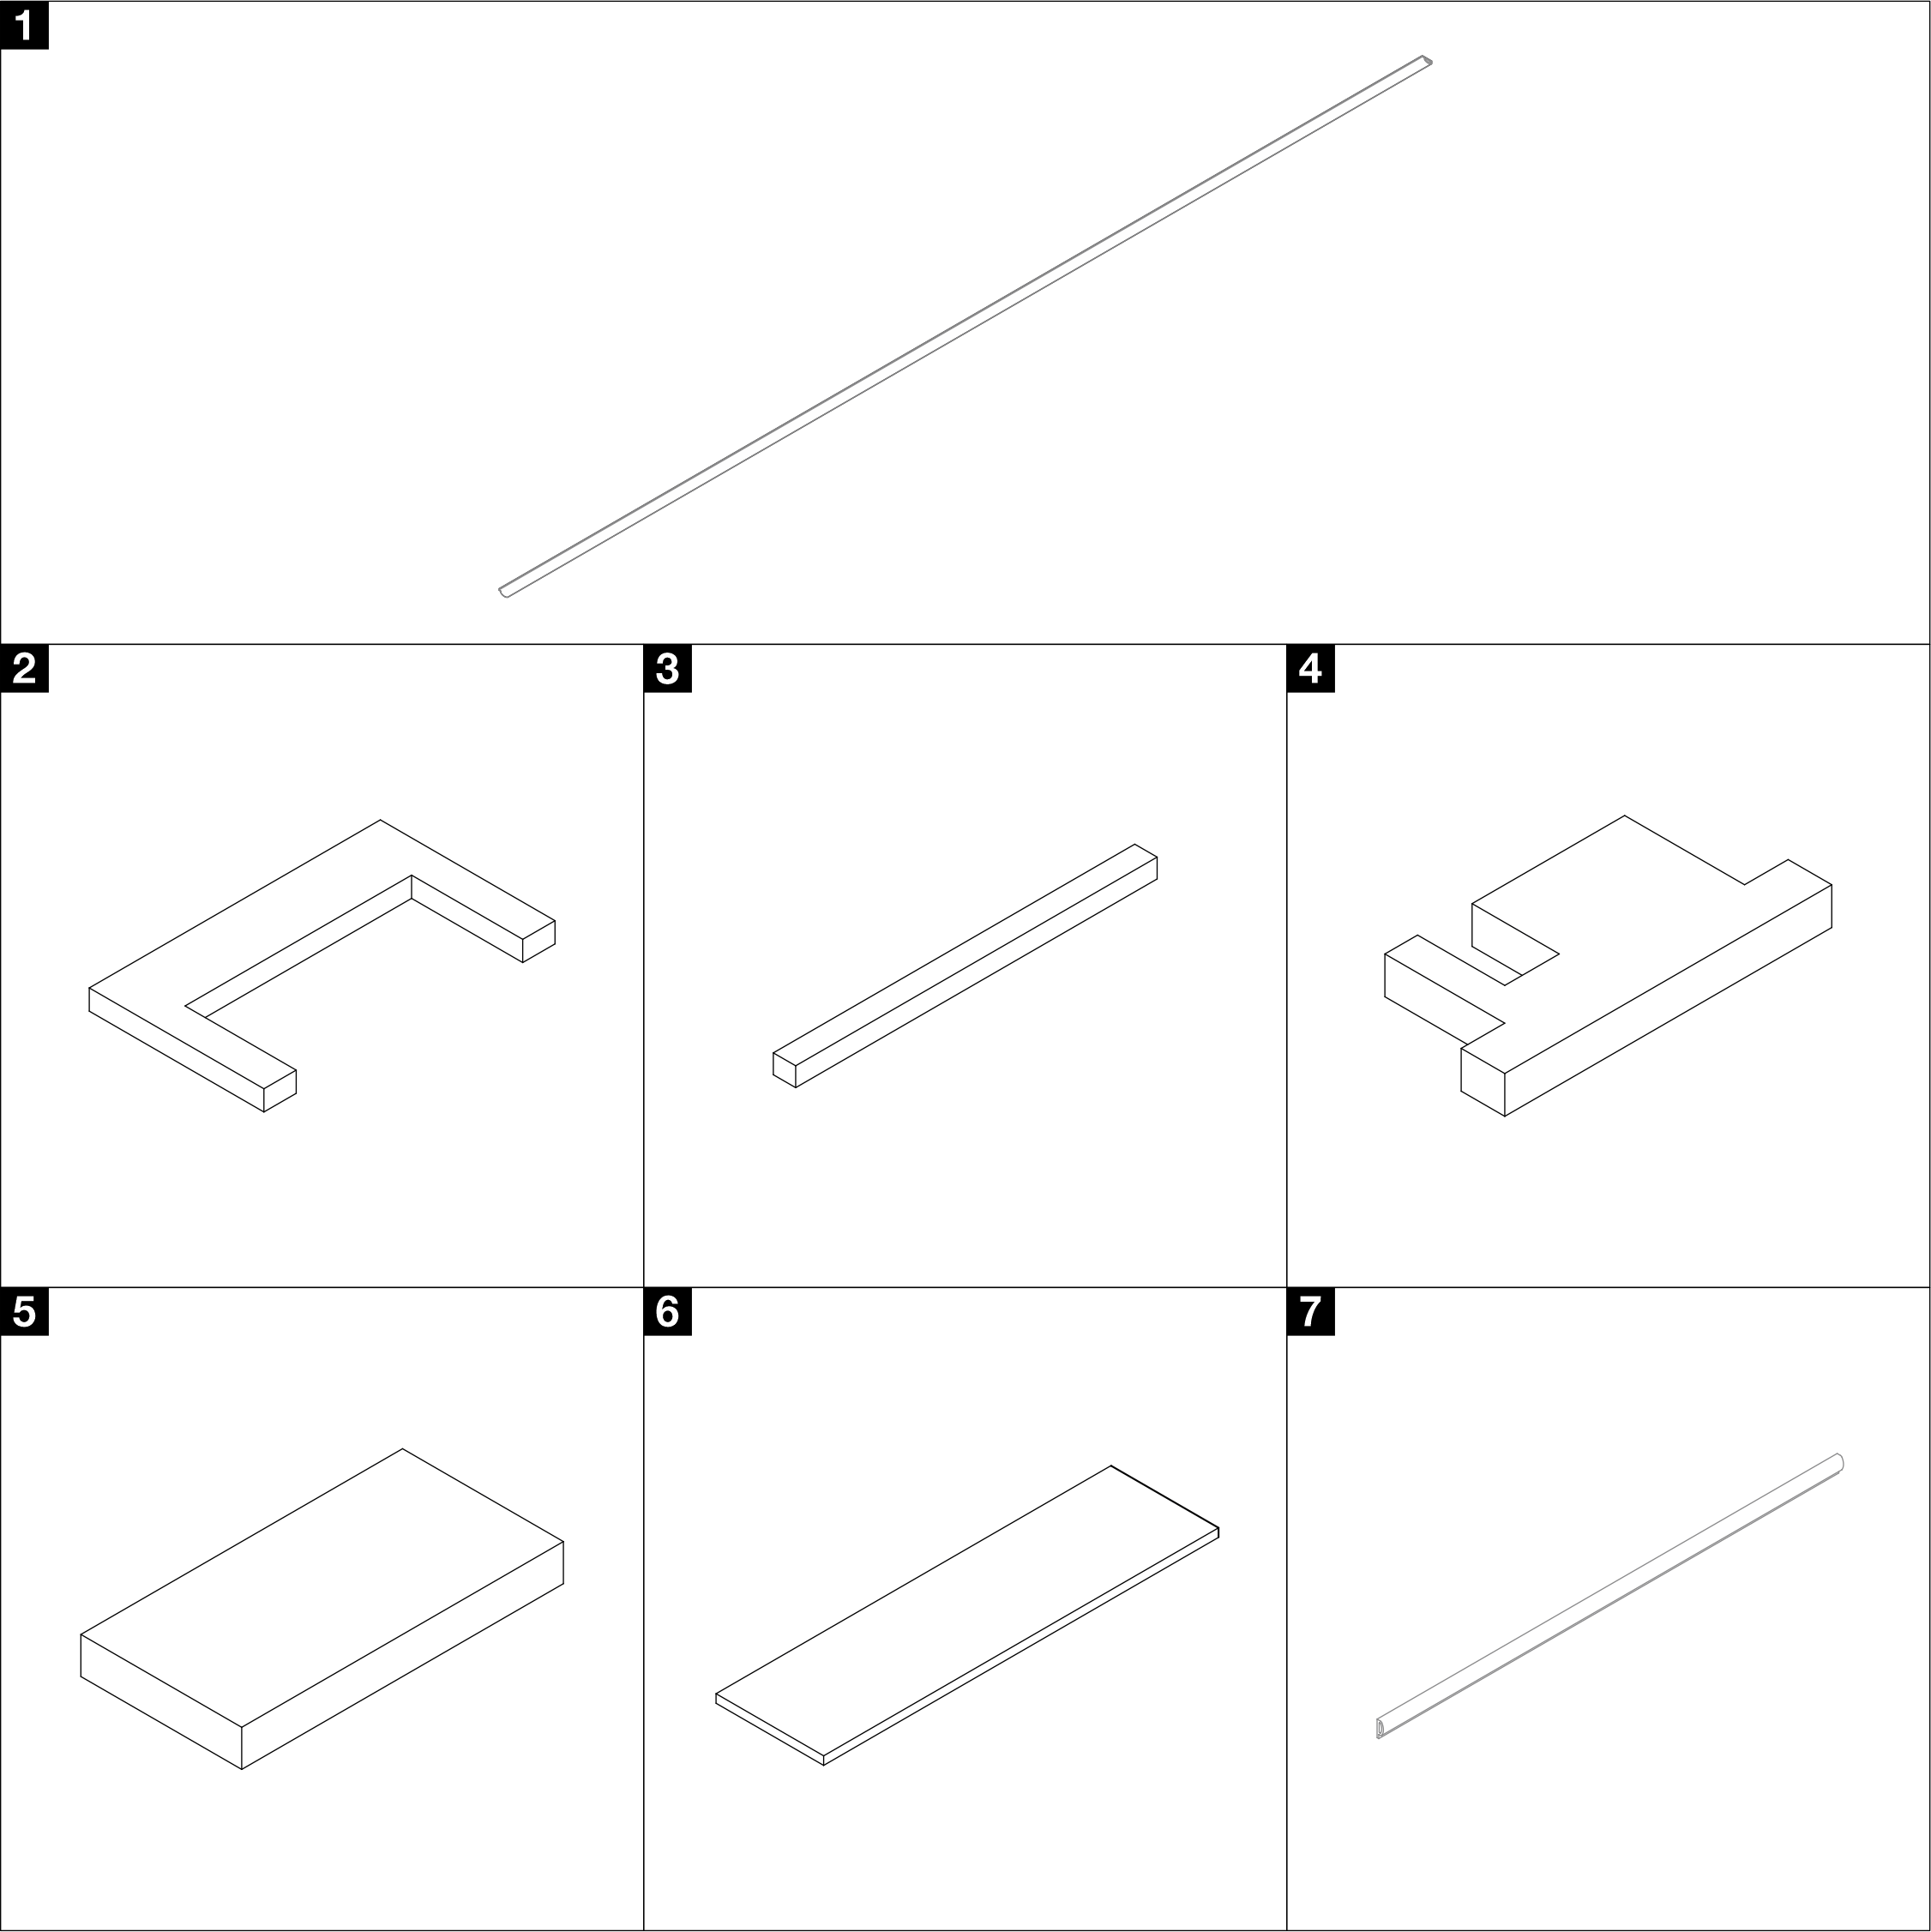 | Insulation foam dimensions:
Note
|
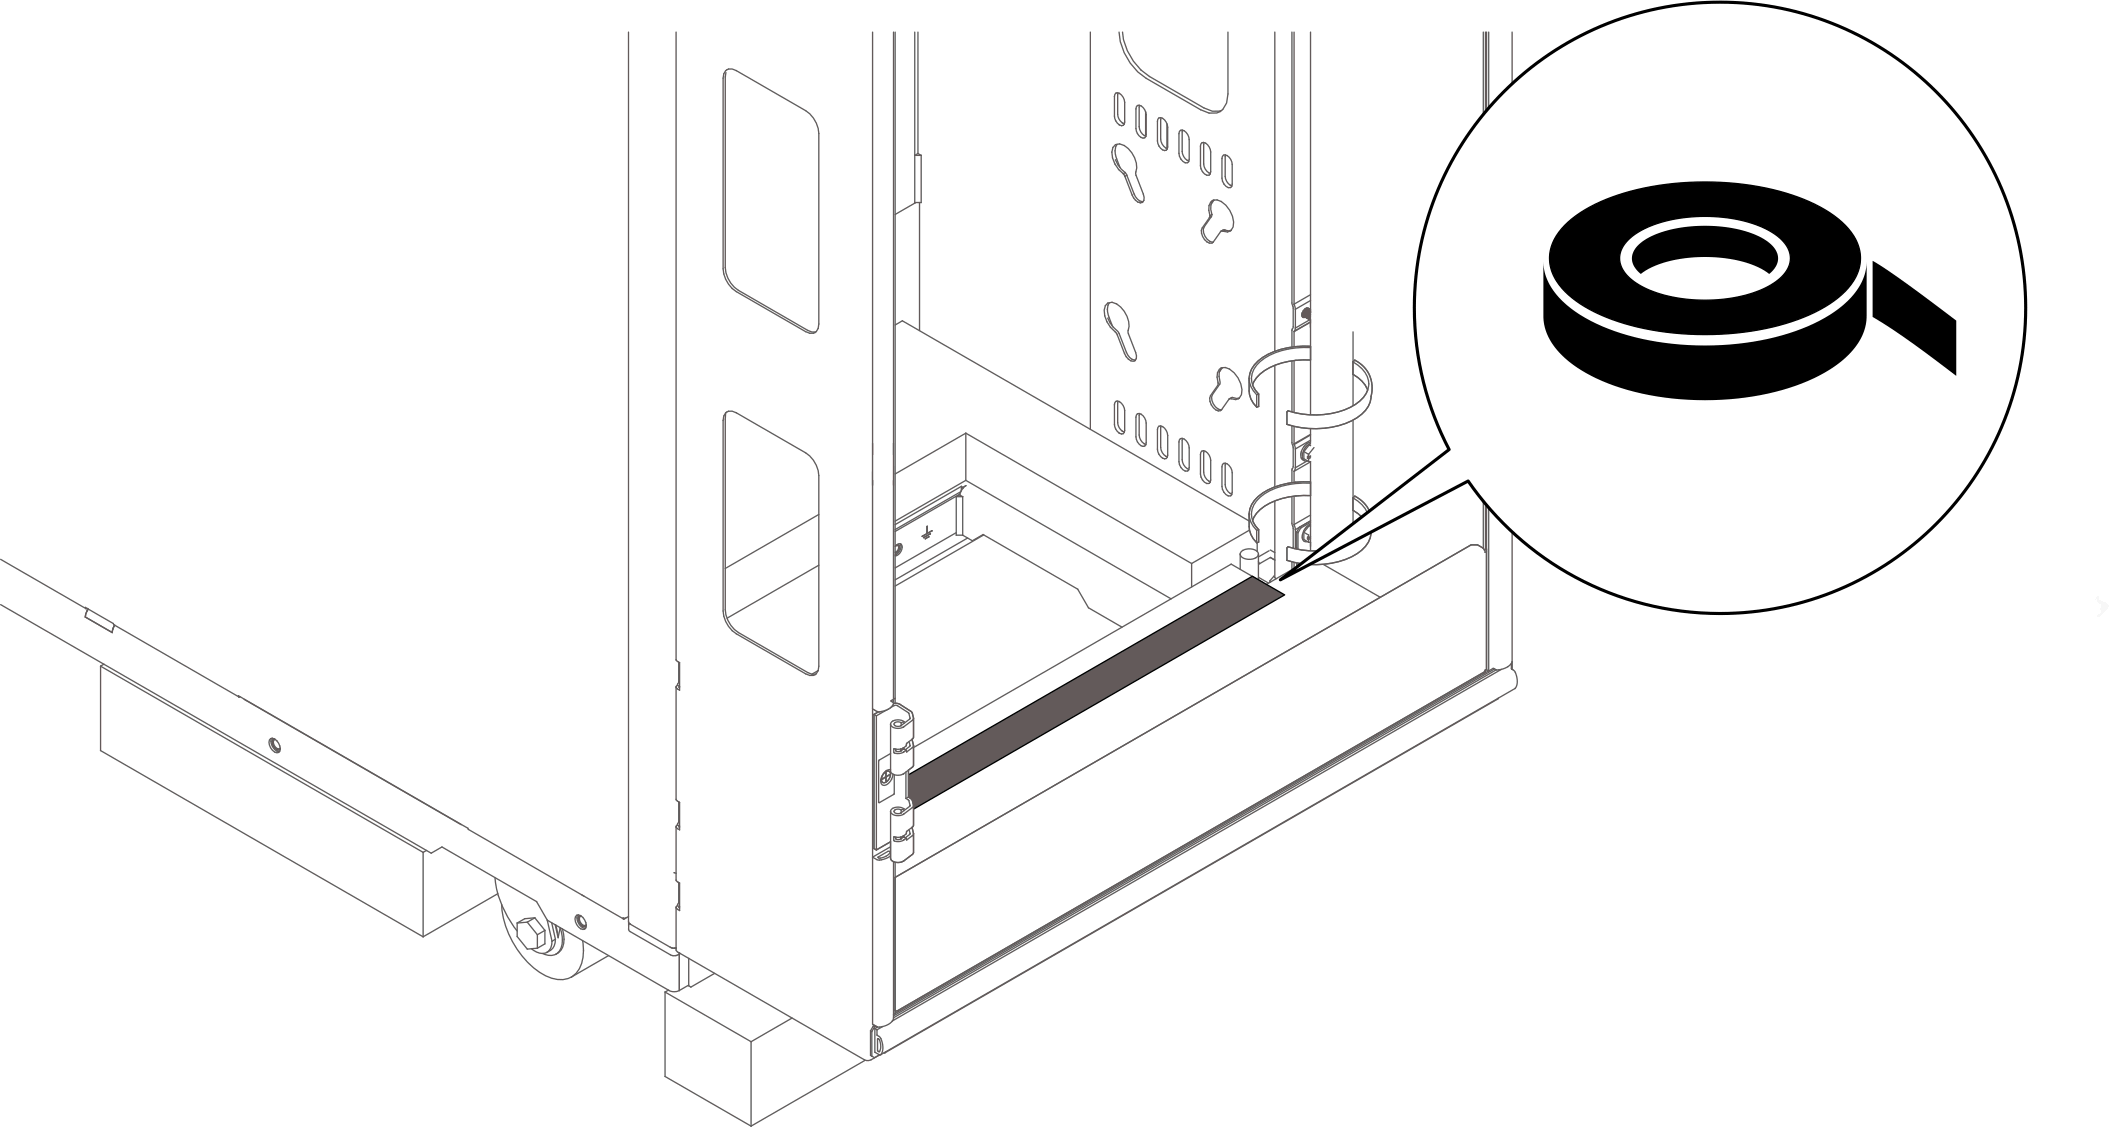
1 Gap sealing foam
- Place the foam onto the gap between the rack cabinet frame and the extension, and attach it to seal the gap. Cut off the excess foam with a sharp tool.Figure 1. Installing the sealing foam
2 3 Rear foams
- Peel off the liner, and attach the foam (2) to the rear side of the rack cabinet as illustrated.NoteSkip this step when
ThinkSystem N1380 Neptune One Enclosure is installed. Figure 2. Installing the rear foam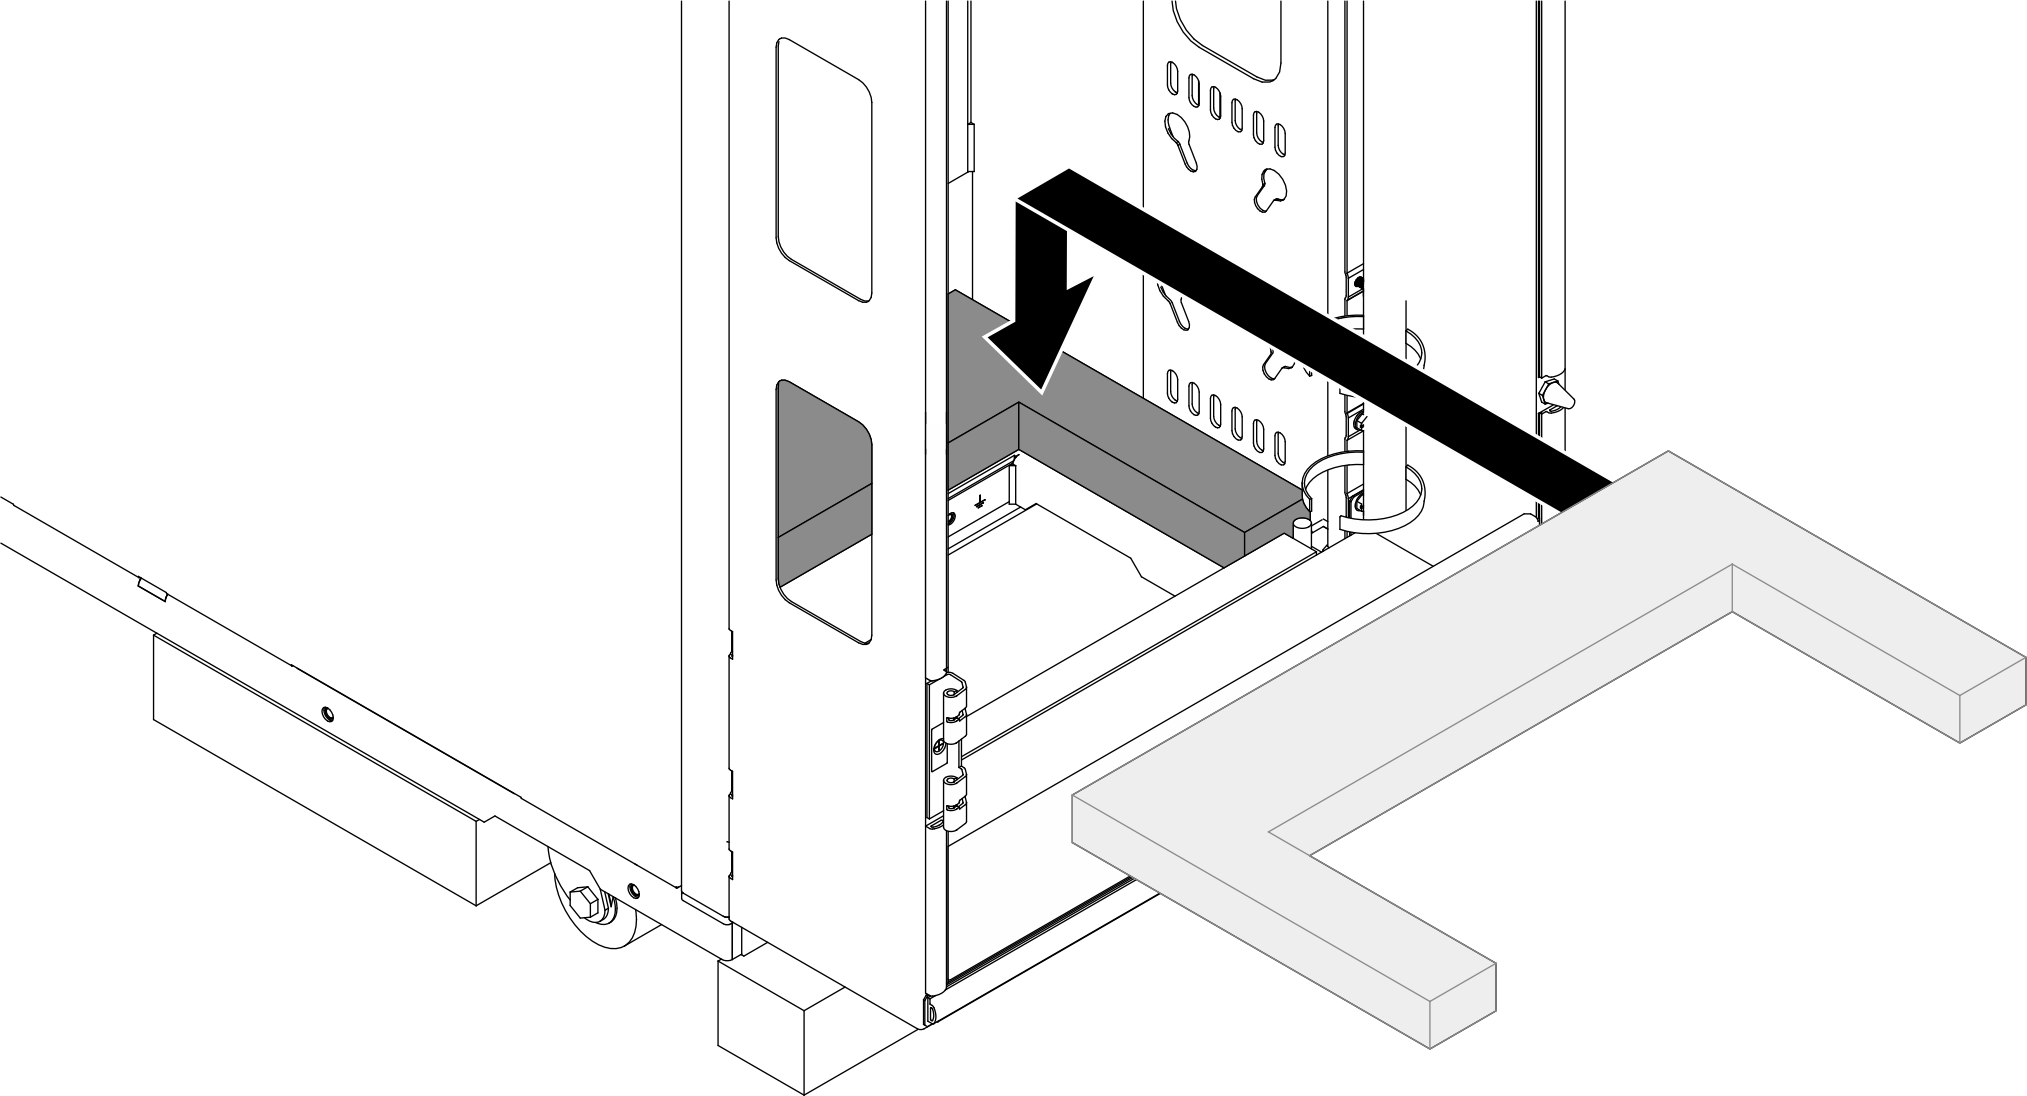
- Peel off the liner, and attach the foam (3) to the rear side of the rack cabinet as illustrated.Figure 3. Installing the rear foam
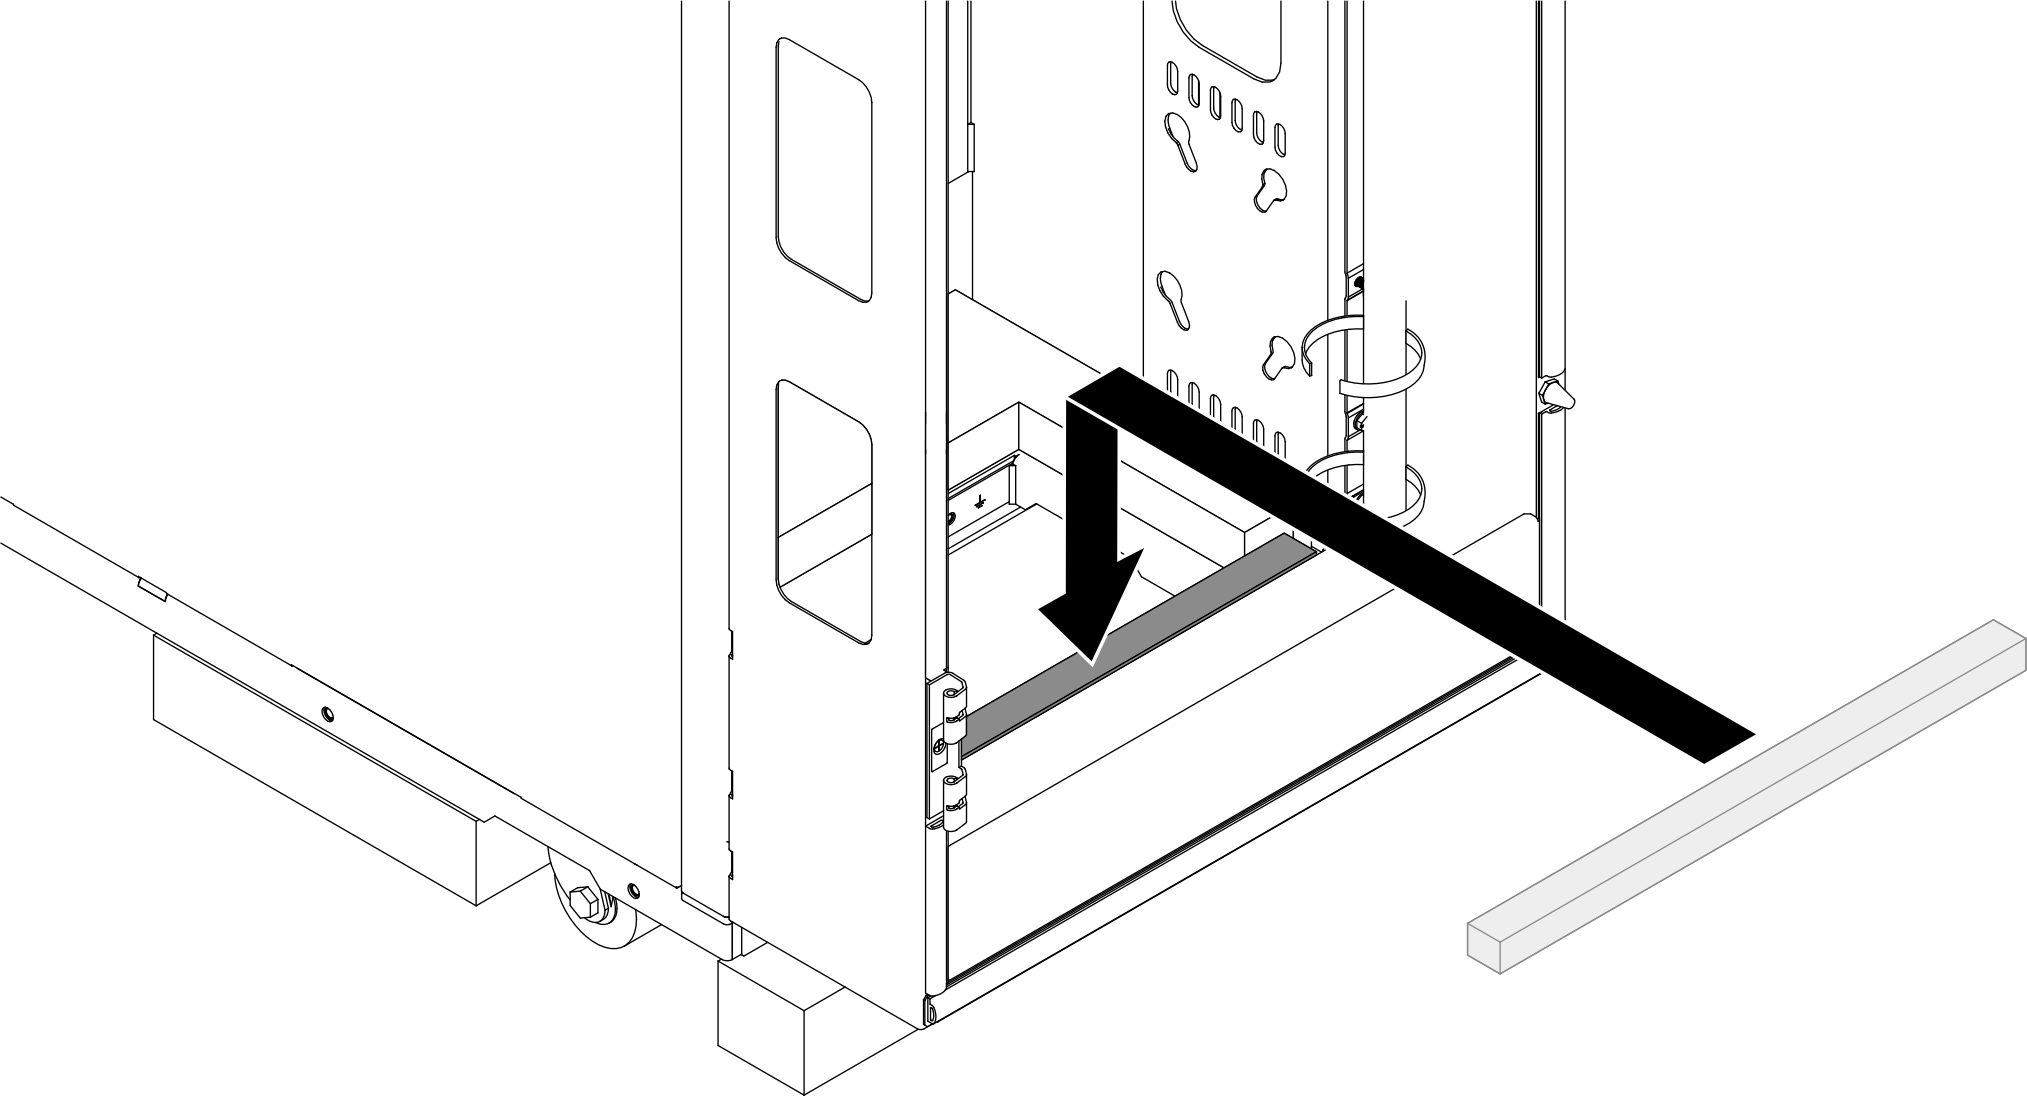
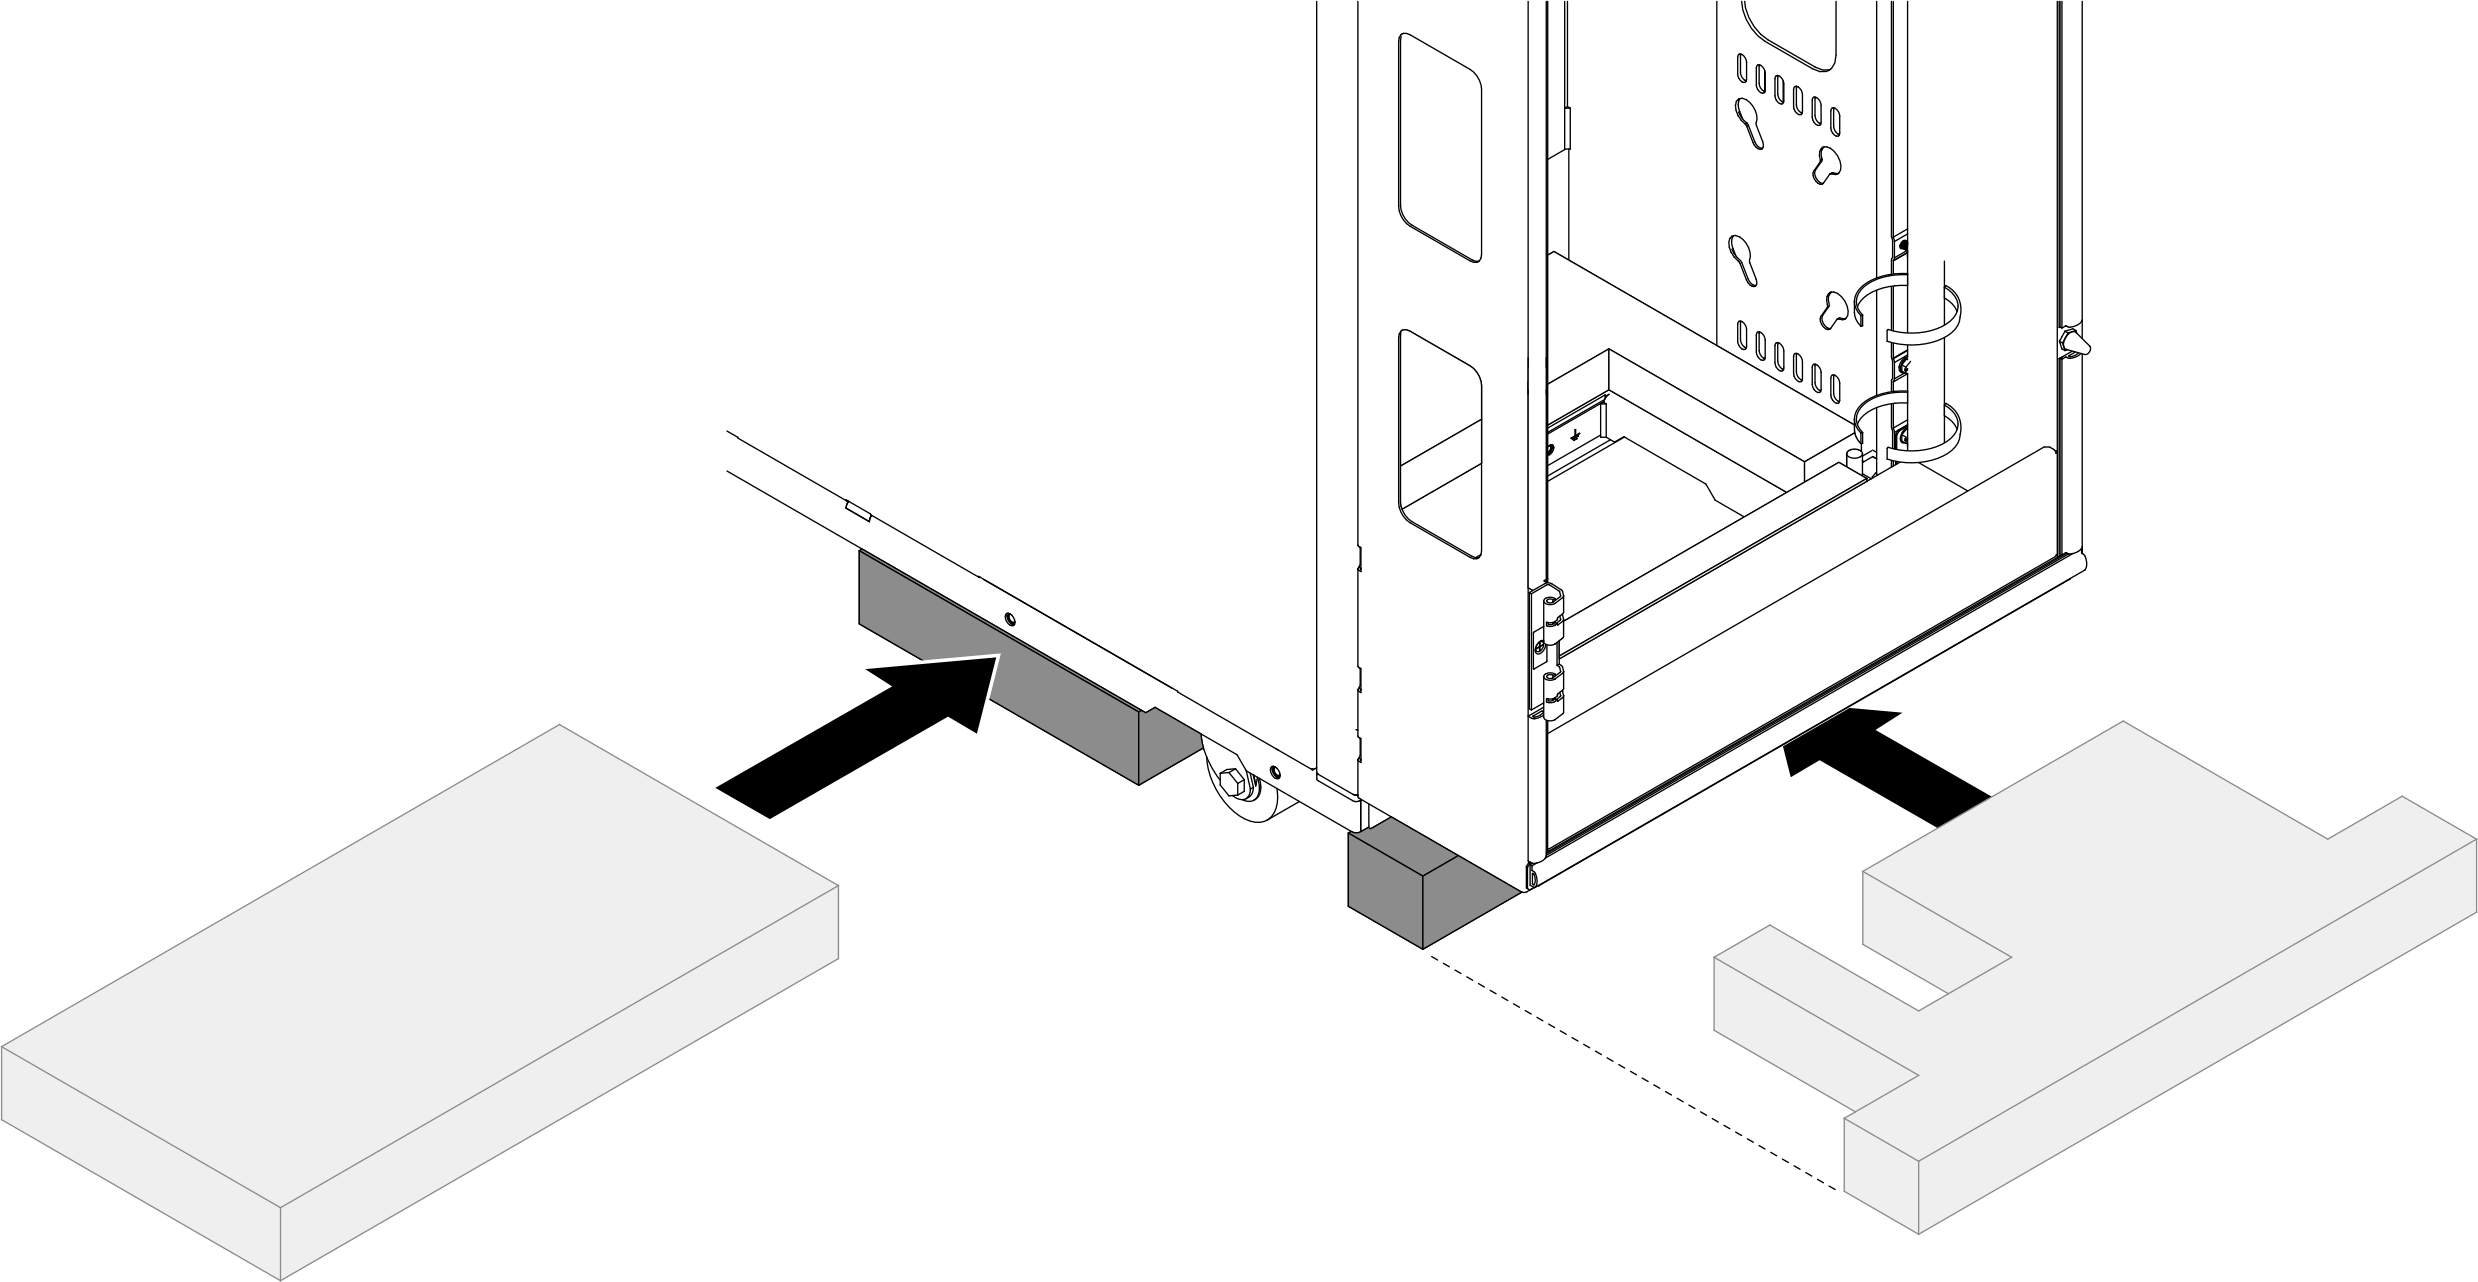
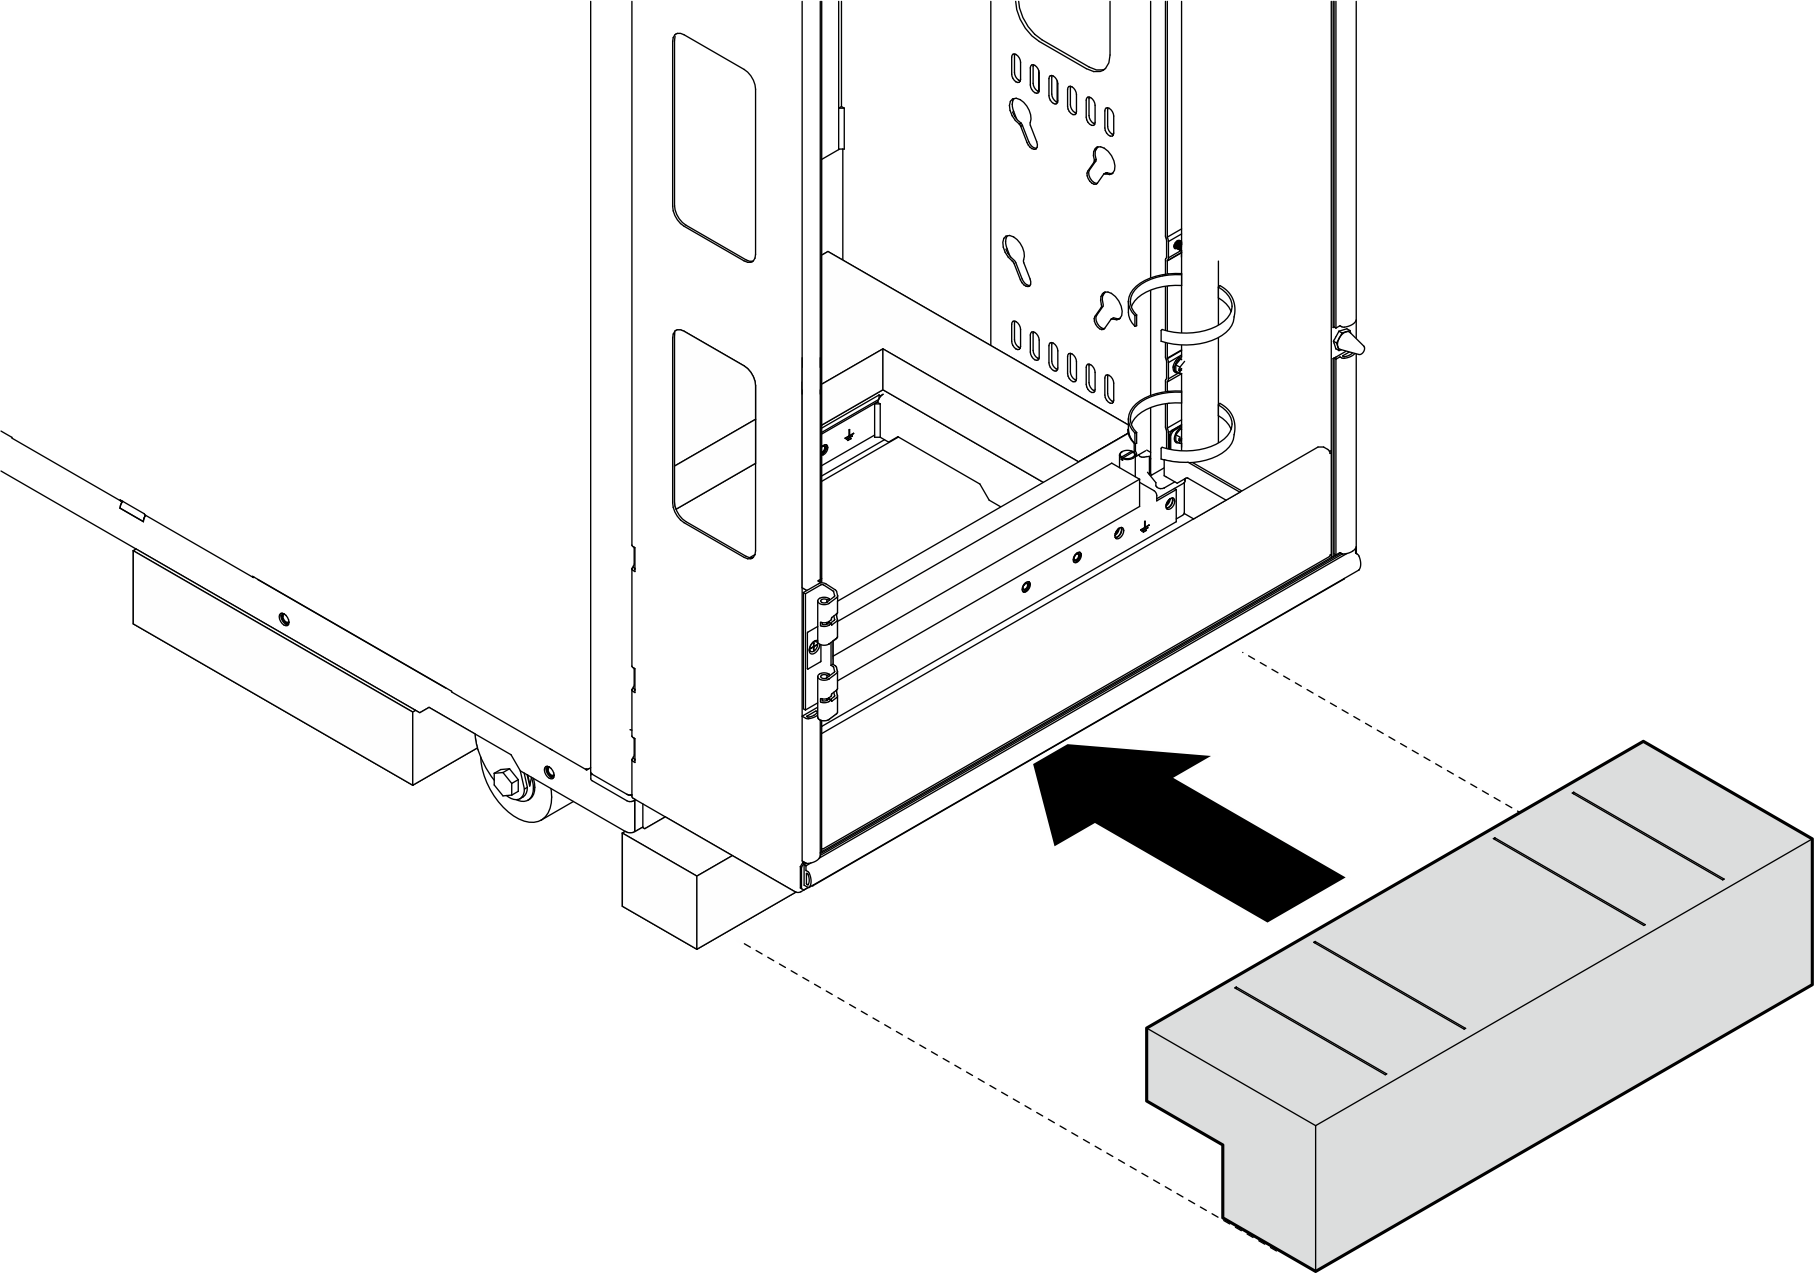
4 5 Ground foams
- Insert the foam (5) into the rear bottom of the rack cabinet until it connects to the other one.Figure 4. Installing the ground foams
6 Rear extension foam
Note
Install the foam only when ThinkSystem N1380 Neptune One Enclosure is installed.
- If necessary, cut the rear extension foam along the cutting lines; then, route cables and hoses through the foam.Figure 5. Installing rear extension foam
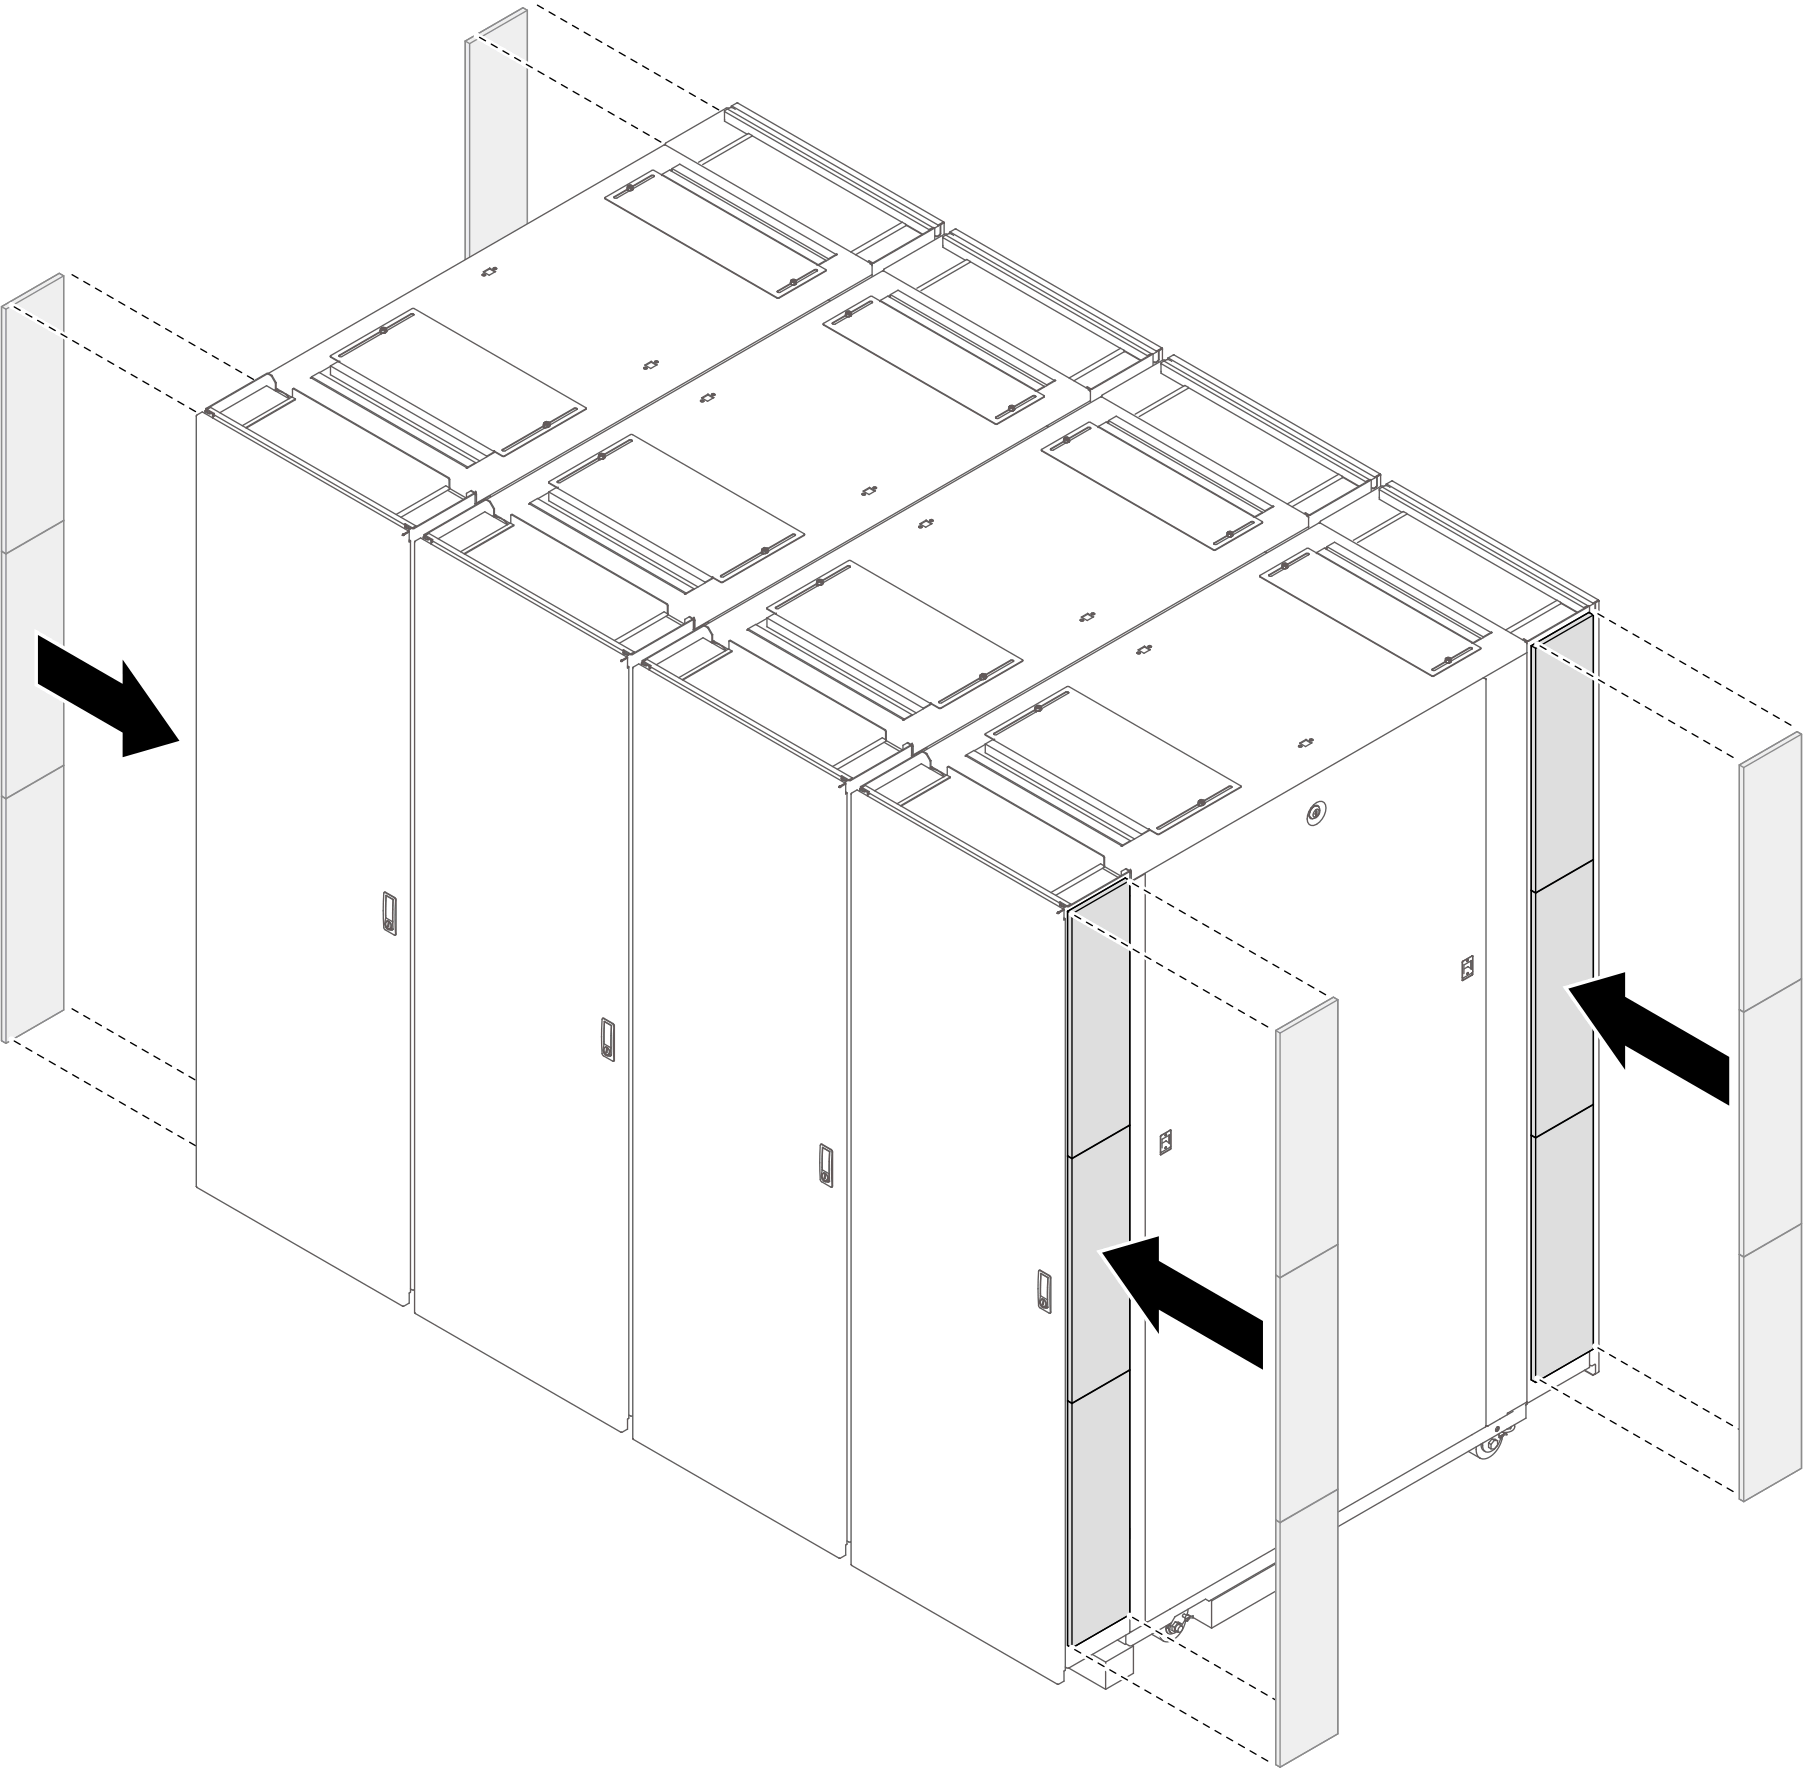
7 Extension foam
Install the extension foam after multiple racks are connected.
- Repeat to attach the foams to the other three extensions.Figure 6. Installing extension foam
8 Extension sealing foam
- Remove the door.Figure 7. Removing a door
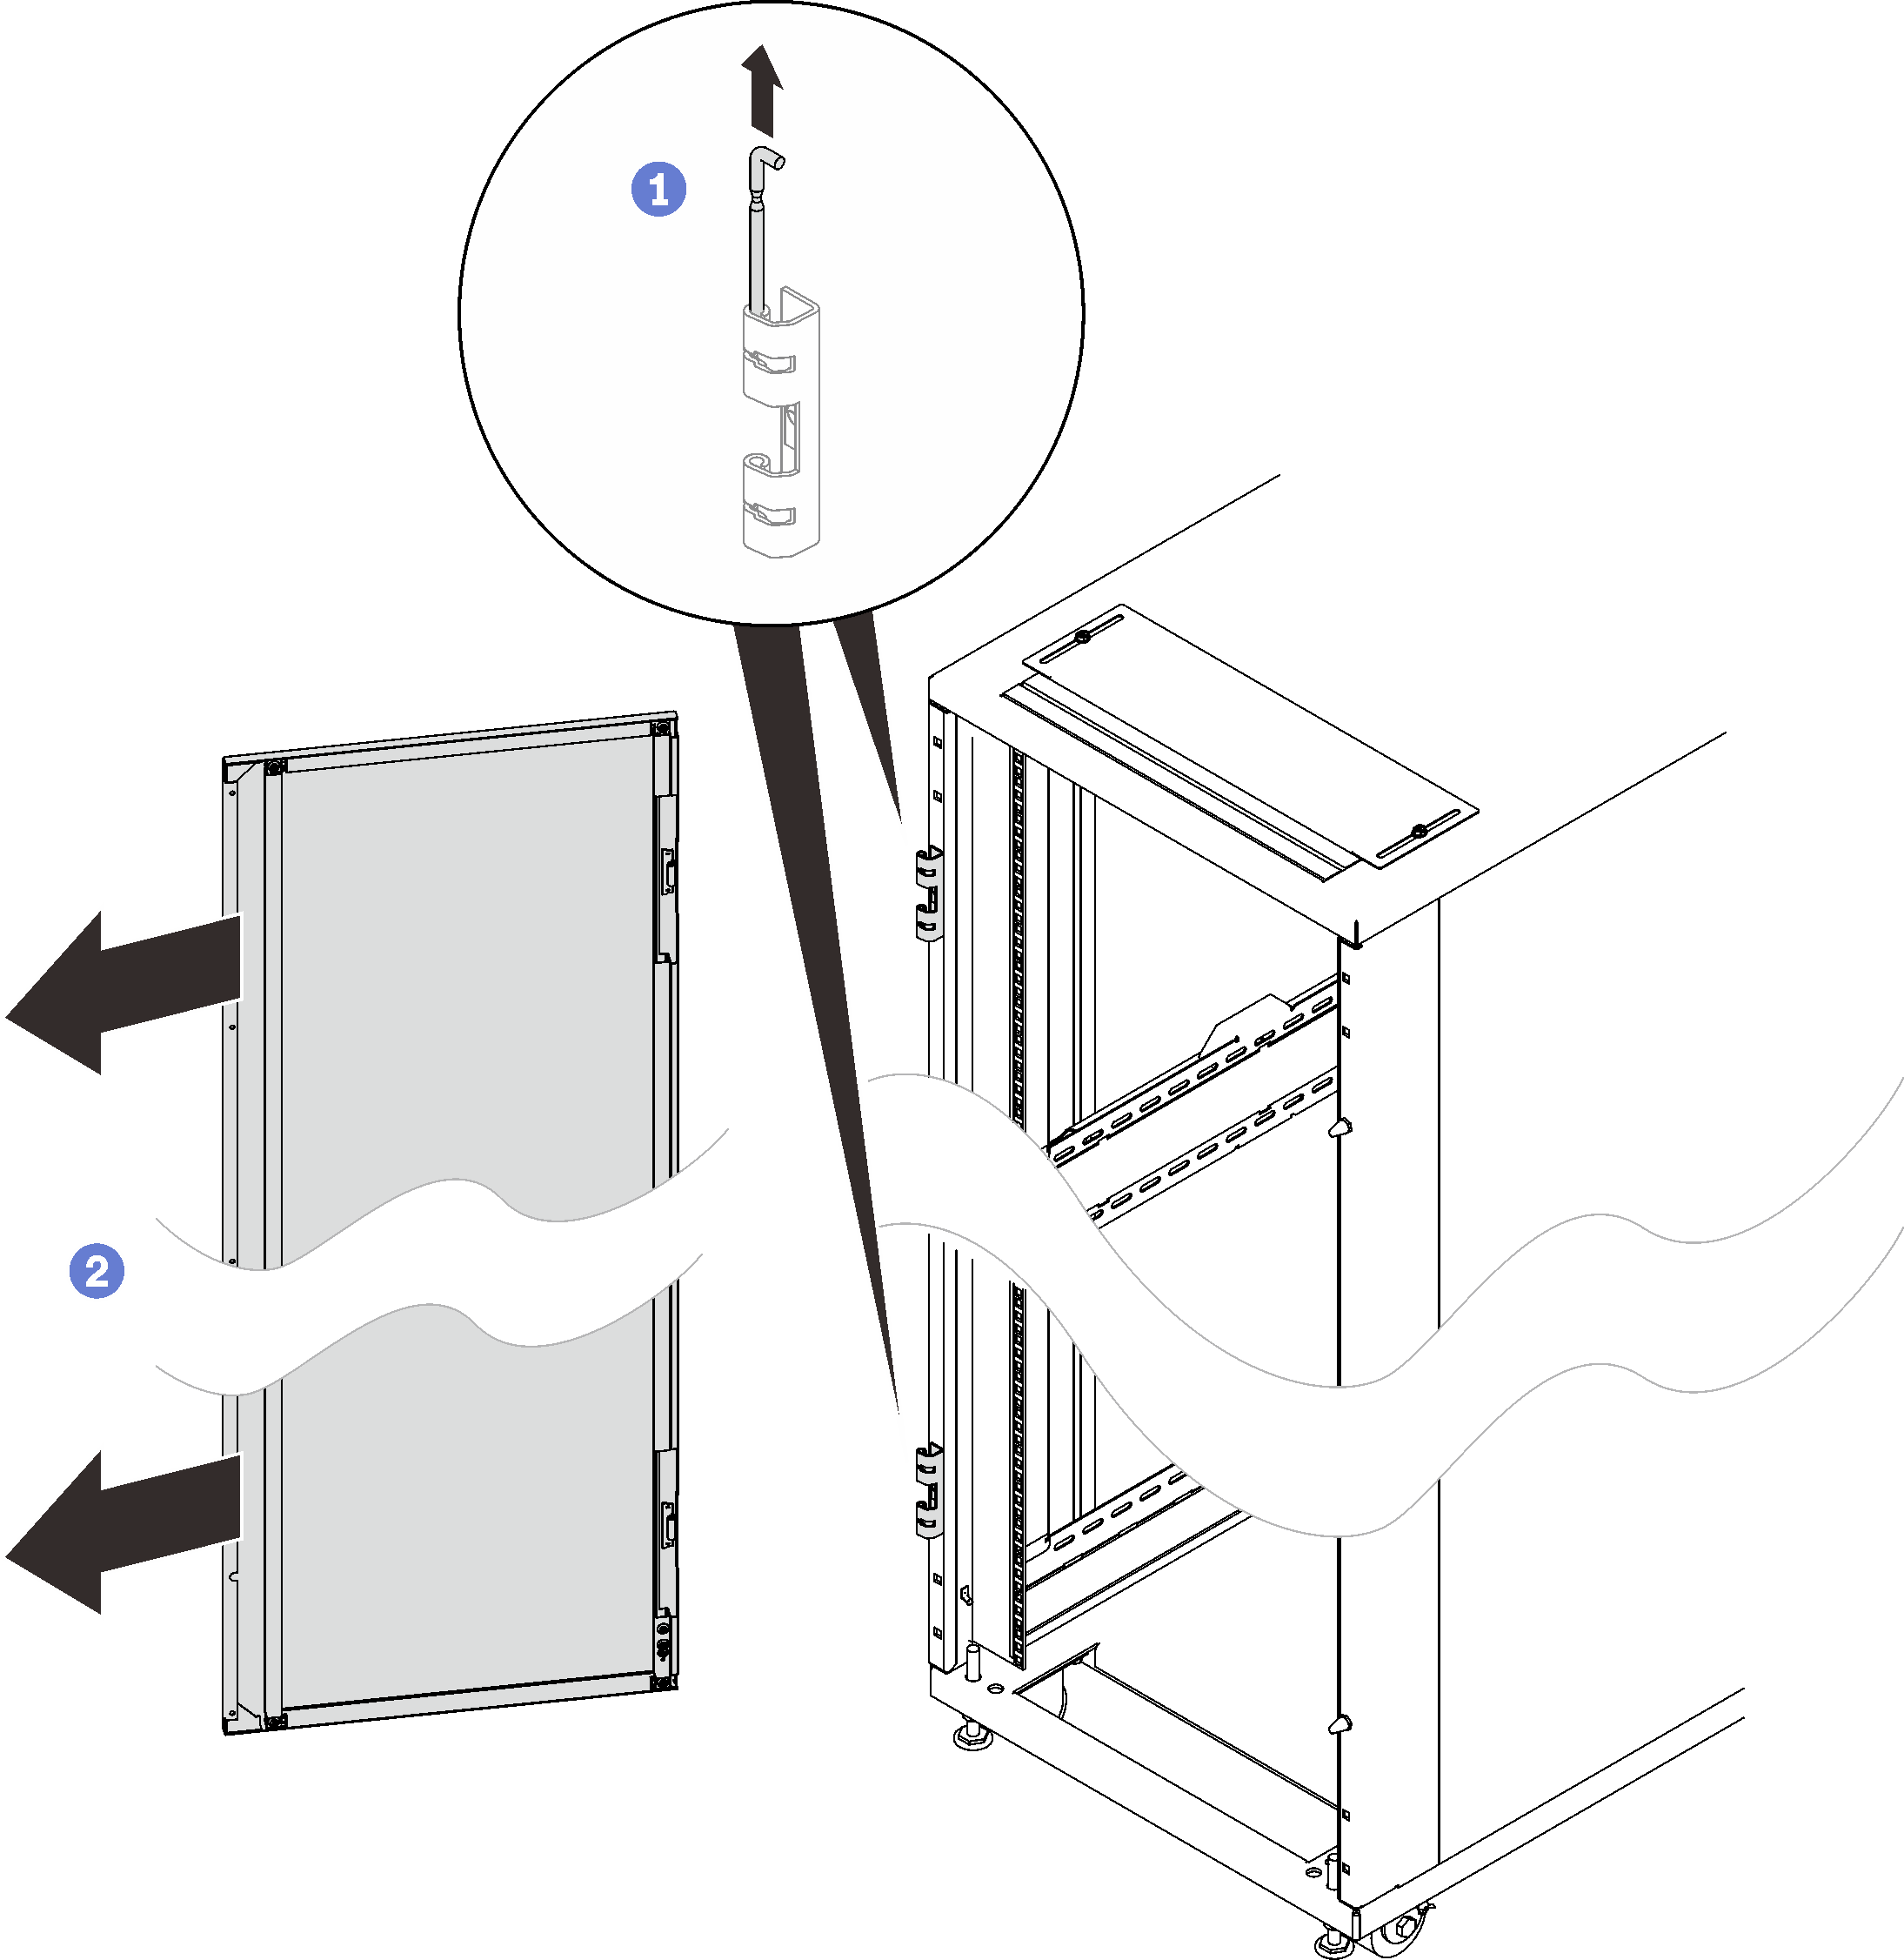
 Hold the door in place, and lift both hinge pins until they lock in the open position so that the door is disengaged.
 Remove the door from the rack cabinet frame.
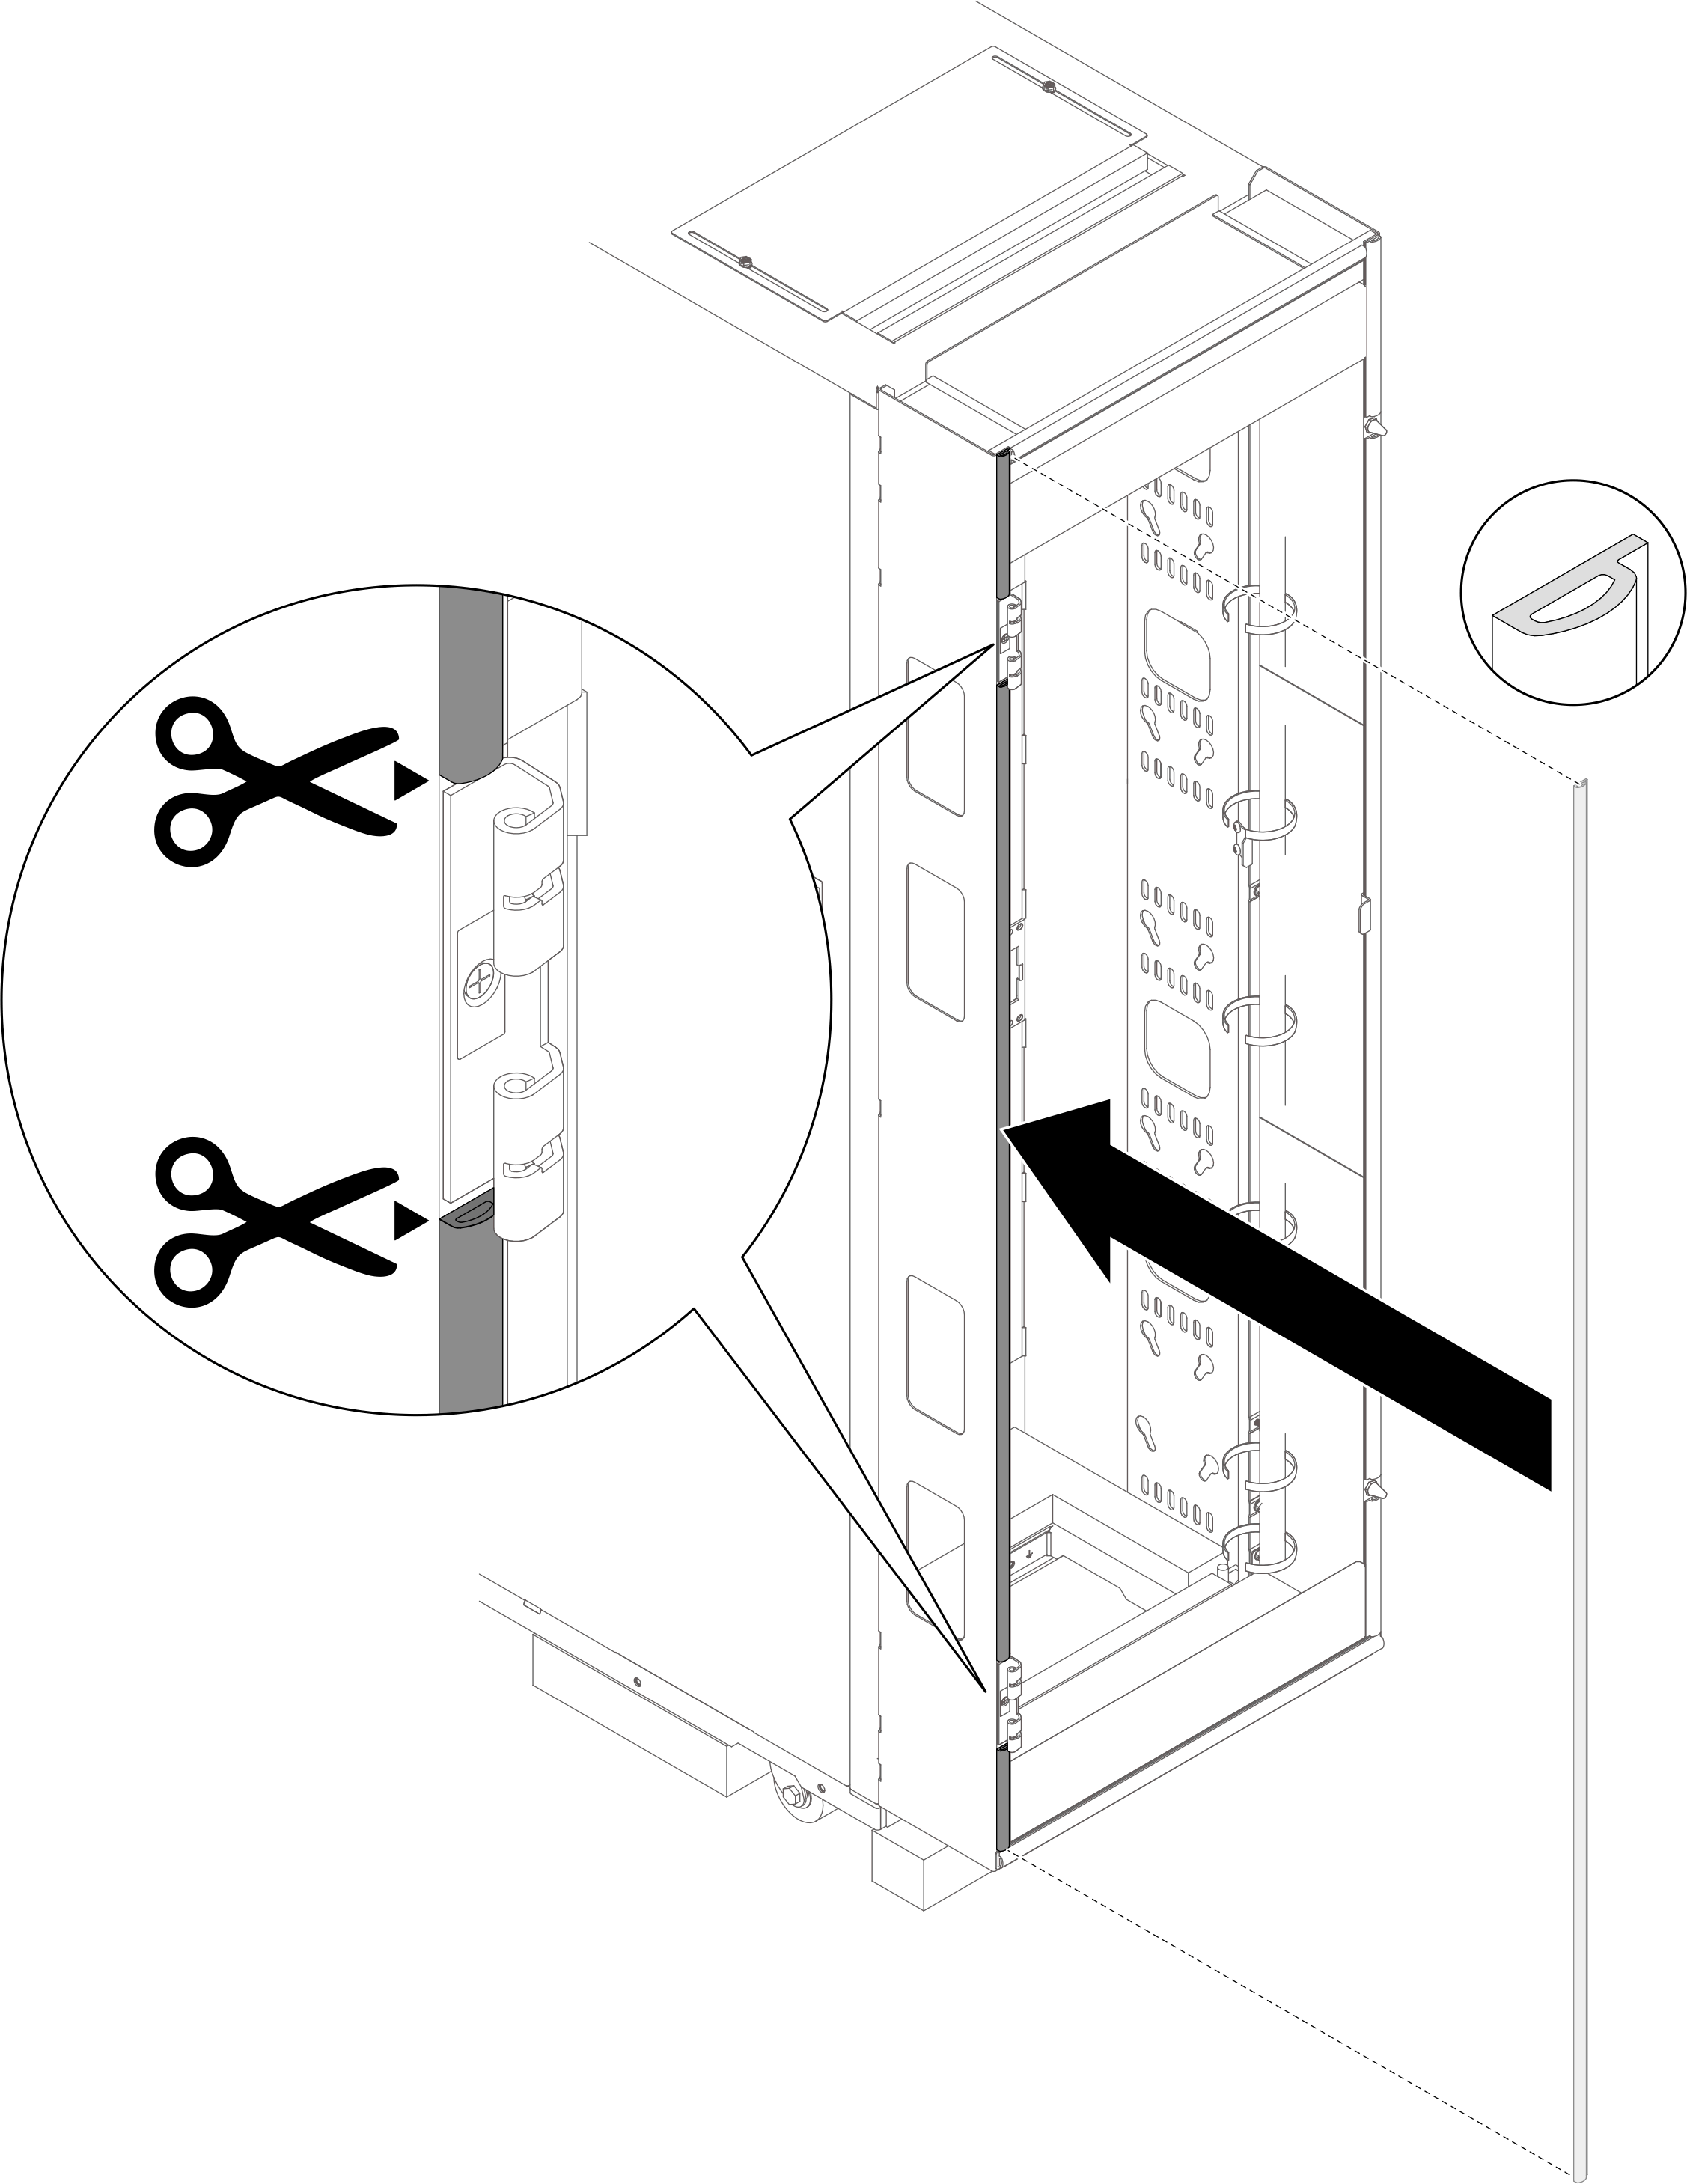
- Center align the foam with the folded edge of the left side of the rack, and attach it. Cut off the foam with a sharp tool where the hinges are installed.Figure 8. Installing the extension sealing foam to the left side of the rack
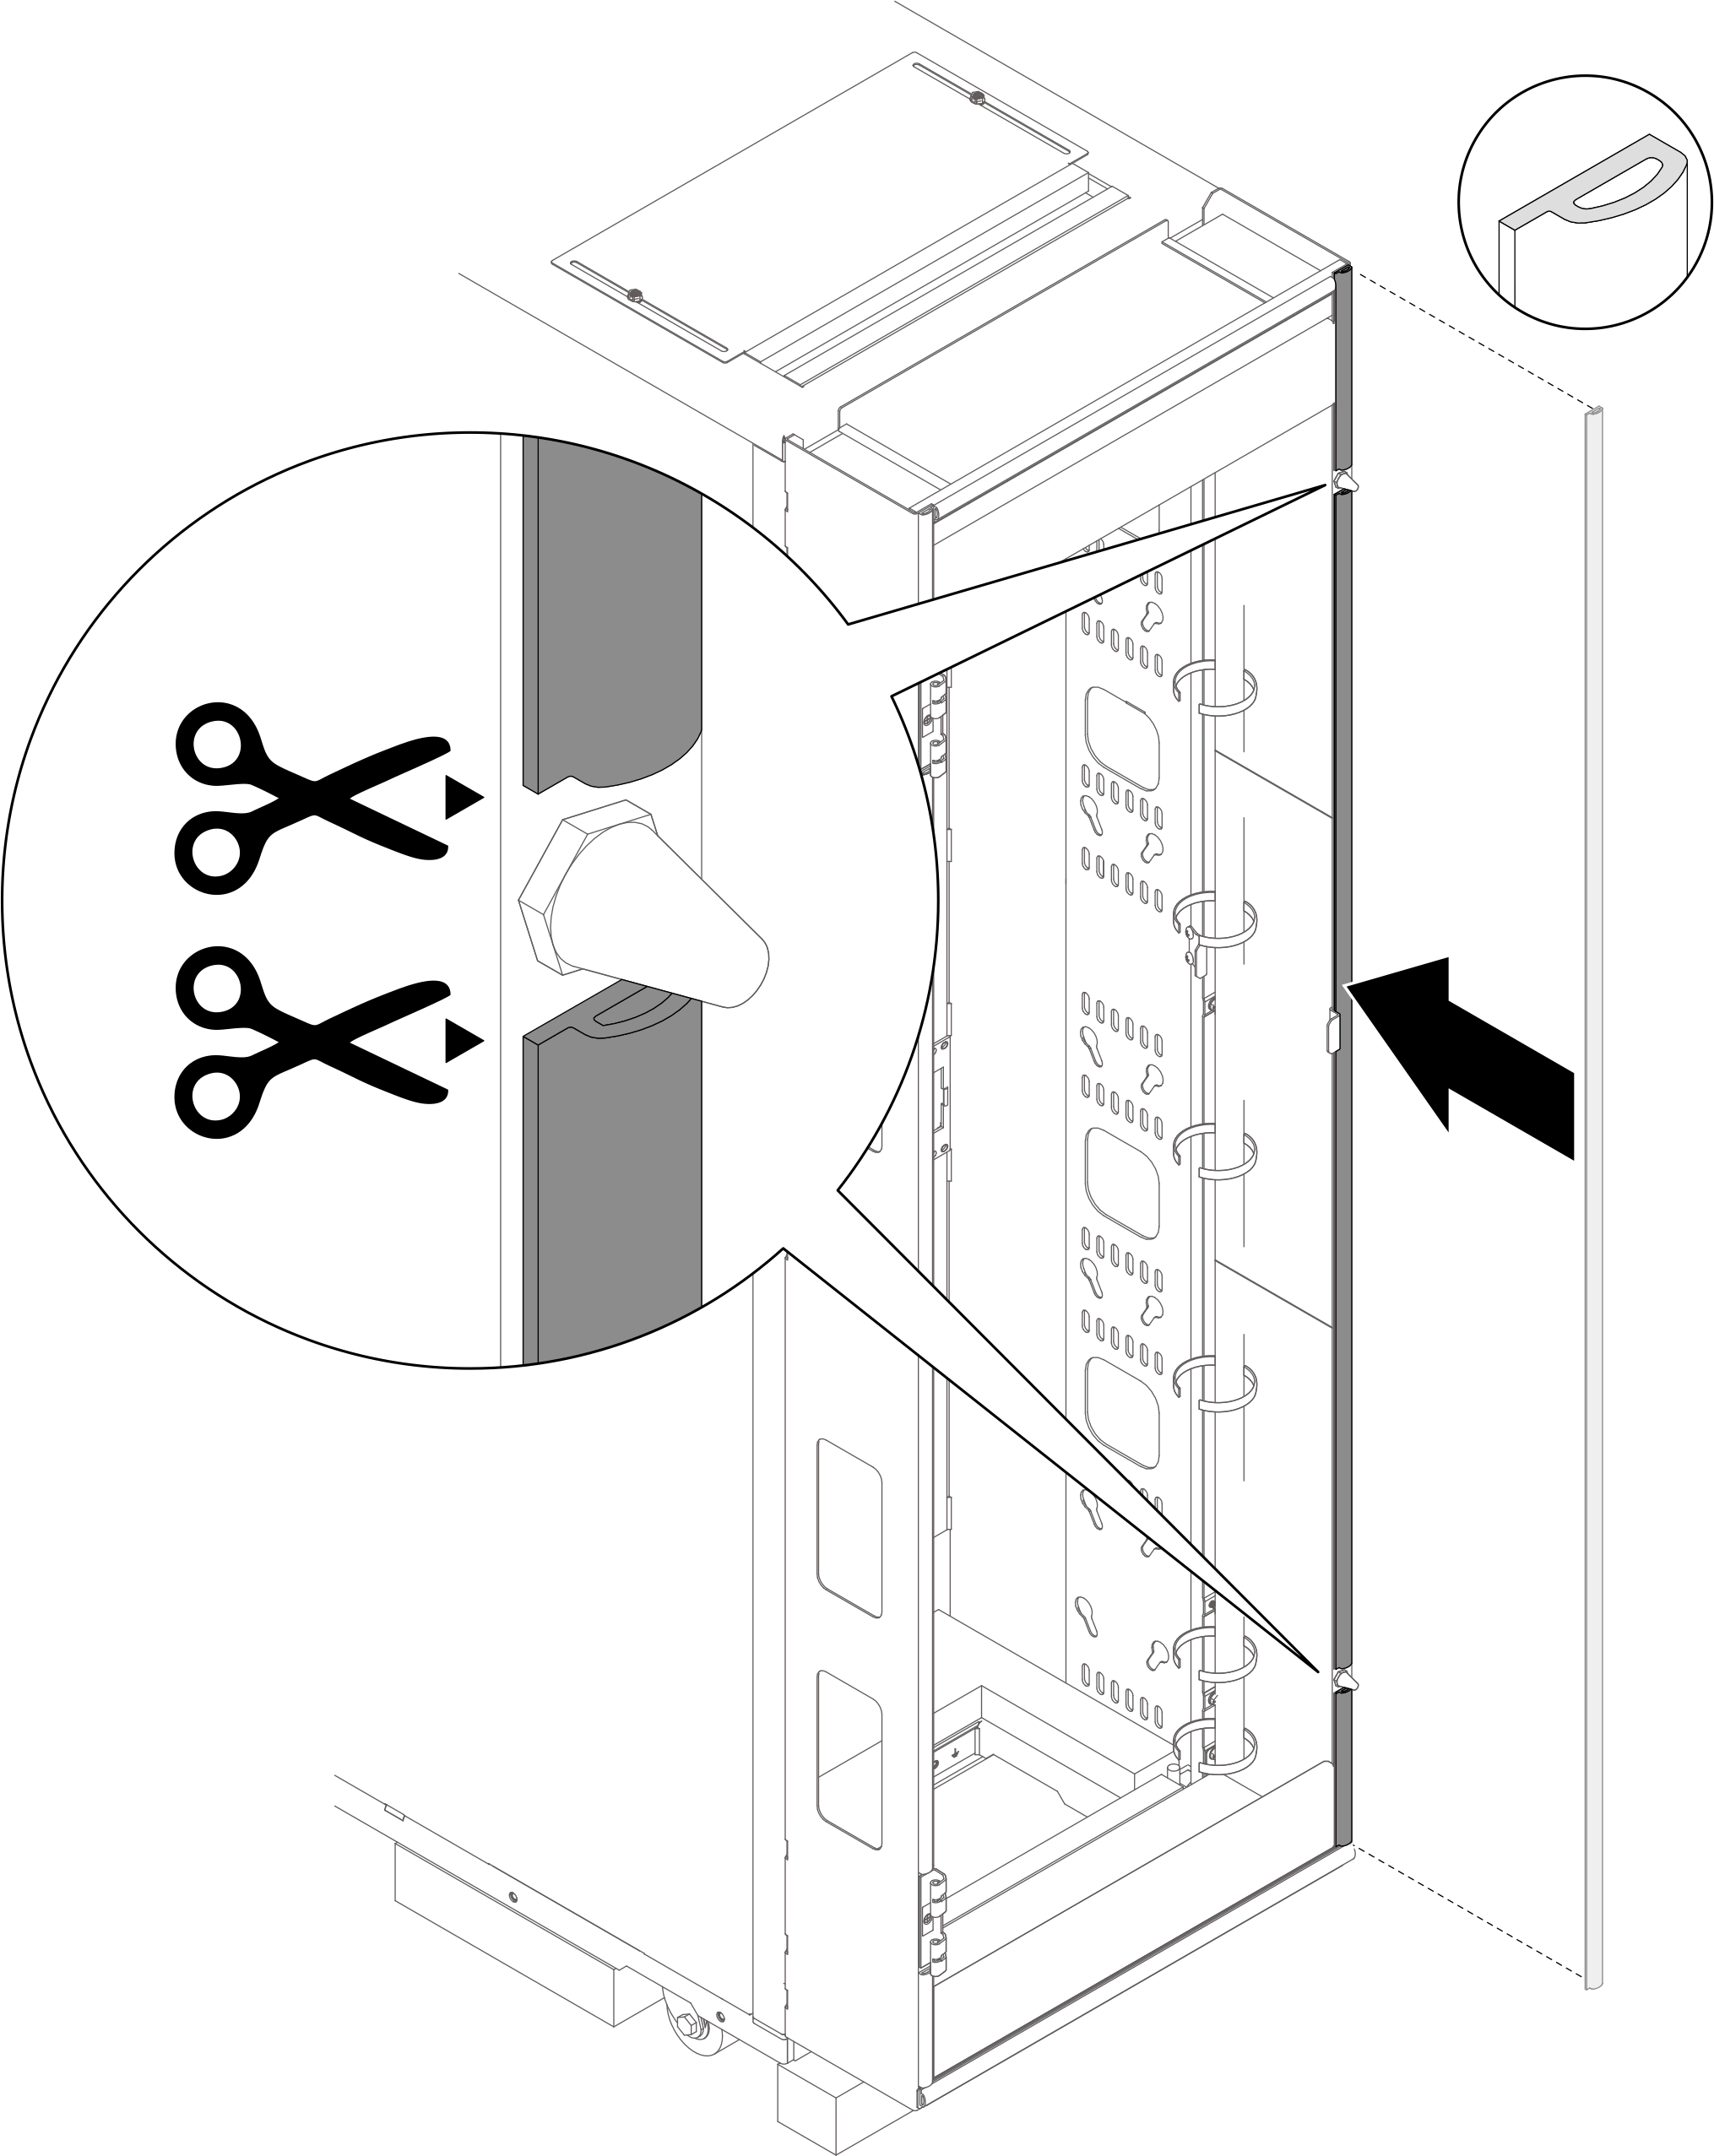
- Center align the foam with the folded edge of the right side of the rack, and attach it. Cut off the foam with a sharp tool where the guide pins are installed.Figure 9. Installing the extension sealing foam to the right side of the rack
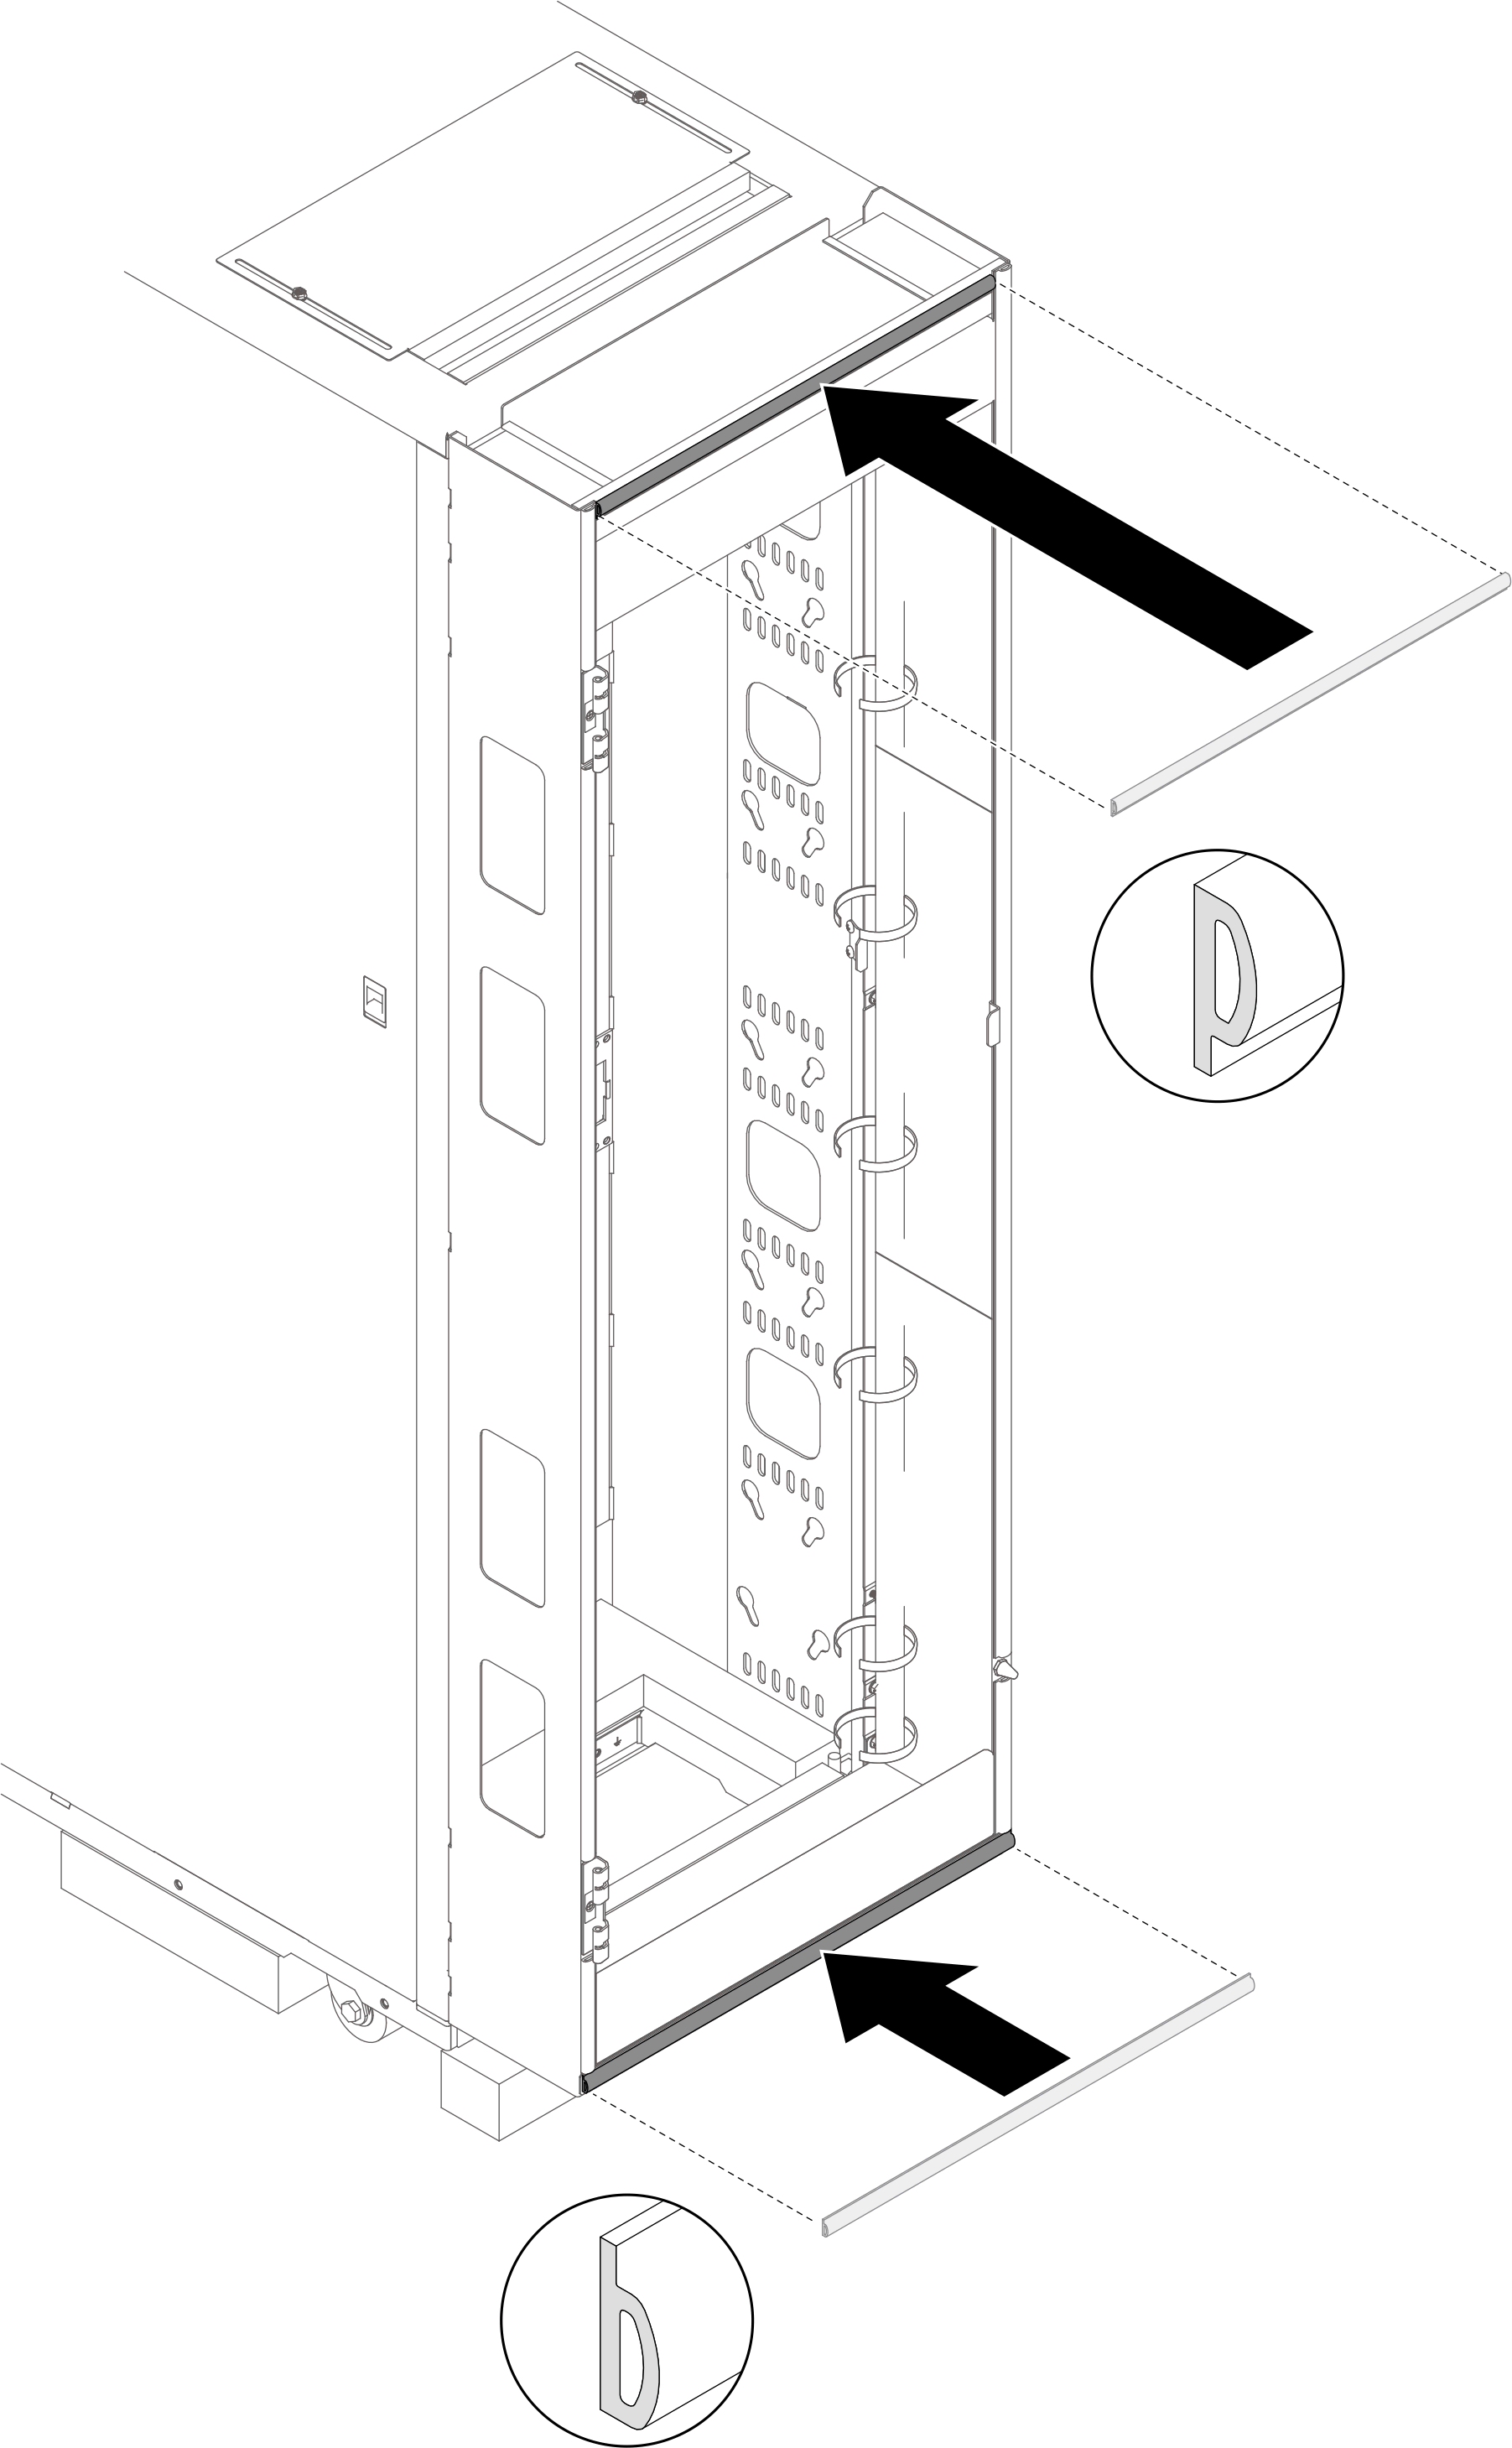
- Install the foam to the extension top cover and bottom cover.Figure 10. Installing the extension sealing foam to the extension top cover and bottom cover
- Install the door.Figure 11. Installing a door
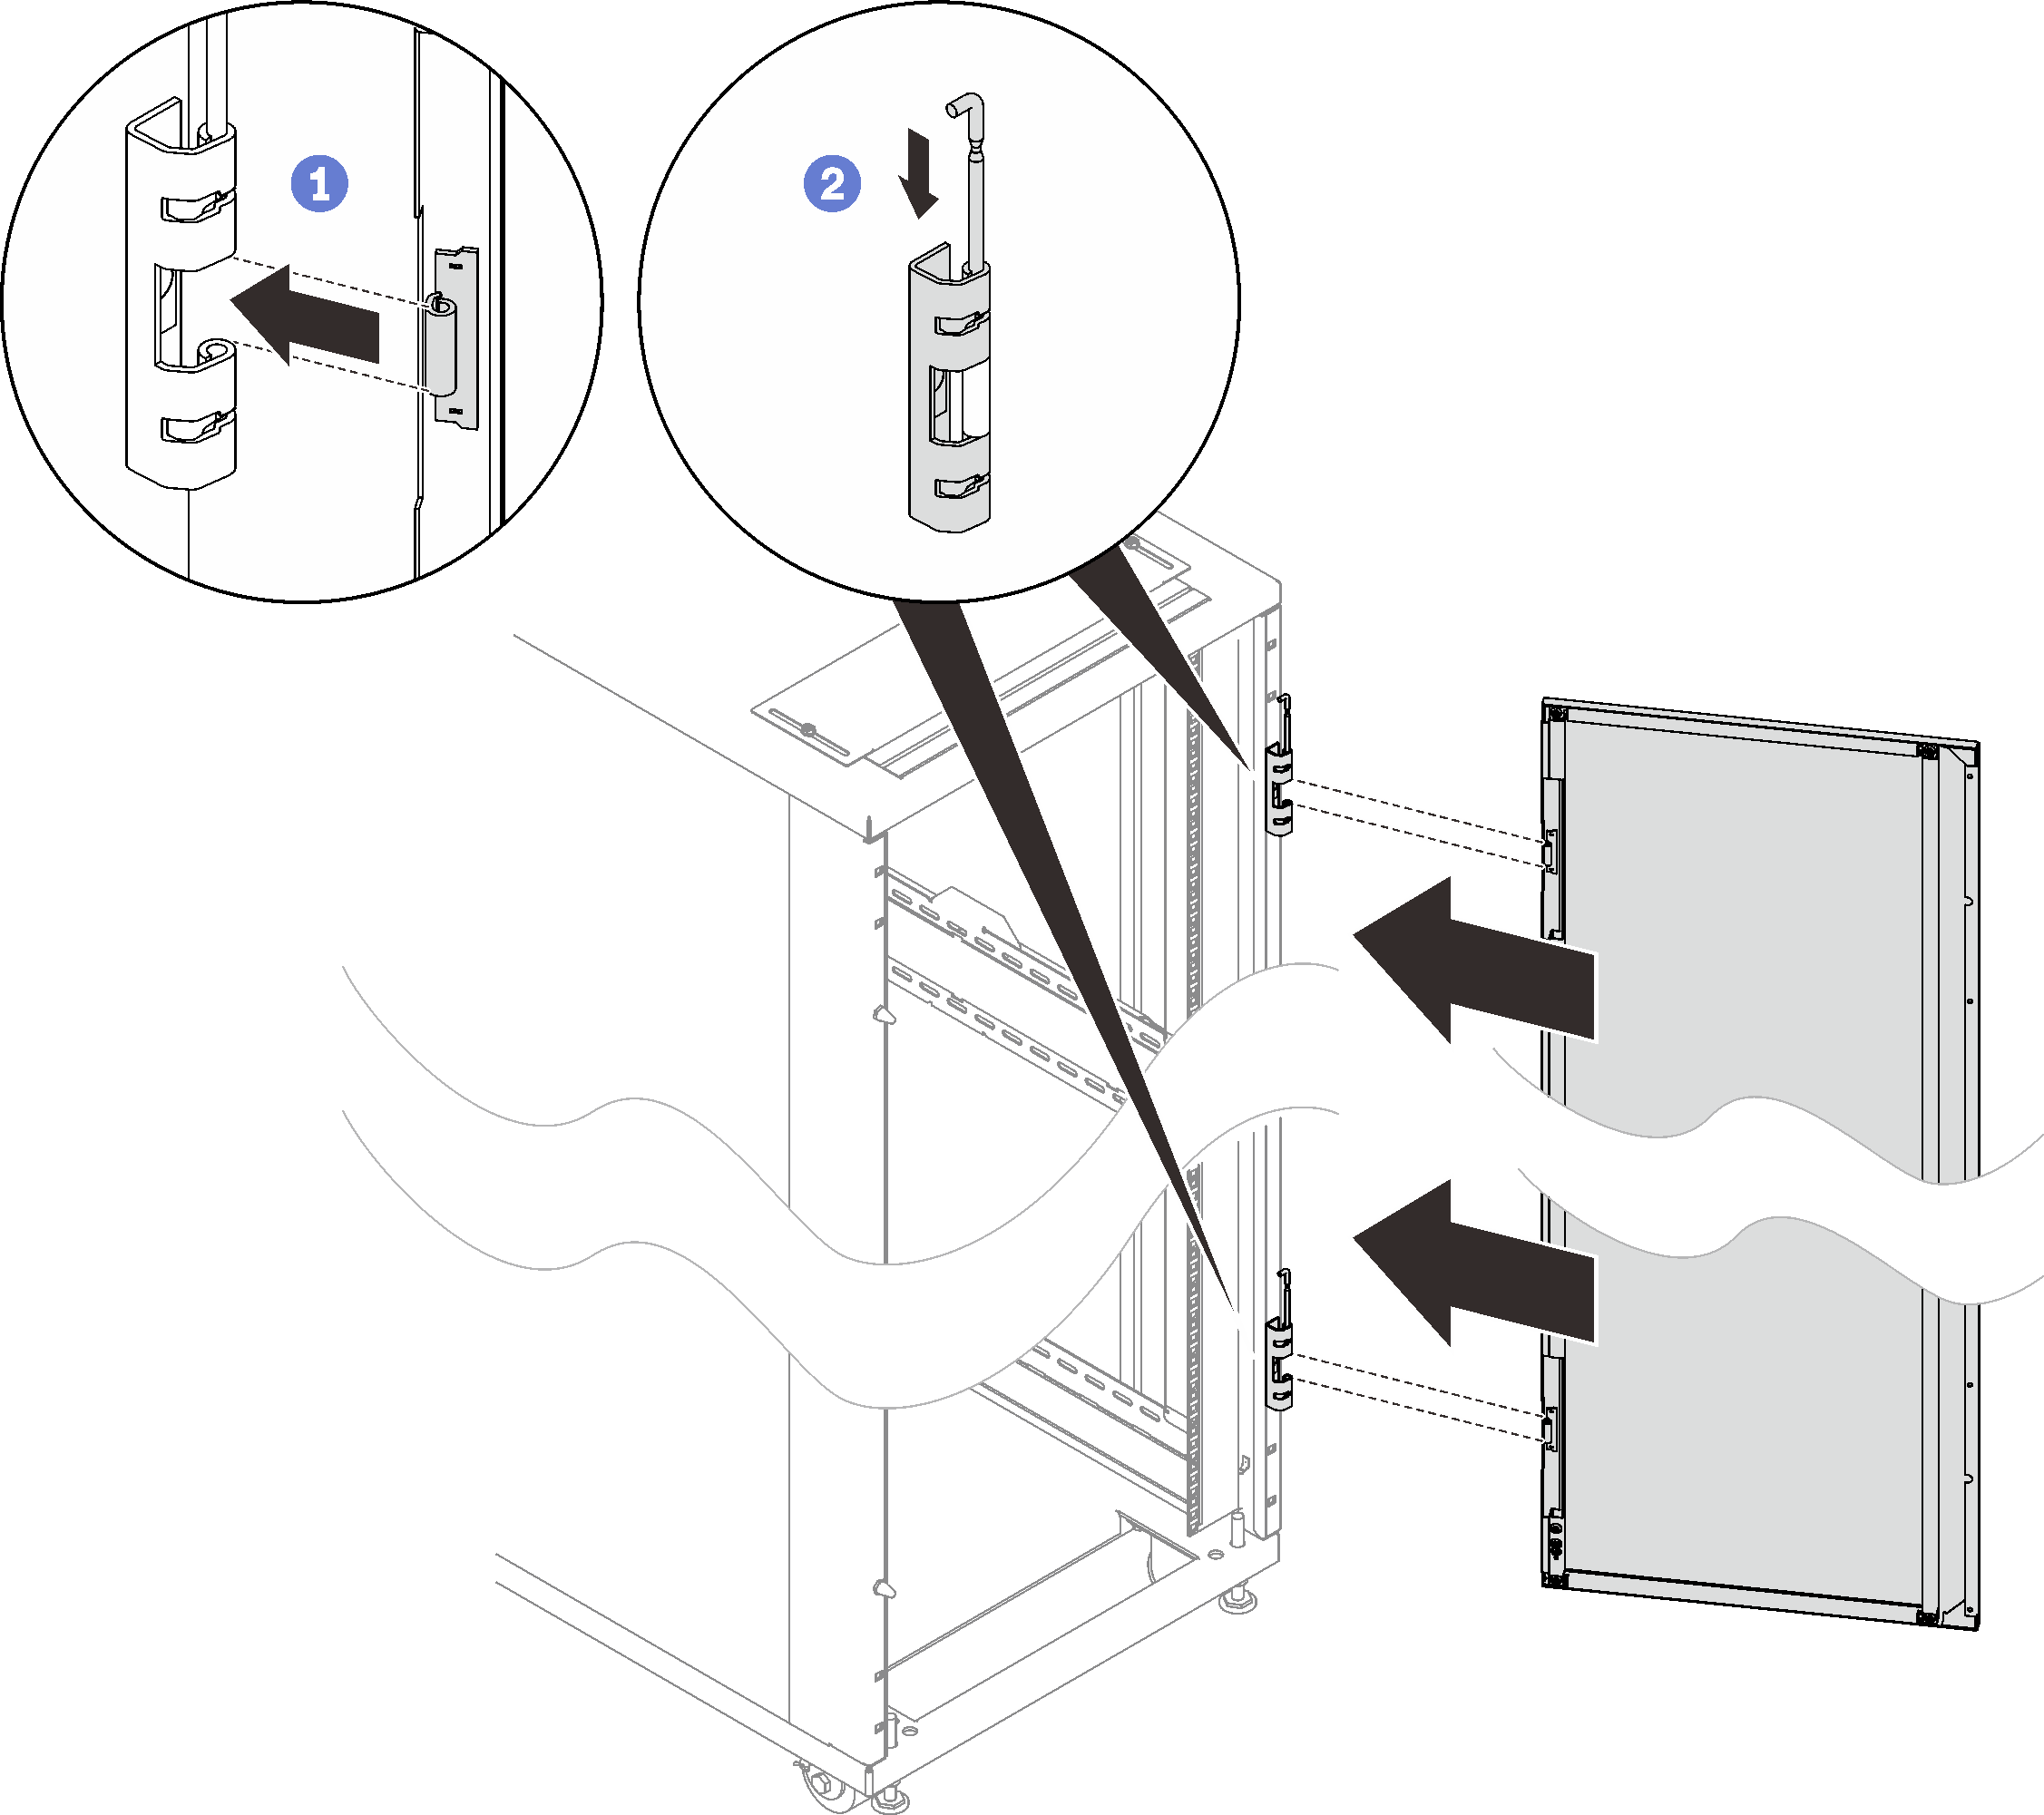
- Align the door with the hinges, and hold the door in place.
- Push the hinge pins down to the closed position so that the door is secured.
Give documentation feedback