Intel® PPIN
Reading PPIN
Protected Processor Inventory Number, or PPIN, is a mandatory information for enabling Intel On Demand. PPIN can be read via XCC Web GUI, XCC REST API, and LXCE OneCLI. See the following for more information.
Reading PPIN via XCC Web GUI
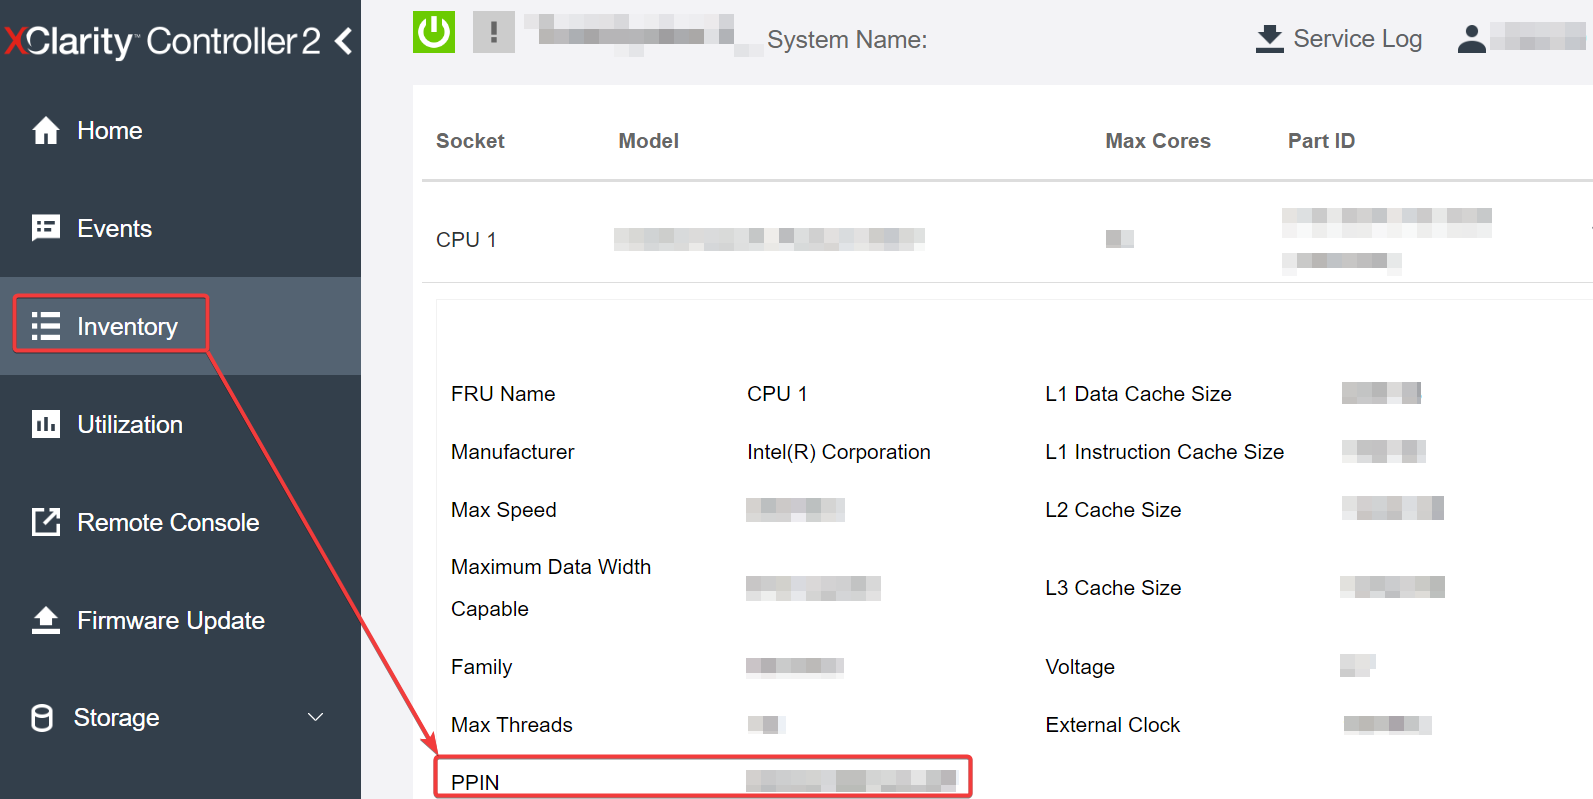
Open XCC Web GUI, go to
Figure 1. Reading PPIN via XCC Web GUI
Reading PPIN via XCC REST API
- Use the GET method with the following Request URL:
For example:GET https://bmc_ip/redfish/v1/Systems/1/ProcessorsGET https://bmc_ip/redfish/v1/Systems/1/Processors In the response JSON object, the Members field shows reference link to an element of processor resource.
For example:"Members":[
{
@odata.id: "/redfish/v1/Systems/1/Processors/1"
},
{
@odata.id: "/redfish/v1/Systems/1/Processors/2"
}
],- Select the processor you need to read the PPIN from. Use the GET method with the following Request URL, where x is the CPU numbering:
For example, to read Processor 1 PPIN, see the following:GET https://bmc_ip/redfish/v1/Systems/1/Processors/xGET https://bmc_ip/redfish/v1/Systems/1/Processors/1 In the response JSON object, the ProcessorId field shows the ProtectedIdentificationNumber field, which is the PPIN info of the requested CPU.
For example:
"ProcessorId":{
  "ProtectedIdentificationNumber":"1234567890xxxyyy"
},
Reading PPIN via LXCE OneCLI
Input the following command:
OneCli.exe fod showppin -b XCC_USER:XCC_PASSW0RD@XCC_HOST
The output shows PPIN information. For example:
Machine Type: 7D75
Serail Number: 7D75012345
FoD PPIN result:
======================================
|   Socket ID   |        PPIN        |
|  Processor 1  |  1234567890xxxyyy  |
|  Processor 2  |  9876543210zzzyyy  |
======================================
Give documentation feedback