Importing Lenovo XClarity Integrator Add-in

You must import the Lenovo XClarity Integrator Add-in zip file into SCVMM manually. After the InstallShiled Wizard completes, the Lenovo XClarity Integrator Add-in zip file is copied into a specified folder. Use following the procedure to import it.

Before you begin

Ensure that the Lenovo XClarity Integrator Add-in has not been imported or has been removed. For removal instructions, see Removing the Lenovo XClarity Integrator Add-in from SCVMM.

Procedure

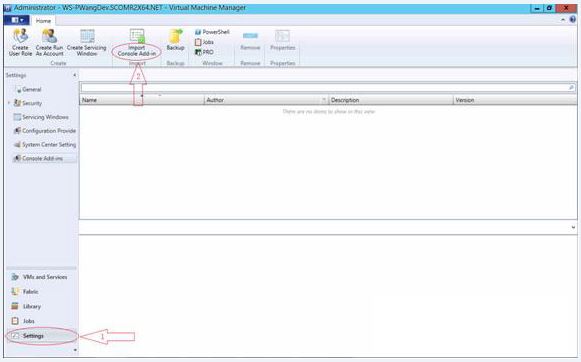
  1. From the SCVMM Console, on the Settings category page, click Import Console Add-in. The Import Console Add-in Wizard window displays.
    Figure 1. Import Console Add-in selection
    Import Console Add-in selection
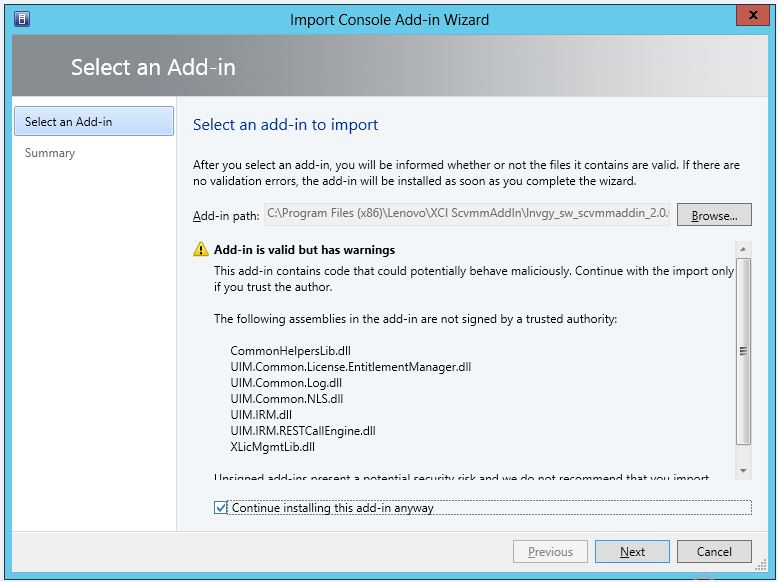
  2. In the Import Console Add-in Wizard window, click Browse.

    Import Console Add-in Wizard window
  3. Navigate to the lnvgy_sw_scvmmaddin_version_windows_32-64.zip file.
    The zip file is typically located in the following path: C:\Program Files (x86)\Lenovo\XCI ScvmmAddIn.
  4. Select the Continue installing this add-in anyway check box.
  5. Click Next to continue.
  6. Click Finish to continue with the import procedure.
    The status of the import procedure is presented in the Jobs report console.