Running disk drive test
If you want to save the test result, attach a USB storage drive to the server or connect your server to a shared network. For instructions on how to connect to a shared network, refer to Configuring network settings.
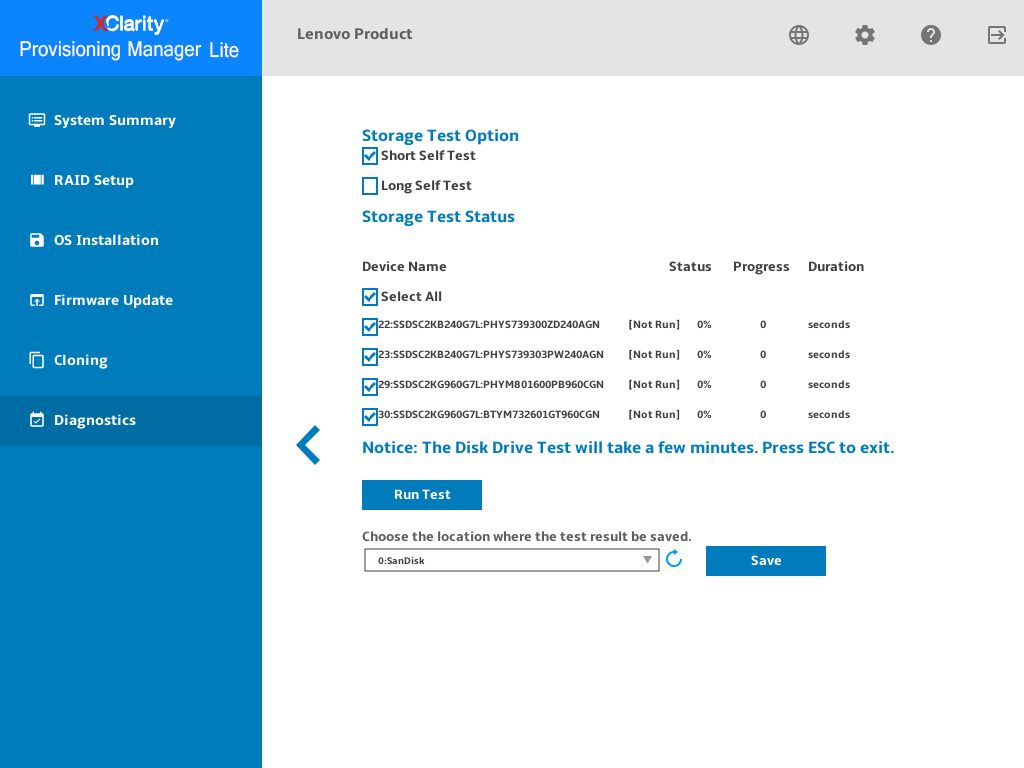
Click the Disk Drive Test tab.
- Select the test options according to your need, and click Run to start testing.Note
You can select Short Self Test or Long Self Test according to your needs.
Short Self Test is selected as the test type by default.
The mouse pointer is not active during the testing process.
You can press Esc to stop the test.
If you are running test for NVMe SSDs, no matter you select Short Self Test or Long Self Test, the test item only includes the Self-Monitoring, Analysis, and Reporting Technology (SMART) flag status.
If there is no disk drive information displayed in System Summary page or Disk Test page, ensure that the boot mode of your server is set to UEFI, and then restart your server.
- Click Save after the testing process is completed if you want to save the test result.Note
The test result will be saved in a test_hdd.txt file in the USB storage drive or the shared network folder. The file includes more details than the test result displayed on the interface.
If two M.2 drives are configured as a RAID array, the drives are not supported in the disk drive test. If you want to use disk drive test function to test the M.2 drives, do not configure them as a RAID array.