Running memory test
To run memory test, do the following:
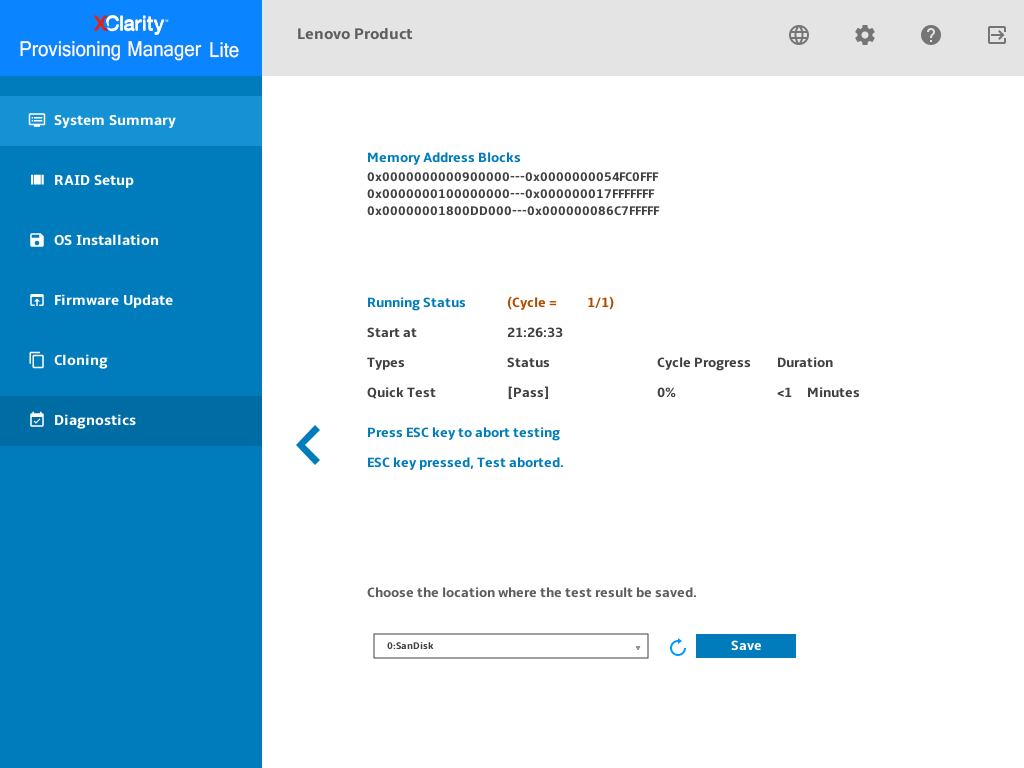
If you want to save the test result, attach a USB storage drive to the server, or connect your server to a shared network. For instructions on how to connect to a shared network, refer to Configuring network settings.
Click the Memory Test tab.
- Select the test options according to your needs, and click Run Test to start testing.Note
You can select Test by cycles or Test by time according to your needs.
Quick Test is selected as the default test type and it only runs the WriteRead test pattern.
Full Test runs all test patterns and takes a long time to finish.
The mouse pointer is not active during the test process.
After the testing process is completed, the test result will be displayed to show you if the test is passed or failed.
You can press Esc to stop the test.
Figure 1. Memory test interface – 1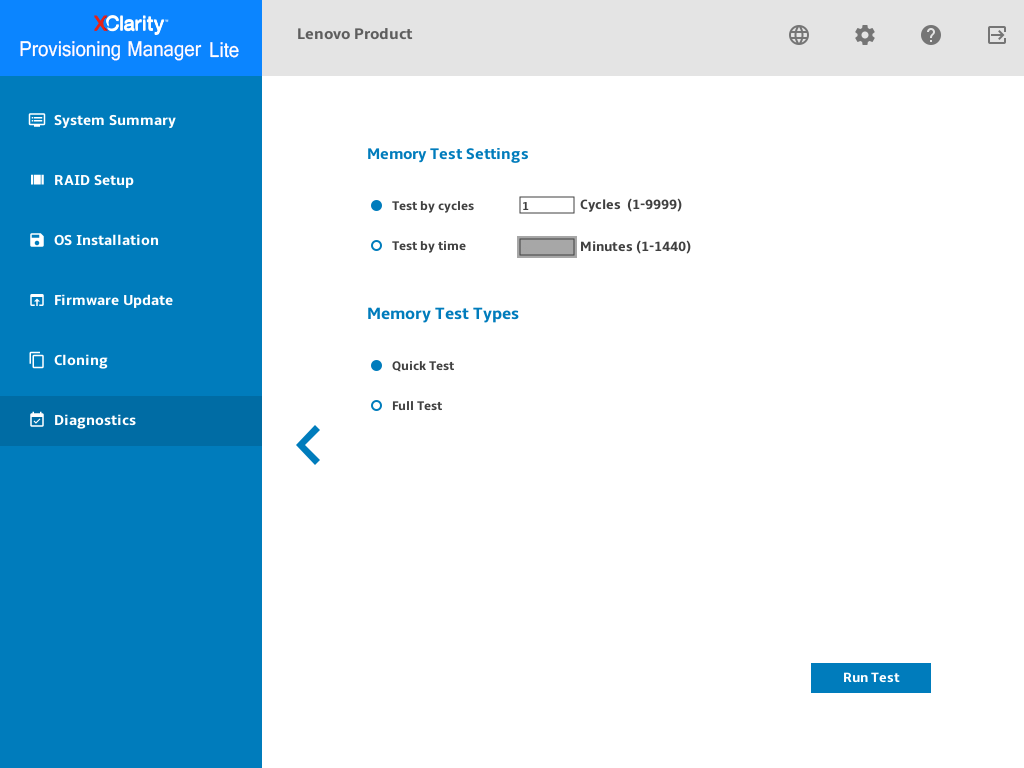
- Click Save after the testing process is completed if you want to save the test result.NoteThe test result with more details will be saved in a memorylog.txt file in the USB storage drive or the shared network folder. For example, if the memory test fails, you can see the specific number of the fault devices, such as CPU and DIMM in the file.Figure 2. Memory test interface – 2
Give documentation feedback