OPA 400 어댑터 라이저 어셈블리 제거
이 정보를 참조하여 OPA 400 어댑터 라이저 어셈블리를 제거하십시오.
이 작업 정보
필수 도구
T10 및 PH1 나사용 드라이버
Waterloop Miscellaneous Kit (SC750 V4) .
OPA 400 Gap Pad
OPA 400 Conduction Plate (OPA 400을 처음 설치하는 경우)
시스템은 아래 그림에 표시된 것과 같이 2가지 유형의 라이저 케이지(A/B가 인쇄된 1번, A/B/C/D가 인쇄된 2번)를 지원합니다. OPA 400을 설치할 때는 2번 라이저 케이지를 사용해야 합니다.
그림 1. 라이저 케이지 유형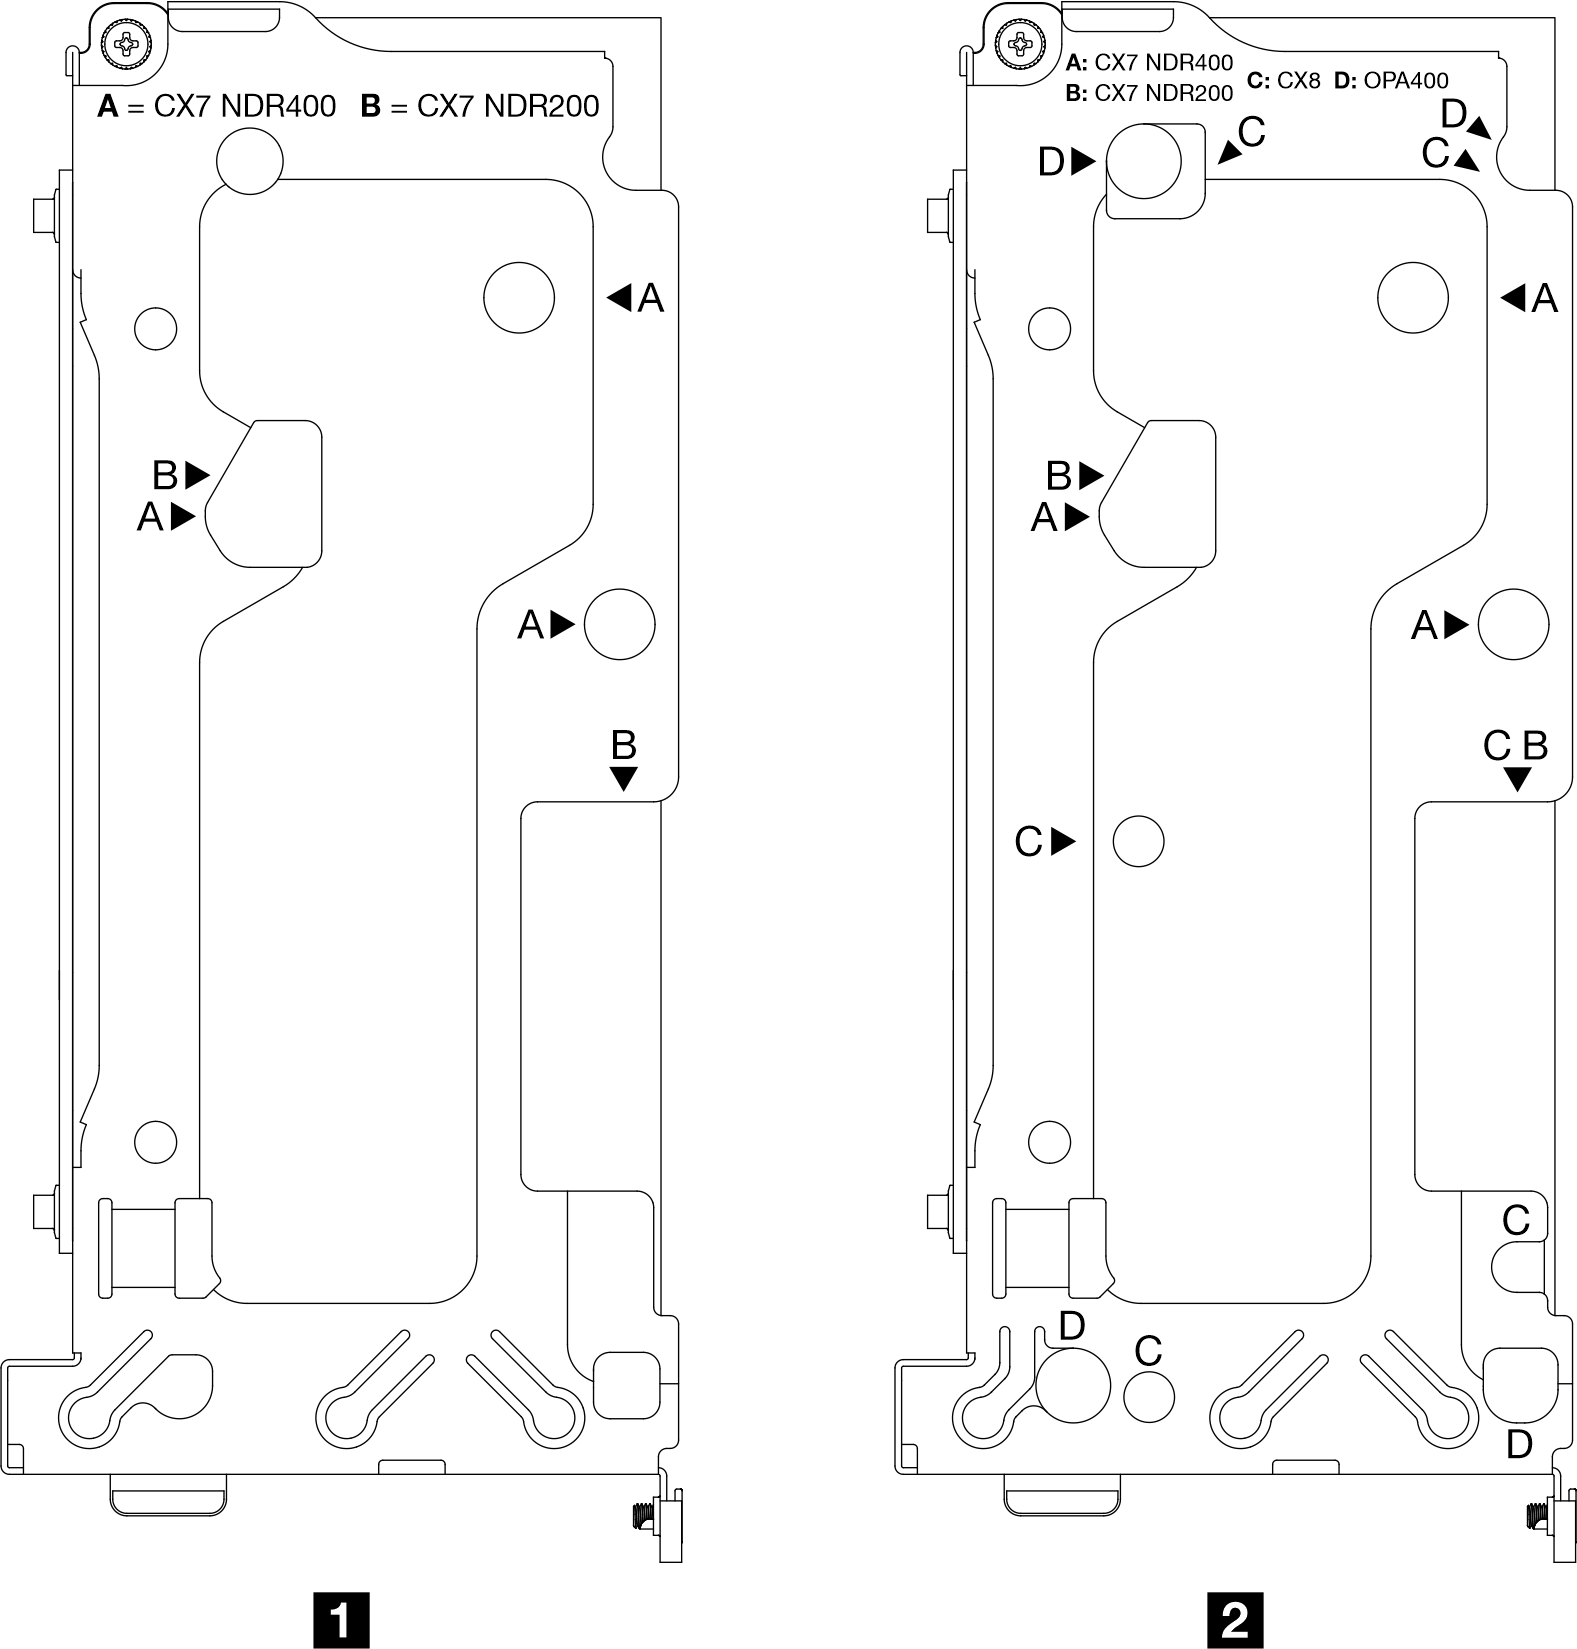
절차
- 워터 루프에서 OPA 400 라이저 어셈블리를 풉니다.
 라이저 어셈블리의 고정 나사를 푸십시오.
 D로 표시된 라이저 케이지의 나사 구멍에서 T10 나사 4개를 제거합니다.
그림 2. OPA 400 라이저 어셈블리 풀기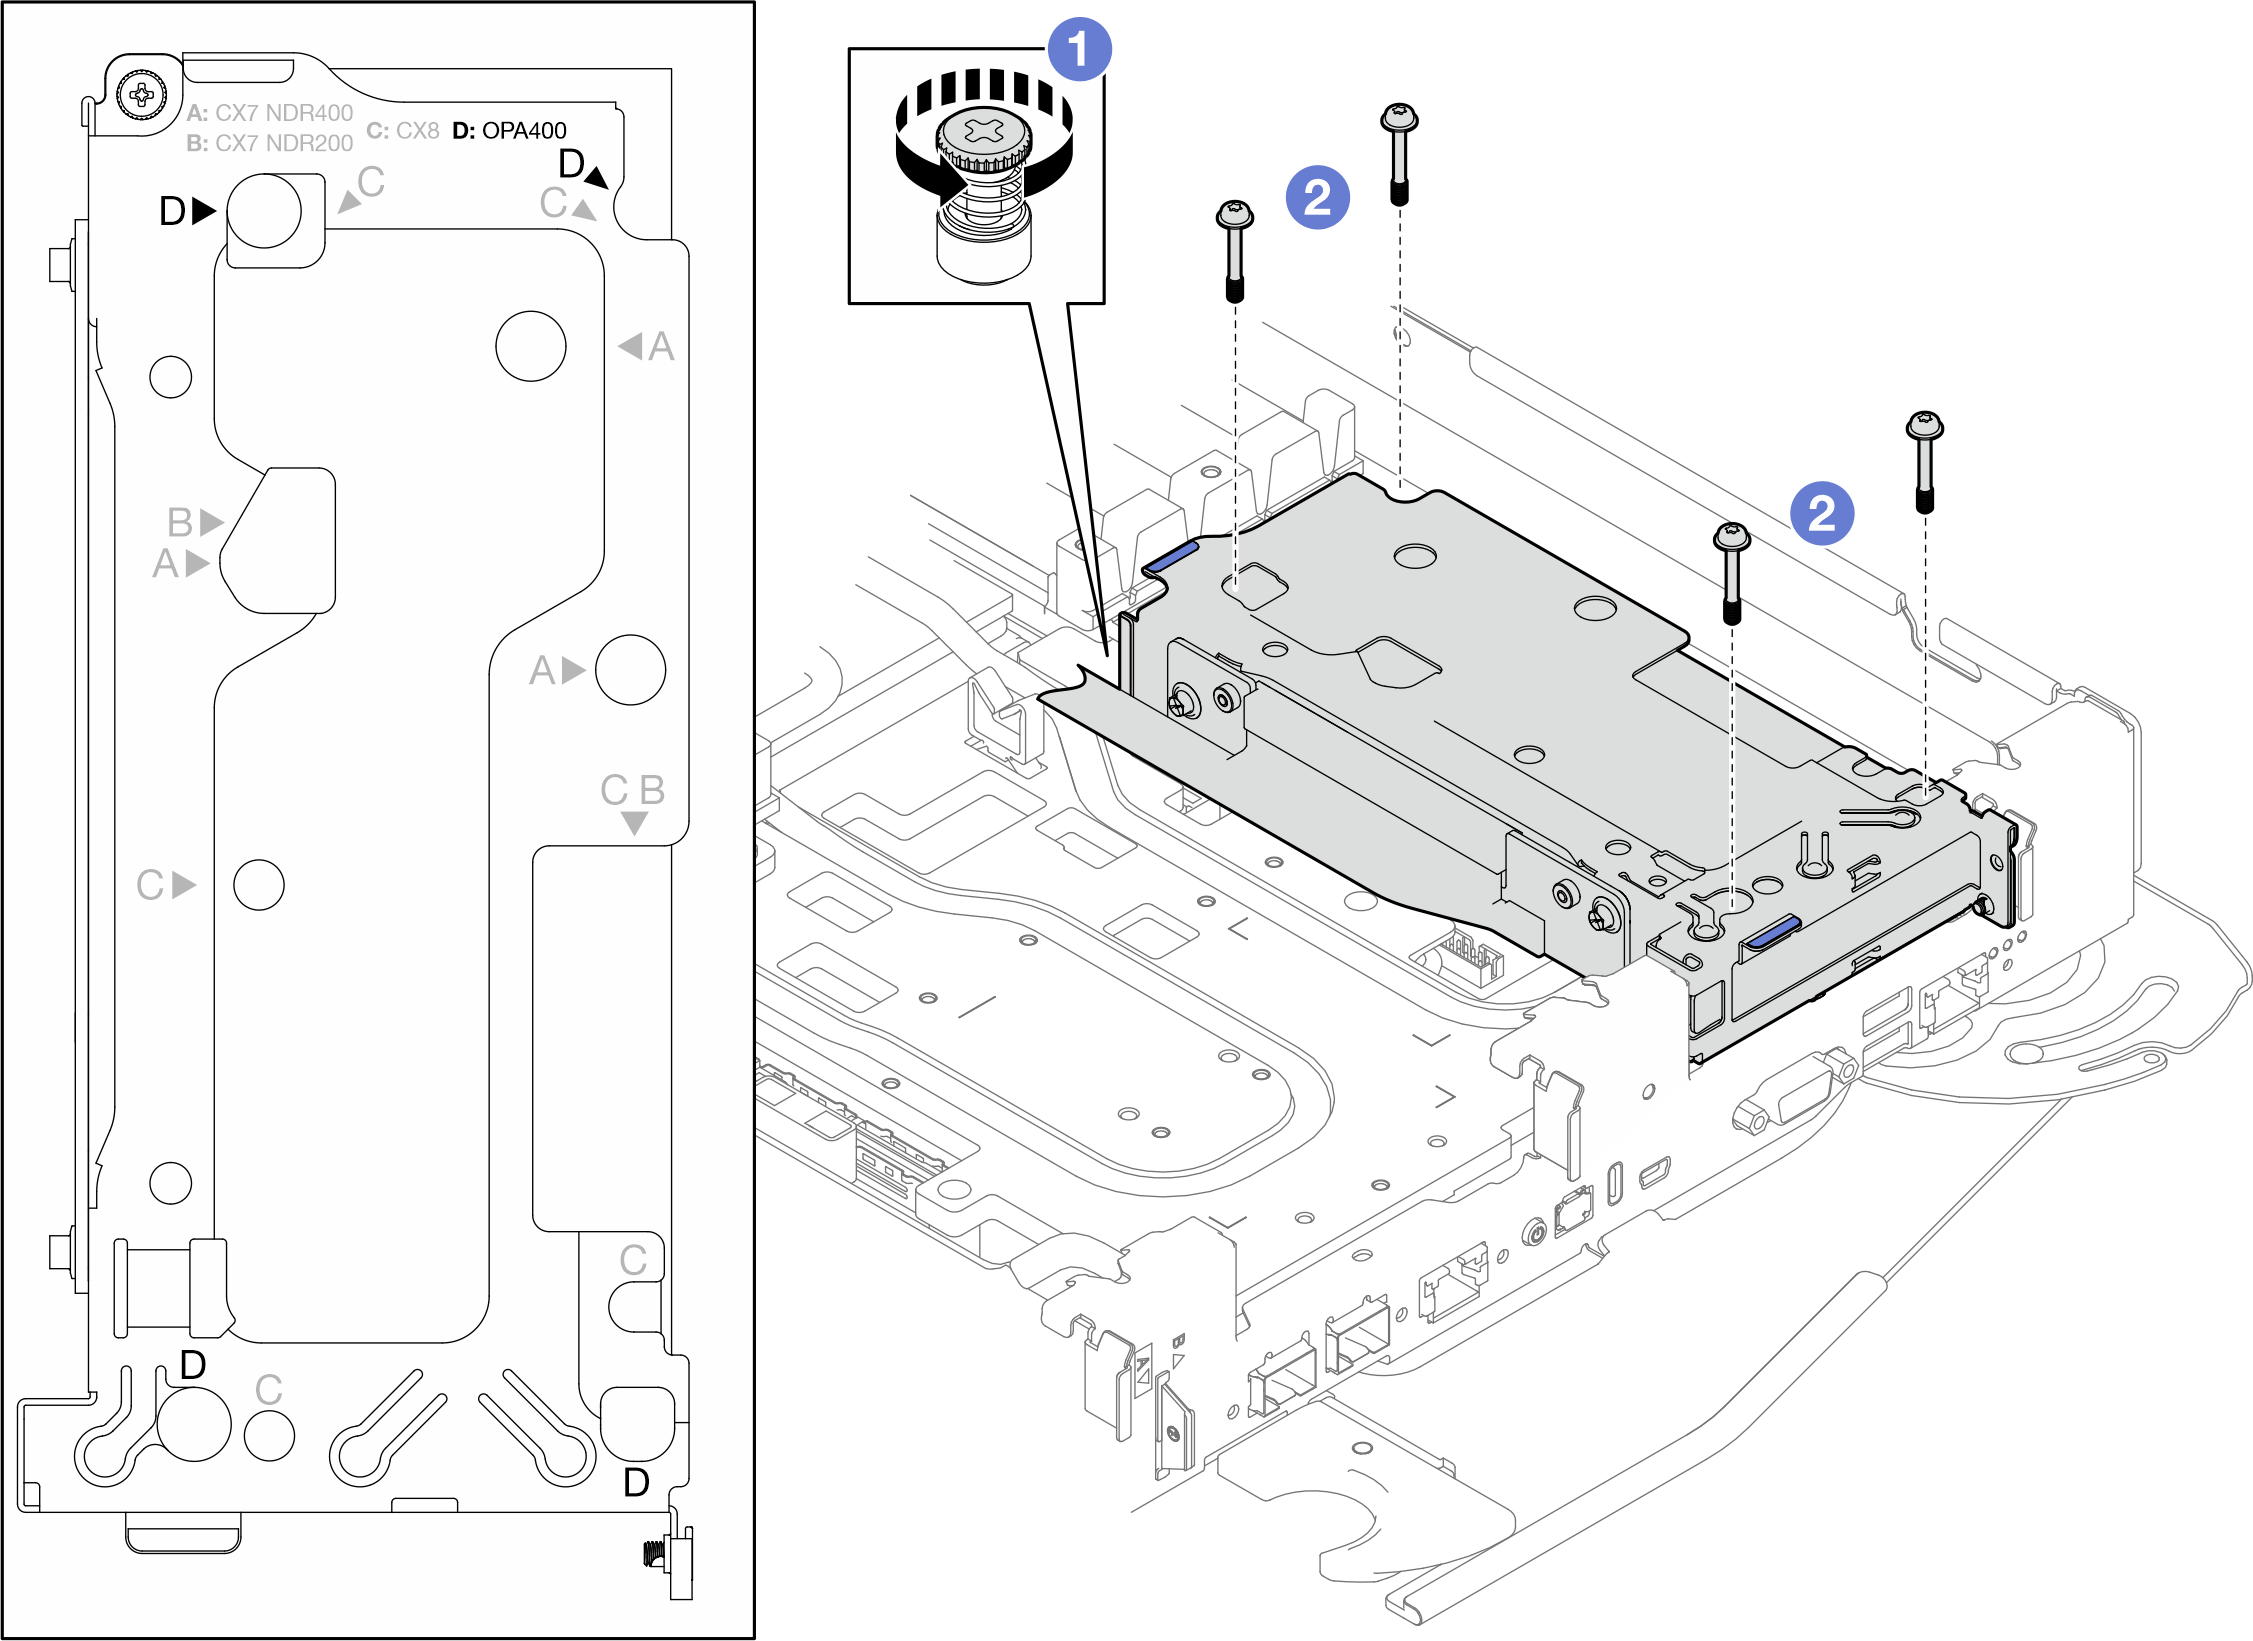
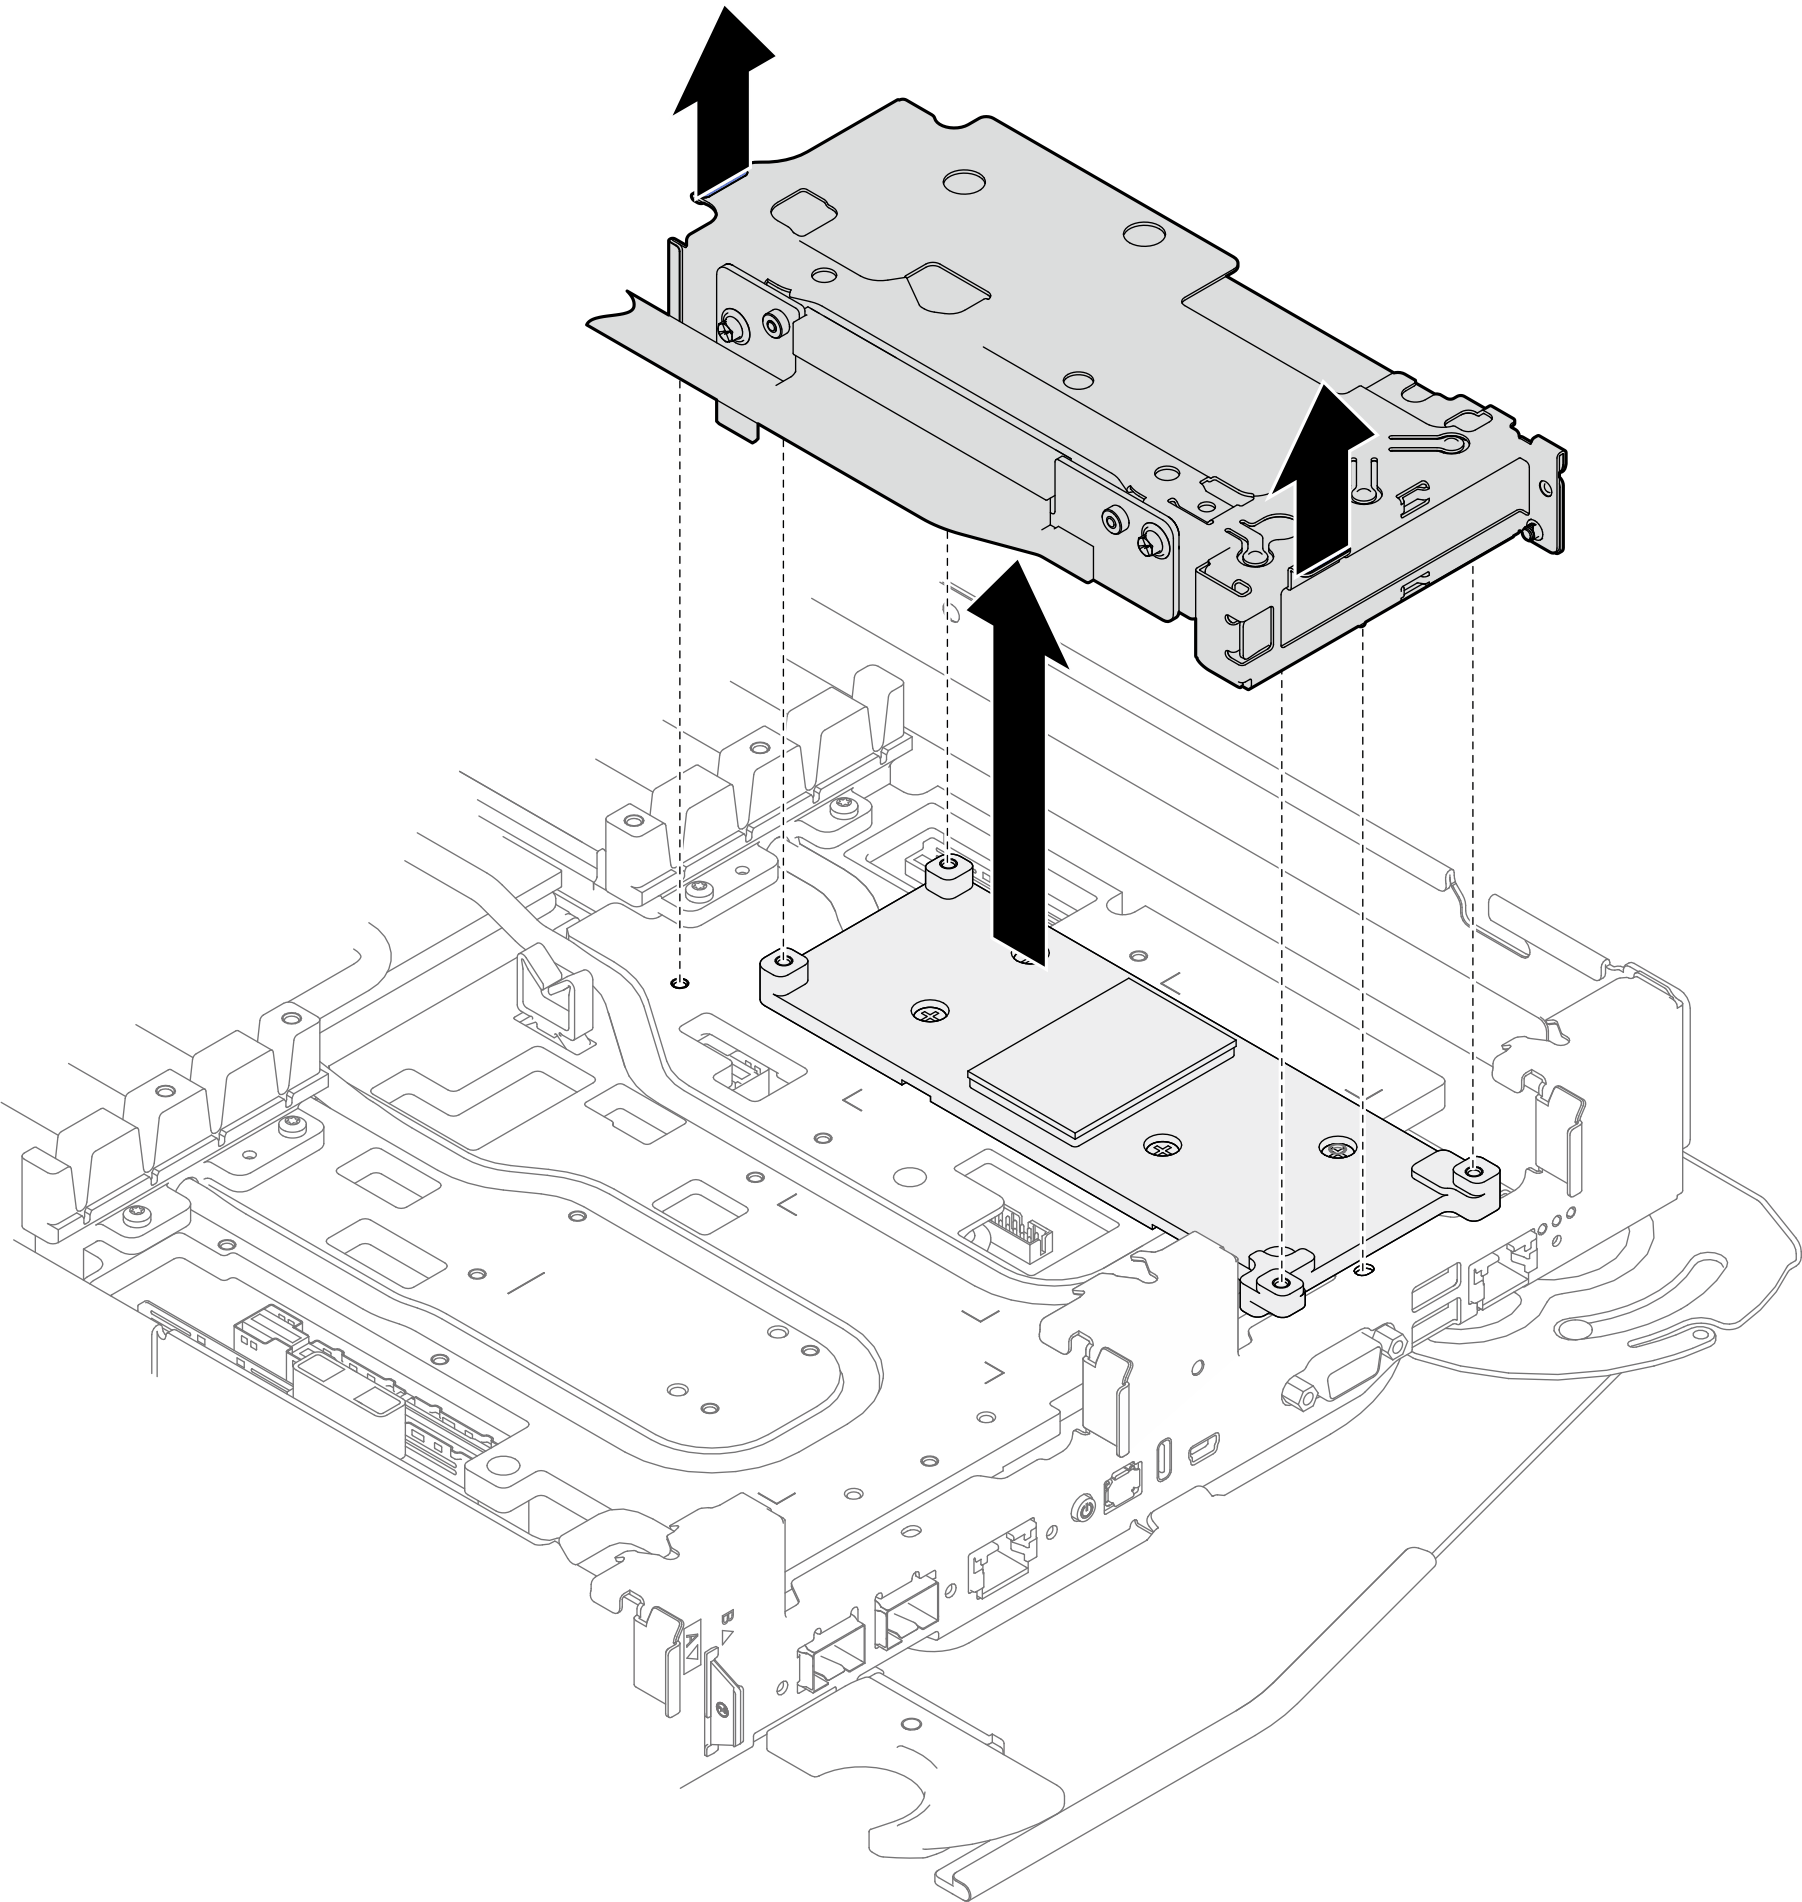
- 라이저 어셈블리의 가장자리를 조심스럽게 잡고 노드에서 라이저 어셈블리를 제거하십시오.그림 3. OPA 400 어셈블리 제거
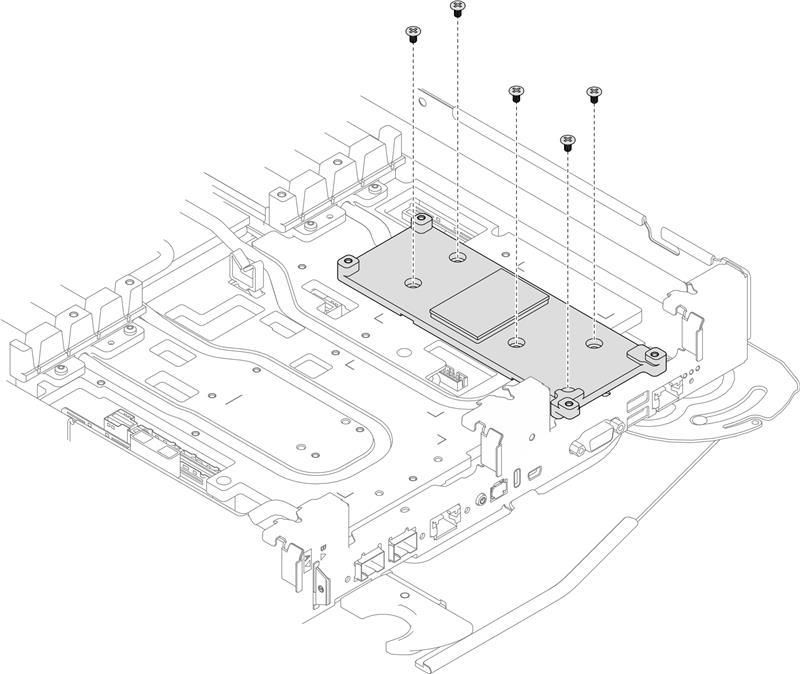
- 필요한 경우 인터페이스판을 제거하십시오.
- 인터페이스판에서 PH1 나사 4개를 제거하십시오.그림 4. OPA 400 라이저 어셈블리 인터페이스판 제거
- 일자 드라이버로 인터페이스판을 풉니다.
인터페이스판의 하단에는 일자 드라이버 삽입을 위한 구멍이 있습니다(아래 그림에서 검은색 삼각형으로 표시됨). 일자 드라이버를 사용할 수 있는 구멍 하나를 선택하십시오.
구멍에 일자 드라이버를 삽입하십시오. 그런 다음 드라이버를 약간 돌려 워터 루프 냉각판에서 인터페이스판을 분리하십시오.
그림 5. OPA 400 라이저 어셈블리 인터페이스판 하단의 개구부 위치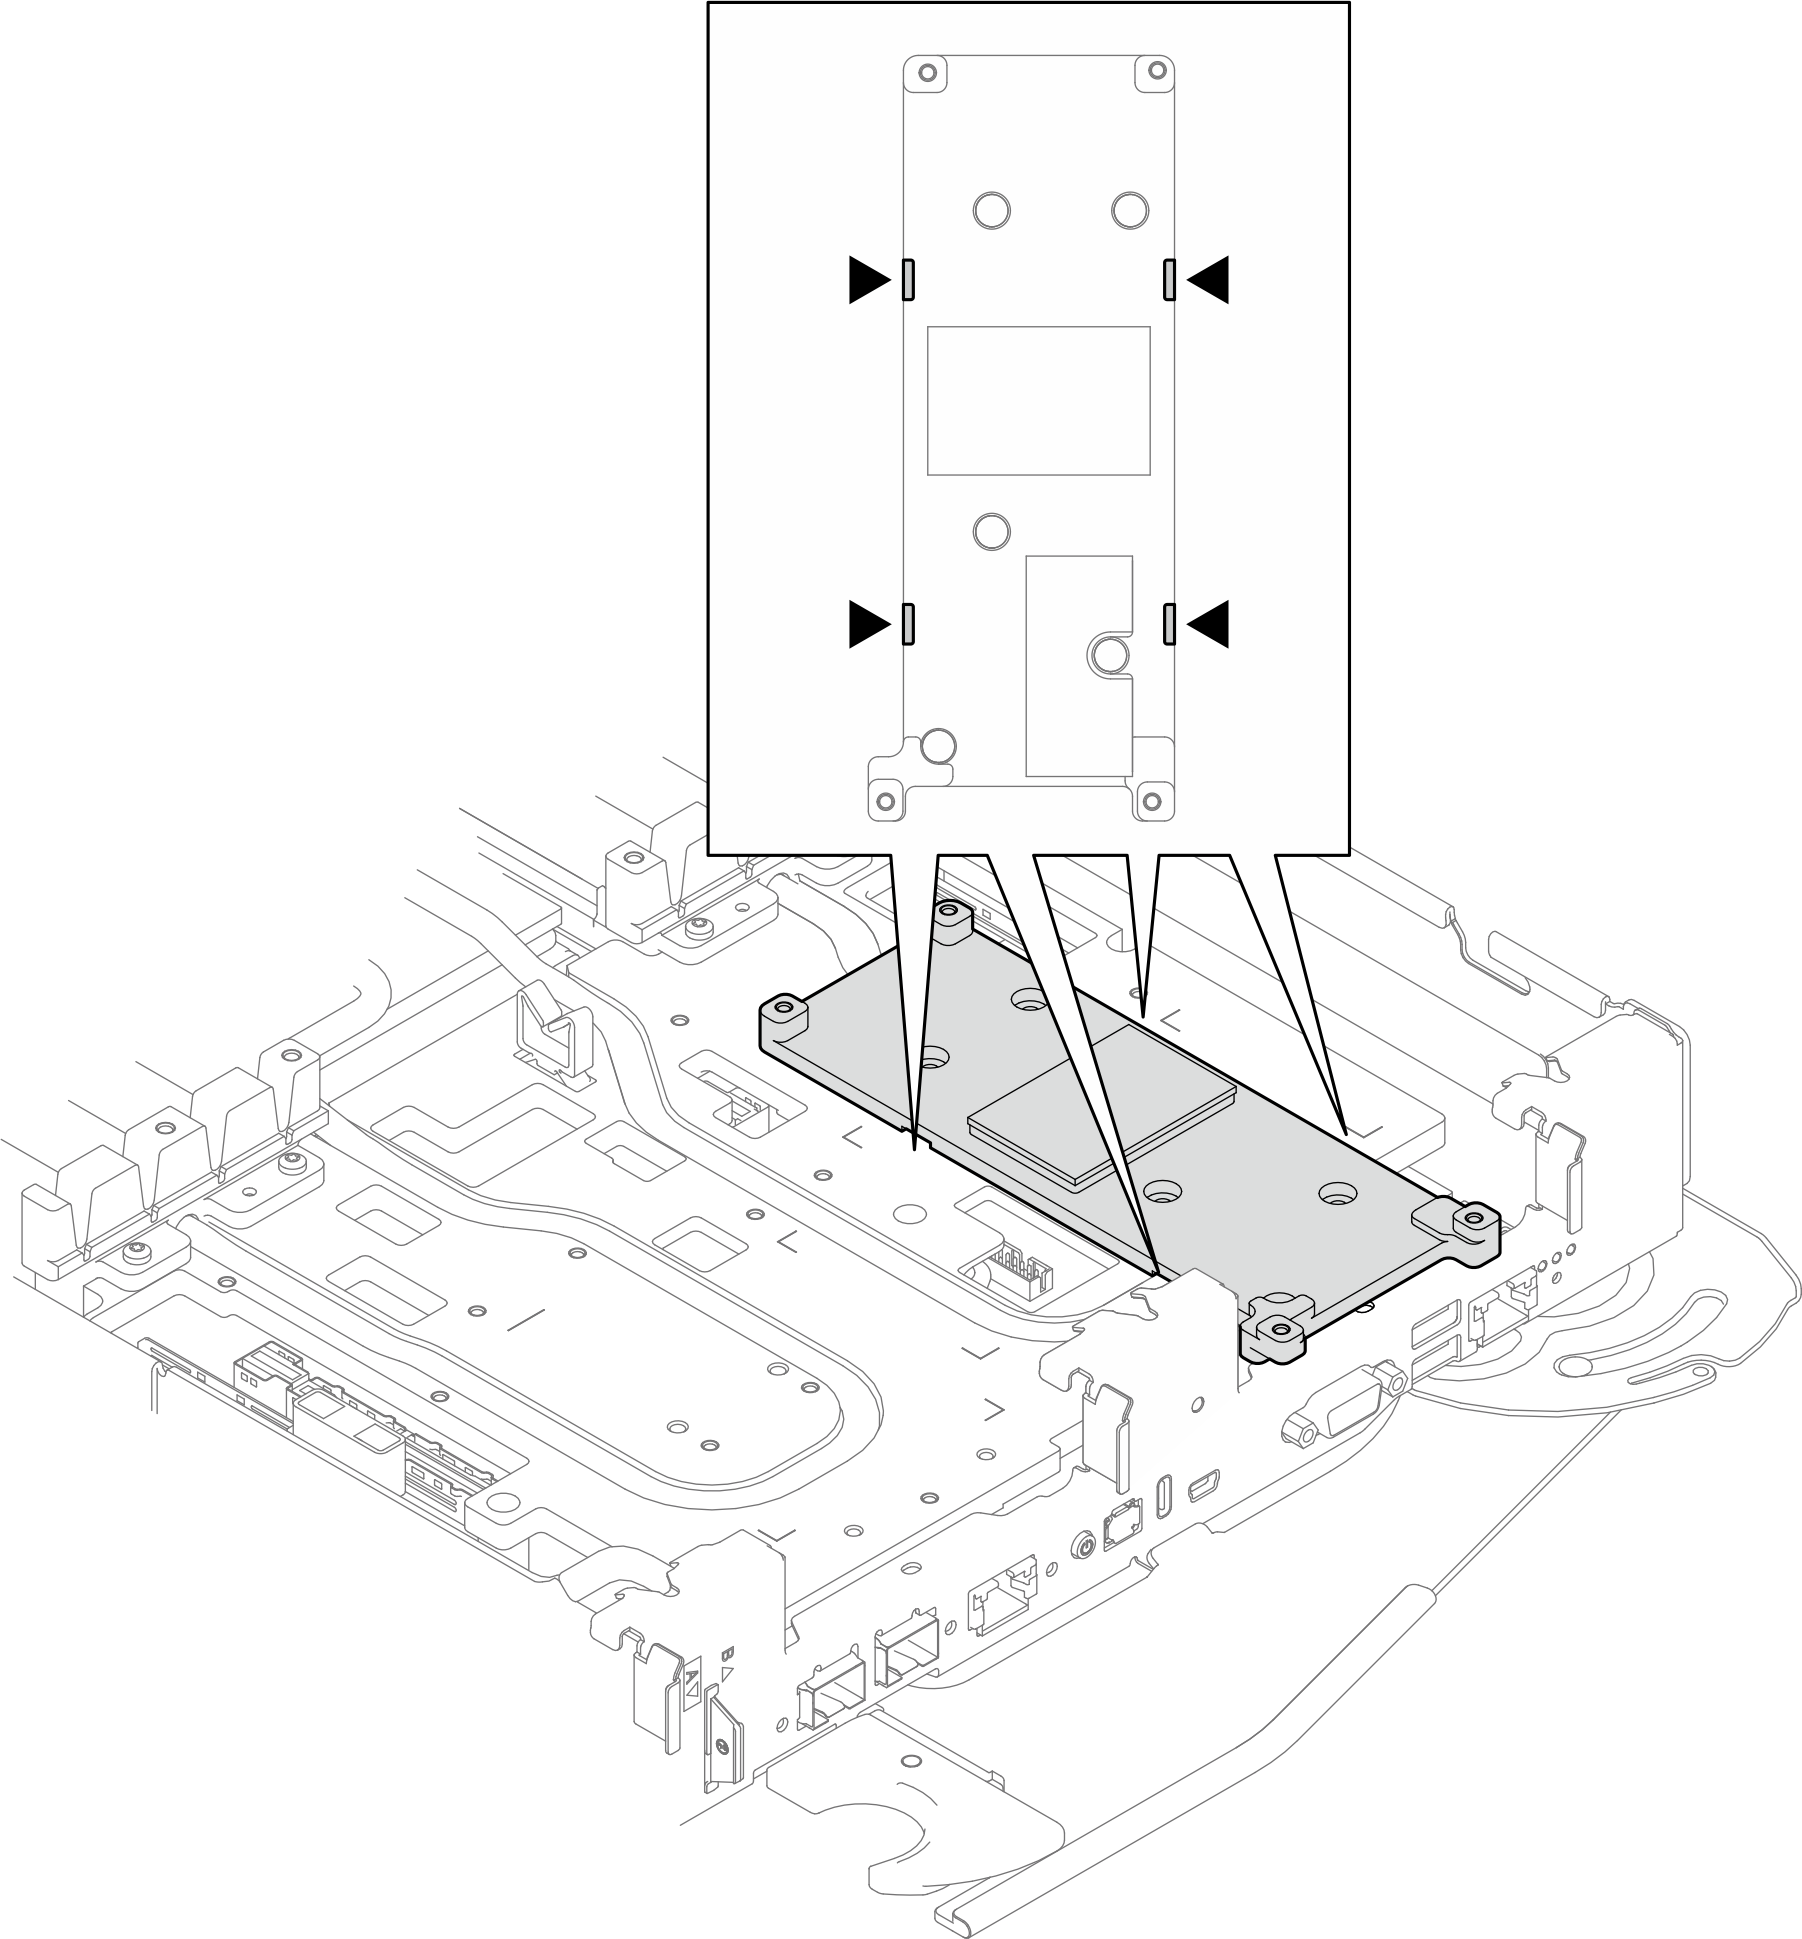 그림 6. 워터 루프 냉각판에서 인터페이스판 분리
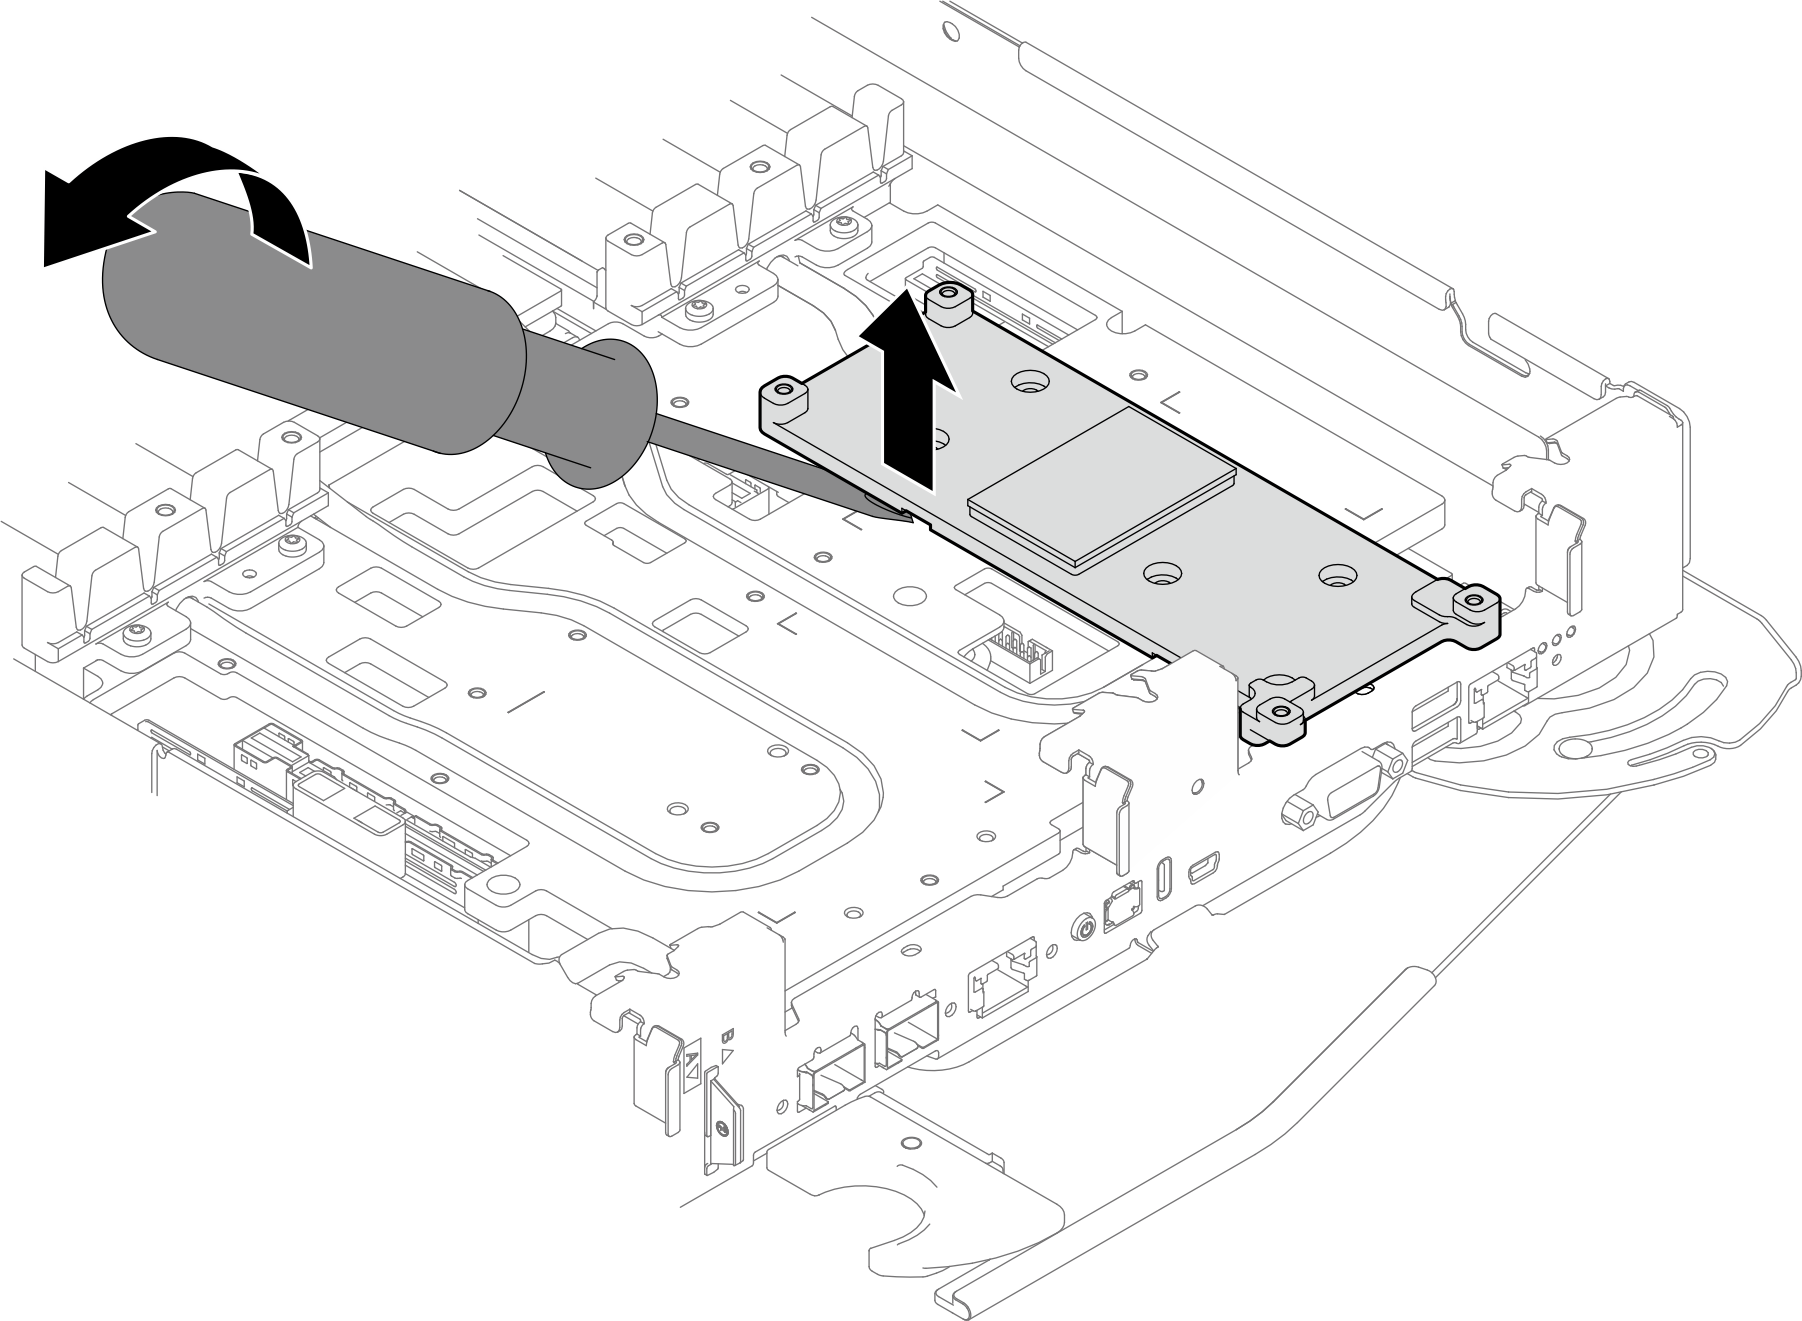
- 트레이에서 인터페이스판을 제거하십시오.그림 7. 인터페이스판 제거
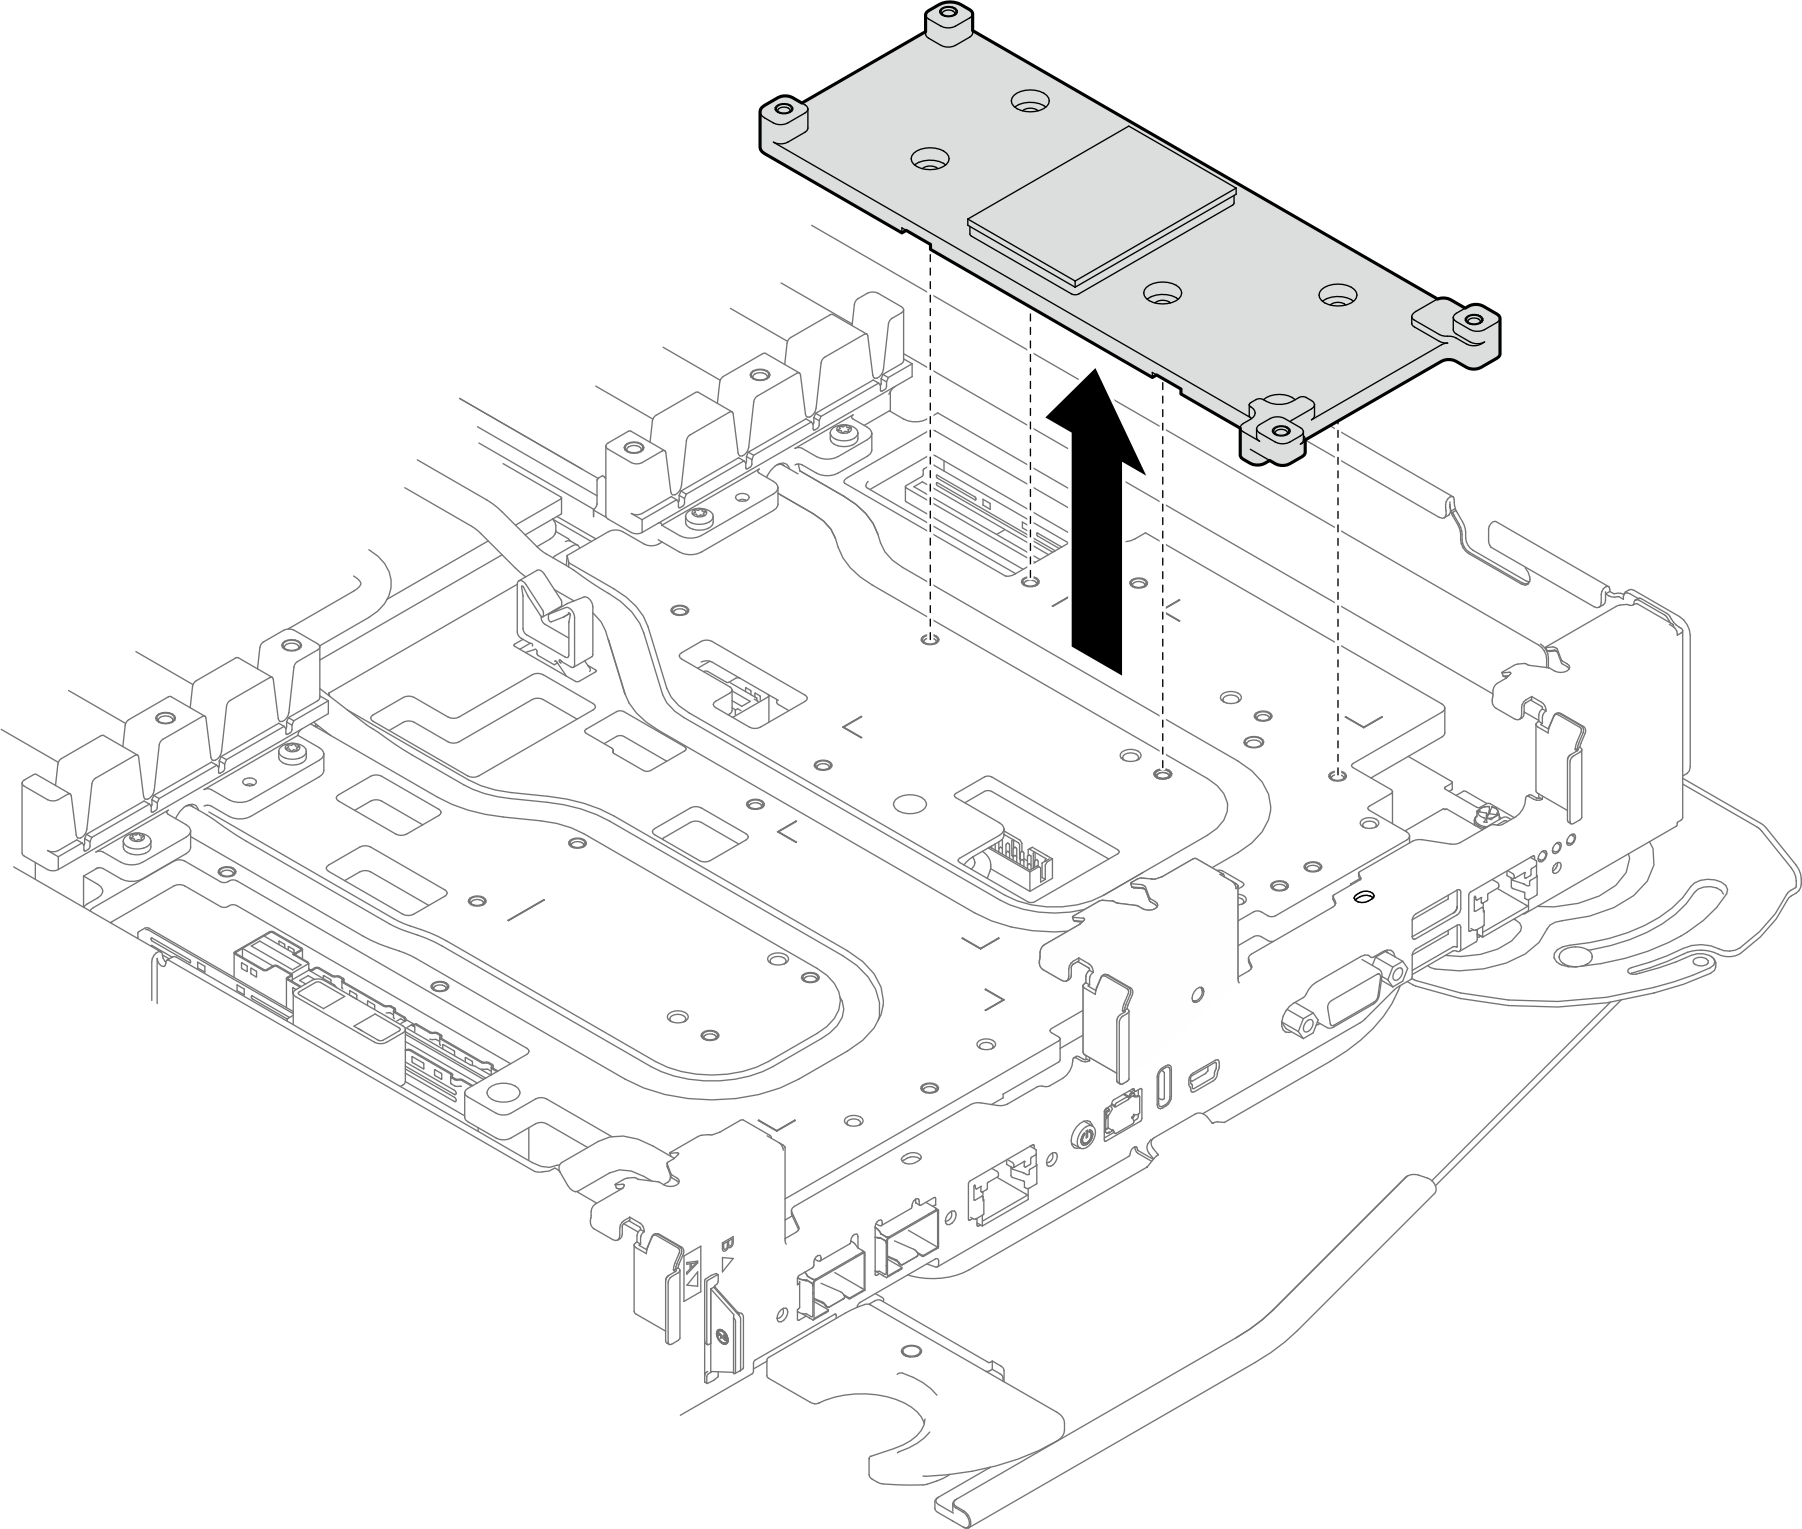
- 인터페이스판에서 PH1 나사 4개를 제거하십시오.
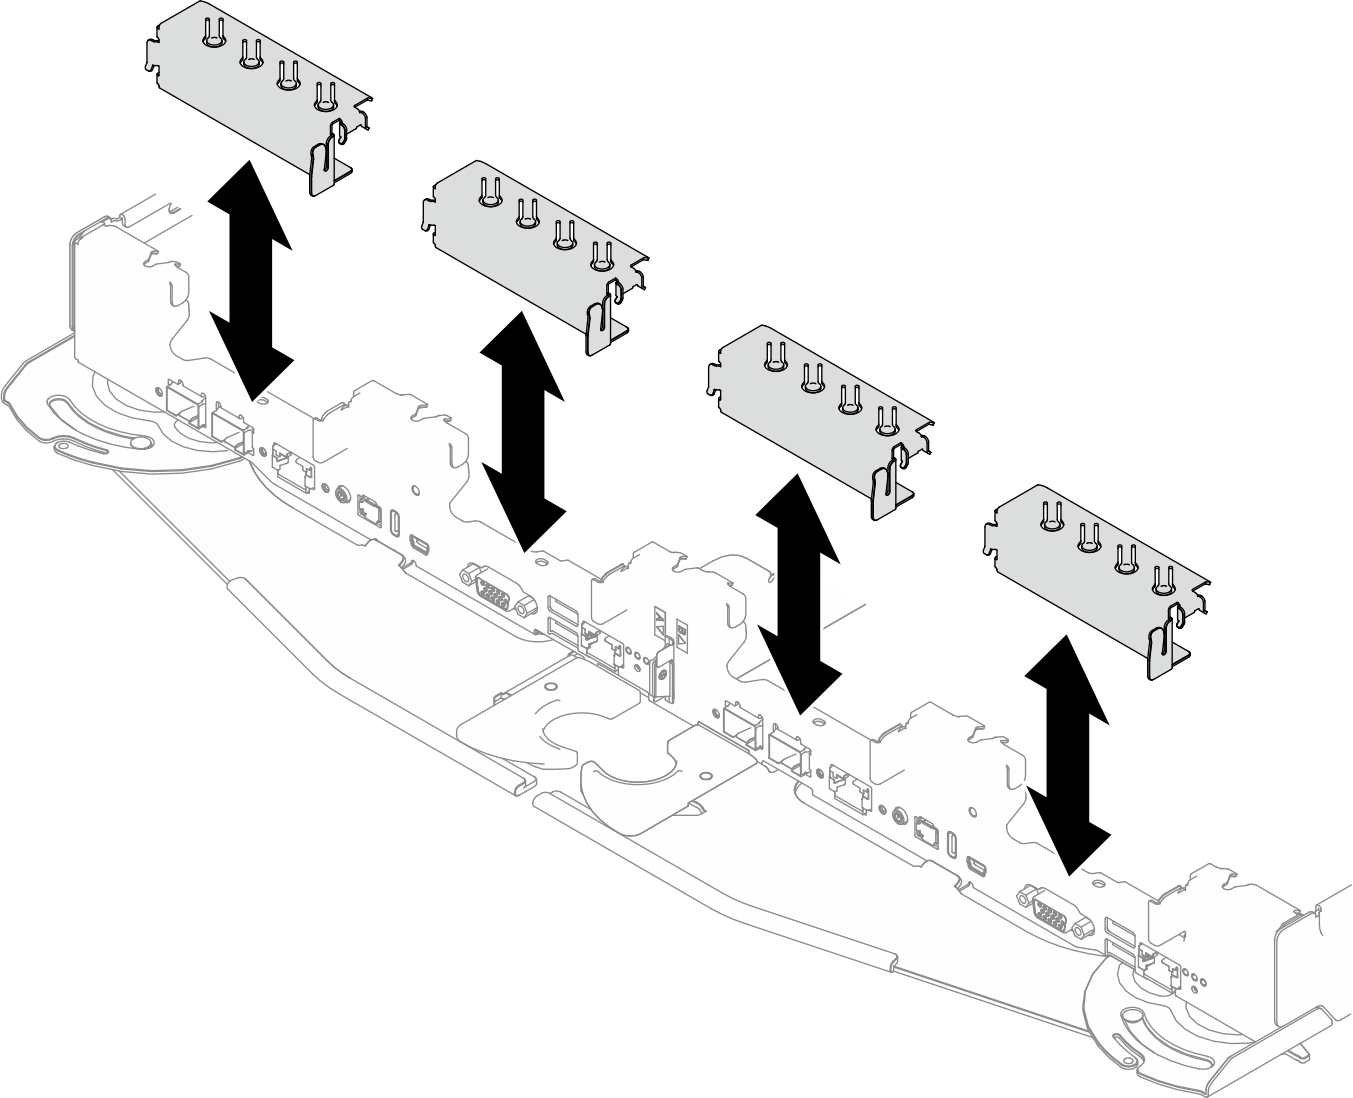
- 라이저 케이지 또는 드라이브 케이지를 설치하지 않을 경우 빈 베젤 필러를 설치하십시오.그림 8. 빈 베젤 필러 설치
완료한 후
구성 요소 또는 옵션 장치를 반환하도록 지시받은 경우 모든 포장 지시사항을 따르고 제공되는 운송용 포장재를 사용하십시오.
피드백 보내기