Install a PCIe adapter
Use this information to install a PCIe adapter.
About this task
Attention
Read the Installation Guidelines to ensure that you work safely.
Procedure
Figure 1. PCIe adapter installation
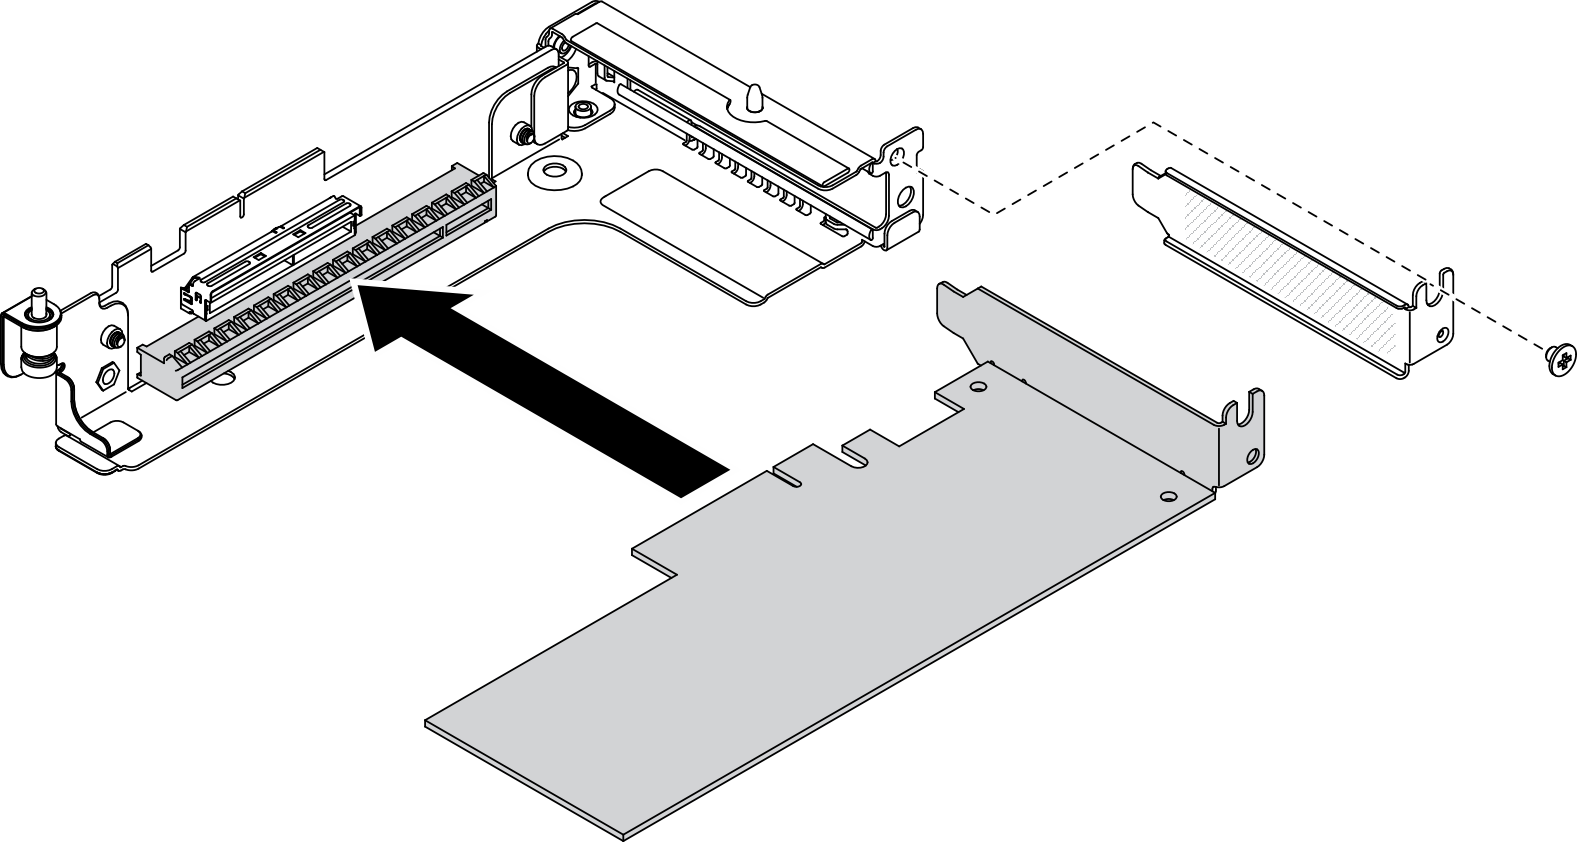
- Remove the screw; then, remove the filler from the PCIe riser-cage.
- Align the adapter with the PCIe connector on the riser-cage; then, carefully press the adapter straight into the connector until it is securely seated.
- Fasten the screw to secure the adapter.
After you finish
- Reinstall the components listed below into the compute node in the following order:
PCIe riser assembly (see Install the PCIe riser assembly).
Front air baffle (see Install the front air baffle).
Node front cover (see Install the node front cover).
Reinstall the compute node into the enclosure (see Install a compute node in the enclosure).
Check the power LED on each node to make sure it changes from fast blink to slow blink to indicate the node is ready to be powered on.
Demo video
Give documentation feedback