Remove an M.2 drive from the M.2 backplane
Use this information to remove an M.2 drive from the M.2 backplane.
About this task
To avoid potential danger, read and follow the following safety statements.
- S001
 DANGERdangerElectrical current from power, telephone, and communication cables is hazardous.
To avoid a shock hazard:
- Connect all power cords to a properly wired and grounded electrical outlet/source.
- Connect any equipment that will be attached to this product to properly wired outlets/sources.
- When possible, use one hand only to connect or disconnect signal cables.
- Never turn on any equipment when there is evidence of fire, water, or structural damage.
- The device might have more than one power cord, to remove all electrical current from the device, ensure that all power cords are disconnected from the power source.
Attention
Read the Installation Guidelines to ensure that you work safely.
Procedure
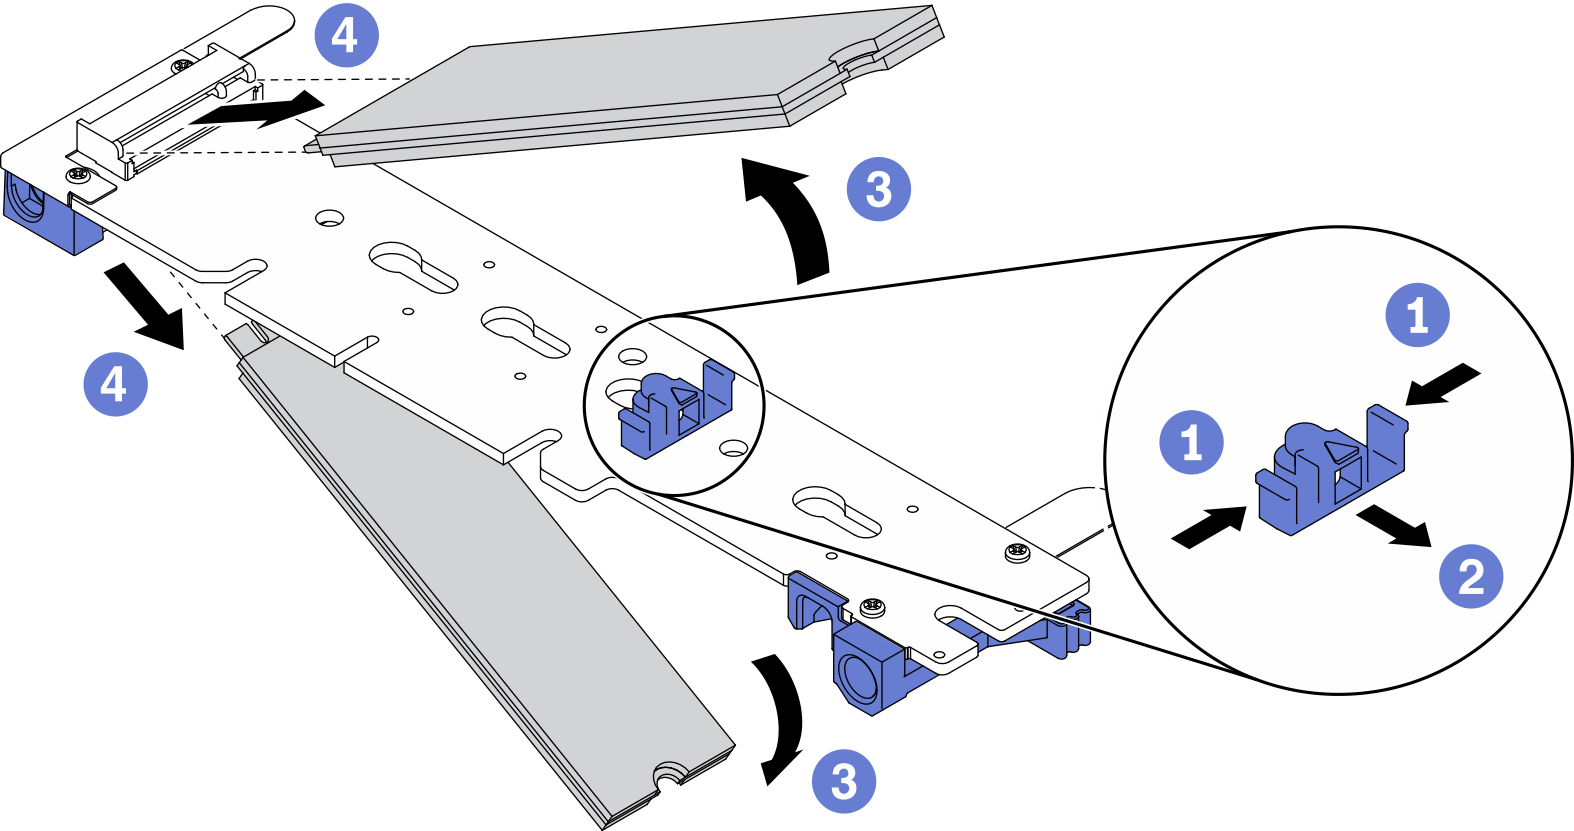
Figure 1. M.2 drive removal
- Make preparations for this task.
- Remove an M.2 drive from the M.2 backplane.
 Press both sides of the retainer.
 Slide the retainer backwards to loosen the M.2 drive from the M.2 backplane.NoteIf your M.2 backplane has two M.2 drives, they will both be released outward when you slide the retainer backwards.
 Rotate the M.2 drive away from the M.2 backplane.
 Remove the M.2 drive by pulling away from the connector at an angle (approximately 30 degrees).
After you finish
If you are instructed to return the component or optional device, follow all of the packaging instructions, and use any packaging materials for shipping that are supplied to you.
Demo video
Give documentation feedback