Install the M.2 backplane
Use this information to install the M.2 backplane.
About this task
S001


DANGER
danger
Electrical current from power, telephone, and communication cables is hazardous.
To avoid a shock hazard:
- Connect all power cords to a properly wired and grounded electrical outlet/source.
- Connect any equipment that will be attached to this product to properly wired outlets/sources.
- When possible, use one hand only to connect or disconnect signal cables.
- Never turn on any equipment when there is evidence of fire, water, or structural damage.
- The device might have more than one power cord, to remove all electrical current from the device, ensure that all power cords are disconnected from the power source.
Attention
- Read the following sections to ensure that you work safely.
- Turn off the corresponding DWC tray that you are going to perform the task on.NoteIf Shared I/O adapters are installed, power off the auxiliary node (node 1/3/5/7/9/11) first, and then power off the primary node (node 2/4/6/8/10/12).
Note
Ensure you have “SD650 V2 or SD650-N V2 Neptune® DWC Waterloop Service Kit “ in hand to install components.
Procedure
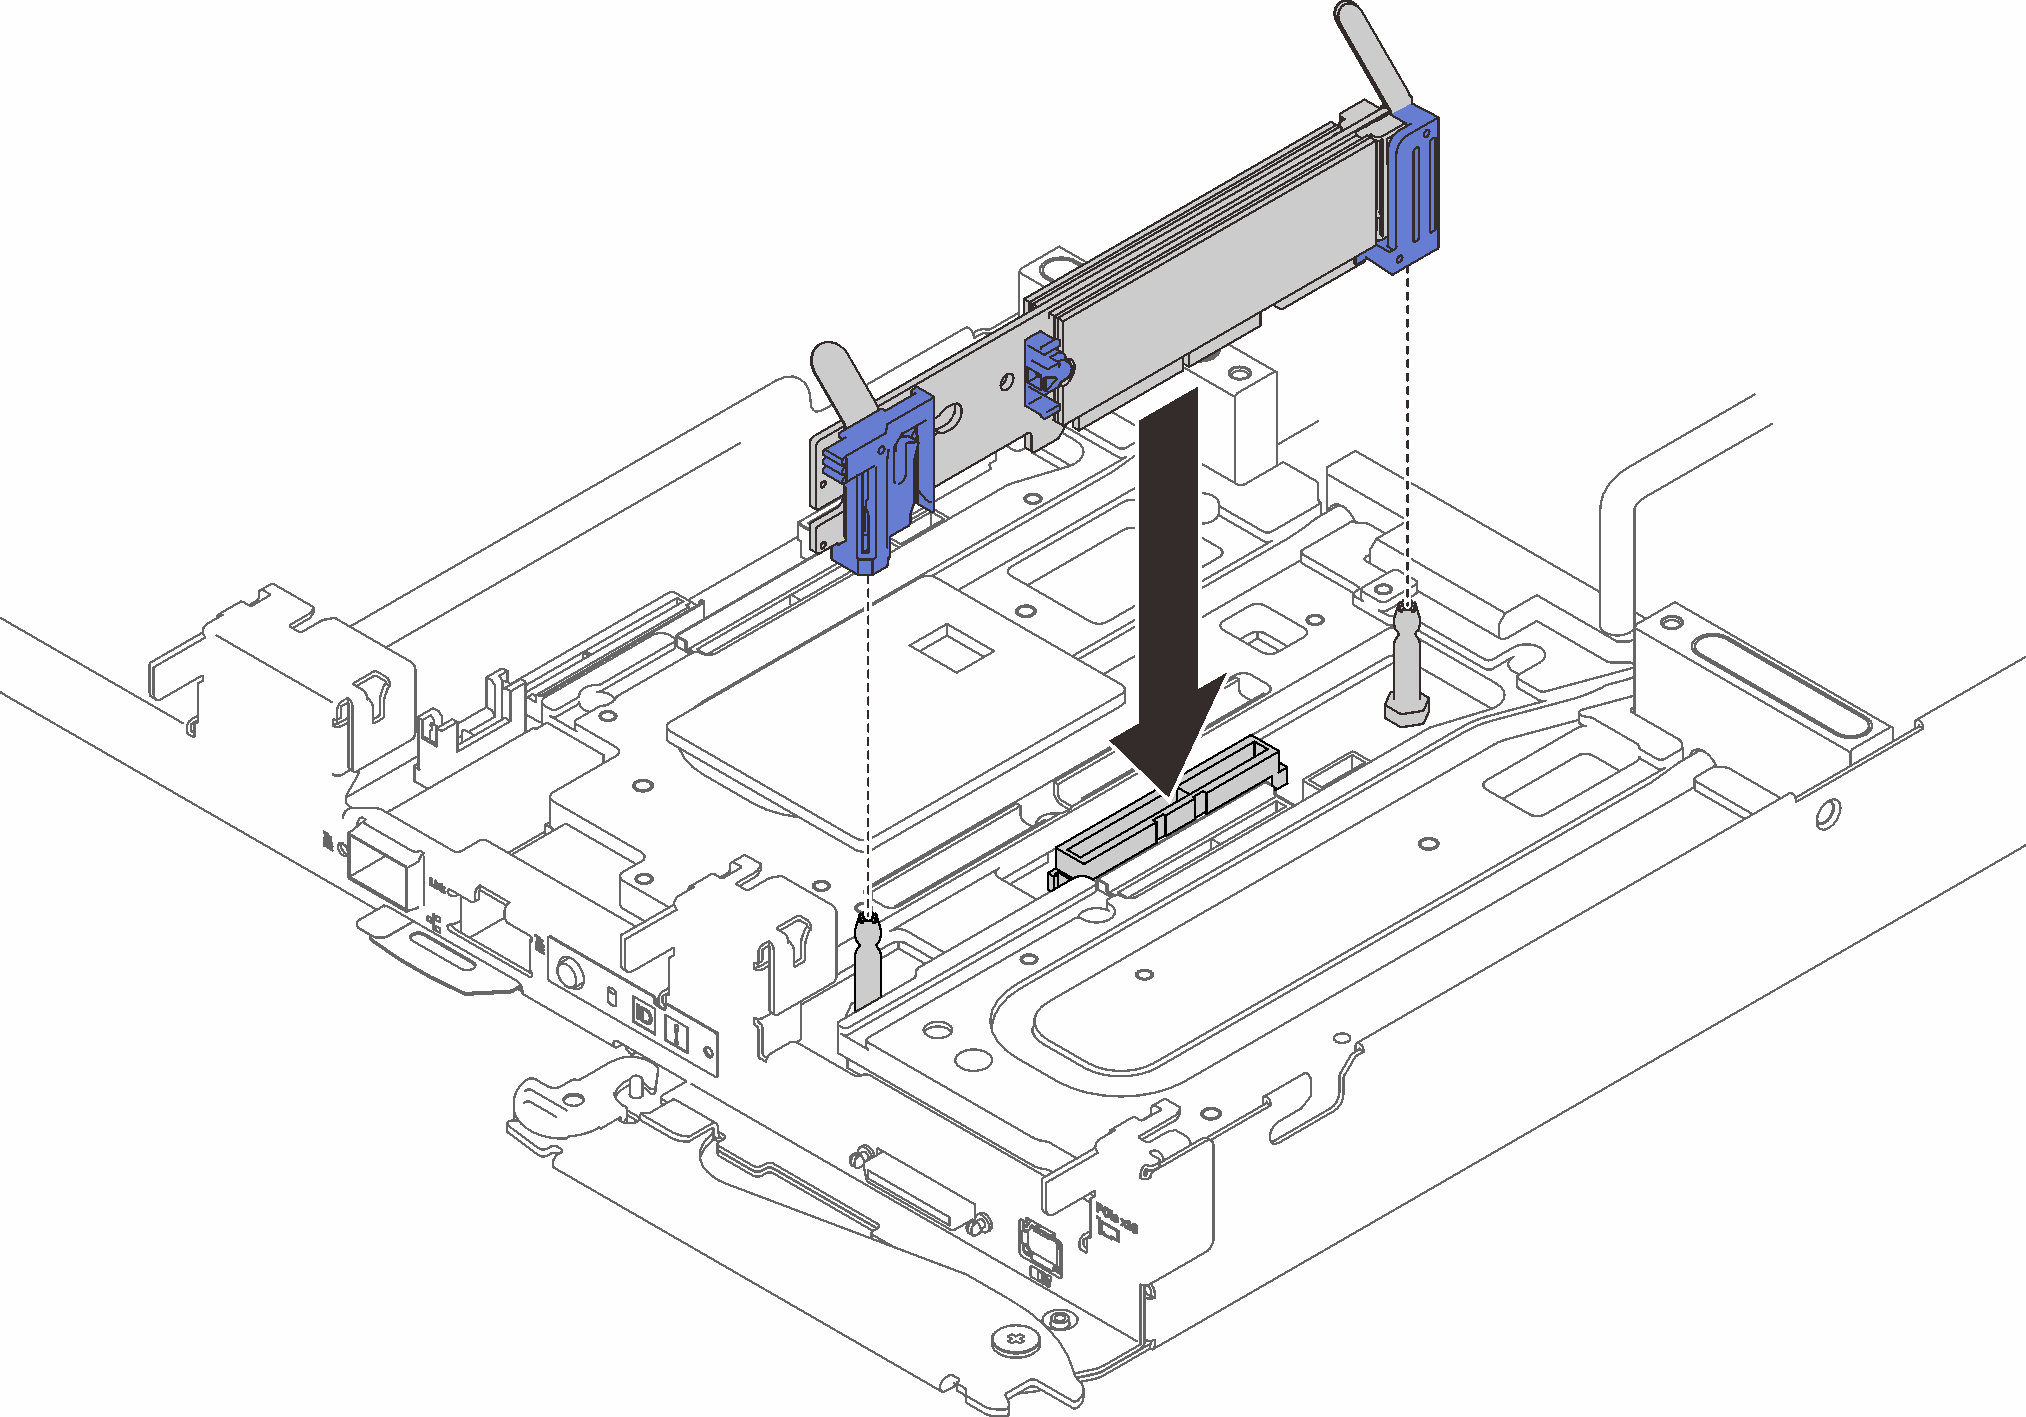
Figure 1. M.2 backplane installation


Align the openings located at the bottom of the blue plastic supports at each end of the M.2 backplane with the guide pins on the system board; then, insert the backplane in the system board connector. Press down on the M.2 backplane to fully seat it.
After you finish
Reinstall the tray cover (see Install the tray cover).
Reinstall the tray (see Install a DWC tray in the enclosure).
NoteFor safety, use the lift tool to install the tray into the rack.- Connect all required external cables to the enclosure.NoteUse extra forces to connect QSFP cables to the enclosure if Mellanox ConnectX-6 adapters are installed.
Check the power LED on each node to make sure it changes from fast blink to slow blink to indicate all nodes are ready to be powered on.
Demo video
Give documentation feedback