Install an Internal Faceplate Transition (IFT) adapter
Use this information to install an IFT adapter.
Before you install an IFT adapter:
Read the Installation Guidelines to ensure that you work safely.
Complete the following steps to install an IFT adapter.
- Connect the IFT cable.
- Rotate the IFT connector release spring toward the cable side of the connector; then, press it down until it engages the clips on the processor retainer.Figure 1. IFT connector connection
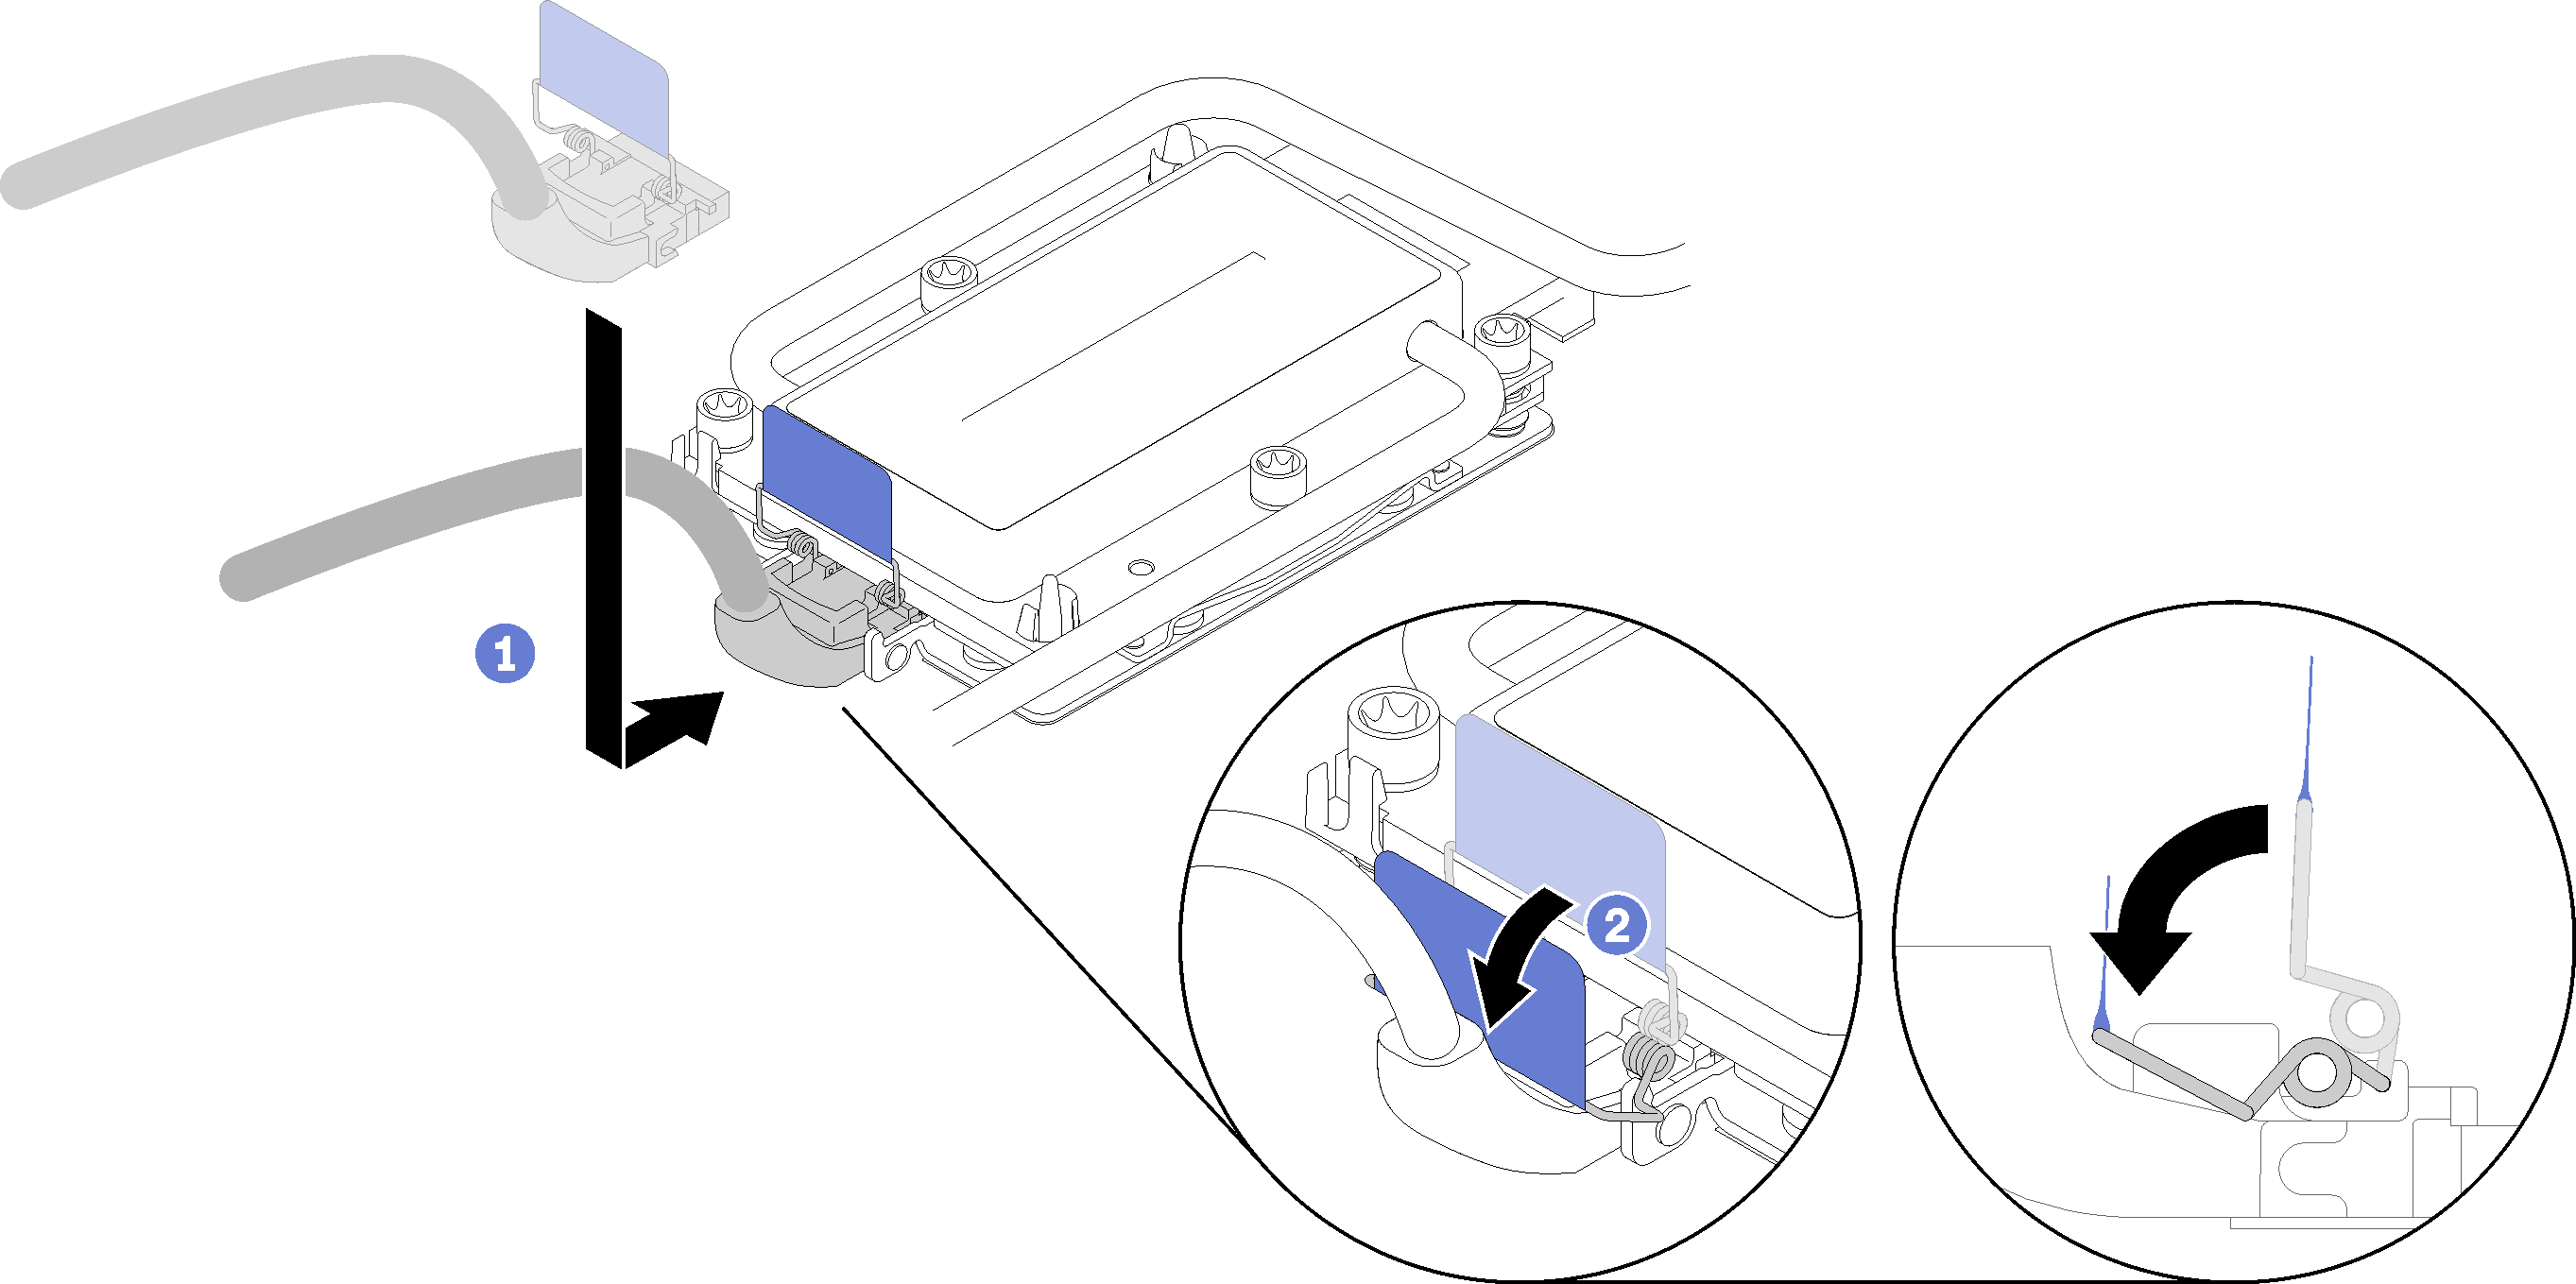
- Rotate the IFT connector release spring toward the cable side of the connector; then, press it down until it engages the clips on the processor retainer.
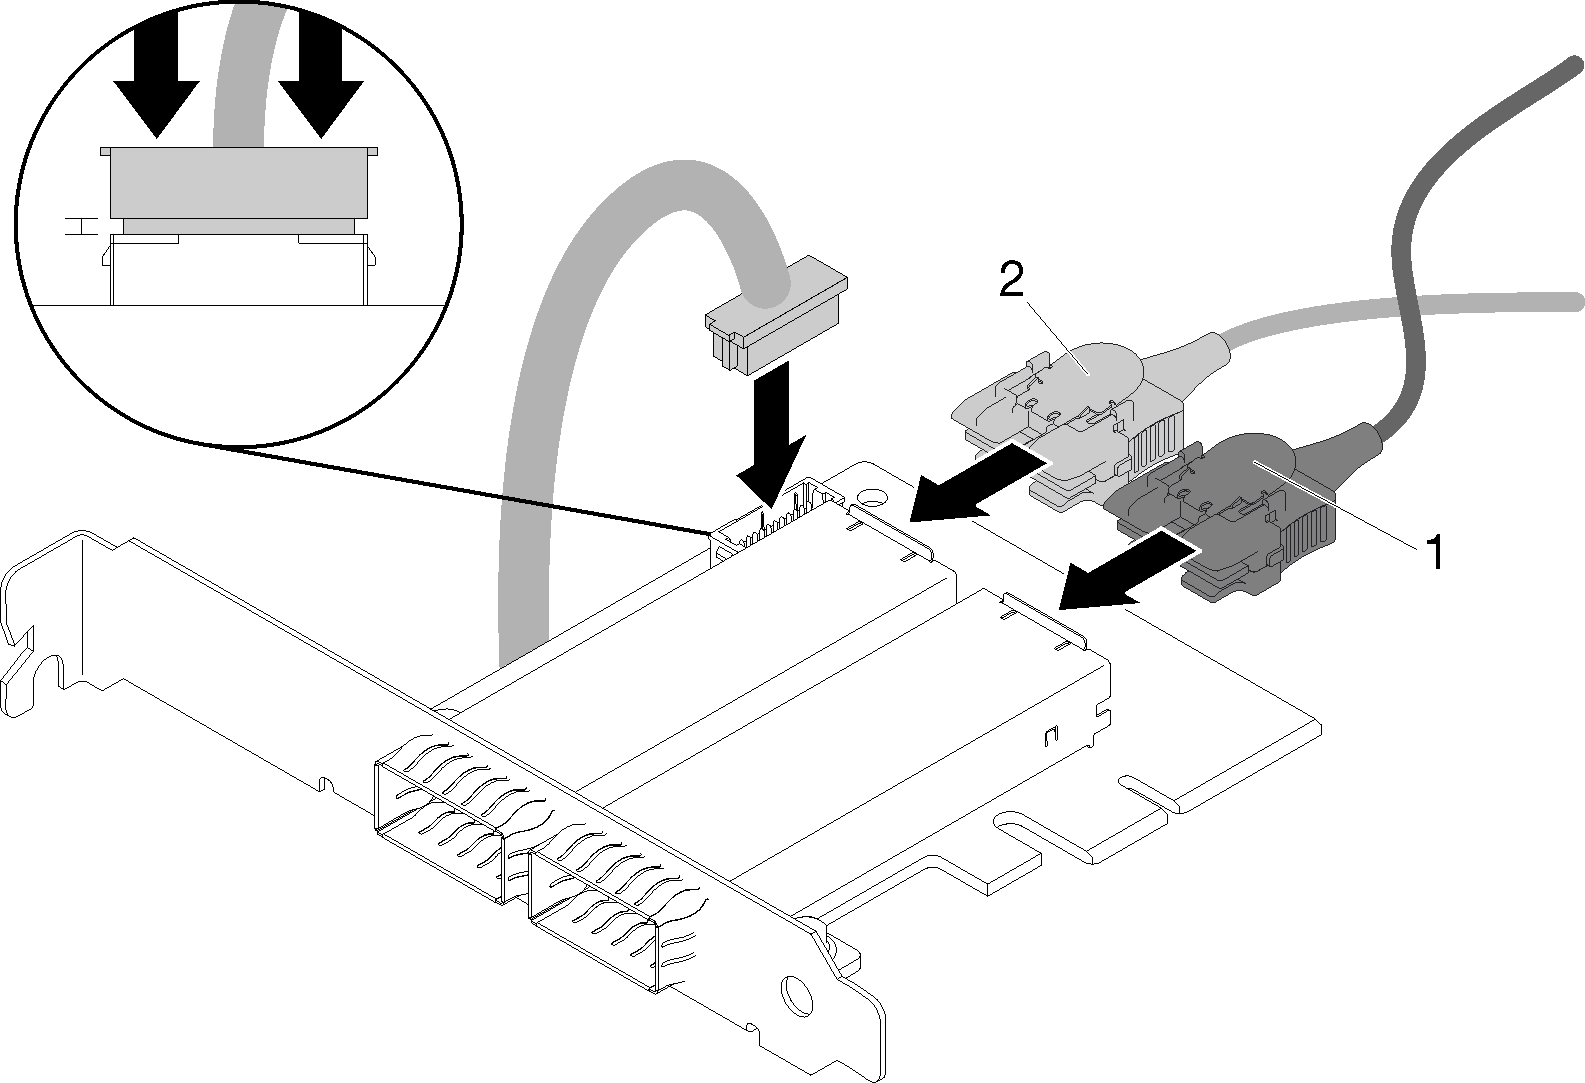
- Connect three connectors as illustrated.Figure 2. Connector connection
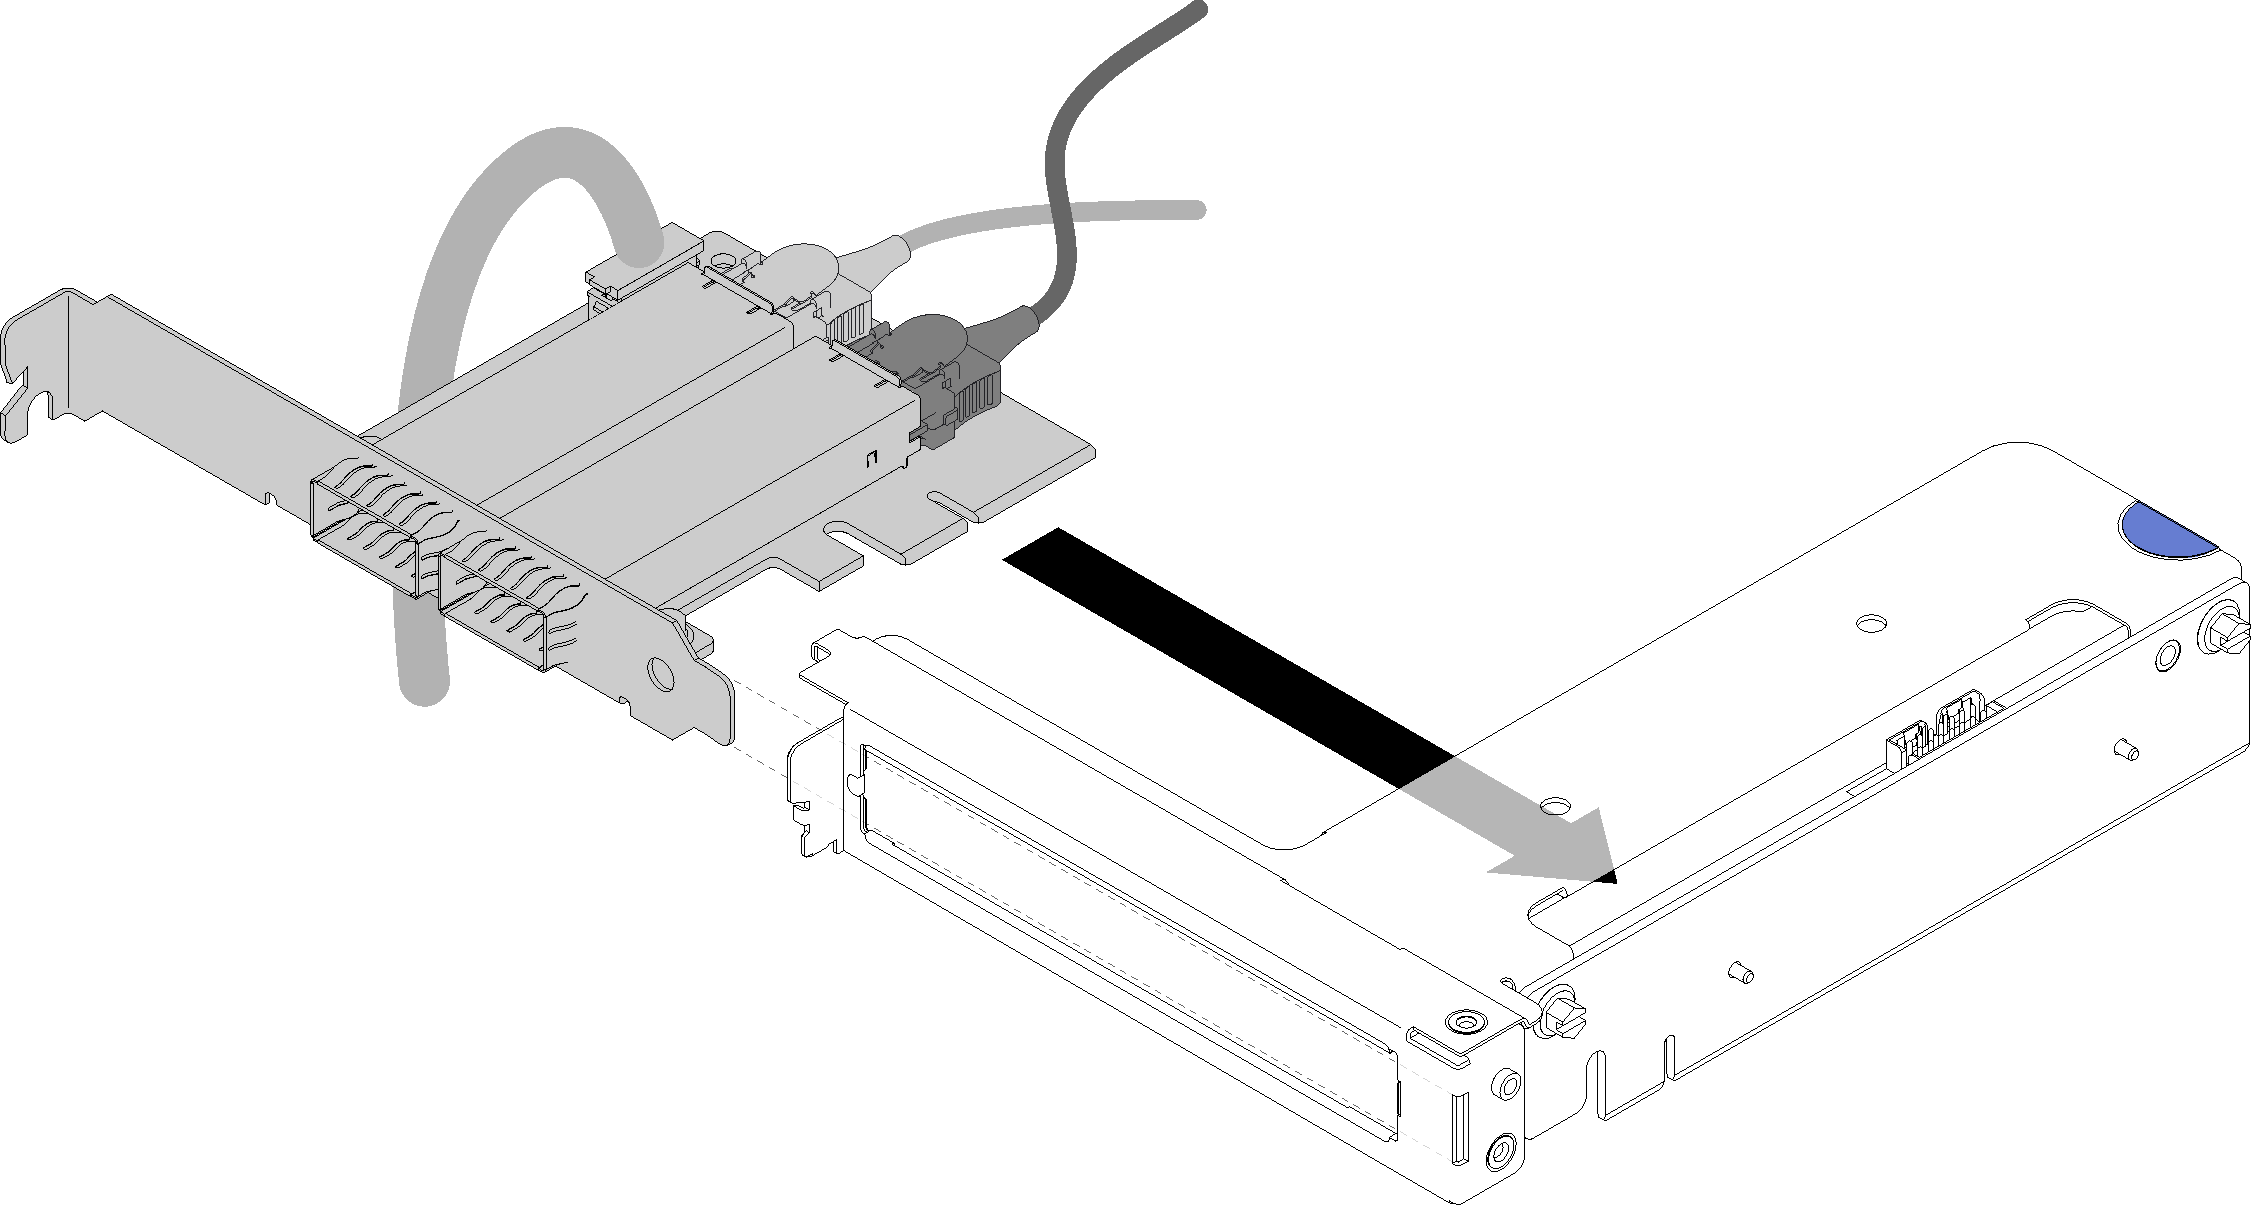
- Align the adapter with the PCIe slot on the riser-cage. Then, carefully press the adapter straight into the slot until it is securely seated.Figure 3. Adapter installation
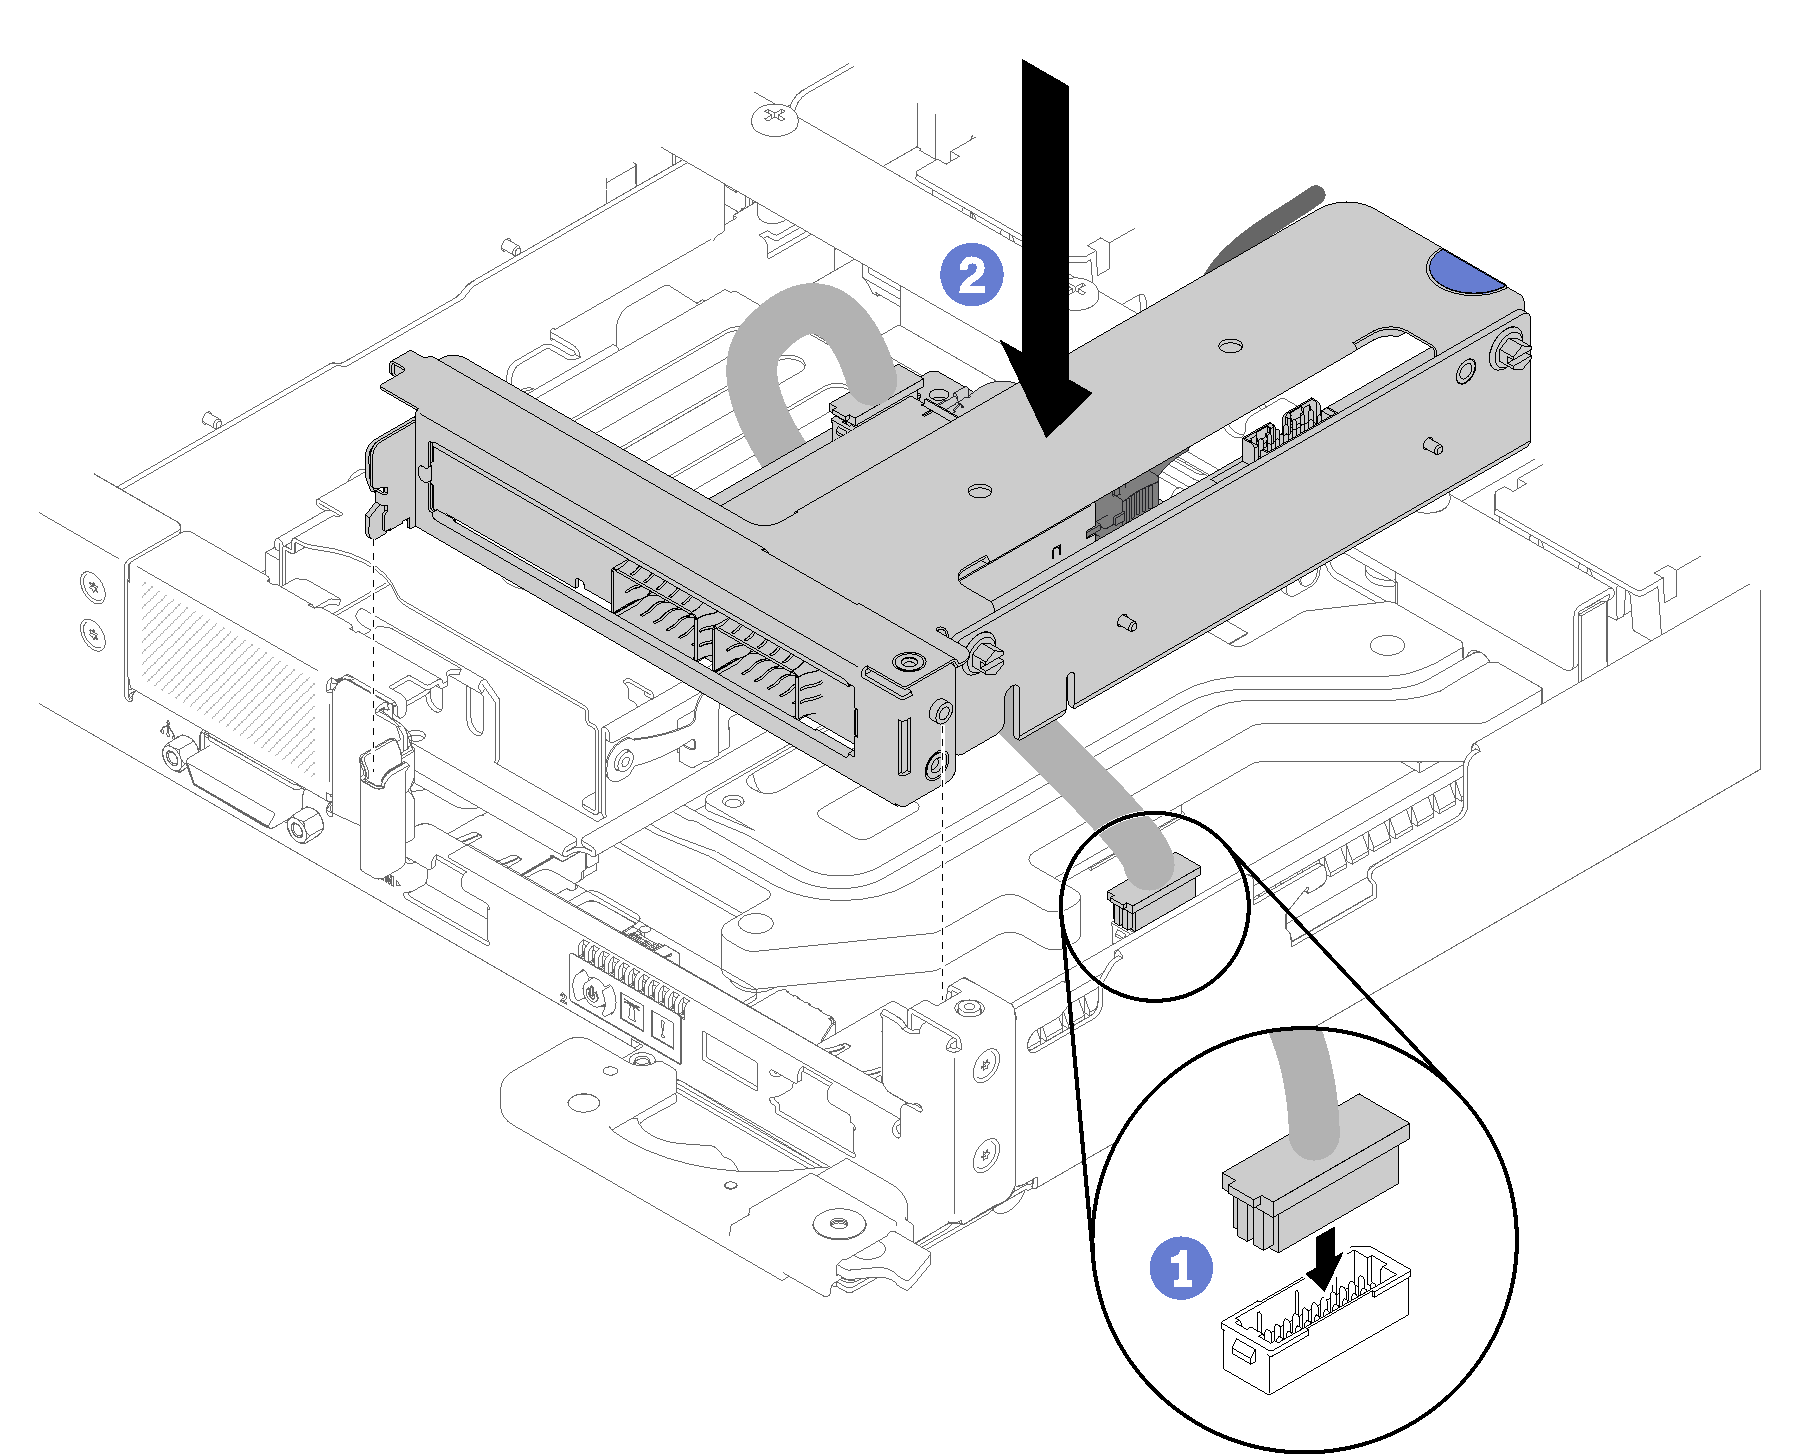
- Connect the connector; then, align the PCI riser-cage assembly with slots and press the PCI riser-cage assembly firmly into the node. Figure 4. PCIe riser-cage assembly installation
- Carefully route cables as illustrated.NoteEnsure the IFT cable is routed in the notch and use the cable tie to collect cables.Figure 5. Cable routing

After you install an IFT adapter, complete the following steps:
Reinstall the drive cage if needed (see Install a drive cage assembly).
Reinstall the front cross brace.
Figure 6. Front cross brace installation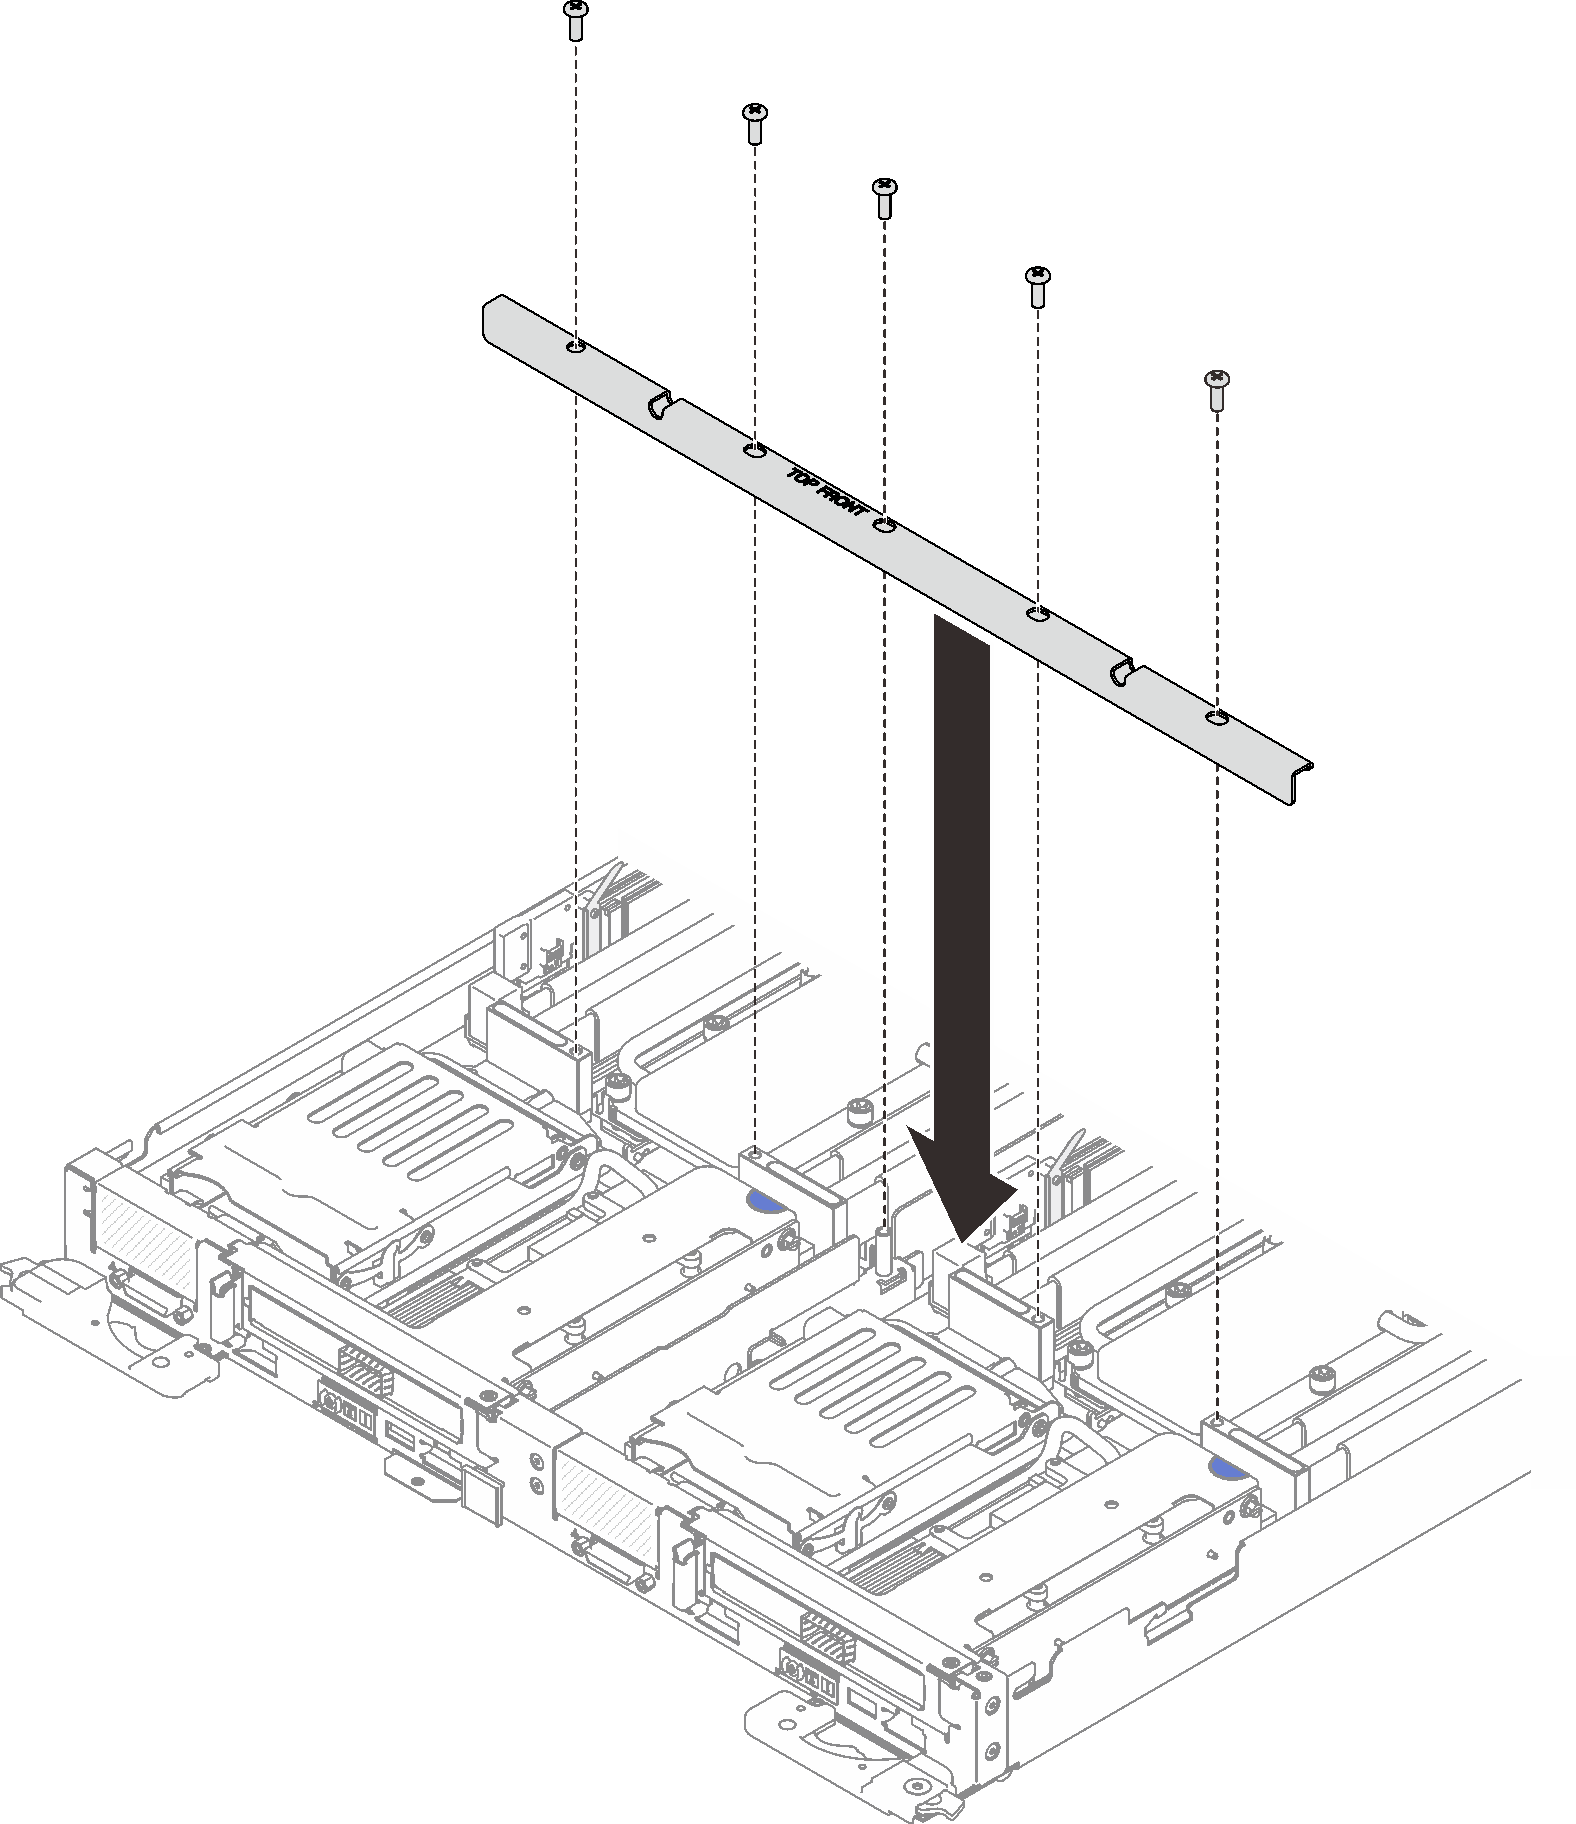
Reinstall the tray cover (see Install the tray cover).
Reinstall the tray (see Install a DWC tray in the enclosure).
Check the power LED on each node to make sure it changes from fast blink to slow blink to indicate both nodes are ready to be powered on.
Give documentation feedback