Install a M.2 data adapter
Use this information to install a M.2 data adapter.
Before you install a M.2 data adapter, complete the following steps:
- Read the following sections to ensure that you work safely.
Turn off the server. Disconnect the power cords and all external cables (see Power off the server).
Note
For more details about the M.2 drive and slot numbering, see M.2 drive and slot numbering.
Procedure
- Install the screw.
M.2 riser assembly
Figure 1. M.2 data adapter installation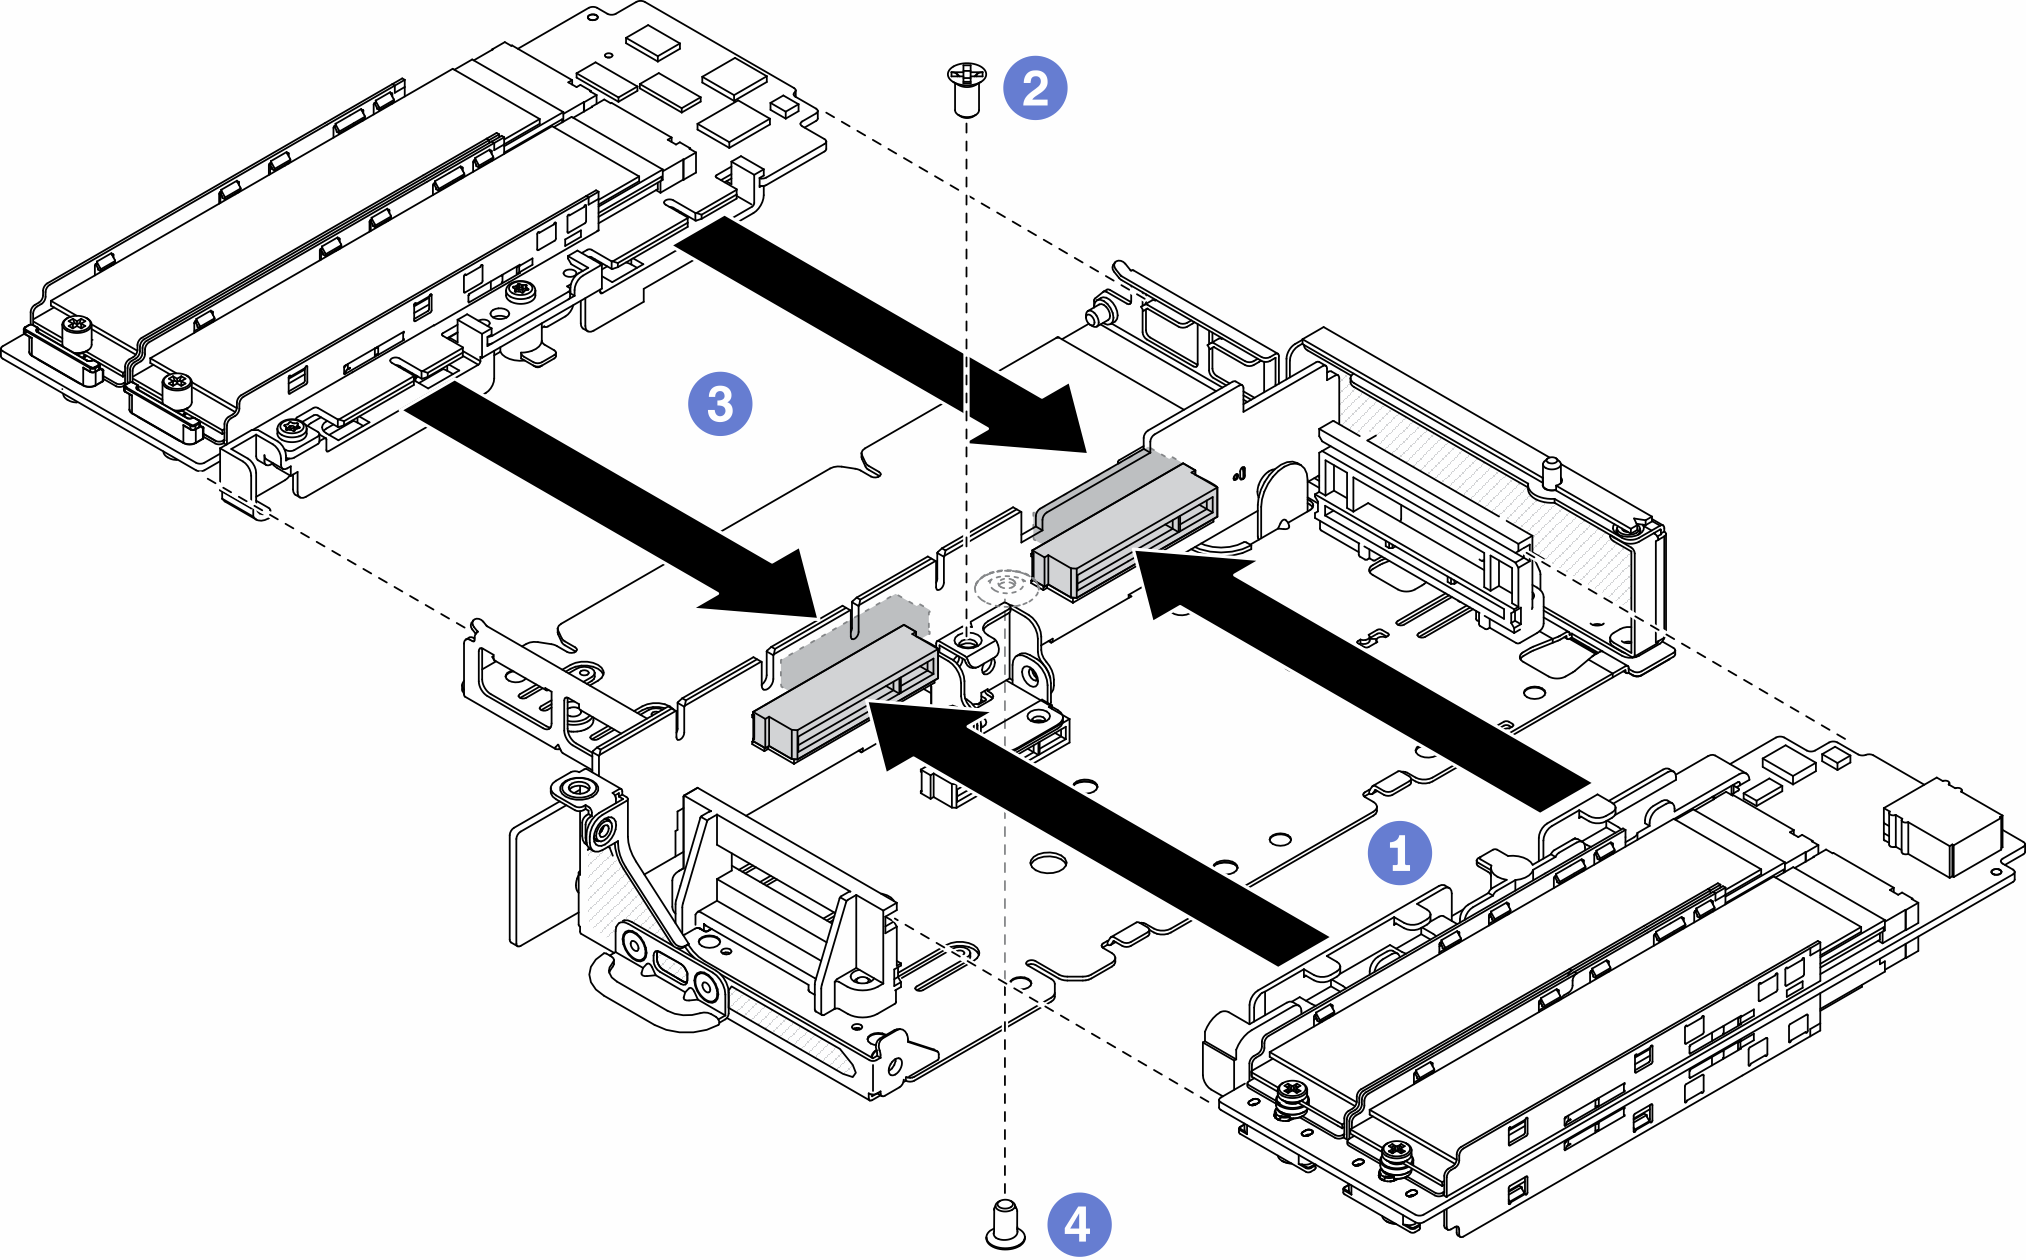
PCIe and M.2 riser assembly
Figure 2. M.2 data adapter installation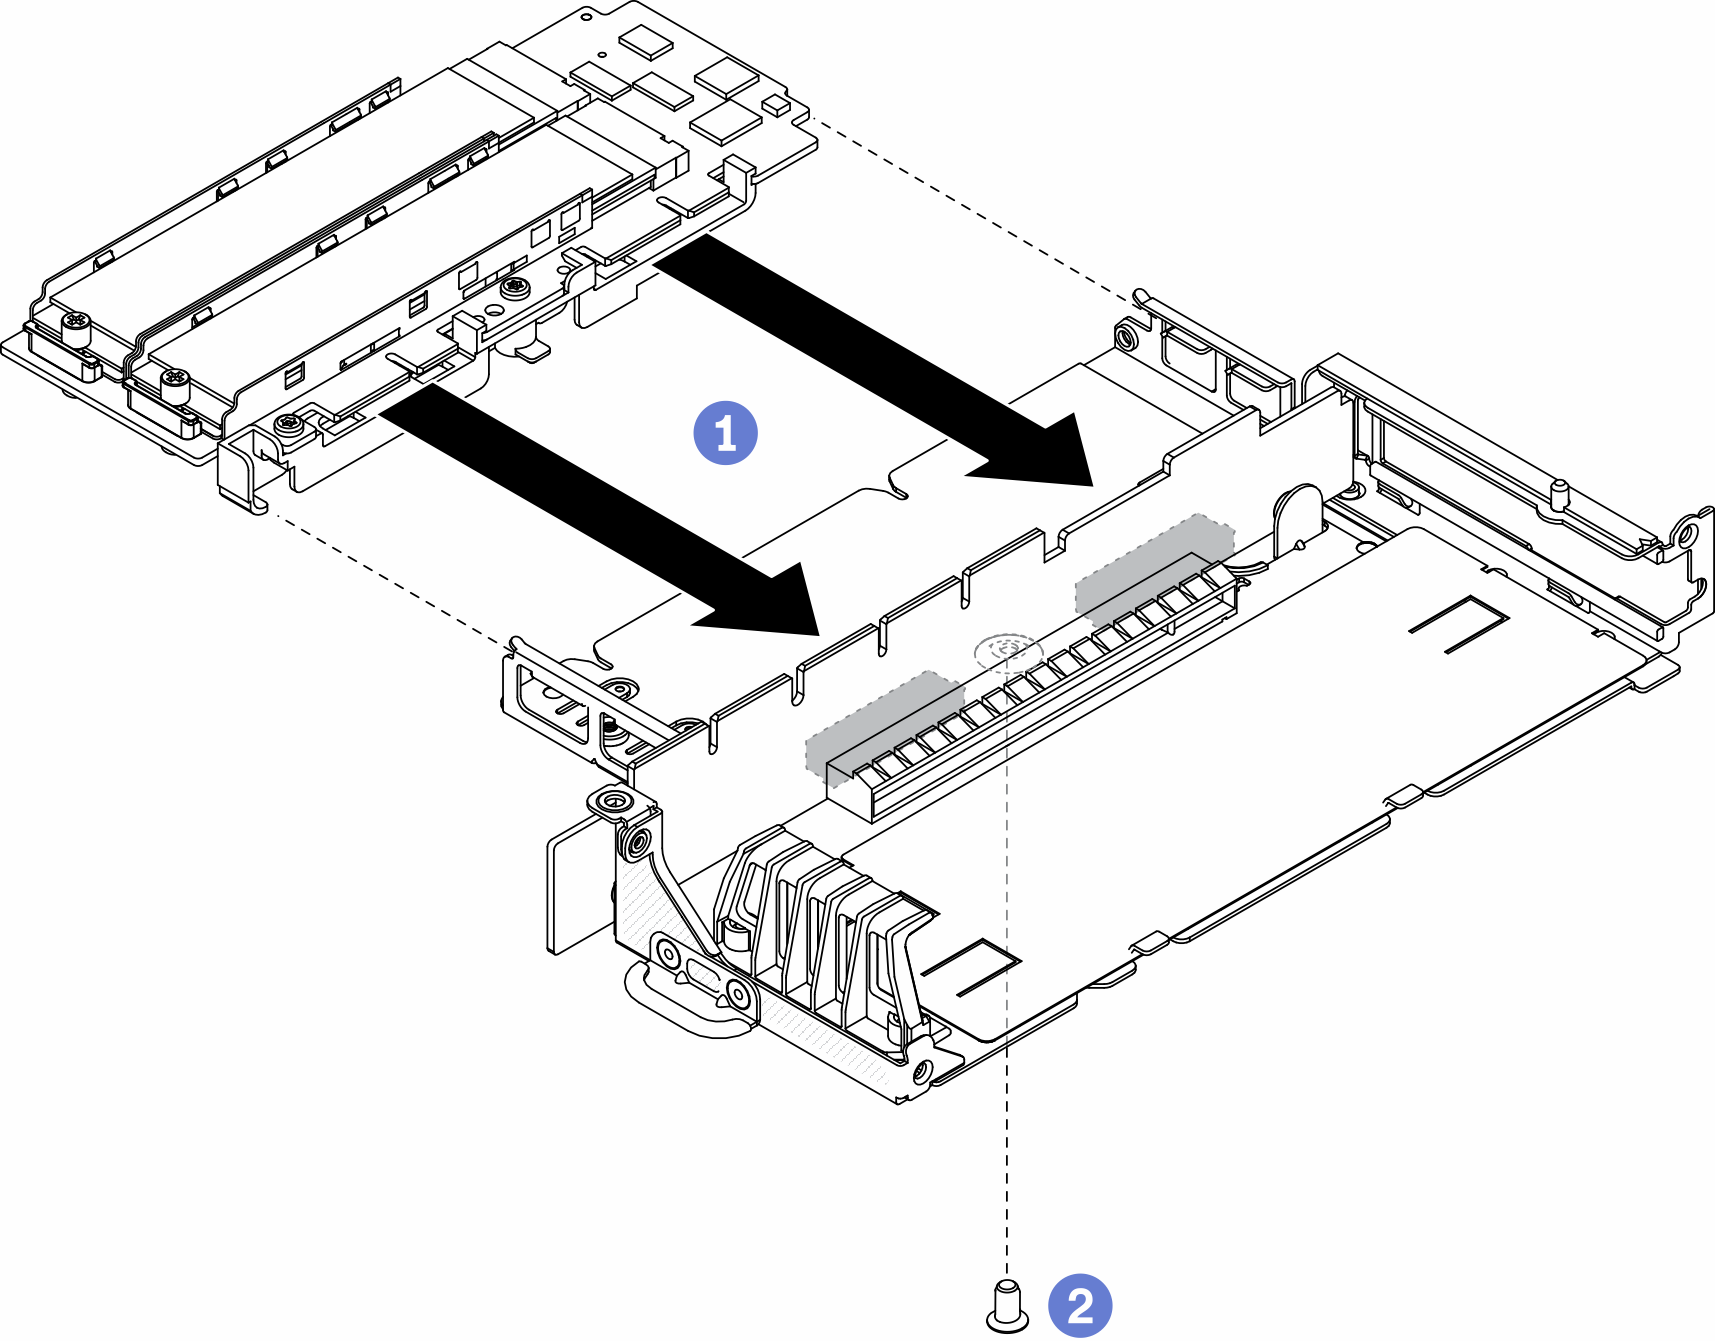
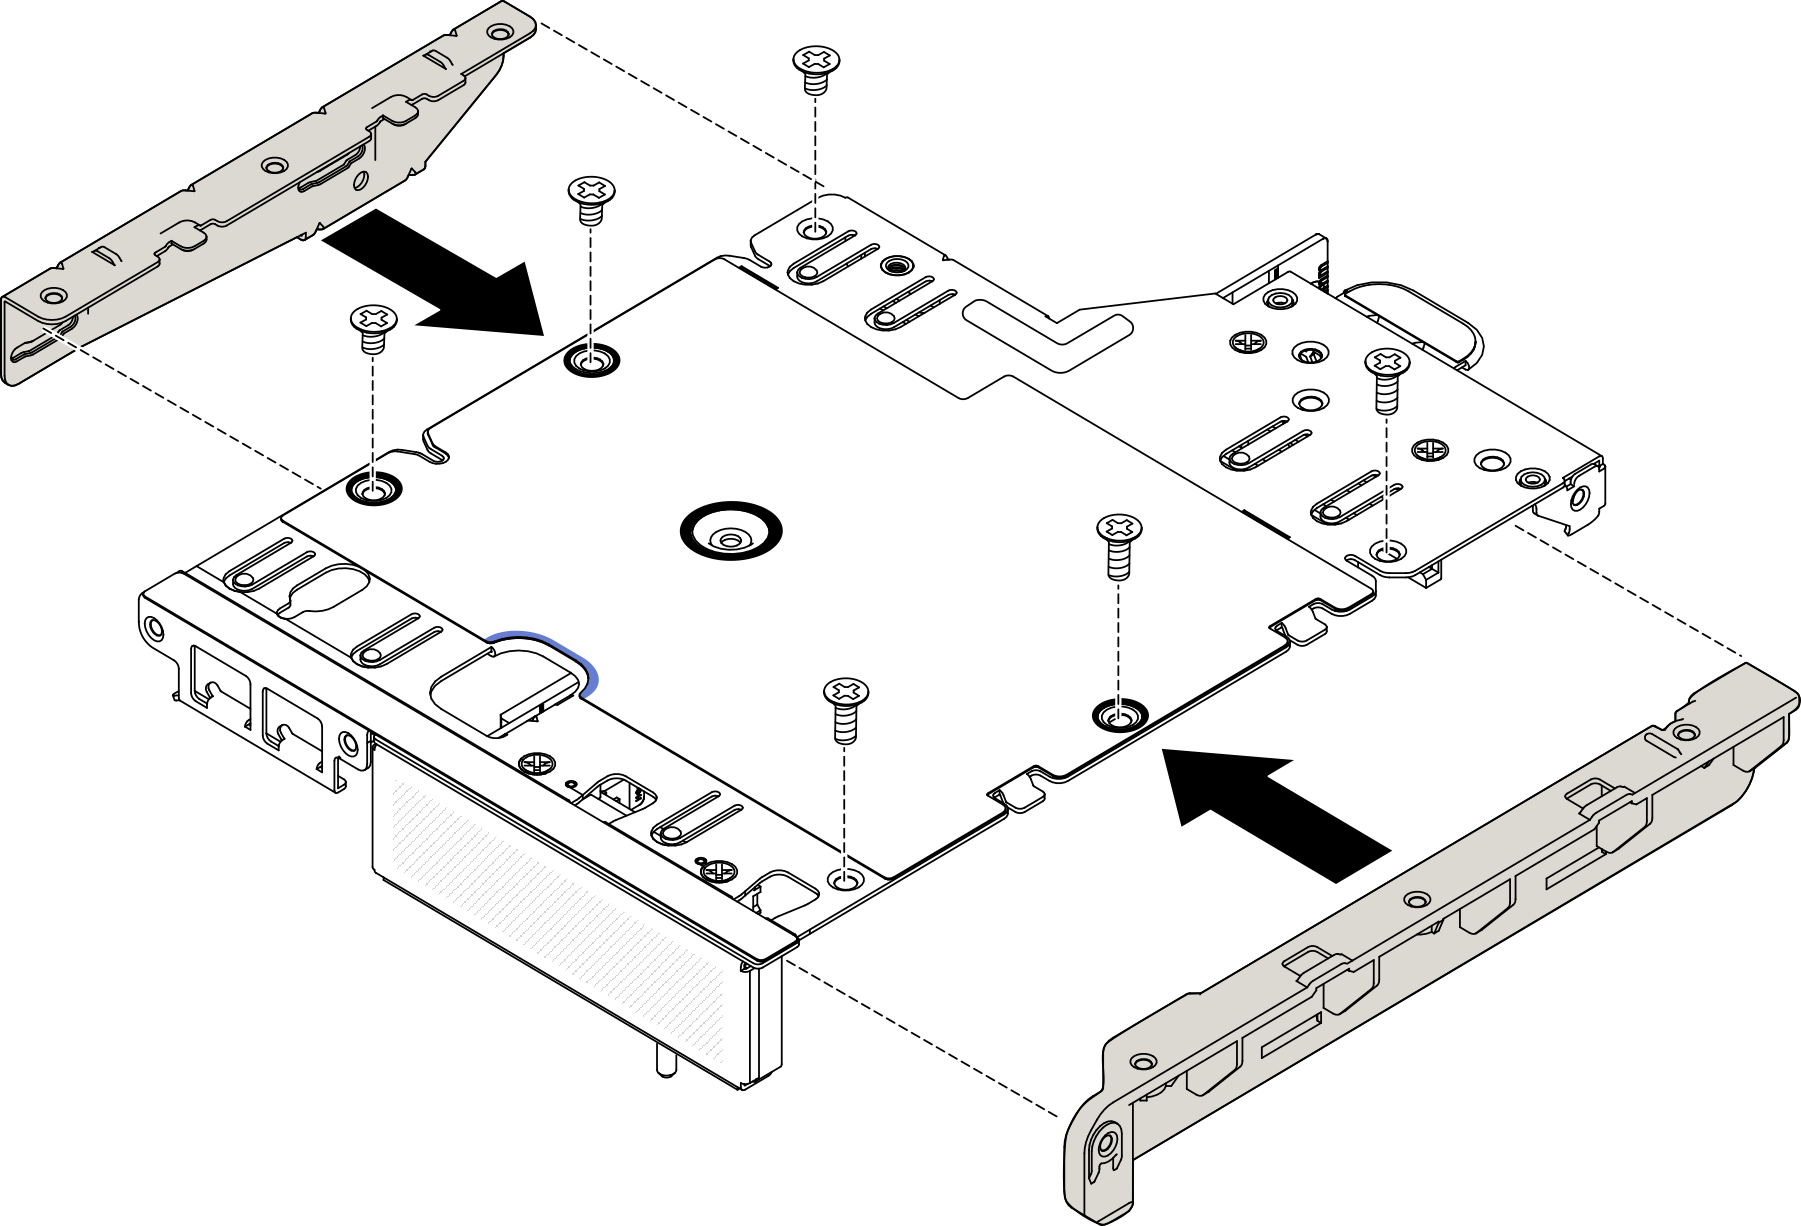
- Insert the bezels to the riser assembly on the both sides and install the six screws as shown.NoteThe color and the size of the screws on each side are different, make sure to install the short ones one the left and long ones on the right.Figure 3. M.2 data adapter installation
After you install a M.2 data adapter, complete the following steps:
Install the PCIe riser assembly (see Install the PCIe riser assembly for instructions).
Install the node if needed (see Install a node).
Reconnect power cords and all external cables.
Demo video
Give documentation feedback