Install a 2.5-inch hot-swap drive
Use this information to install a 2.5-inch hot-swap drive.
About this task
Read Safety inspection checklist and Installation Guidelines to ensure that you work safely.
There are two 2.5-inch drive bays in the compute node. If the compute node is already equipped with one 2.5-inch drive, you can install an additional 2.5-inch drive. RAID level-0 (striping) can be configured on a compute node with a single drive installed. A minimum of two disk drives of the same interface type must be installed to implement and manage RAID level-1 (mirroring) arrays. See the ThinkSystem SN550 V2 Setup Guide for more information.
Procedure
- Install the 2.5-inch hot-swap drive.
 Keep the handle on the drive open, then slide the drive into drive bay until the drive handle catches on the bezel.
 Rotate the handle and secure it to the latch. The drive will be seated fully in the bay.
Figure 1. 2.5-inch hot-swap drive installation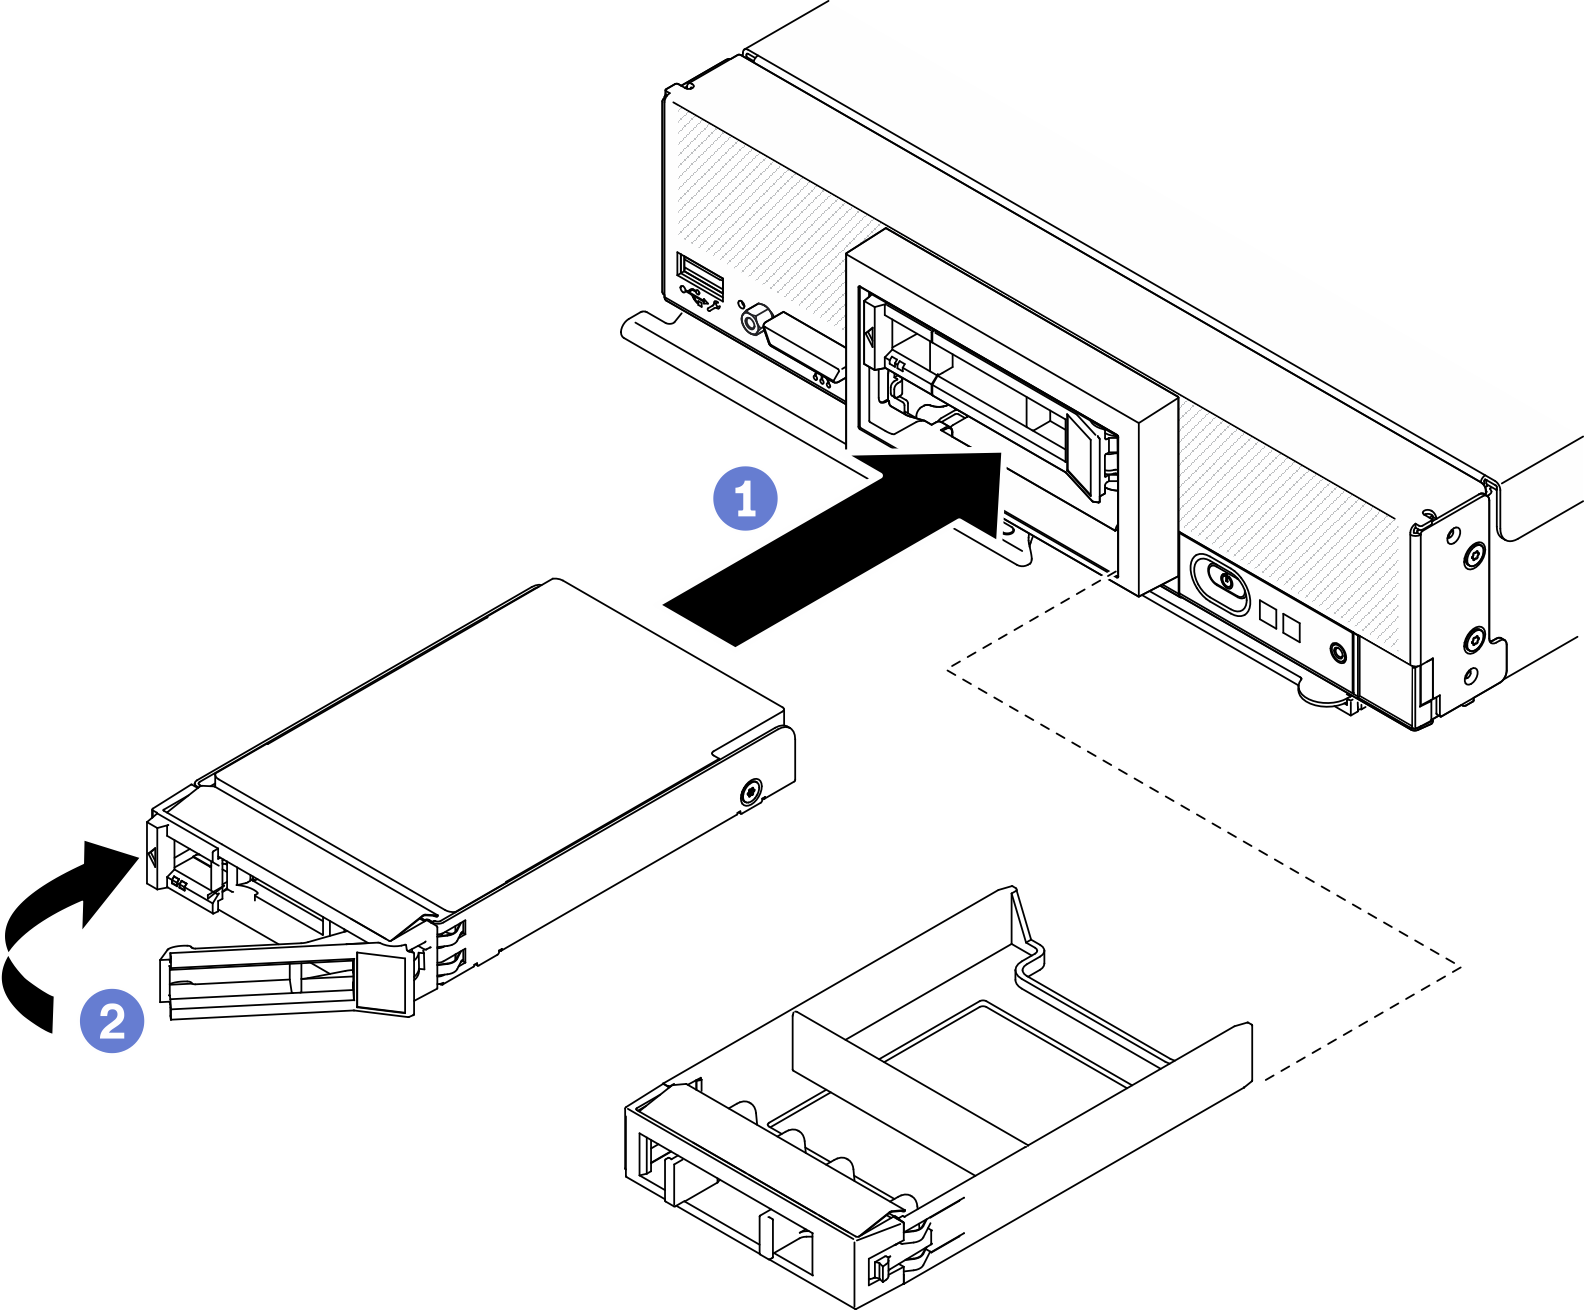
If the compute node is operating (power on), check the drive status LEDs to make sure that the drive is operating correctly. See Compute node controls, connectors, and LEDs.
Demo video