Install the storage cage
Use this information to install the storage cage.
Before you install the storage cage, complete the following steps:
Read Installation Guidelines to ensure that you work safely.
To install the storage cage, complete the following steps:
Figure 1. Storage cage installation
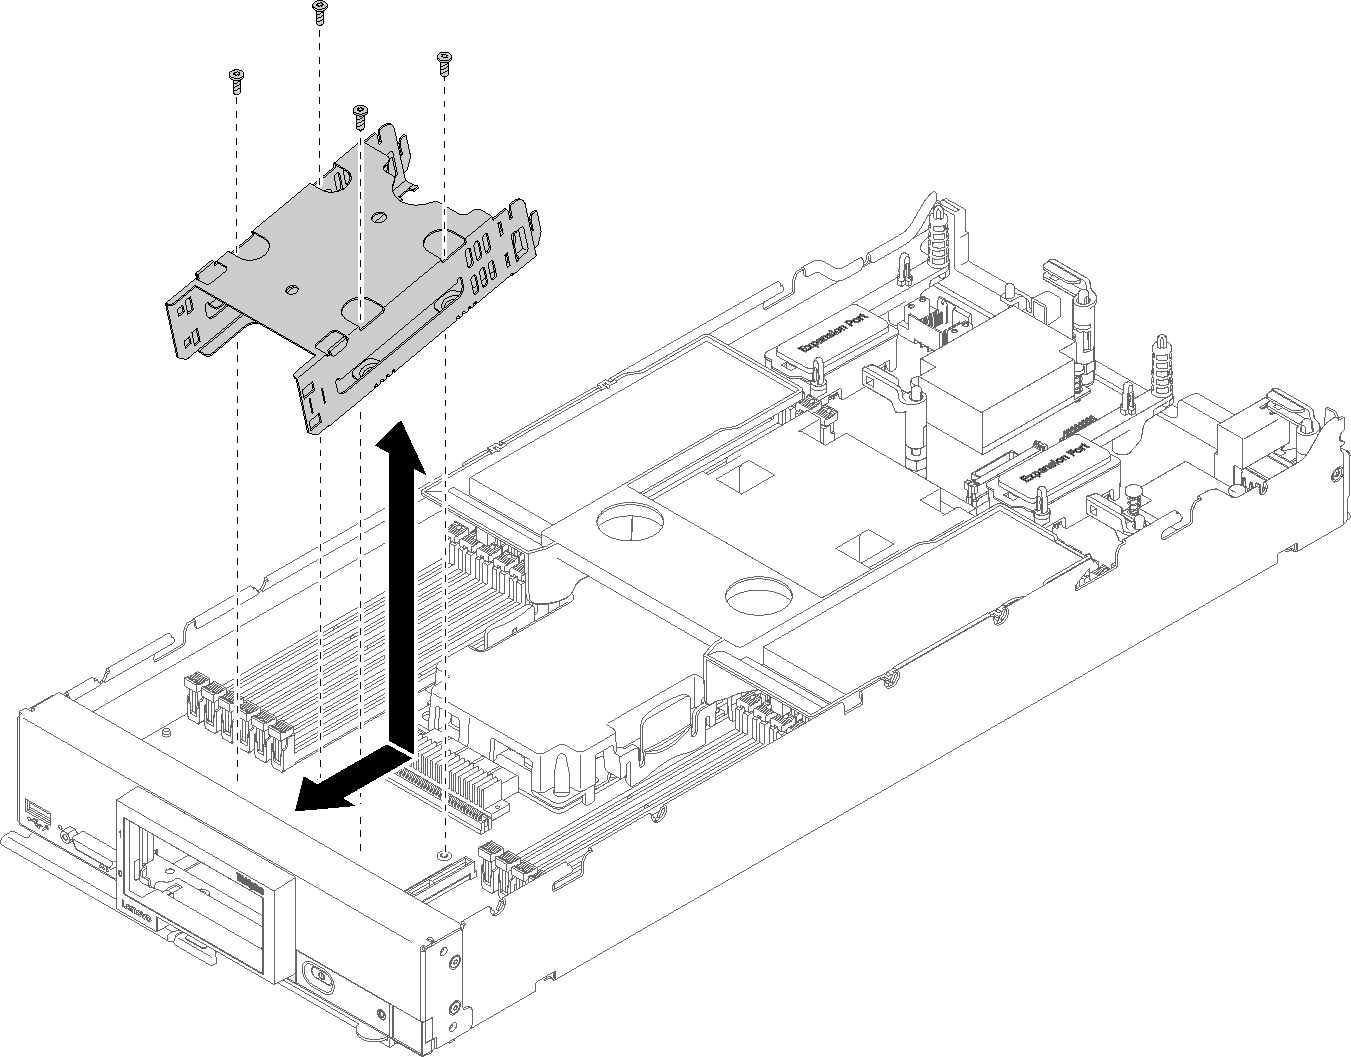
- Position the cage in the compute node front panel at an angle and rotate the cage into position on the system board.
- Align the cage with the screw holes on the system board.
- Using a T10 Torx screwdriver, insert the four screws and secure the cage in the compute node.
After you install the storage cage, complete the following steps:
Install the 2.5” drive backplane (see Install a 2.5-inch drive backplane ).
Install the bezel (seeInstall the bezel).
Install any removed storage drives, optional drive components, and drive bay fillers (see Install a 2.5-inch hot-swap drive ).
Install the compute node cover (see Install the compute node cover ).
Install the compute node into the chassis (see Install the compute node in the chassis ).
Power on the compute node.
Demo video
Give documentation feedback